1. Introduction
This is Part 19 of the “DASLIGHT / DVC4 HOW TO Course”. This time, I will introduce "Arranging Lighting Fixtures" with the basic version of Daslight 4 .
2. Arranging Lighting Fixtures
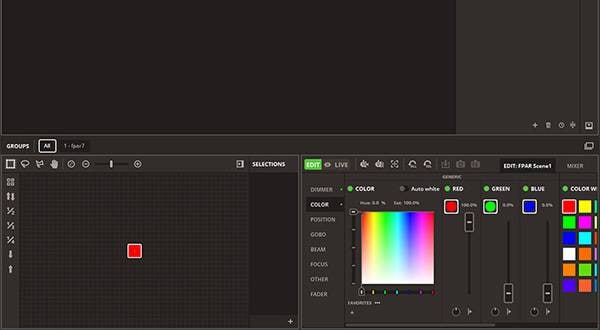
The position of the lamp displayed in the lamp window can be moved by dragging and dropping the u.
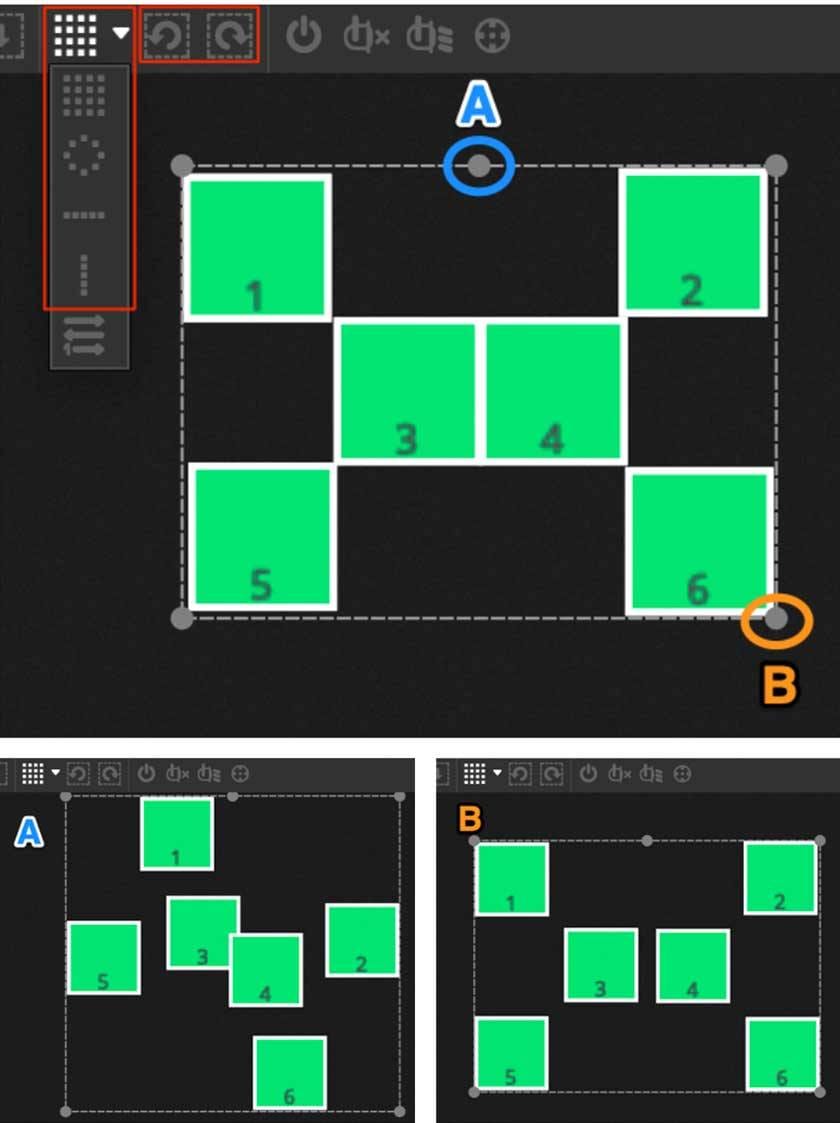
If you select multiple fixtures, you can rotate the selected group by moving the cursor near circle A and moving the displayed arrow. In addition, click on the right-to-left or left-to-right rotation icon in the toolbar for 45 degree rotation. You can change the size of the entire fixture group by moving the cursor near circle B and moving the displayed arrow. In addition, you can place the fixture group in the shapes as shown in each icon by clicking the "Box", "Circle", and "Line" icons on the toolbar.
3. Positioning by matrix format

The fixture can be positioned in a matrix format, changing the number of Rows or Columns in "Dimensions" and changing the arrangement. The order of the fixtures can be changed using "Advanced positioning".
4. Group
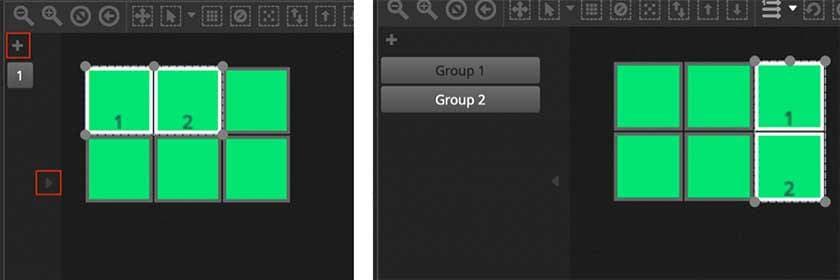
You can easily group the fixtures together. You can also index multiple groups differently to create unique effects for each group. To create a group, select the fixtures you want to include in the group and click the "+" in the fixture window. By default, groups are labeled with "1", "2", "3", and so on. To see the full name of a group, click the right arrow "▶" to open the group bar.
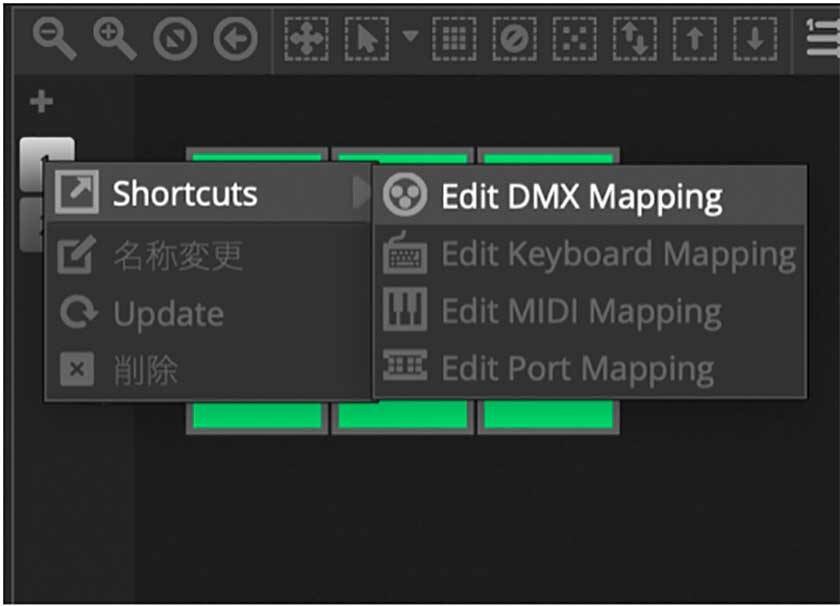
In addition, you can right-click on a group and select various options.
■ Shortcuts
① Edit DMX Mapping
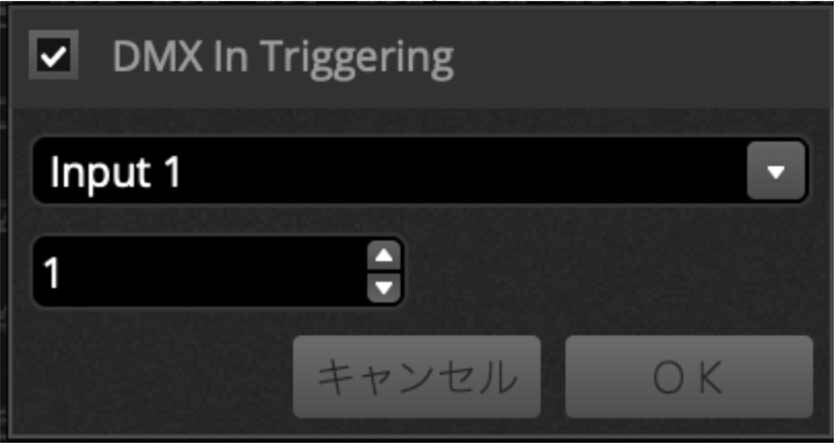
Map the DMX IN to your scene. Also, a DMX value of 0-127 will stop the scene, and a DMX value of 128-255 will play the scene.
② Edit Keyboard Mapping
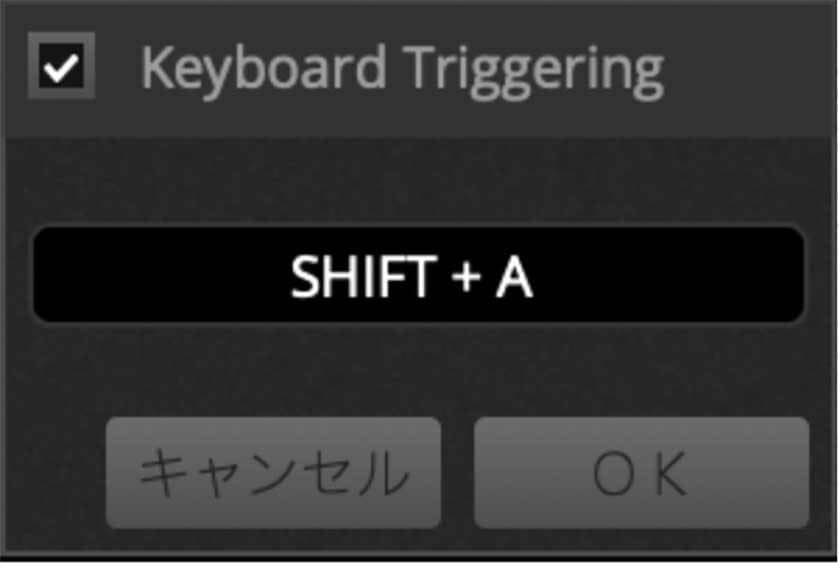
Map any key on your computer keyboard to the scene. It can also be combined using SHIFT.
③ Edit MIDI Mapping
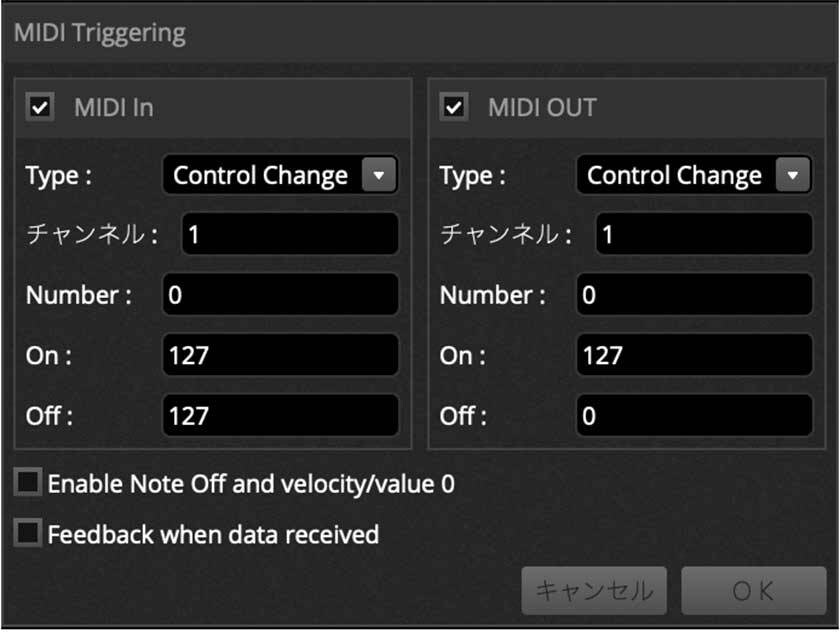
You can change individual MIDI message components. MIDI IN messages can be set from the left side, and MIDI OUT messages can be set from the right side.
- Type: MIDI message type
- Channel: Channel number: 1-16
- Number: Note / CC / PC number: 0-127
- On: Play the scene
- Off: Stop the scene
- Enable Note Off and velocity / Value 0: Only note-off messages can be received.
- Feedback when data received: Sends back a MIDI OUT message when a button on the MIDI controller is pressed. * The operation may differ depending on the MIDI controller being used.
④ Edit Port Mapping
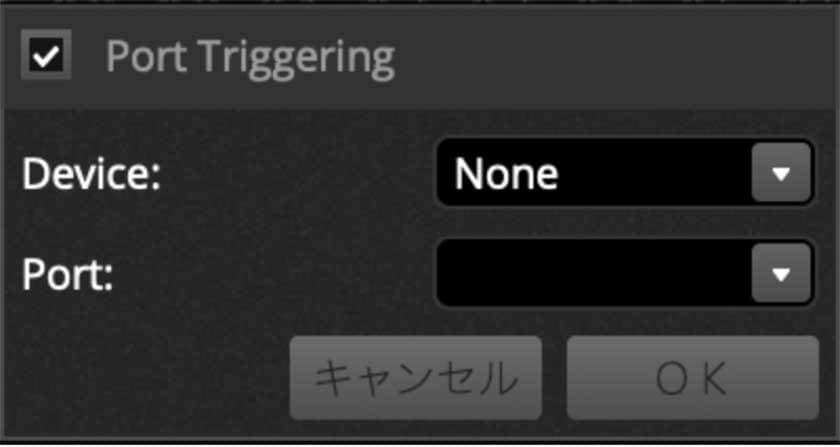
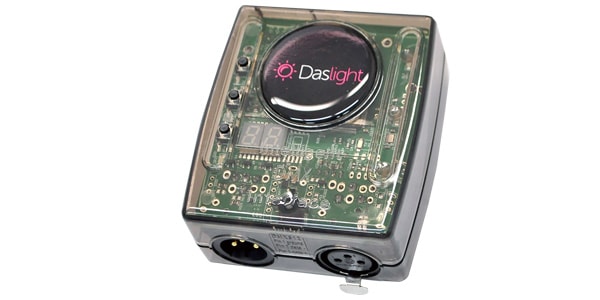
Map the dry contact port to the scene. The connected device, such as "DVC4 Gold", is displayed in Device. Also, if the port is already in use, an * will appear next to the port name, such as "* port: 1".
- Rename: Rename the group.
- Update: Updates the contents of the currently selected group.
- Delete: Deletes the group.
5. Summary
This time, I introduced convenient functions when Arranging Lighting Fixtures. You can place the fixtures in any position, but you can also easily arrange them in a circle by simply clicking the icon on the toolbar. Also, if you are thinking of implementing DASLIGHT, you can download Daslight 4 software for free and check its usability in advance, so please try it out! https://www.daslight.com/ja/download.htm
https://www.daslight.com/ja/download.htm
Please look forward to the next time!
DASLIGHT / DVC4 GOLD
DASLIGHT / DVC4 HOW TO Course
Part 1 "Moving Head-How to Program Circle Effect"
Part 2 "How to use a MIDI controller"
Part 3 "Setting up a multi universe"
Part 4 "How to Use Scan Library Editor"
Part 5 "How to use 3D Visualizer"
Part 6 "How to play scenes simultaneously"
Part 7 "How to Use Scan Library Editor: Moving Head"
Part 8 "USB Interface DVC4 GOLD ZM"
Part 9 "USB Interface Extra / Dry / Contact"
Part 10 “DVC4 FUN USB Interface”
Part 11 “DVC4 GOLD USB Interface”
Part 12 “Daslight 4 Basic - Patch”
Part 13 “Daslight 4 Basic - Fader”
Part 14 “Daslight 4 Basic - Fixture Windows”
Part 15 “DASLIGHT / DVC4 FUN upgrade method”
Part 16 “How to deal with the XHL-NAP error“
Part 17 “About compatibility with macOS Big Sur“
Part 18 “How to use Scan Library Editor-New Creation-Part 1-“