1.Introduction
This is Part 14 of the “DASLIGHT / DVC4 HOW TO Course." This time, we will introduce the role of "Fixture Windows" in Daslight 4 Basic.
2.The fixture window
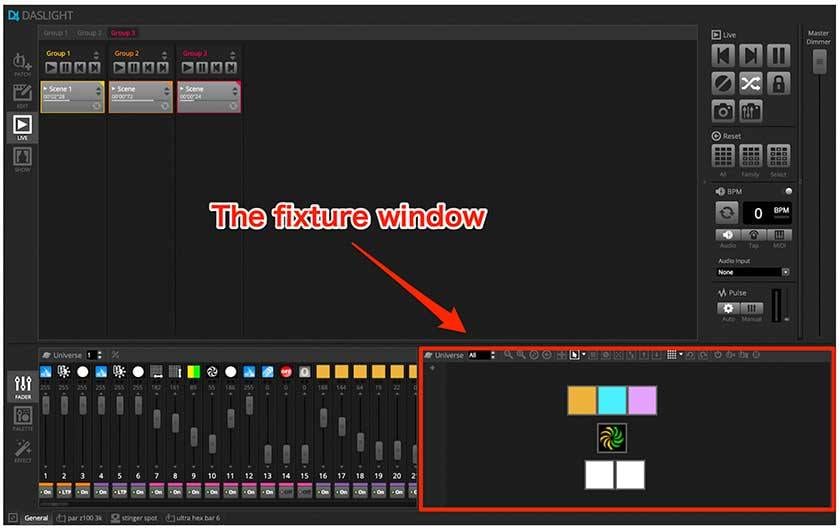
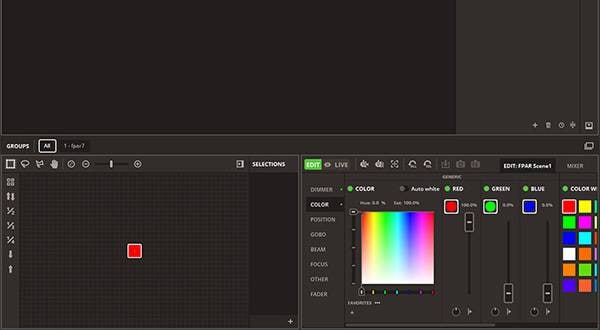
A patched lighting fixture is indicated by the "□" in the light window at the bottom right of the screen. In addition, bar-type LED washers and the like are represented by multiple "□" in a row. The "□" reflects the fixture operation status (dimmer, shutter/strobe, color, iris, gobo + gobo rotation). Displayed content varies depending on the function registered in the fixture profile.
3.Navigation around the fixture window
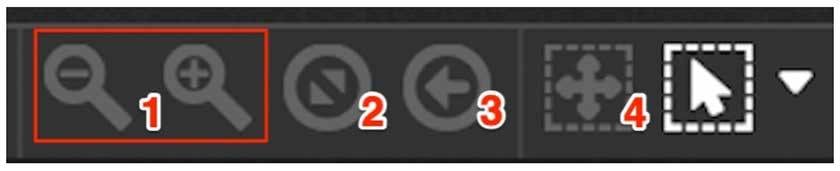
When a fixture is patched, the position and zoom level of the fixture window is automatically set so that all fixtures are visible, but this can be adjusted by clicking on the buttons on the following toolbar
- Zoom in and out to enlarge or reduce the "□" representing the fixture.
- Adjust the "□" to the optimum size and position so that all the fixtures can be displayed.
- Reset the zoom and return the "□" to its original size without changing the position.
- Switch between the fixture selection mode and the window position adjustment mode, which moves with all fixtures fixed.
4.Selecting Fixtures
To select a fixture by default, click on the "□" or drag the "□". To select multiple fixtures, hold down the next key and click "□".
・On a Mac, use the command key.
・In Windows, press the Ctrl key.
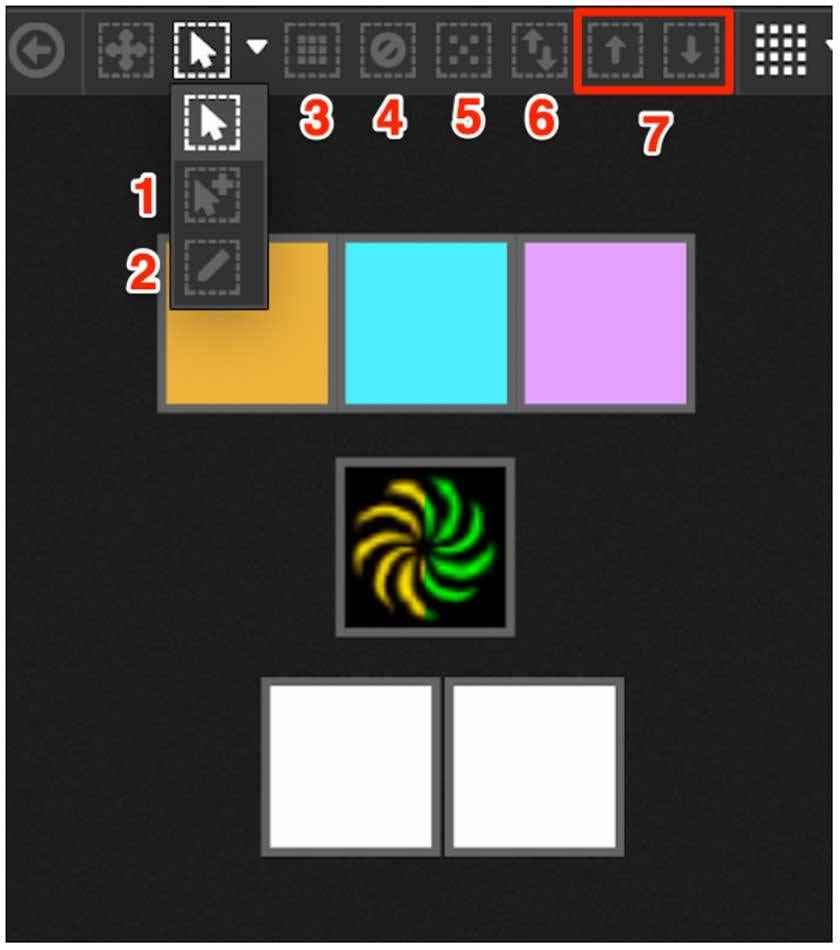
There are several other options when selecting a fixture. To make a selection, use the Quick Selection button.
- Free selection. (Drag multiple "□" with the mouse while holding down the left button.)
- Selection by pen. (Draw a line from the top of the "□" with a pen.)
- Select All "□".
- Cancel all the selected "□".
- Select the odd-numbered "□".
- Reverses the selection. (The selected "□" is released and the unselected "□" are selected.)
- The selection of "□" can be changed using the up or down button.
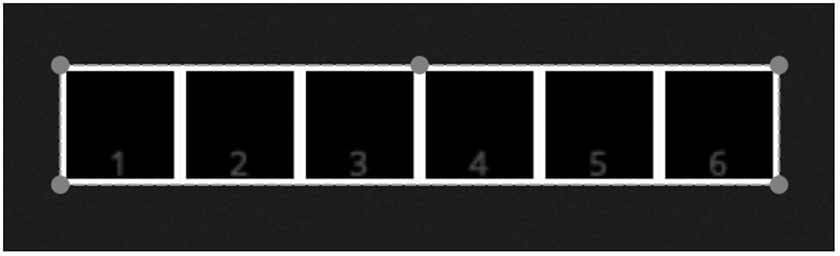
5.Fixture Index
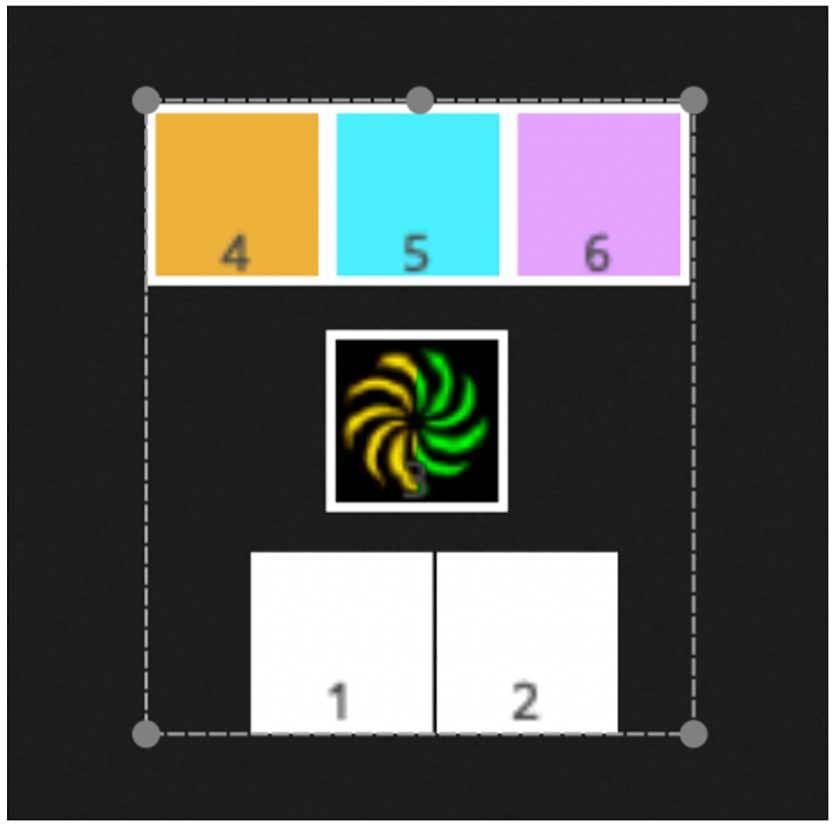
When a fixture is selected, the "fixture index" will be displayed under "□". When using effects, the order in which the fixtures are selected is very important because the effects are generated in the order of the fixture index. For example, if your fixtures are connected and you want to create a pixel effect that flows from left to right, the choice of fixture is important. In this case, make sure that the fixture index is set from left to right, as shown in the example below.
6.Summary
In this article, we introduced the "light window" used for selecting patched lights. The buttons on the toolbar of the light window allow you to control lighting more easily. I'd be happy if this has helped you to find a useful feature that you haven't used before. Also, if you are thinking of implementing DASLIGHT, you can download Daslight 4 software for free and check its usability in advance, so please try it out!
https://www.daslight.com/ja/download.htm
See you next time!
DASLIGHT / DVC4 GOLD DMX Software & Interface
DASLIGHT / DVC4 HOW TO Course
Part 1 "Moving Head-How to Program Circle Effect"
Part 2 "How to use a MIDI controller"
Part 3 "Setting up a multi universe"
Part 4 "How to Use Scan Library Editor"
Part 5 "How to use 3D Visualizer"
Part 6 "How to play scenes simultaneously"
Part 7 "How to Use Scan Library Editor: Moving Head"
Part 8 "USB Interface DVC4 GOLD ZM"
Part 9 "USB Interface Extra / Dry / Contact"
Part 10 “DVC4 FUN USB Interface”
Part 11 “DVC4 GOLD USB Interface”
Part 12 “Daslight 4 Basic - Patch”
Part 13 “Daslight 4 Basic - Fader”