


I just released the first installment of my guitar repair project, and it happened by accident:
If you haven't seen the first part yet, check this out first!
⇒ The Mystery Behind Restoring This Guitar - Part 1.
I was working on these parts that were easy to get into for the project which I mentioned in Part 1, things such as re-drilling the holes for the tension controller and filling in and re-drilling the screws for the holes under the joint screws, when suddenly the incident occurred.
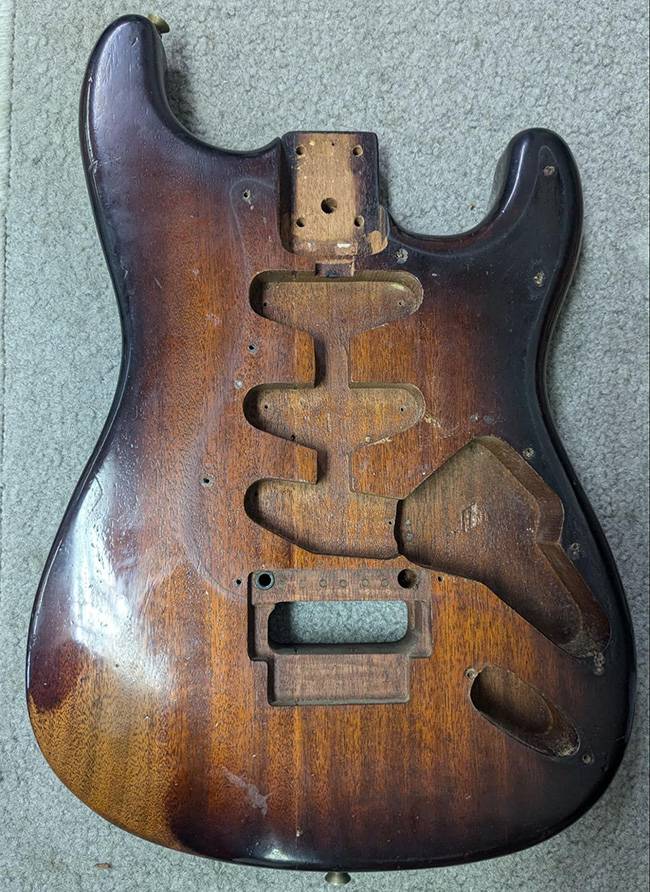
First, let's check the current situation.
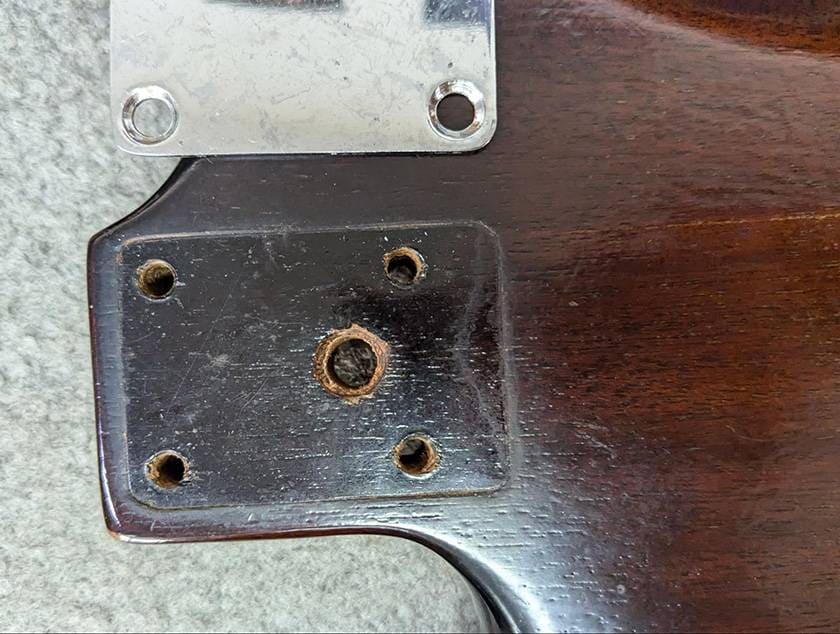
As you can see, there was a mysterious hole in the bottom of the plate, so I couldn’t install a more common plate.
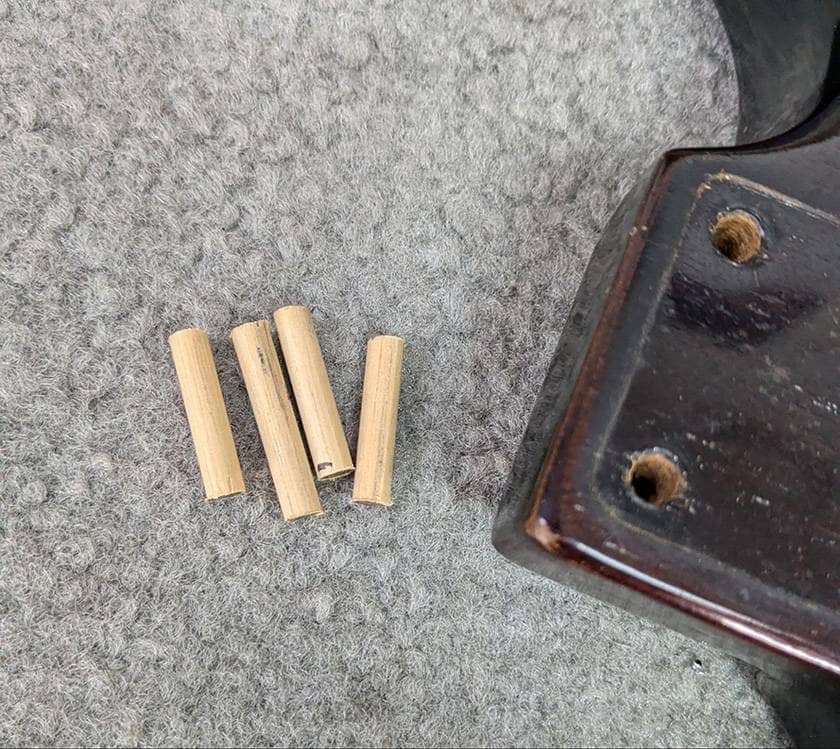
The dowel is like this.
The dowel is a little thicker than the hole, so it needs to be shaved down with paper and a little force to be able to press it into the hole.
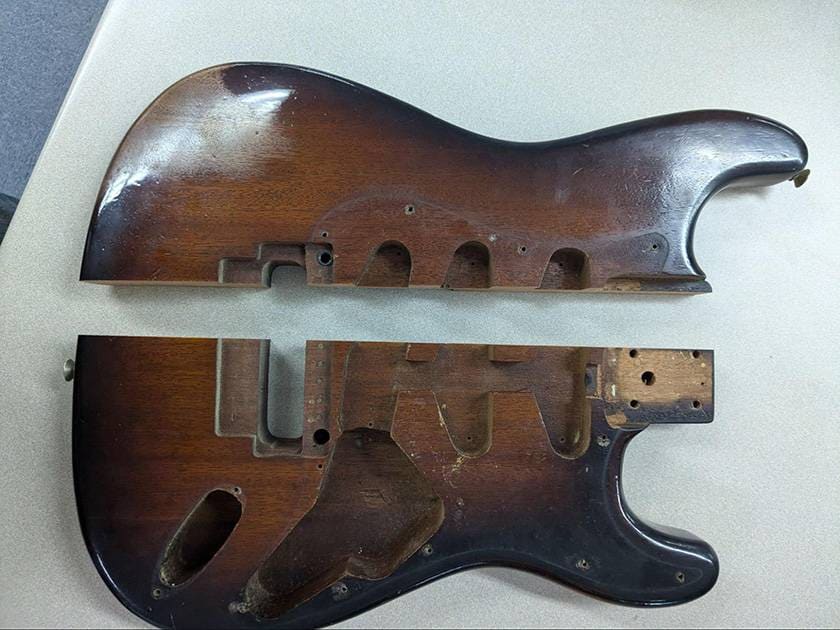
And, what happened here?
I was lightly tapping the finished dowel with a plastic hammer into the holes, and in the blink of an eye, the body split in half…Right down the seam. lol
The vibration of the hammer caused the adhesive to erode, but I have never seen anything like this before…
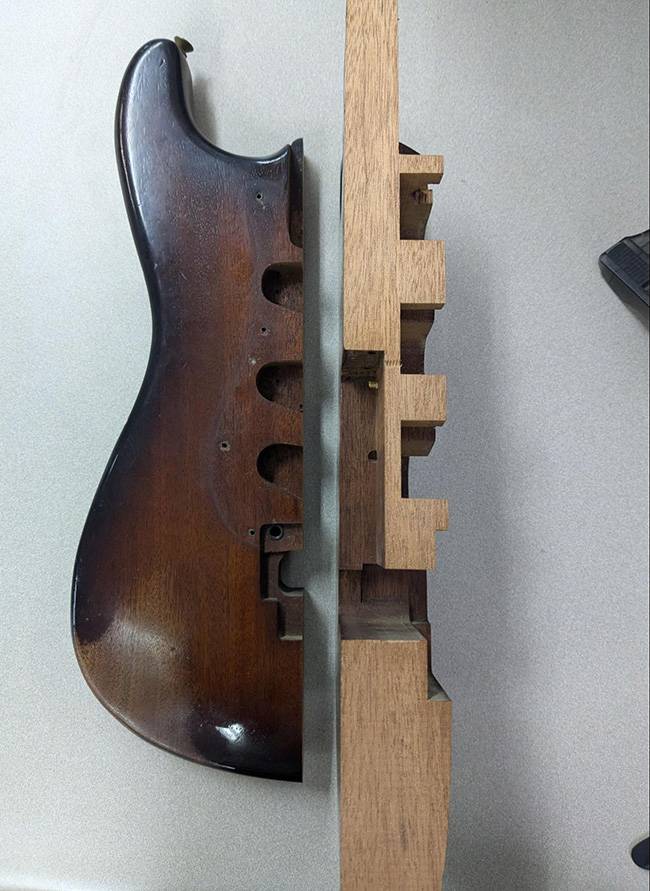
When I was a student, I had to draw a cross-sectional drawing like this when I was doing my drafting.
Anyway, if I can’t fix this, this blog series will be forced to be terminated after only the second post. Let's glue it together.
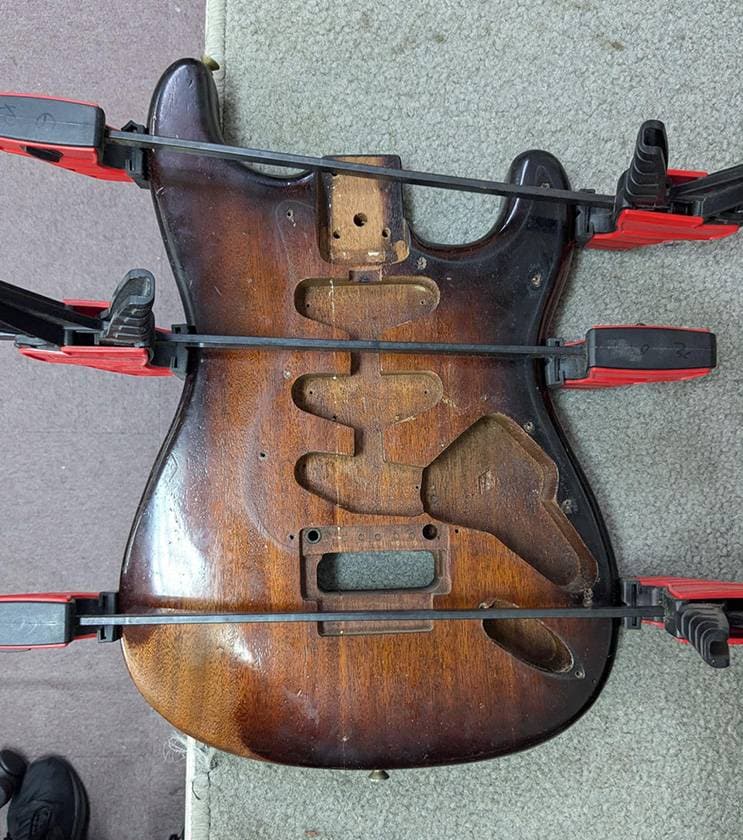
If it’s true, I should cut out a piece of wood along the perimeter of the body and clamp it so that the force is applied evenly, but it is a bit difficult to do that.
I temporarily clamped them and they adhered together nicely, so I glued them together so they bonded together tightly.
Two days later, I removed the clamps and the glue dried.
I tried to break it open again with a lot of force to check the strength, but it didn't budge, so I guess it’s good now.
I really didn't expect the body to break in half when I was messing around with the guitar. (lol)
After this incident, I think that you should ask a professional to fix or modify your guitar because problems you never imagined can happen… I’m fully realizing this now.
Next, I reattached the tension controller.
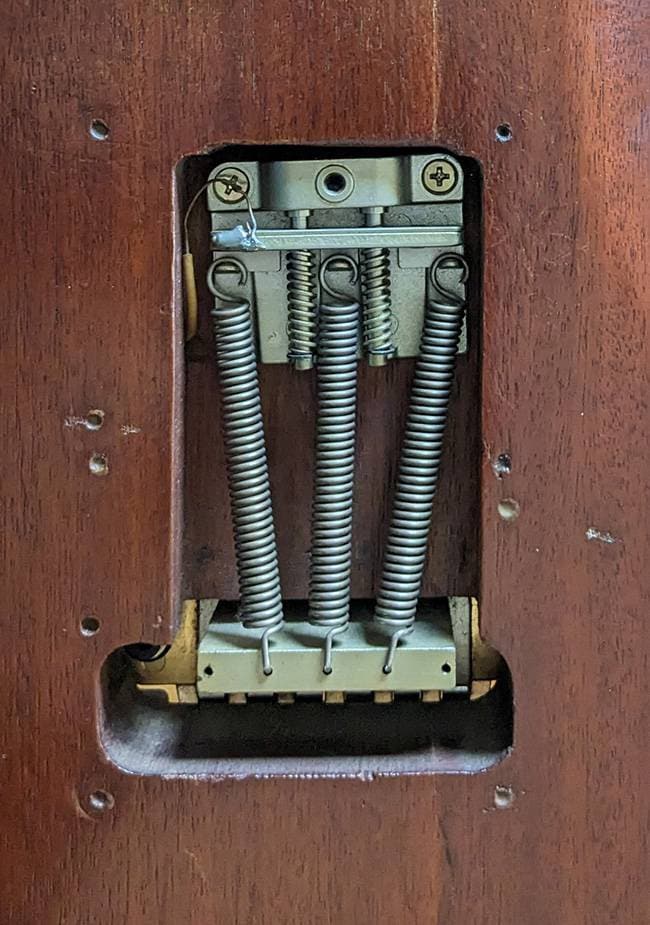
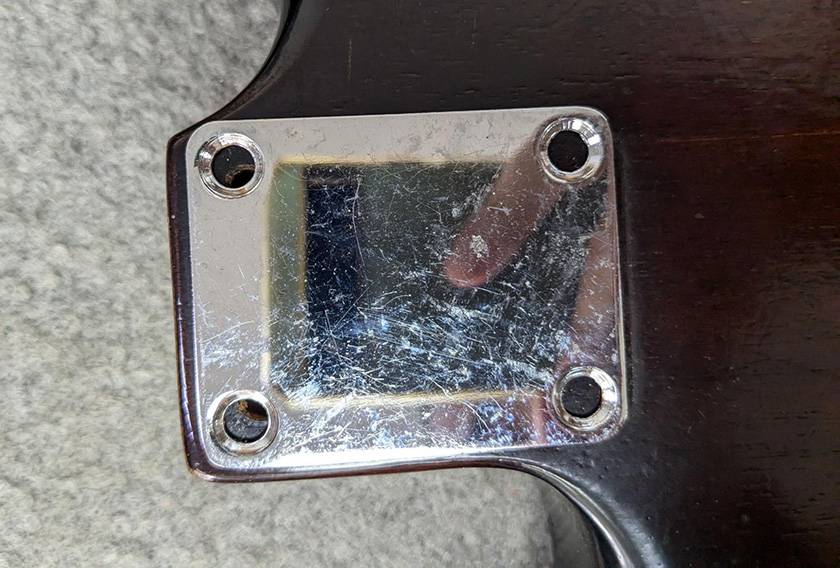
As shown in the photo, the tension controller was installed crookedly, so I filled in the dowels, re-drilled the holes, and reinstalled it. The repaired tension controller looks like this.
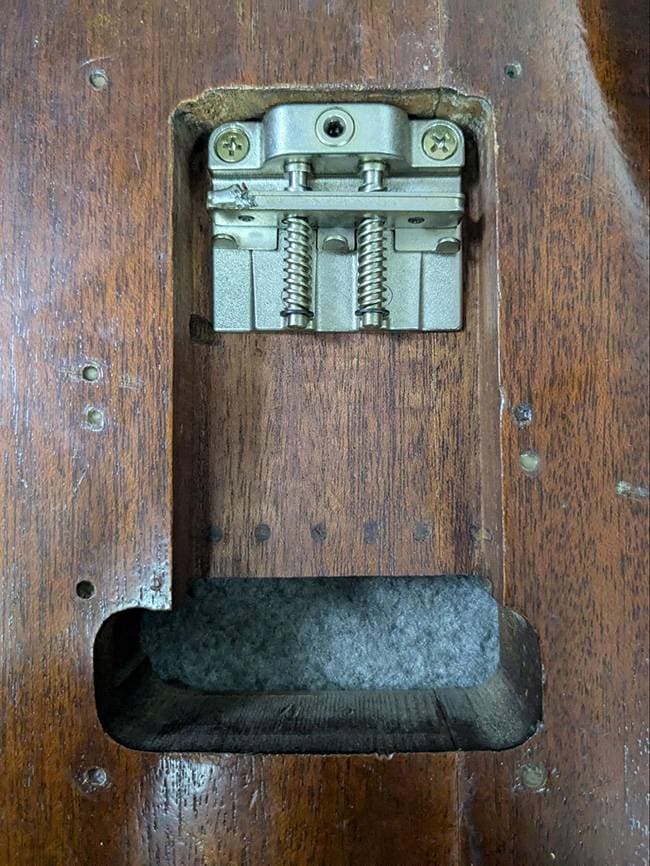
It feels good to have the tension controller lay straight!
■ A Little Something Extra
I had forgotten about the tension controller due to the impact of the cracked body, but when I removed it and looked at it, I found the words "Made in W Germany"
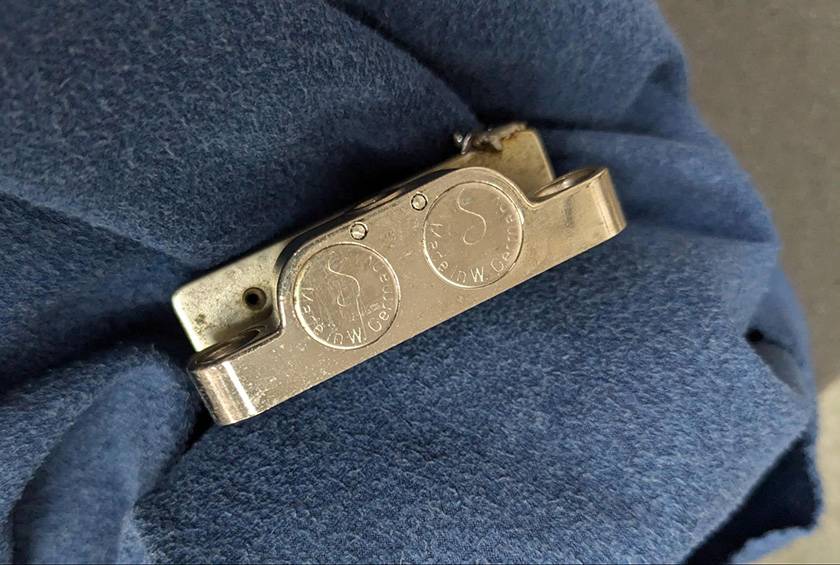
This was made when Germany divided into East and West.
I often see "Made in W Germany" on old SCHALLER pegs and 80s Floyd Rose, but I was impressed to see that the tension controller was a very long-selling product. I was curious and looked up the release date, but couldn't find any information about it…
I would like to know if there is anyone who knows about it!
Well, I’m experiencing some unforeseen circumstances for the mystery guitar restoration blog series, but I will try to continue this blog at a leisurely pace, so I hope you will stay tuned for the next article!
Come again to the next article!


 Chicken Picks ギター/ベース用ピック
 ギターパーツの沼
 ギター名人ラボ
 ギタースタートガイド
 めちゃラク!ギター講座
 ケーブル購入ガイド


