Hello everyone! It suddenly got really cold, and taking care of our health has become a challenge. Let’s all keep doing our best without pushing ourselves too hard.
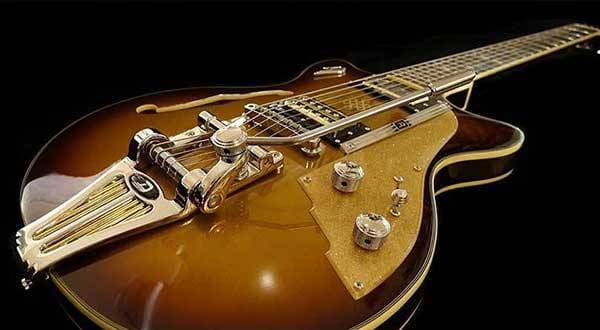
Anyway, out of the blue, I recently replaced the saddle on my beloved Jazzmaster! Since it was my very first saddle swap, I was honestly nervous about whether I’d be able to do it properly, but the process turned out to be really fun, so I wanted to share the experience with you all. And for those who are struggling with the notorious Jazzmaster saddle issues, I hope this article can offer some helpful information.
The Jazzmaster Saddle Issue
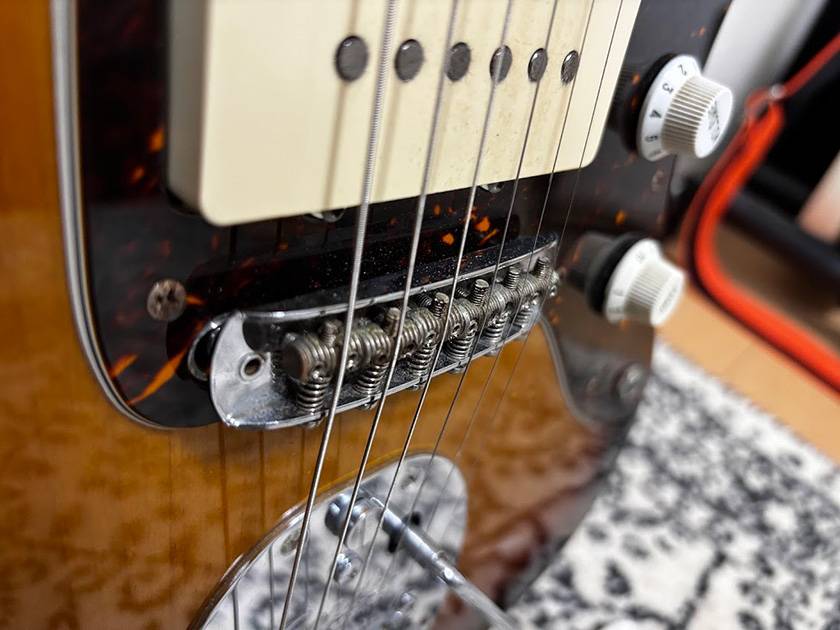
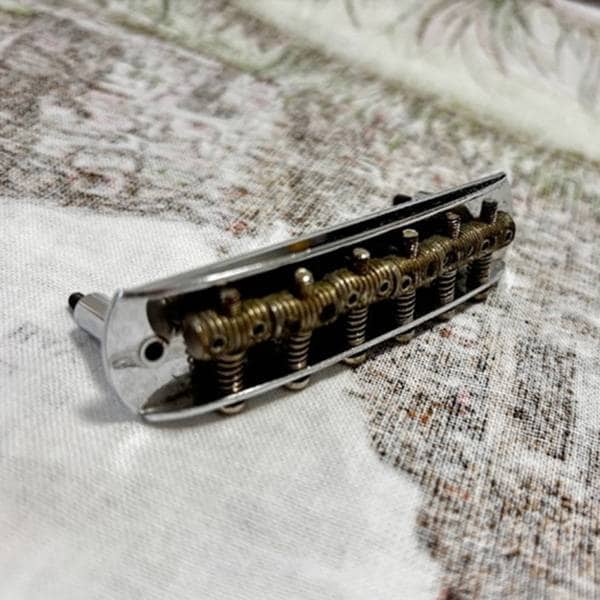
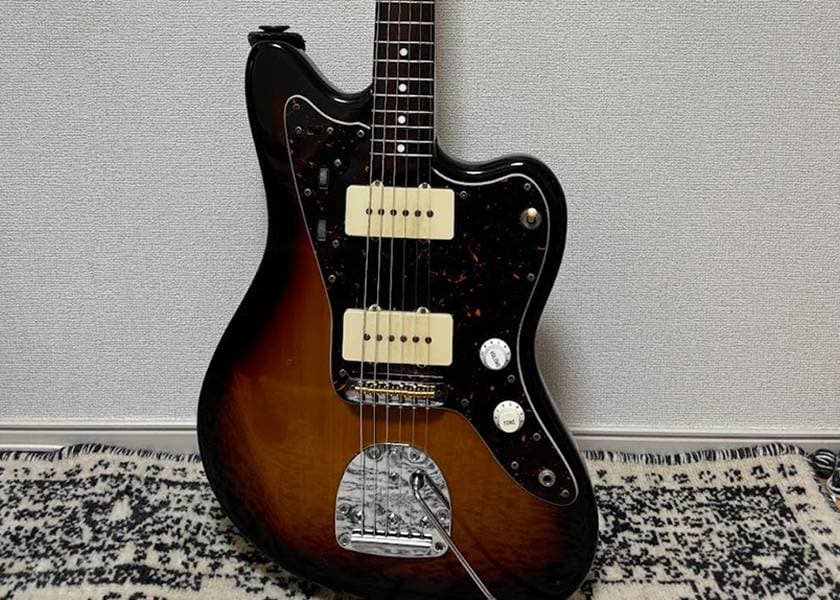
The stock saddles on a Jazzmaster have extremely narrow and shallow grooves where the strings sit! The photo shows my Jazzmaster before the saddle replacement. It really looks like the strings are just casually resting on top of the saddles. Because of this, when you pick the strings a little harder, the strings can slip. This is commonly known as “string drop”, which throws off your tuning. I think if you talk about modifying a Jazzmaster, this is probably the very first issue that comes up.
Until now, I had been telling myself, “That’s just how Jazzmasters are,” and ignored it, but this time I finally decided to take action and improve it!
Choosing a Saddle!
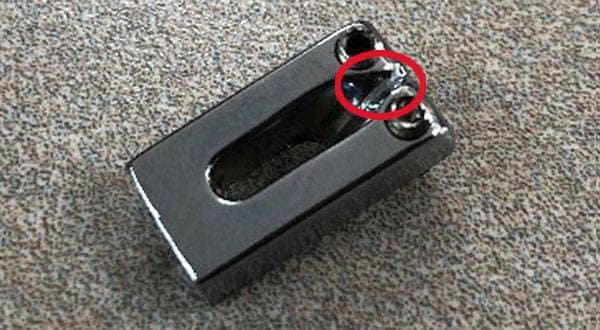
First, let’s buy a replacement saddle! A common choice seems to be using Mustang saddles as a substitute. For example, this one here. As you can see, it has a single groove in the center, and by securely seating the string in this groove, it helps prevent string drop. This change is widely reported to be highly effective, so if you’re unsure, this is the saddle to pick. However, being a bit contrarian, I felt that just swapping to this standard since the commonly used saddle just didn’t feel quite right… So, I researched some alternatives. Luckily, at my workplace there are plenty of staff who know way too much about guitar parts, and with their help, I was able to find the perfect saddle. And here it is!
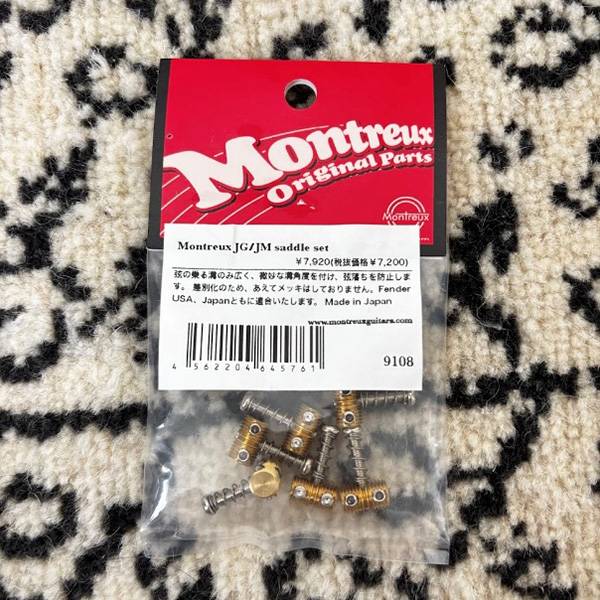
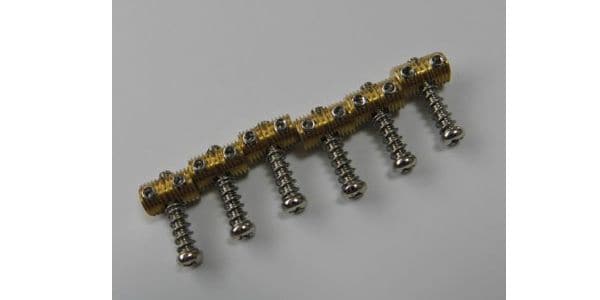
MONTREUX / JG/JM saddle set[9108]
![MONTREUX / JG/JM saddle set[9108]](https://www.soundhouse.co.jp/images/shop/prod_img/m/mont_9108a.jpg)
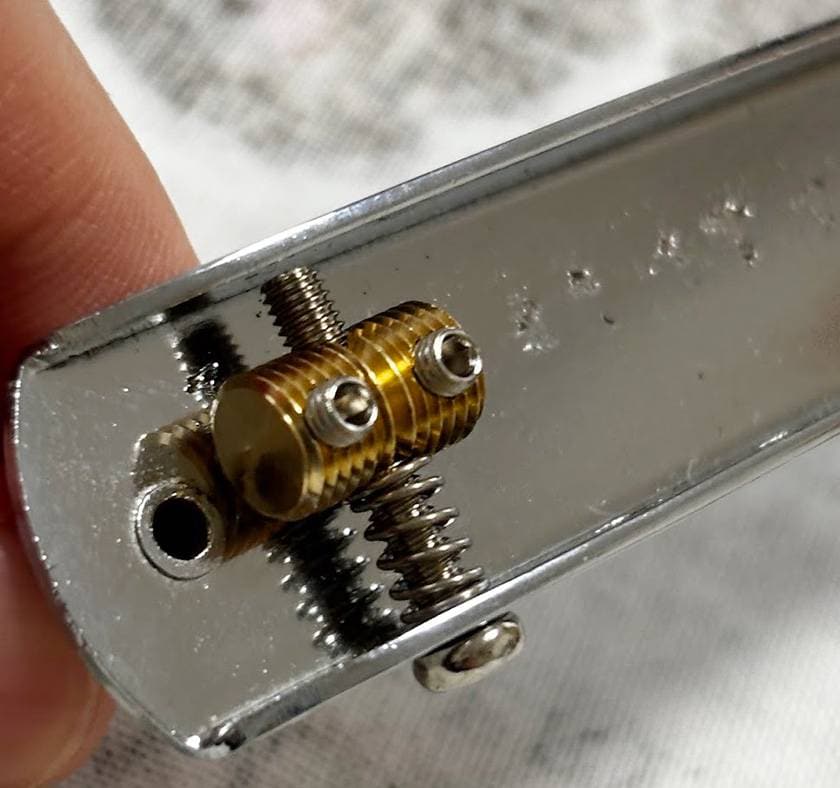
First, as you can see, the shape is almost identical to the stock saddle. However, if you look closely, the middle groove among the multiple grooves is larger and deeper. This means that by setting the string in this central groove, the string is held more securely than with a standard saddle. In other words, it improves functionality while still keeping the unique character of the Jazzmaster, which is why I immediately decided to buy it! The gold color looks really cool too (lol).
Now, let’s get down to work! First, remove the old saddles.
Embarrassingly, I had never done this kind of modification since I bought this guitar (a 2012 model) used about six years ago, so it feels pretty seasoned (one of the set screws for string height adjustment had been left off, leaving it in quite a disastrous state). Thank you for your service all these years.
Here’s the star of today’s show. The subdued gold color looks so cool. I feel like my Jazzmaster is eager to have these installed soon. Hang in there a little longer, Jazzmaster!
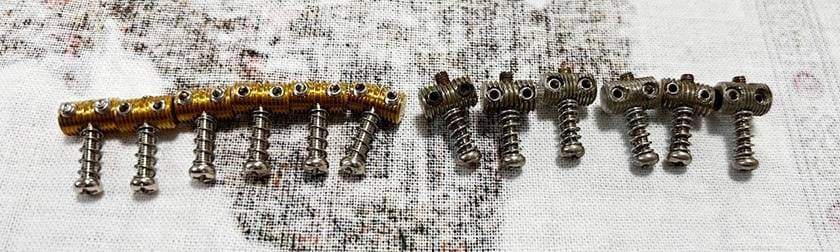
I lined them up for comparison! The shine and luster are noticeably different (lol). Size and construction look almost identical. Unlike Mustang-type saddles, the replacement saddles I chose to have set screws on each piece just like the stock saddles, so that it would allow string height adjustment for each string with a hex wrench, which is another great feature.
Now let’s attach the saddles to the bridge!
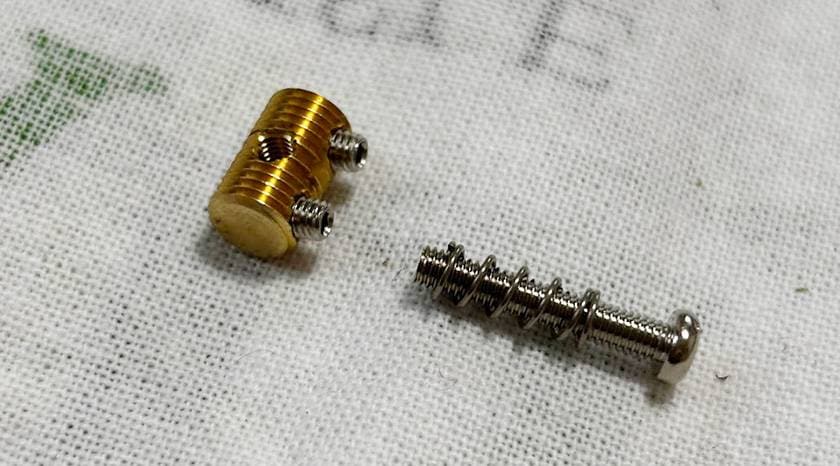
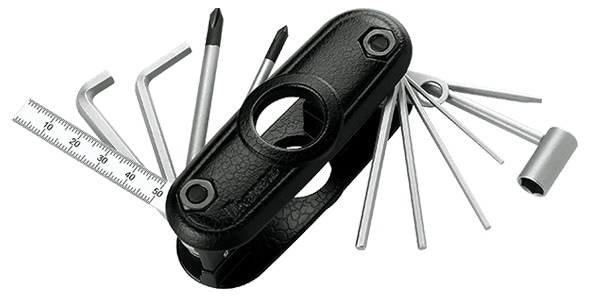
First, remove the individual saddle pieces and their screws. By the way, I had no problem doing this with a multitool I had on hand—just for reference.
After removing them, attach them to the bridge! I’m not particularly dexterous, so it was a little tricky at first. I found it smoother to press the saddle piece against the side of the bridge first, then thread the screw through while holding it in place.
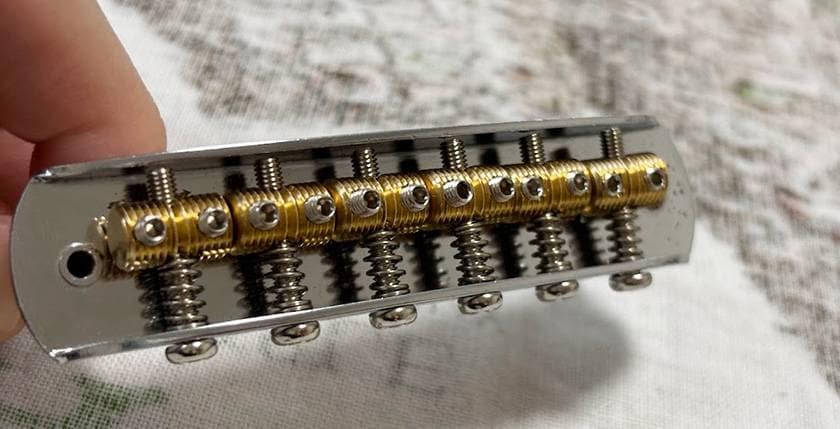
Attachment complete! Once you get the hang of it, the process goes by fairly quickly. I think it took about 20 minutes in total. For a first attempt, I’m pretty happy with how cleanly it came out—what a relief.。
From here, all that’s left is to reinstall the guitar strings and adjust the string height and intonation.
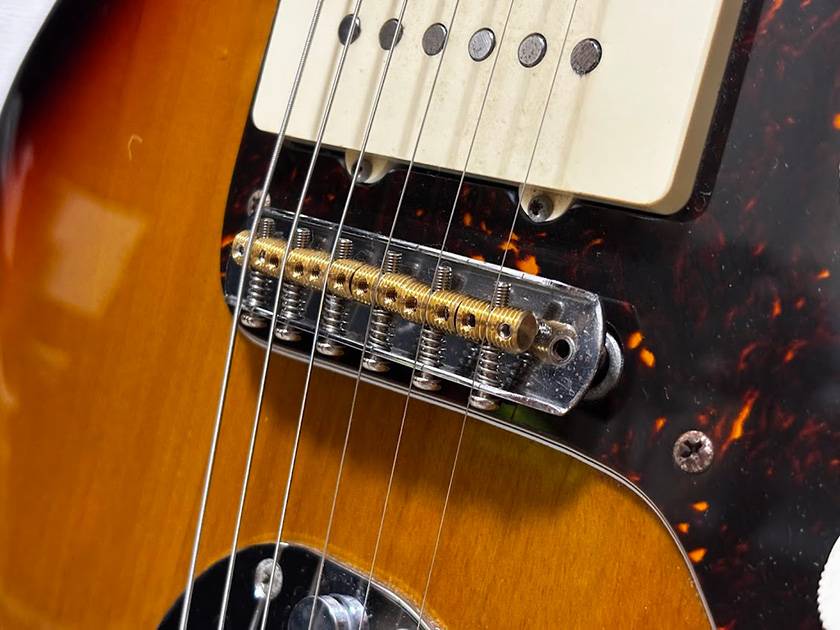
It’s done! And it feels great!
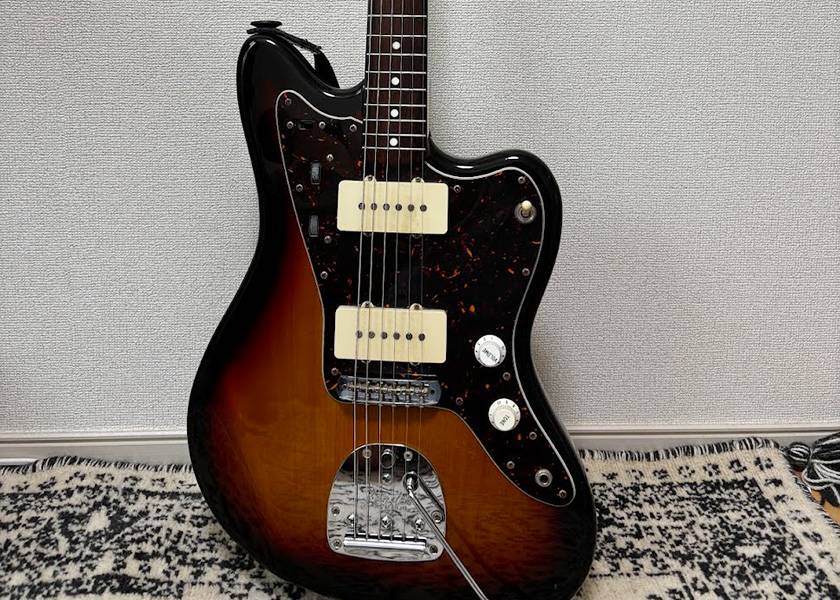
Here’s a before-and-after shot from a distance. What do you think? Doesn’t it make a noticeable difference? It feels a little more refined, almost like it has a higher-end look, which I really like!
In terms of playability, it feels different too. Most importantly, no more string slippage. Since changing the saddles, I haven’t experienced a single string drop! Whether that’s due to the material or just the added stability, the strings feel more secure, and the tone has more presence and clarity. The high end seems to stand out a bit more, with a sharper, brighter character. All of this improvement came without sacrificing the classic Jazzmaster feel—everything is just easier to play now. This is exactly the kind of modification I was hoping for, and I’m thrilled with the results.
Reflections on My First Saddle Modification
Before starting, I was really worried about whether I could do it properly, but once I got my hands on it, the process actually went surprisingly smooth and I had a lot of fun. I was also pleasantly surprised by how much the playability and tone changed—I really appreciated that aspect.
Most of all, changing the part out myself made me feel a much stronger attachment to my guitar! I’m still at a beginner level, but I was able to fully enjoy the fun of guitar modification. I’ll be sure to share any future modifications with you all as well.
So, everyone—enjoy your guitar life!


![MONTREUX / Mustang saddle set [9720]](/images/shop/prod_img/m/montreux_9720.jpg)


 ギターパーツの沼
 DIY ギターメンテナンス
 プレイテックのギターを最強に改造!!
 ピックアップの種類(エレキギター)
 ギターのお手入れ
 ギター名人ラボ