Have you ever felt that something just doesn’t sound right when livestreaming or creating videos?
Your microphone, background music, and game audio are all there, yet somehow they don’t come together as a single cohesive mix.
In fact, one of the most common stumbling blocks for beginners is audio management.
This time, I’m going to introduce a simple way to solve this ‘audio all over the place’ problem.
The key is a feature called Loopback.
■ What Is Loopback?
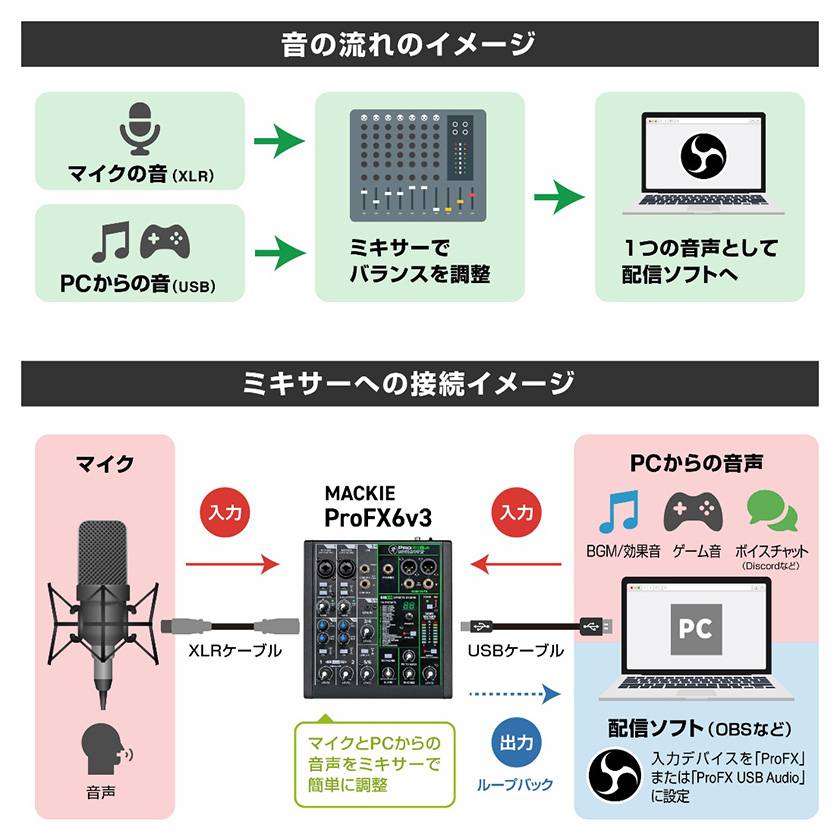
Loopback is a function that routes audio being played back on your computer—such as BGM or game audio—back into the mixer via USB, combines it with your microphone signal, and then sends the mixed audio back to the computer.
In a typical setup...
- Microphone audio
- Computer audio (BGM, game audio, etc.)
are treated as separate sources, requiring complicated configuration within streaming software.
However, with Loopback...
- Microphone audio
- BGM
- Game audio and voice chat audio
can all be mixed and adjusted within the mixer, then output as a single audio source for streaming.
In other words, instead of making detailed adjustments later inside your streaming software, you can send a fully mixed signal from the start.
Utilizing loopback can greatly simplify your streaming setup.
So, what kind of equipment should you actually choose?
When it comes to live streaming, the key requirements are quite simple:
- ① Support for microphone input
- ② USB connectivity to a computer (USB audio support)
- ③ Loopback functionality
Having these three features alone can make managing your audio much easier.
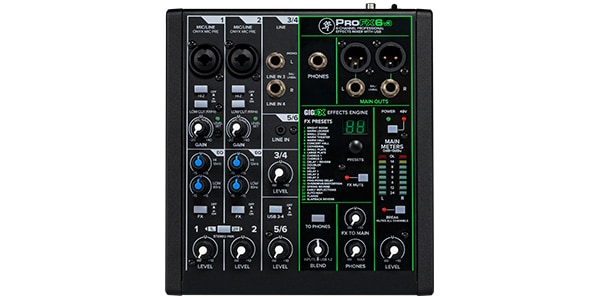
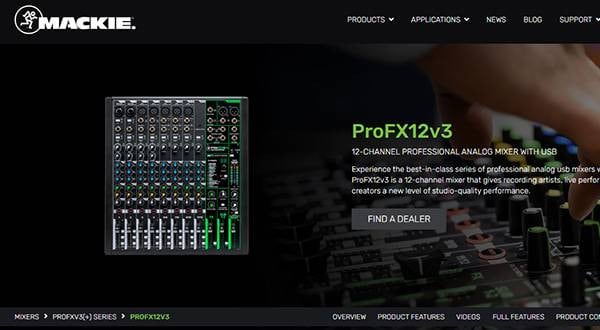
For example, the Mackie ProFXv3 Series, including the Mackie ProFX6v3, is equipped with both USB audio and loopback functionality, making it a great option for building a streaming setup.
As an example, let’s look at a basic streaming configuration using the ProFX6v3:
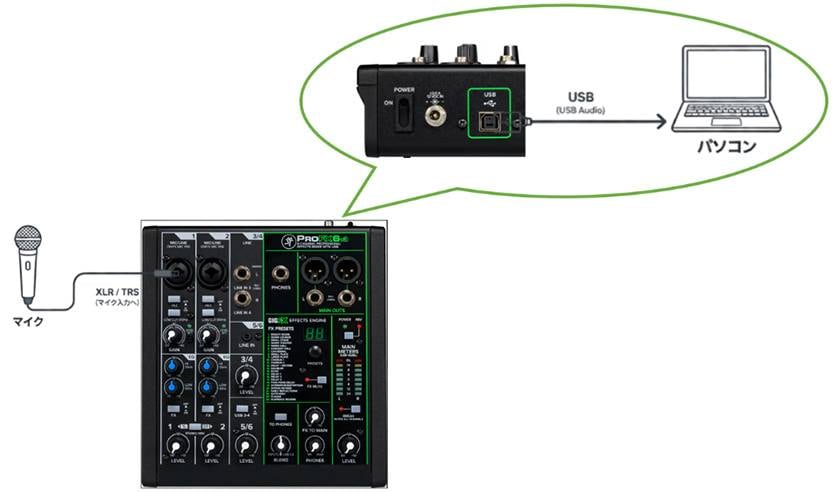
- Connect a microphone to one of the ProFX6v3’s XLR inputs
- Connect the mixer to your computer via USB
Then, in your streaming software (such as OBS), select Mackie’s USB audio device—such as ProFX or ProFX USB Audio—as the input source.
On the mixer, adjust the balance between:
- Microphone audio
- BGM and game audio returning from the computer
The mixed signal is then sent from the Main Mix to the streaming software via USB, where it is output as a single audio source for your stream.
Simply put...
- Adjust microphone audio using the mixer's gain and EQ controls
- Route computer audio back into the mixer via loopback
- Balance both signals within the mixer
Then send the combined signal to your streaming software.
Rather than struggling to fix everything inside your streaming application afterward, a loopback-enabled mixer allows you to send a properly balanced mix from the very beginning.
■ Setup Instructions
ProFXv3 Series
When connecting a Mackie ProFXv3 mixer via USB, the key is choosing between USB 1-2 and USB 3-4 routing depending on your application.
Pattern A: USB 1-2 Routing
This configuration allows you to monitor audio safely through headphones without sending PC audio to the main speakers.
- Windows Playback Device Settings: Control Panel > Sound → Set speakers (ProFX 1-2) as the default playback device.
- Mac Playback Device Settings: Audio MIDI Setup > Configure Speakers (ProFX) → Assign Analog 1 to both the left and right channels.
[Mixer Settings]
- ① Press the [TO PHONES/CONTROL ROOM] button (ON)
- ② Set the [BLEND] knob to the center position
- ③ Adjust monitoring volume using the [PHONES] knob
Pattern B: USB 3-4 (Loopback/Streaming)
This configuration routes computer audio (BGM, etc.) fully back into the mixer, where it is combined with microphone audio and sent to both the main outputs and the stream.
- Windows Playback Device Settings: Control Panel > Sound → Select speakers (ProFXv3 USB3, USB4).
- Mac Playback Device Settings: Audio MIDI Setup → Assign Analog 3 to the left channel and Analog 4 to the right channel under the Configure Speakers (ProFX).
[Mixer Settings]
- ① Press the [USB 3-4] button on the far-right stereo channel (ON)
- ② Raise the channel's [LEVEL] control to the U (unity) position
- ③ Adjust overall volume using [MAIN] or [PHONES]
ProFXv3+ Series
Understanding the Three Recording Modes
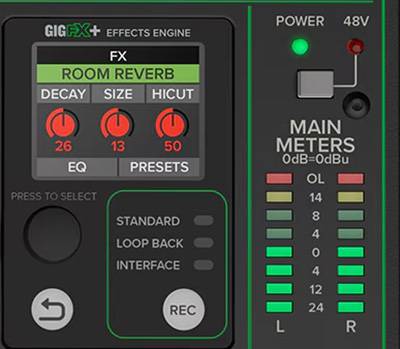
Press the [REC] button located to the left of the MAIN METERS section and select a mode using the LCD display.
Streaming Setup
[LOOP BACK]
Mixes audio from the mixer with computer audio (such as BGM) and sends the combined signal back to the computer (ideal for live streaming).
- Windows: Control Panel > Sound → Select [ProFX 3-4] under the Playback tab.
- Mac: Audio MIDI Setup → Assign Analog 3 to the left channel and Analog 4 to the right channel under the Configure Speakers.
Press the [REC] button located to the left of the [MAIN METERS] section on the mixer and select [LOOP BACK] mode.
Press the [USB 3-4] button on the USB stereo channel to turn it on.
Raise the channel's [LEVEL] control to the U (unity) position, then use the mixer controls to adjust the balance between the microphone signal and the audio coming from the computer.
Recording Setup
This setup allows you to listen to backing tracks (instrumentals) played from your PC while recording only your microphone or instrument signal directly into your DAW, preventing the backing track from being recorded twice through a loopback path.
[STANDARD]
Sends the mixer’s complete signal, including effects, to the computer (ideal for general recording and streaming).
[INTERFACE]
Bypasses the mixer’s effects and sends only Channels 1-2 directly to the computer (ideal for DAW recording).
- Windows: Control Panel > Control Panel > Sound → Select [ProFX 1-2] under the Playback tab.
- Mac: Audio MIDI Setup > Configure Speakers → Assign Analog 1 to both the left and right channels.
Press the [REC] button on the mixer and select either [STANDARD] or [INTERFACE] mode depending on your application.
- If you want to record with effects (such as reverb) applied → [STANDARD]
- If you want to record a dry signal and process it later in your DAW → [INTERFACE]
Press the mixer’s [TO PHONES] button so that it is on, set the [BLEND] knob to the center position, and adjust the monitoring volume using the [PHONES] knob.
■ Summary
By using the loopback function, you can easily solve common streaming issues such as:
“Only the microphone can be heard”
“The BGM isn't included in the stream”
“OBS settings are too complicated”
Loopback simplifies audio routing by allowing you to manage all of your audio sources in one place.
It is especially useful for those who:
- Are just getting started with live streaming
- Want to simplify their video production workflow
- Are building a gaming livestream setup
For these users, a mixer with loopback functionality can be an extremely practical solution.
We also offer a selection of mixers suitable for streaming, so be sure to check them out when choosing the right equipment for your setup.




![Mackie Streaming-Focused Digital Mixer DLZ CREATOR - A Closer Look at Its Recommended Features!!: The Three Modes [Easy/Enhanced/Pro], AUTO GAIN, AUTO MIX](/contents/uploads/thumbs/2/2025/12/20251204_2_33788_1.jpg)

 ライブ配信に必要な機材
 MACKIE GOシリーズ特集
 MACKIE ブランドページ
 スマホ用ワイヤレスマイク特集
 初心者向けUSBマイクの選び方
 配信・ポッドキャスト特集!(ライブ/動画/ゲーム実況)
 Discount Sale
 Outlet
 New Arrivals
 Podcast (streaming)
 Headphones / Earphones
 Microphones
 Wireless Equipment
 Speakers
 Power Amps
 Mixers
 Processors
 Portable PA Systems
 Recorders
 Karaoke
 Guitars
 Basses
 Ukuleles
 Drums & Percussion
 Pianos / Synthesizers
 Wind Instruments
 Stringed Instruments
 Japanese Instruments
 Harmonicas, Other
 Software
 DJ & VJ
 Stands
 Cables & Connectors
 Racks & Cases
 Lighting
 Stage & Truss
 Video Equipment
 PC PERIPHERALS
 Power Supplies
 Studio Furniture
 Household Items, Other
 Alcoholic Beverages