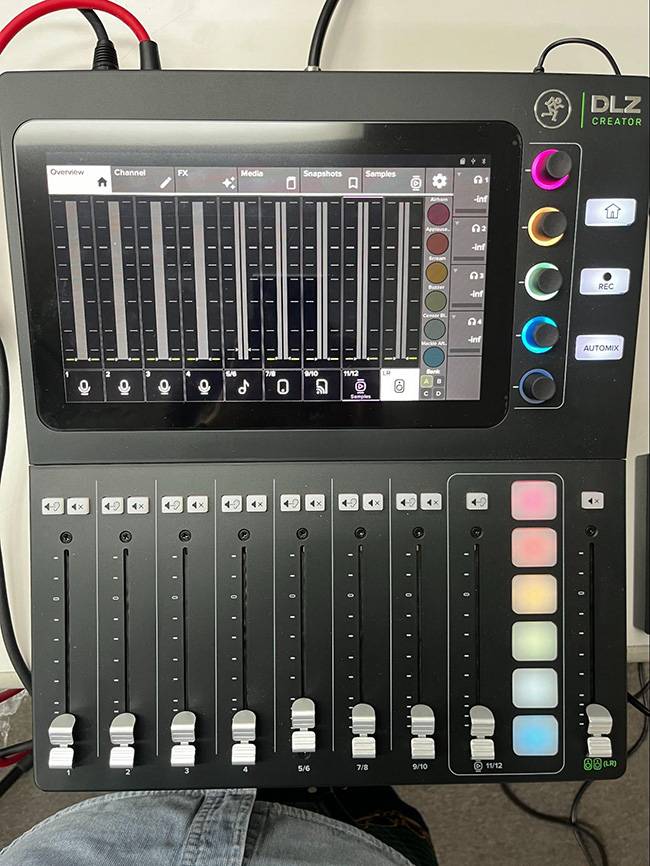
In my previous blog “Playing Around with the Mackie Streaming-Focused Digital Mixer DLZ Creator without Reading the Manual!!” I introduced the idea of outputting some sound and playing with it.
This time, as a feature showcase of the DLZ CREATOR, I will be introducing:
- 3 Modes (Easy / Enhanced / Pro)
- AUTO GAIN
- AUTO MIX
The Three Modes (Easy/Enhanced/Pro)
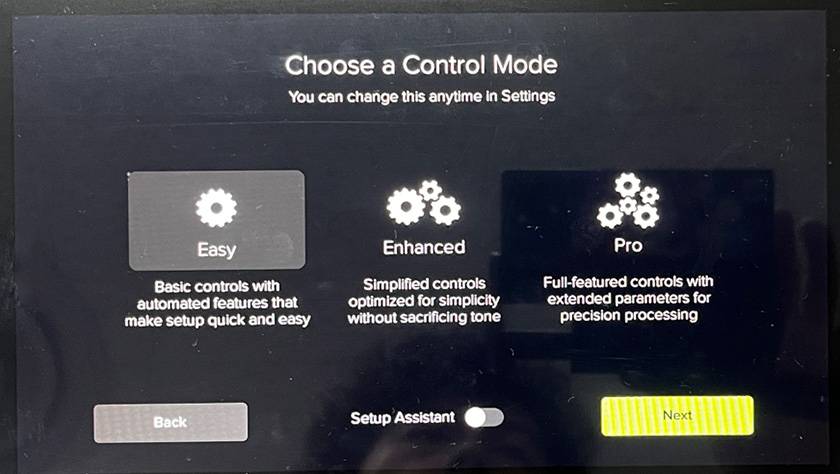
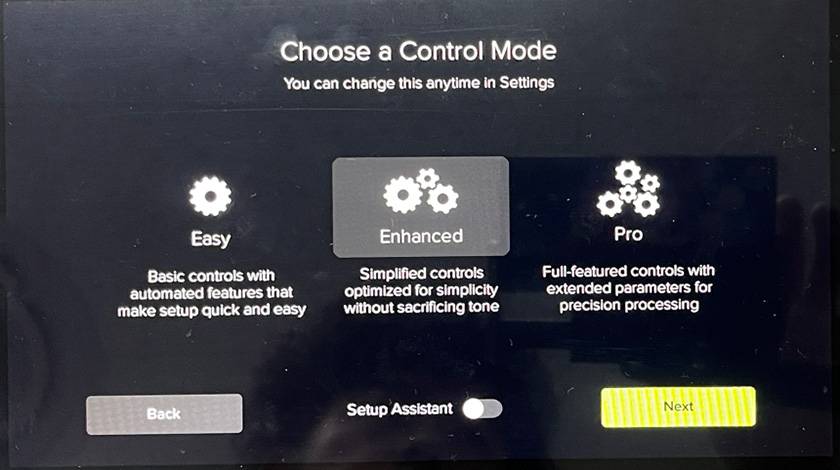
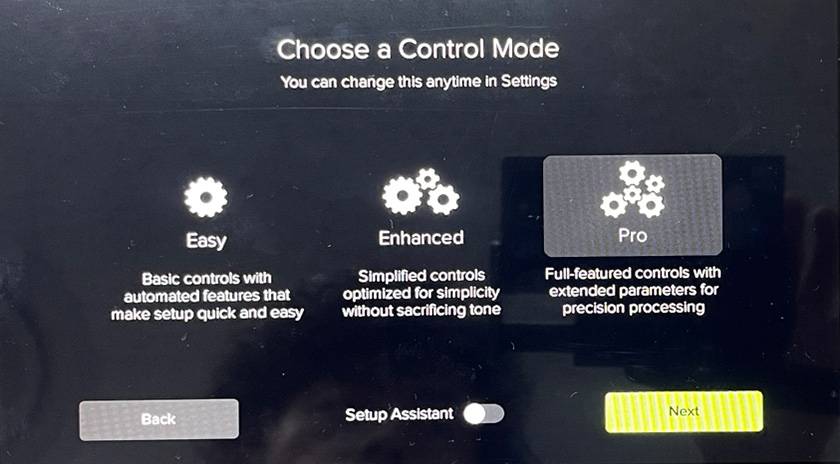
DLZ CREATOR’s work modes allow you to choose from three options—Easy, Enhanced, and Pro—and the user interface changes according to your level of experience and intended use. Simply put, if you want to use it in a straightforward way, choose Easy. If you want detailed settings, choose Pro.
So, how are they different? Let’s take a look at the actual screens!
First, select the gear icon in the upper right of the screen and display the System tab.
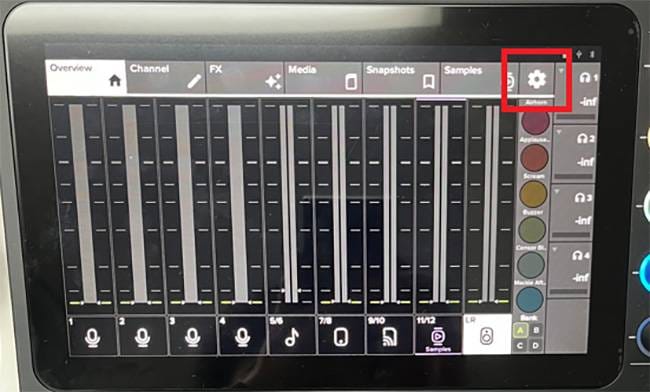
You can switch modes here.
Once you select a mode, touch “Next” in the lower right corner to complete the switch.
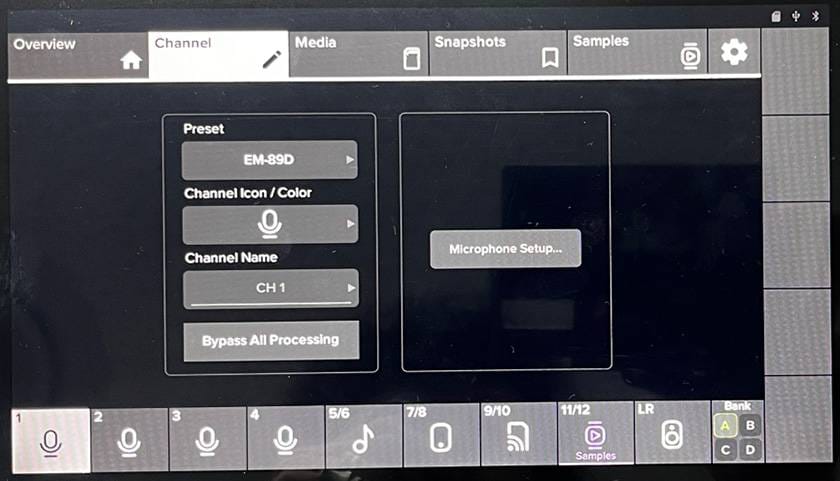
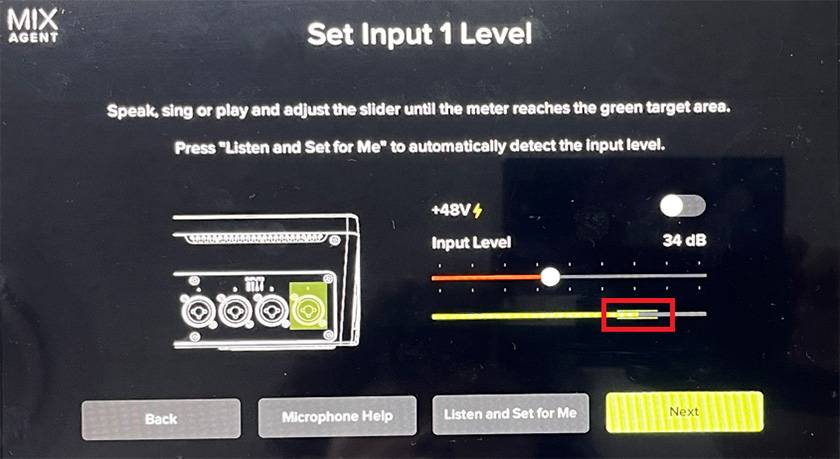
The channel setup screen is truly “Easy”.
Touch “Microphones Setup”.
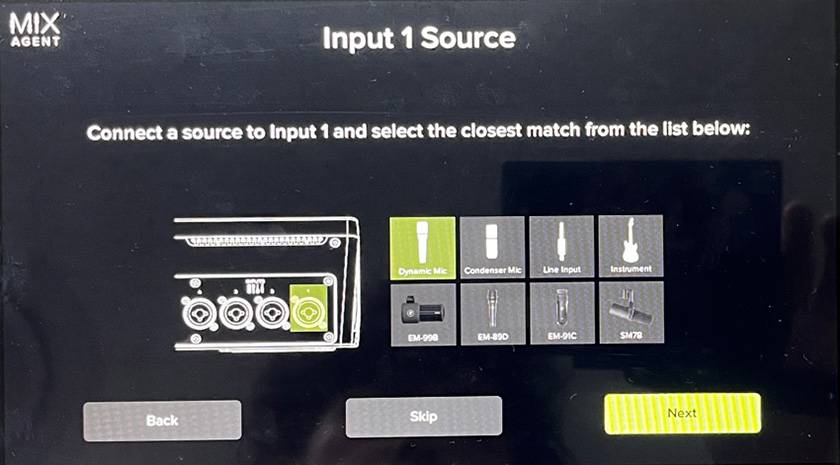
It shows you what you’re connecting using illustrations.
This time, I selected a dynamic microphone and touched “Next”.
While speaking into the microphone, all you have to do is adjust the red Input Level meter so that the yellow-green meter reaches the range outlined in red.
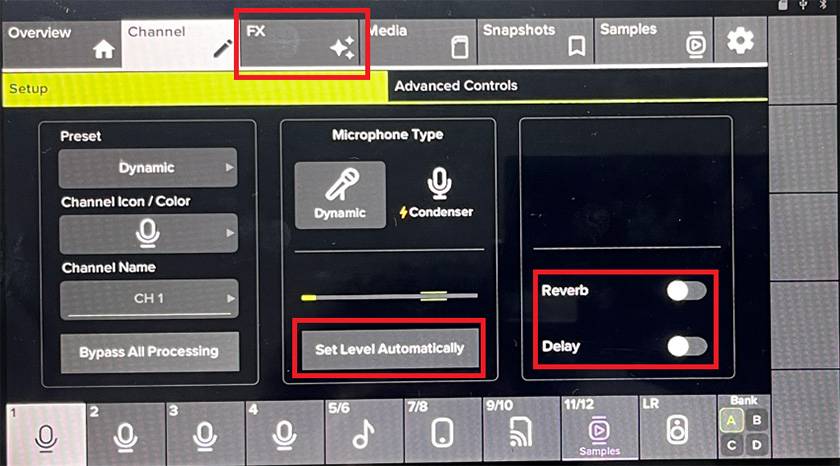
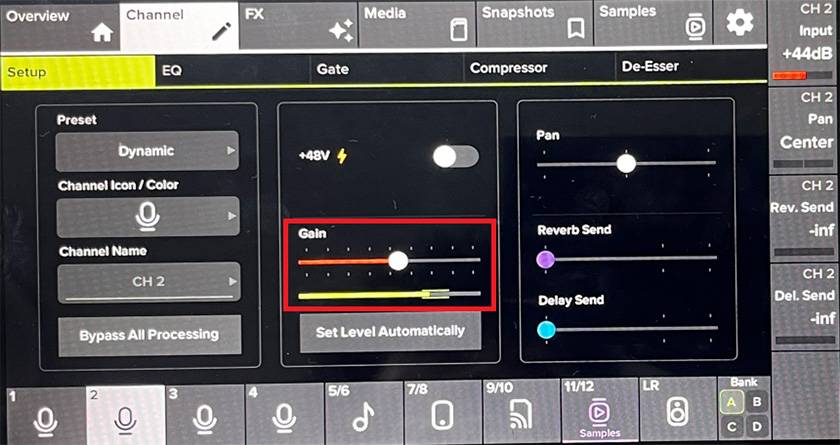
So, what about Enhanced mode?
You can see that “FX” has been added to the top of the screen.
And the level adjustment that was “manual” in Easy mode has become “Set Level Automatically”!
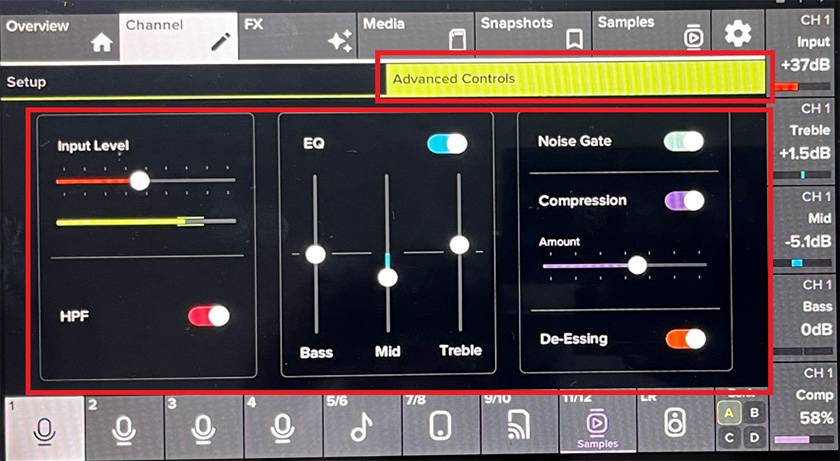
An Advanced Control tab has also been added.
You can adjust HF, 3-band EQ, Gate, Compressor, and De-Esser.
Each processor offers only simple controls, so you can just turn them ON/OFF without worrying about anything complicated. Nice and easy.
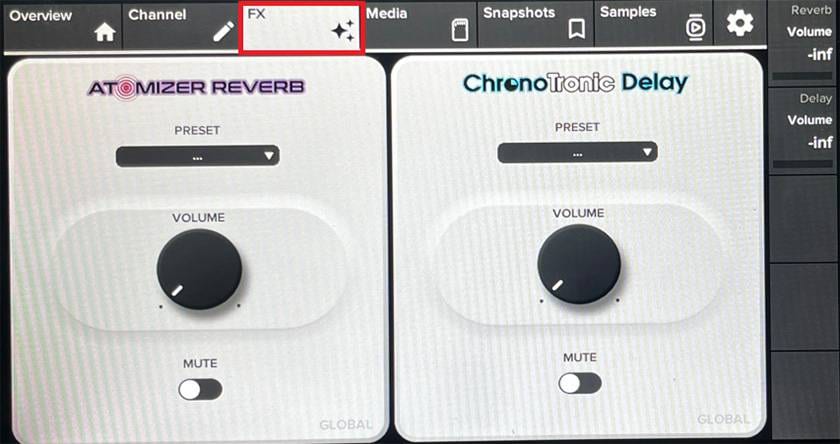
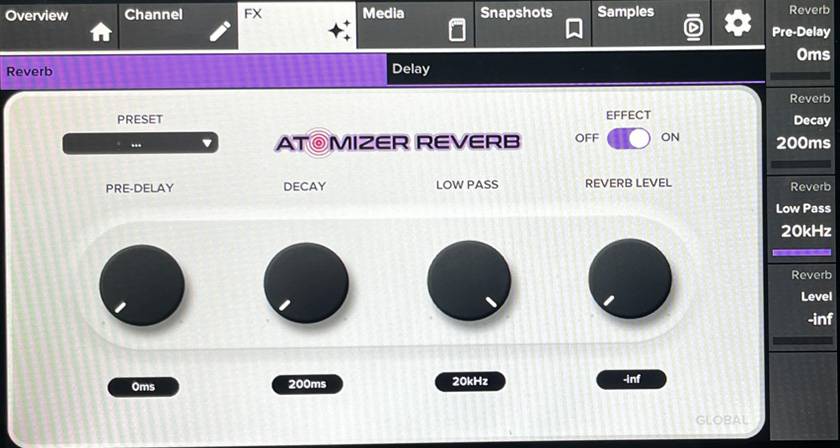
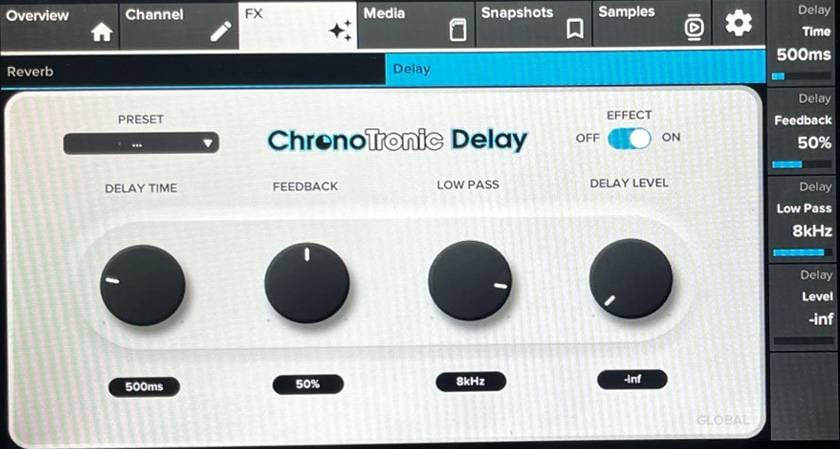
FX settings allow you to adjust REVERB and DELAY using only simple controls for VOLUME and MUTE.
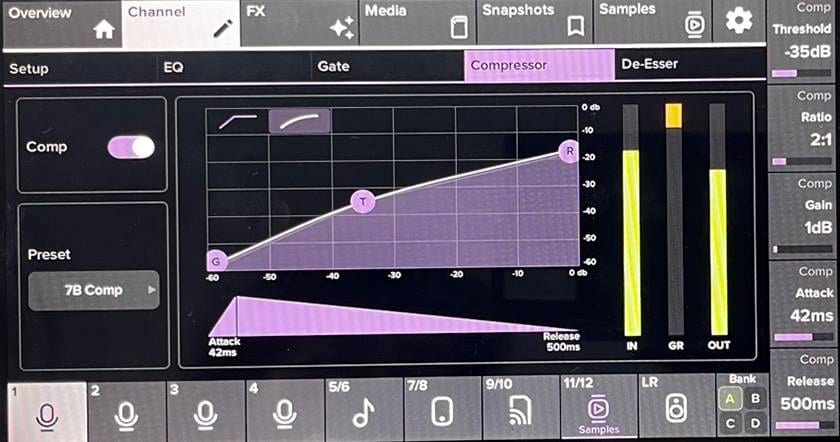
Let’s take a look at Pro mode as well.
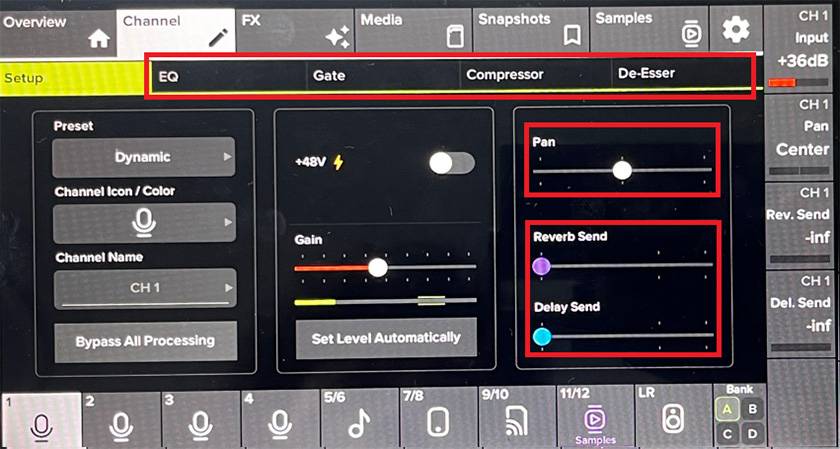
EQ, Gate, Compressor, and De-Esser are added as separate tabs.
Pan is also added, and FX is no longer just ON/OFF—now it uses a slider so you can adjust the amount of FX.
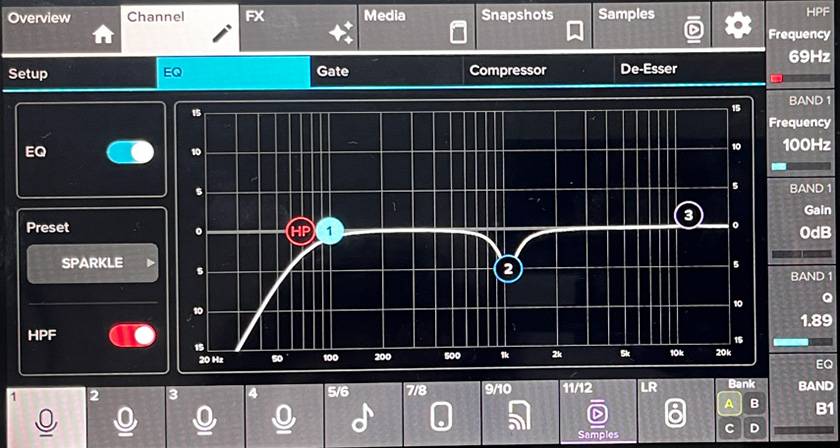
Each processor offers detailed parameters, making it truly professional-grade. Since the DLZ CREATOR has a large screen, it’s easy to visually grasp what kind of effect is being applied.


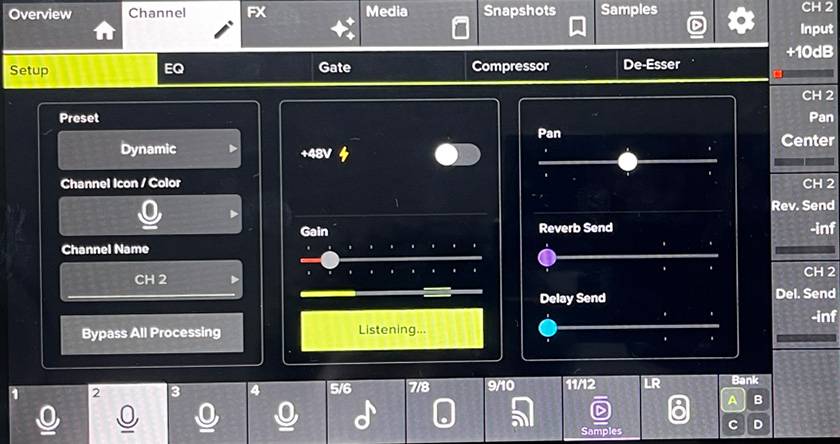
Let’s also touch on AUTO GAIN.
This is, essentially, a function that sets the appropriate gain just by talking into the mic.
In the screen below, the gain is at its minimum position, so naturally the yellow-green meter barely moves.
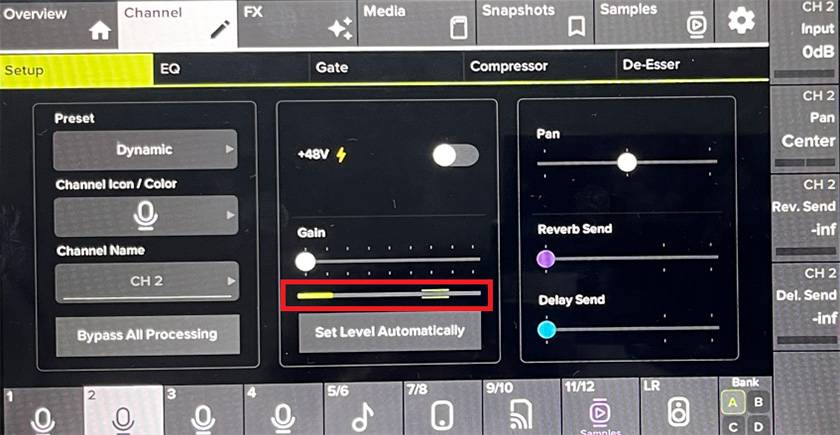
But when you tap “Set Level Automatically” and talk for a moment…
It changes from “Listening” to “Level Set!” and the setup is complete.
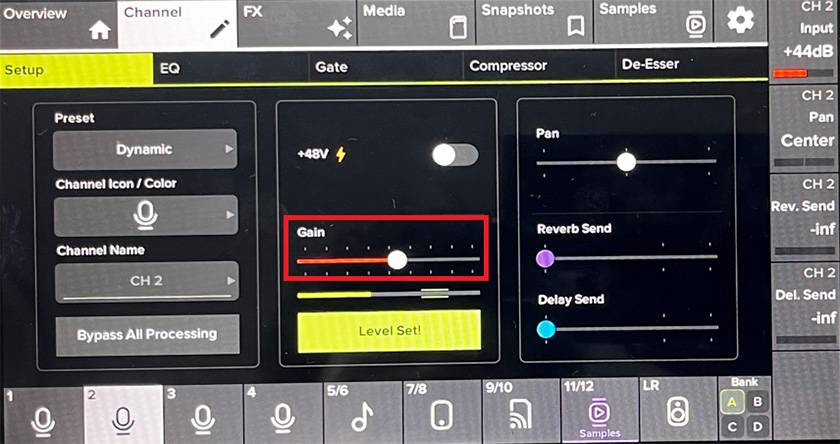
You can see that the yellow-green meter is now properly within the optimal range.
I had to sustain a pretty long tone just to capture this image, lol.
With this, regardless of the speaker’s volume, you can get the right setting just by saying, “Okay, talk normally for a sec!”
Lastly, let’s talk about AUTO MIX.
With DLZ CREATOR, you can:
- Automatically lower the channel level of people who aren’t speaking when multiple people are talking
- Stabilize output levels and reduce the risk of feedback
- Adjust levels by assigning priority
The setup procedure is simple.
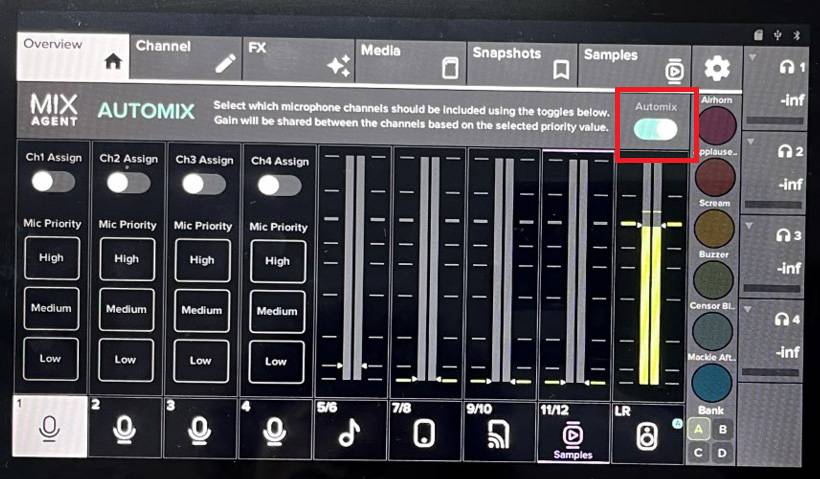
Press the “AUTOMIX” button in the red box,
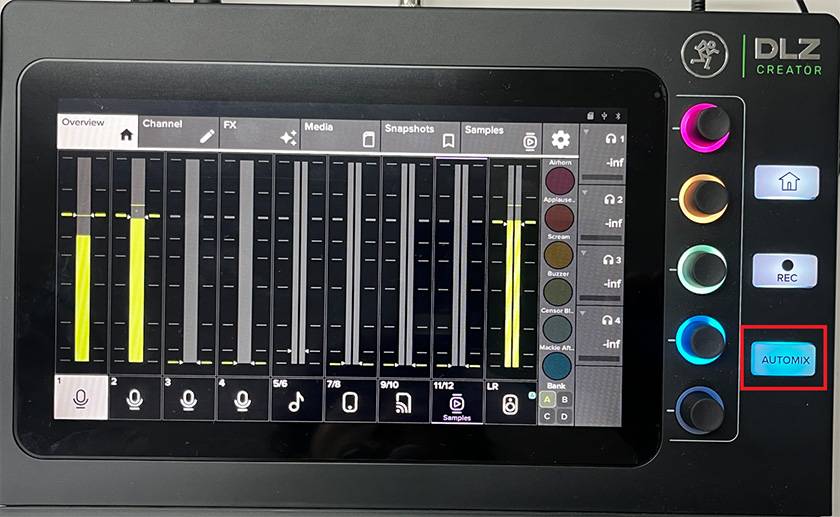
Then turn “Automix ON” at the top of the screen and switch the “Assign” for channels 1–4 to “ON” depending on your environment.
I actually tested what happens when setting this “Priority”.
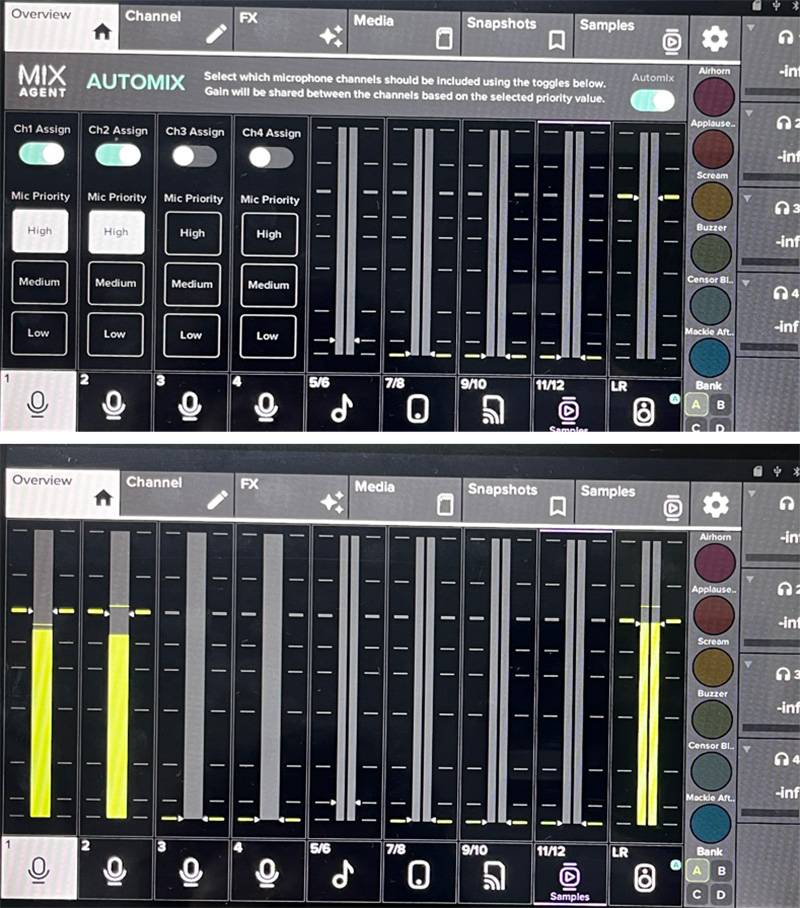
When both channels are set to “High”, there is no particular change in the volume of the two microphones.
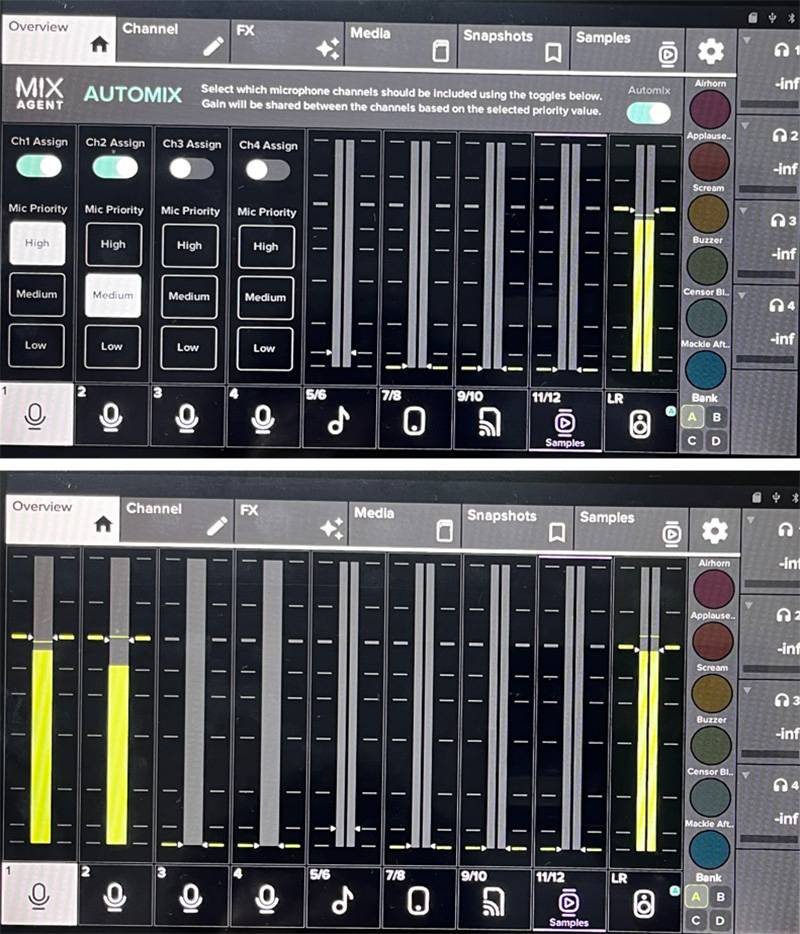
Next, I set channel 2 to “Medium.”
You can see that channel 2 becomes slightly quieter.
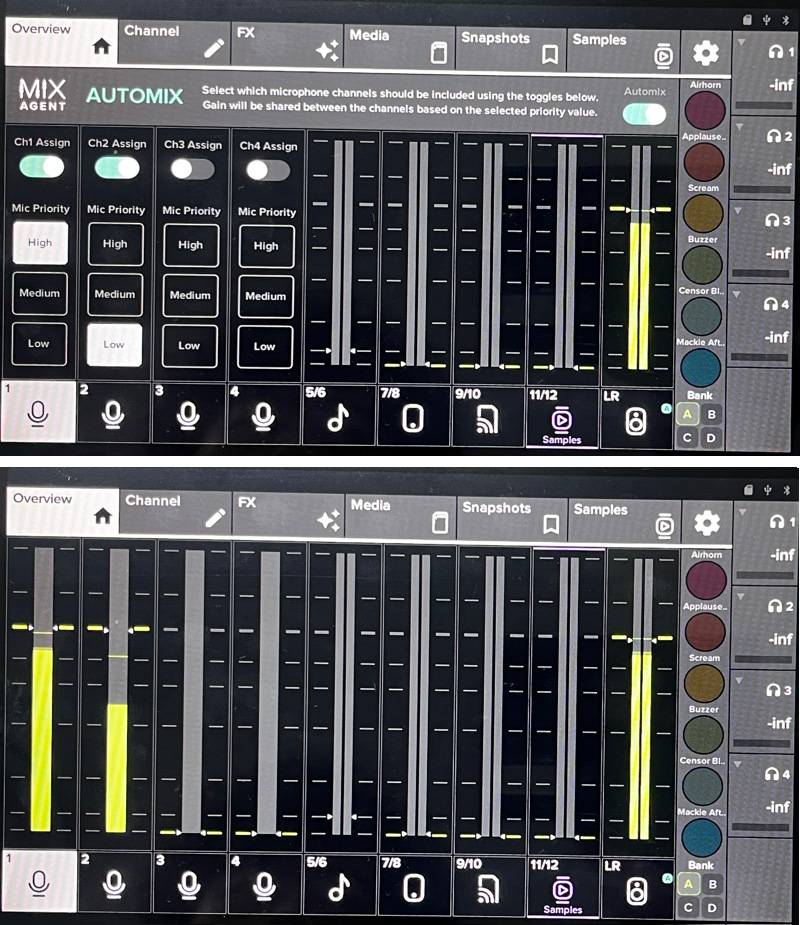
Here is the result when setting ch2 to “Low.”
Channel 2 becomes even quieter, and with it lowered this much, it’s noticeably softer.
At this point, you may be wondering, “So… in what situation would I actually use this?”
I was wondering the same thing.
So, I took a look at the manual and found the following description:
When should AutoMix be used? When (and why) should you assign priority to microphones?
For example, in situations like podcasts, you might assign “High” to the host’s microphone and “Medium” or “Low” to the guests. The same applies to broadcasting. There are play-by-play announcers and commentators. They are given higher priority than special guests in the booth or on-site. In radio stations as well, AutoMix can be used for the main host and their guests.
This made me once again realize that the DLZ CREATOR is truly a digital mixer specialized for streaming.
How was it?
This time, I introduced some of the recommended features of the DLZ CREATOR.
Since the pandemic, the need for streaming has skyrocketed, and various streaming mixers have been released by many companies over the past few years, but there are very few mixers that allow such detailed and flexible configuration. The more you use it, the more interesting it becomes. That’s the kind of mixer it is.
In the next installment, I’ll experiment with and introduce another feature that I recommend, so please stay tuned!


![[If You’re Unsure, Choose This!] Mackie ShowBox Thorough Review!](/contents/uploads/thumbs/2/2025/11/20251128_2_33696_1.jpg)

 MACKIE GOシリーズ特集
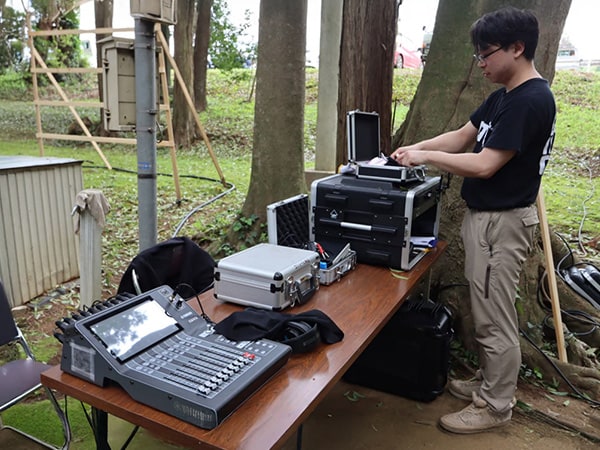 神社でお祭りバンド
 MACKIE ブランドページ
 ミキサーケース セレクター
 Mackie PAスピーカー比較表
 Mackie ミキサー比較