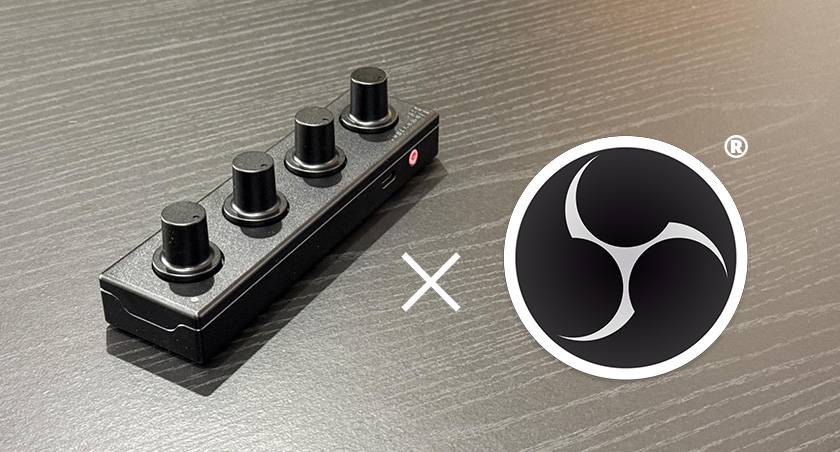
OBS Studio is a popular software used by many streamers.
It’s not only used for streaming on platforms like YouTube Live, but with its virtual camera feature, it can also be utilized for web meetings, making it an indispensable tool in modern streaming setups.
That said, have you ever thought, "It would be so convenient if I could control it with an external device"?
Specialized devices like Elgato's Stream Deck are popular items that make streaming environments more comfortable.
However, for those who are into DTM (Desktop Music Production), you might have thought, "Why can't I just use my MIDI controller to control it?"
OBS Studio and MIDI
OBS Studio does not natively support MIDI control. However, thanks to the efforts of community developers, there is now a plugin that adds MIDI control functionality!
This plugin, "obs midi mg," is hosted on GitHub and has been introduced on the OBS forum, making it a trusted plugin.
Since this is a community-developed plugin, installation instructions are not covered in this blog.
If you're interested, please search for "obs midi mg installation method" for more details...!! m(_ _)m
For this article, let’s proceed under the assumption that this plugin has been installed.
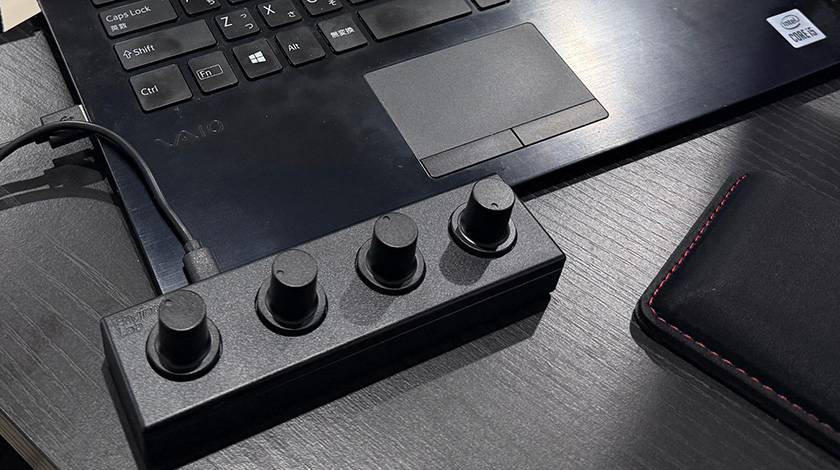
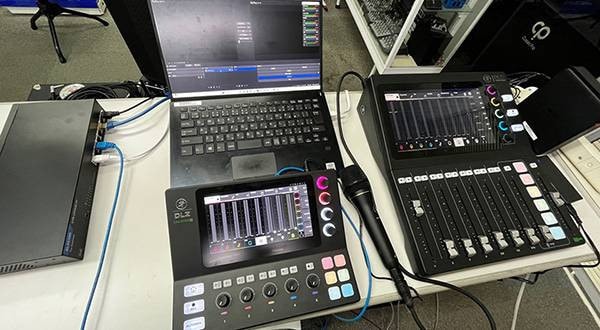
About Engineering Lab / EL4P
Now, let’s talk about the product "EL4P" mentioned in the title.
■ EL4P Series MIDI Controller / Engineering Lab
The EL4P is a MIDI controller by "Engineering Lab," a manufacturer that designs and produces products with a focus on music production workflows, operating with a small team.
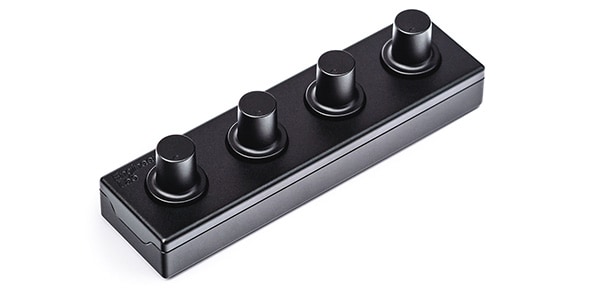
With just a 4-knob design, this simple yet appealing gadget satisfies the gadget lover in me. Honestly, I fell in love with it at first sight—it really fulfills the desire to own it. What's more, the EL4P is hand-assembled in their own lab in Amsterdam, Netherlands, which adds a touch of premium craftsmanship. The box is made from recycled paper and has an industrial look, adding to the stylish factor.
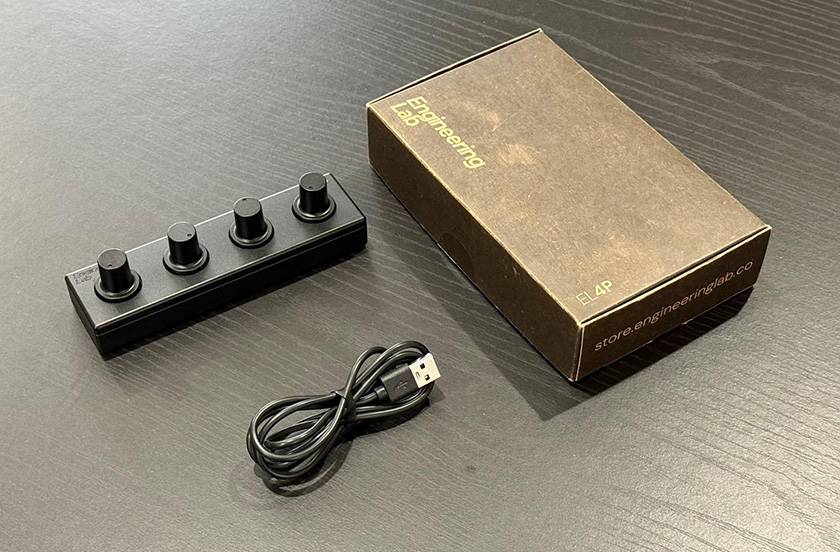
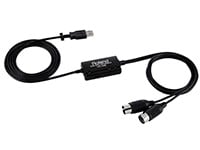
The connection is simple: just connect the PC and the device via a USB cable. The unit comes with a USB Type-C to A cable, and on the PC side, you connect via Type-A. No driver installation is required, so there’s no hassle involved.
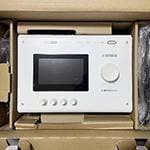
The settings are made using the web configuration tool provided by Engineering Lab. With this tool, you can set the MIDI channel and CC values, as well as check the firmware version and the value changes when you turn the knobs. Furthermore, the settings made here are saved to the hardware by pressing the “UPDATE” button at the bottom of the screen. These settings will be carried over even if you use TRS-MIDI for standalone operation.
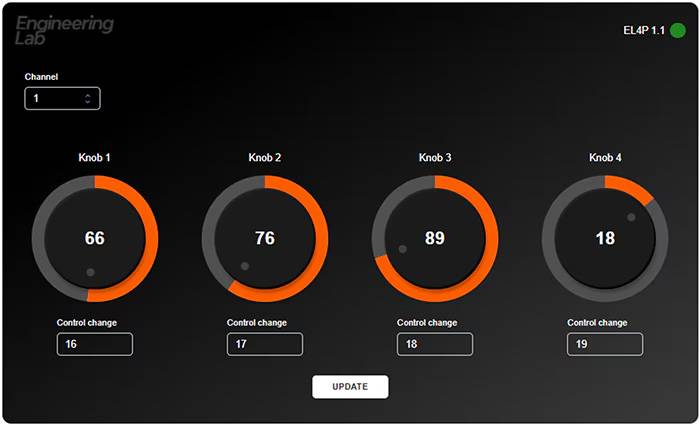
Engineering Lab Web Configuration Tool
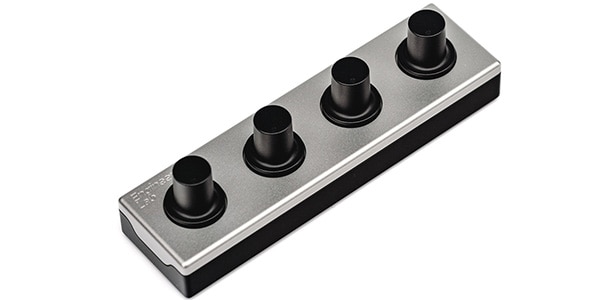
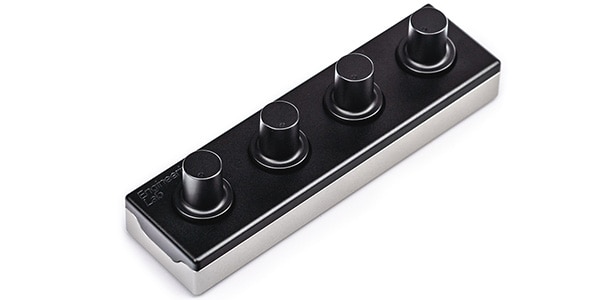
By the way, there are three color variations available. You can choose between Black / Natural for the knobs, top, and bottom of the unit. Personally, I prefer the All Black version in the image, but for those who have a desk with white or silver accents, I also recommend the Black - Natural - Black variant.
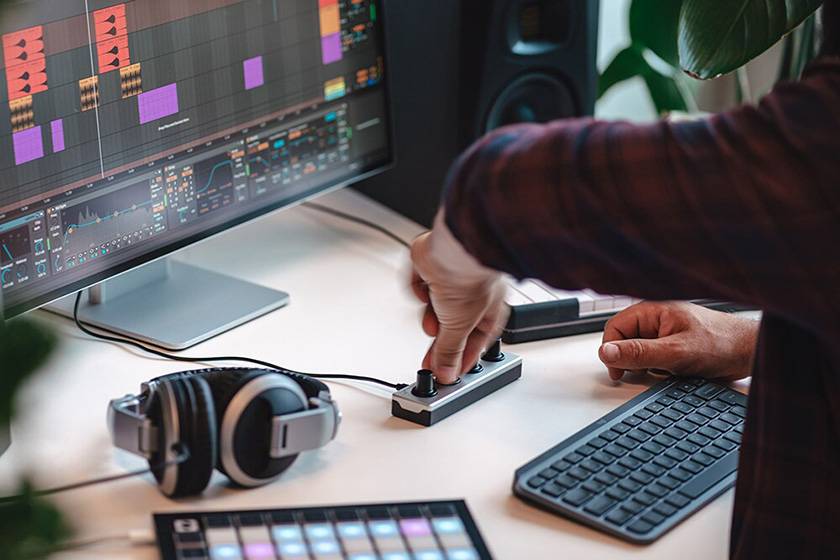
Image: Black - Natural - Black
How to Use obs midi mg with EL4P in OBS Studio
Now, let’s set up OBS Studio to work with the EL4P using obs midi mg!
As mentioned earlier, after installing the obs midi mg plugin, launch OBS and ensure that the "obs-midi-mg Setup" option appears in the tools menu.
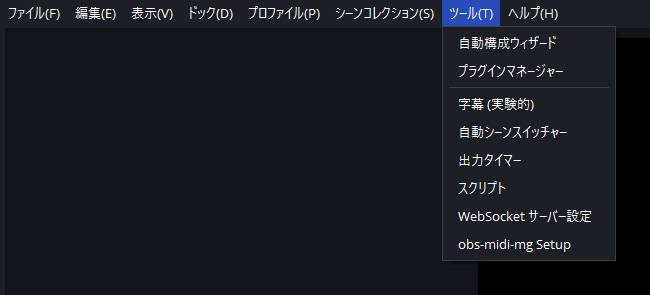
Windows Example Screen
Clicking on "obs-midi-mg Setup" will bring up the setup screen, as shown below. This is the obs midi mg settings screen.
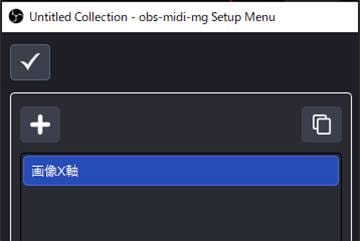
On the left side, under “Binding Collections,” you can configure the detailed values. The preset names for Binding Collections can be freely set.
Since this will change the values for already set sources, make sure to configure the scenes and sources you want to control with the knobs in advance.
*By the way, in my environment, when connected to the web configuration tool, the EL4P was not recognized in OBS Studio. If you're experiencing a similar issue, try leaving the web configuration tool page or closing the browser.
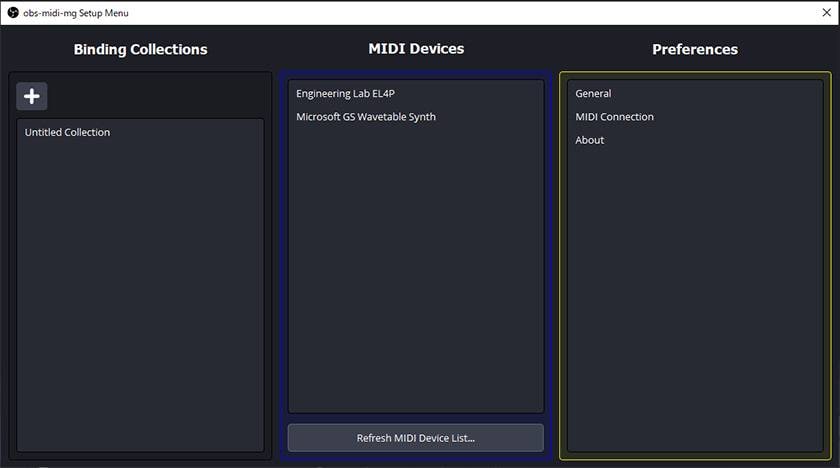
obs-midi-mg Setup Launch Screen
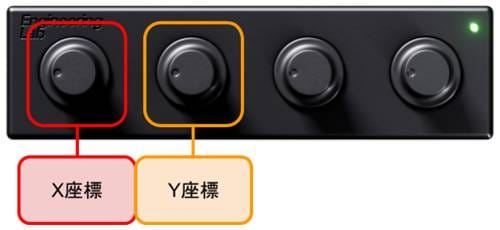
Here, I will explain how to set up the example of "moving the position of an image set to a source."
For the explanation, I will use the leftmost knob to adjust the X coordinate and the second-from-left knob to adjust the Y coordinate.
Launching obs-midi-mg and Moving to the Editing Screen
- First, add the image to the source that you want to move, then launch the obs-midi-mg settings screen.
- Once you select the name of the Binding Collection you want to configure, click on the pencil icon displayed below.
- This will move you to the internal settings of the preset, and the display on the right will switch.
Note: In obs-midi-mg, you need to configure both the "MIDI values being input" and the "changes you want to make" separately.

Preset Detailed Screen
Input Settings
Once you confirm that your MIDI controller (in this case, the Engineering Lab EL4P) appears in the "Device" section, let's first modify the settings for the leftmost knob.
Note: It might be confusing, but after entering the preset, the left column is a "preset for configuring individual inputs and outputs." So, the structure of obs-midi-mg is essentially: large preset > medium preset > smaller presets.
For clarity, let's change the name of the preset. You can double-click the selected preset name to change it.
-
Click the pencil icon surrounded by a green frame in the right column. This will allow you to modify the values in the middle column.
Note: Before clicking the pencil icon, the middle column will not be clickable.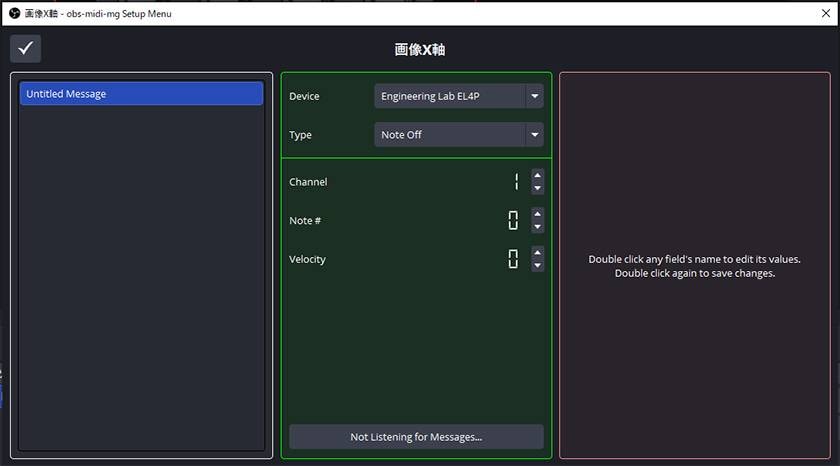
Input MIDI Settings Screen
- Select "Control Change" from the "Type" dropdown.
- Set the "Channel" and "Control #" to the values you configured in the Engineering Lab's web configuration tool.
*Note: If you don’t remember these values, click "Not Listening for Messages..." and turn the desired knob after it turns blue to automatically recognize the value.
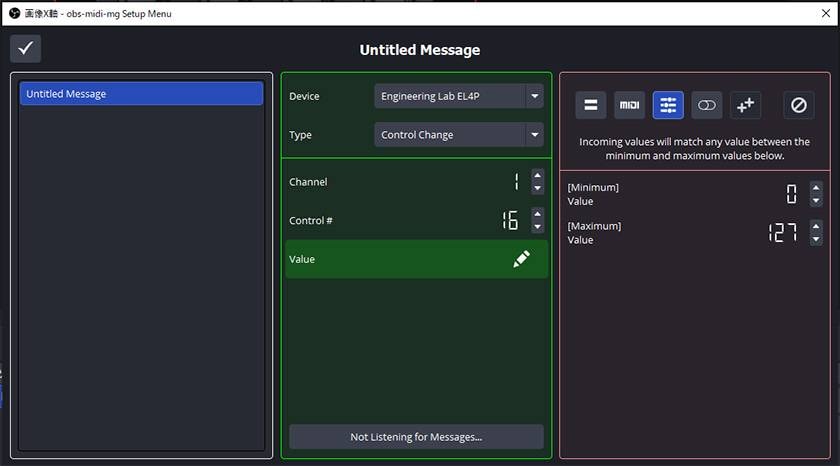
The "Value" is fixed by default, but since the EL4P is a knob-type MIDI controller, you’ll want to use a variable value. Therefore, make the following adjustments: - Double-click the row labeled "Value" to bring up a more detailed settings screen.
- Click the icon
 with three horizontal sliders. Here, you can set the minimum and maximum values. Since the default is 0-127 (the MIDI standard minimum/maximum value), there is no need to change this.
 - After clicking the "Value" row again, the configuration for the "Value" is completed.
-
Finally, click the checkmark in the top left corner to finish setting up the input.
Example of Screen After Settings
Output Settings
Now, let's configure the output settings.
-
Click the pencil icon outlined in red.

Output Settings Screen
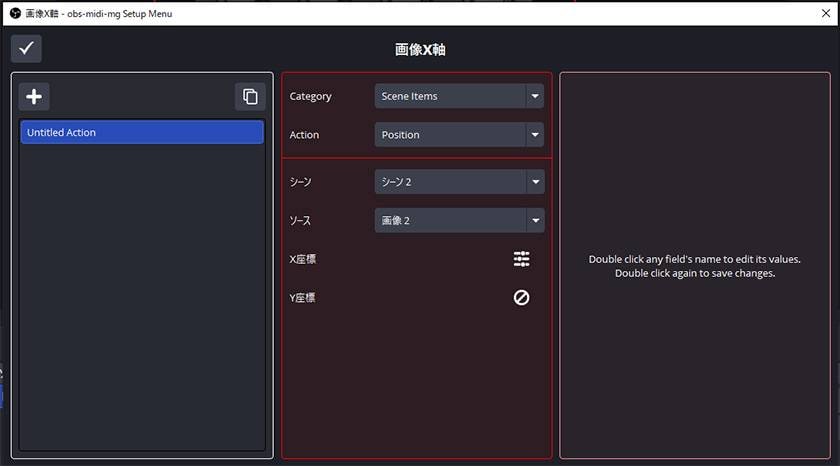
- In the "Category" section, select the item you want to control within OBS Studio.
- This may seem a bit confusing because it's displayed in English, but since we are working on moving the image's position in the source, we will select "Scene Items."
Note: To clarify, "Source" relates to audio, and "Scene Items" is for video, so remember that distinction. - In the "Action" section, configure the action you want to perform. In this case, we will select "Position."
-
First, move the X-axis using the leftmost knob. Double-click the row labeled "X Coordinate."
Note: If you click it once, it will enter a numeric input state, so be careful.
If you enter a fixed value here, the behavior will be "move to the specified X coordinate only when the knob is turned," and since there's no setting to return to the original position, it will result in the action "move slightly and stop."
(Though the video below shows a loop, the actual position is fixed.) - To configure it for variable values like we did with the input settings, select the icon with three horizontal sliders.
- If the "Reference Field" displayed in the bottom right says "Group," change it to "Value."
- Now, set how much you want it to move. This value will vary depending on your stream layout, so adjust it to suit your streaming environment.
*Note: The values will be applied in real-time, so you can adjust them while turning the knob to test it out. -
Since we won’t be changing the Y-coordinate in this setting, select the "No Entry"
 symbol for Y. If, for example, the default value is set to 0, every time you turn the knob, the Y-coordinate will stay fixed at 0, which can cause unexpected behavior (as shown in the video below).
 - As with the input settings, double-click the setting item row to finalize it.
-
Finally, click the checkmark in the top-left corner to complete the output settings.
Example of Final Setup
It may seem like a complicated process, but since you can customize each value with high flexibility, I recommend trying different settings and modifying them to fit your preferences!
By the way, you can duplicate each setting item using the copy button.![]()
For Y-axis movement, I copied the X-axis settings, changed the "Control #" in the input, set the X-coordinate in the output to "No Entry![]() ," and change the Y-coordinate to a variable value.
," and change the Y-coordinate to a variable value.
Now, you can freely move the image in any direction!!!
Summary
Since each source requires its own settings, this might not be ideal for frequently changing images. It’s better suited for static sources like adjusting the position of a web camera for streamers, or changing opacity with filters.
It can also be used to adjust the volume of microphones, which is helpful for quickly changing audio levels during live performances or in situations where multiple people are speaking simultaneously.
Additionally, the Engineering Lab / EL4P is a very compact device, making it convenient for streaming in limited spaces, such as when using a laptop. Its logo is a subtle engraving, so if you want to make people curious and they ask "What's that!?" during a stream, it's perfect! (laughs)
Be sure to enhance your streaming experience with the EL4P!


![[Real Hands-On Review] The New Stream Deck + XL Is Just Sooo Cool!](/contents/uploads/thumbs/2/2026/3/20260313_2_34691_1.jpg)

![[Enhancing Talk Sound Quality] How to Increase Viewer Satisfaction in Streaming, Game Streaming, and Review Videos](/contents/uploads/thumbs/2/2023/5/20230511_2_22530_1.jpg)

 ライブ配信に必要な機材
 ライブ配信に必要な機材を徹底解説 オンラインライブの創り方
 DTMセール情報まとめ
 USB接続MIDIインターフェイス
 配信・ポッドキャスト特集!(ライブ/動画/ゲーム実況)
 DTMに必要な機材