Hello to all the drummers out there and those considering picking up the drums!
Have you heard about the PDS Series, the ultimate cost-effective electronic drums from Sound House?
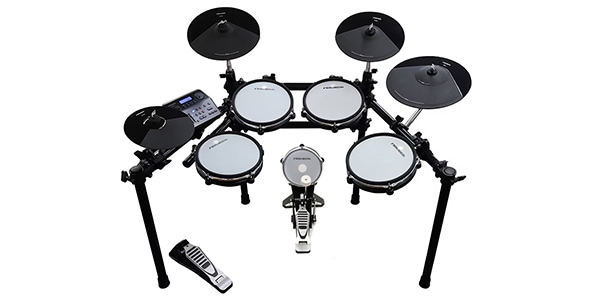
Today, I’m going to assemble the mid-range model of the series, the PDS750!
PLAYTECH / PDS-750 Electronic Drum Set
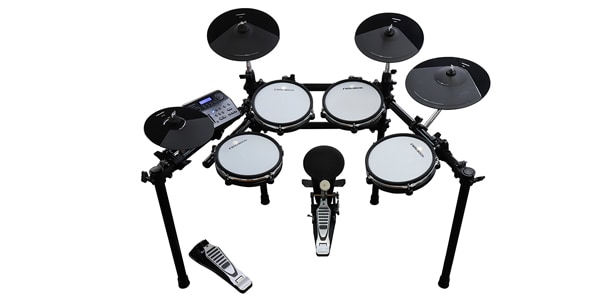
With a rack system, mesh head pads, a sound module boasting 431 different sounds, and more, this set is packed with features at an affordable price. It’s perfect for beginners, amateurs, and professionals alike.
- Parts Included in the Box -
Let’s start by unboxing and laying out all the parts.
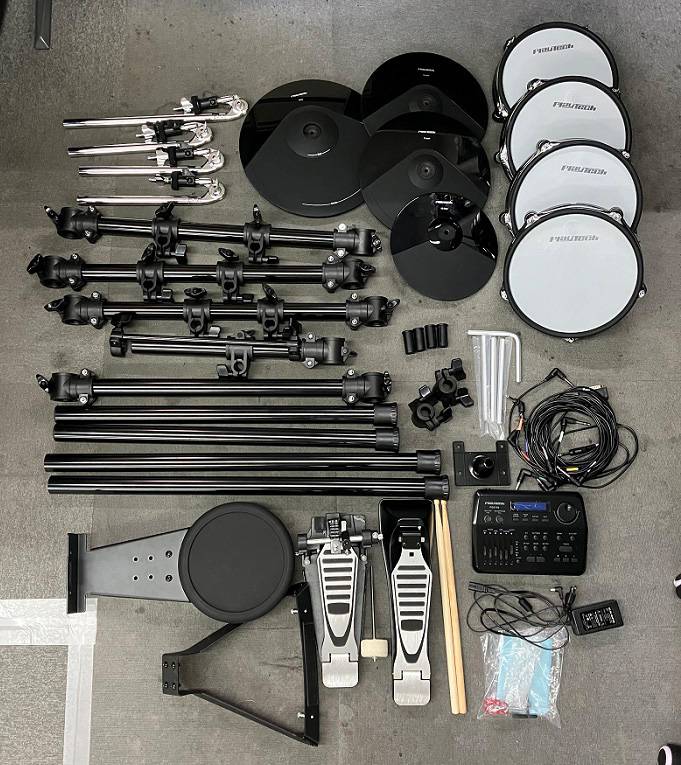
Here’s what’s included:
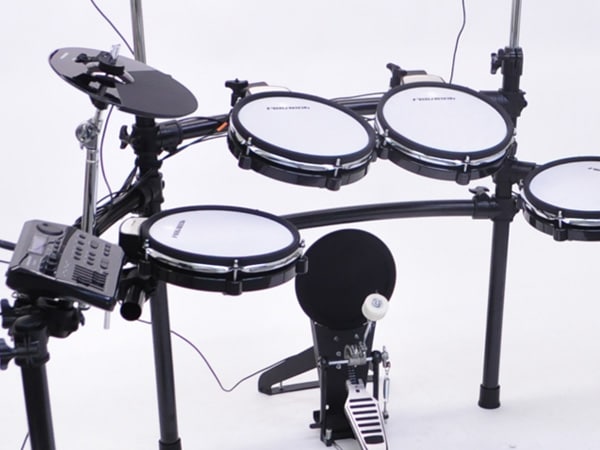
- Rack system parts
- Tom and snare pads
- Cymbal pads
- Kick pad
- Kick pedal
- Hi-hat controller
- Pad cables
- Sound module
- Power adapter
- Drumsticks, Phillips screwdriver, and cloth
Here’s what’s in the box and listed on the manual.
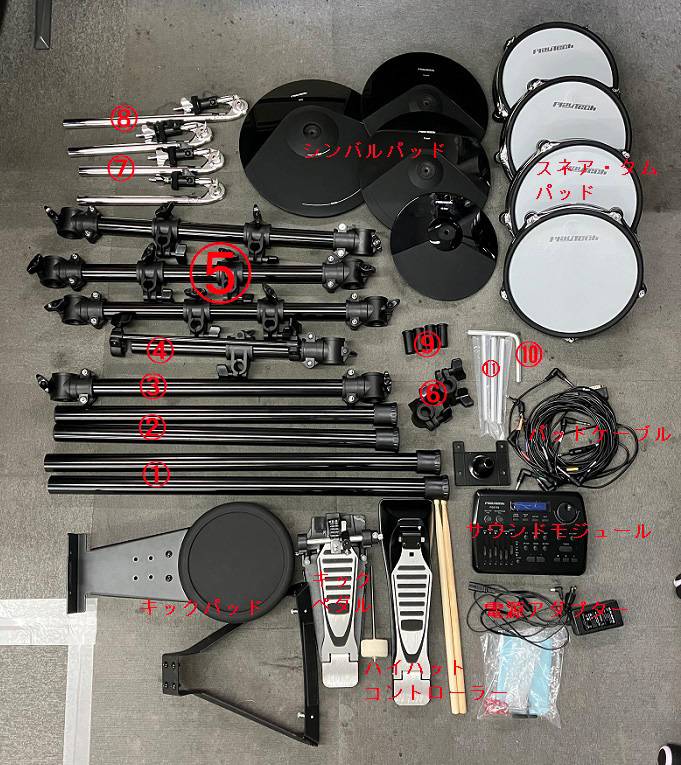
The rack system connection parts are pre-installed, so all you have to do is assemble them.
Let’s get started!
- Assembly Process -
Combine Parts ① and ③ to make a frame.
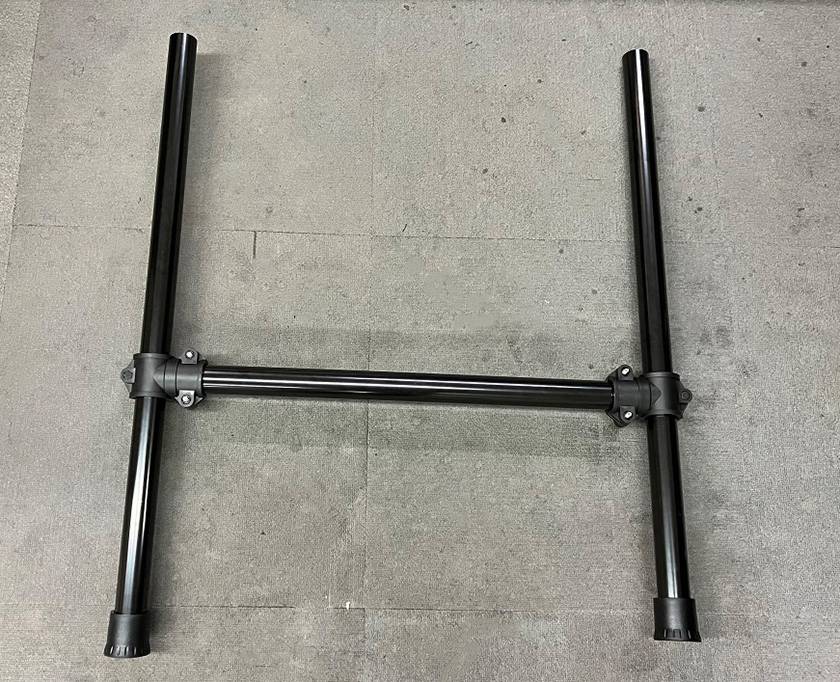
Attach Part ④ to one side of the frame made with Parts ① and ③. Remove the rubber feet and pass the ring from the bottom.
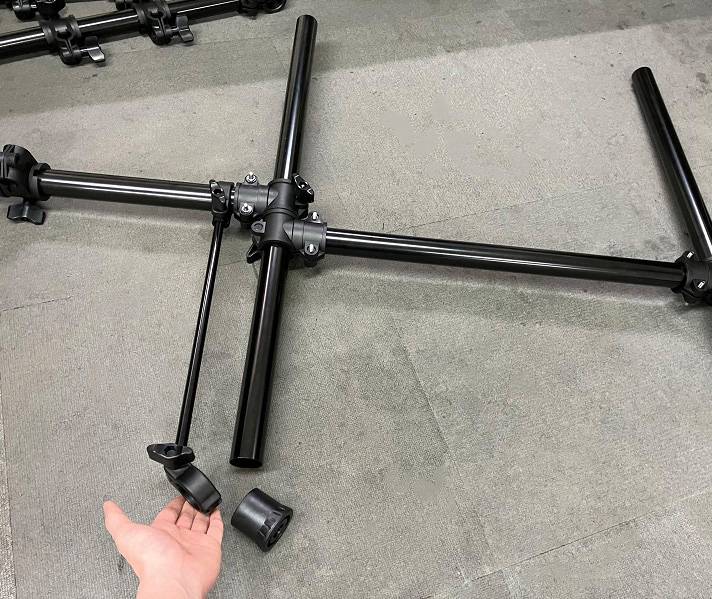
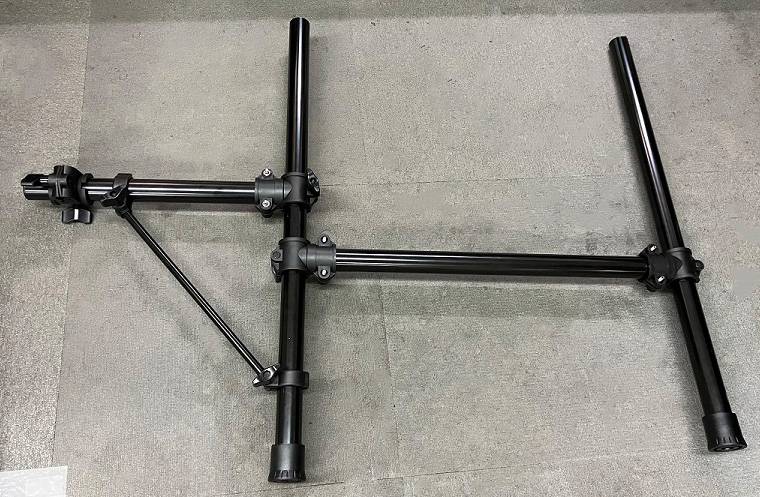
Attach Part ⑤ as shown in the image.
Attach Part ② to both ends. This completes the frame. Adjust the height at this step for ease later on.
Stand the frame upright.

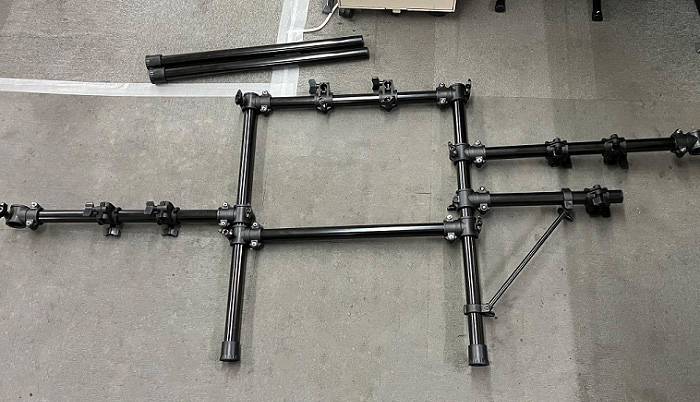
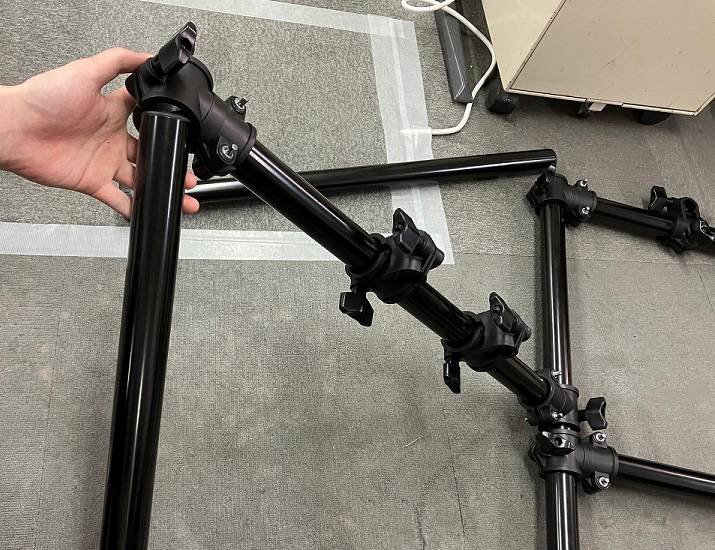
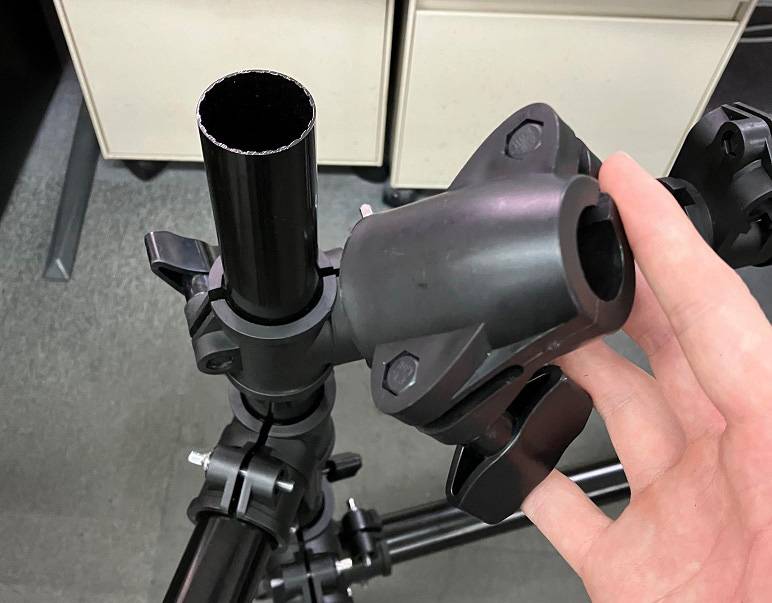
Attach Part ⑥ to the longer support pillars. If it’s too tight to insert, remove the screws and gently widen the opening as you fit it.
Insert Cymbal Arms ⑦ and ⑧ into the fixed parts. The longest cymbal arm is for the ride cymbal and should be attached to the far right.
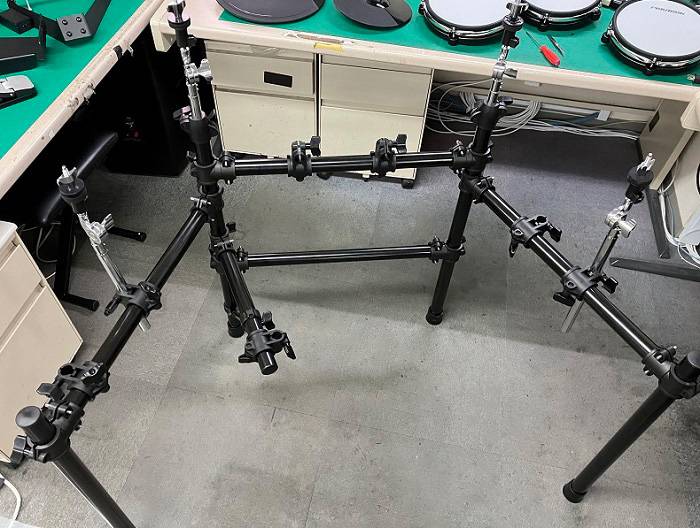
Attach the brackets for snare and tom drums. Combining Parts ⑪, ⑩, and ⑨ first, then insert them into the frame makes the procedure smoother.

Install the pads to the rack. Each pad has a rotation stopper, so align the tabs to attach them.
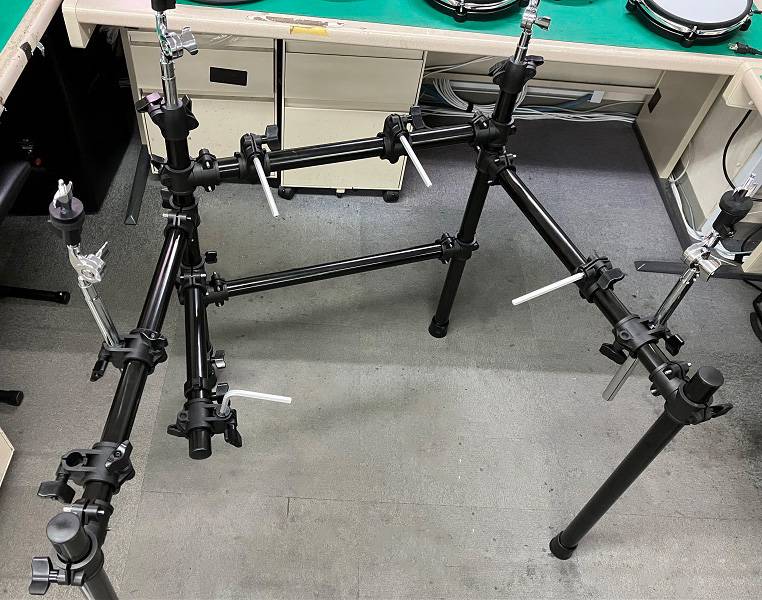
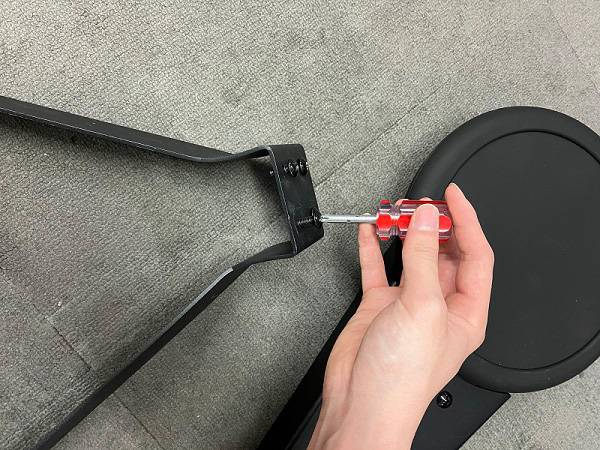
Assemble the kick pad using the included screwdriver. The screws are already on the metal fittings.
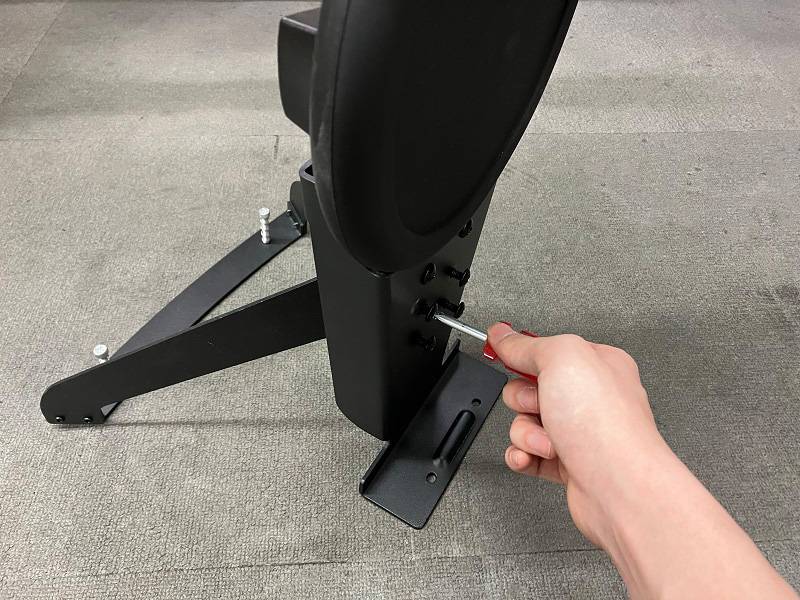
Place the kick pad and hi-hat controller in your desired positions and attach the kick pedal.
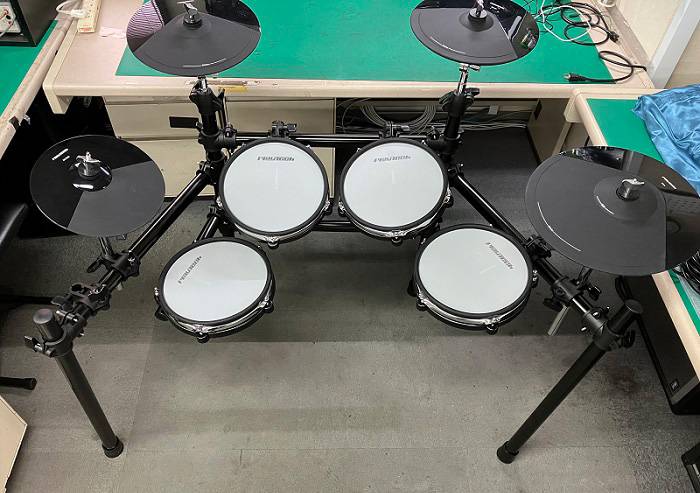
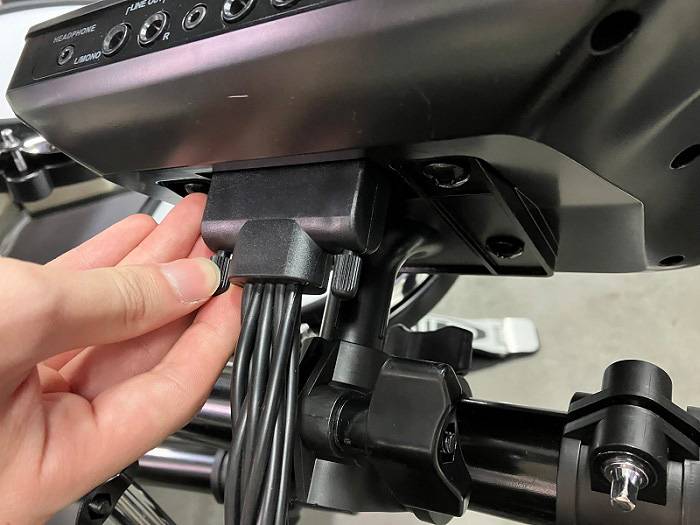
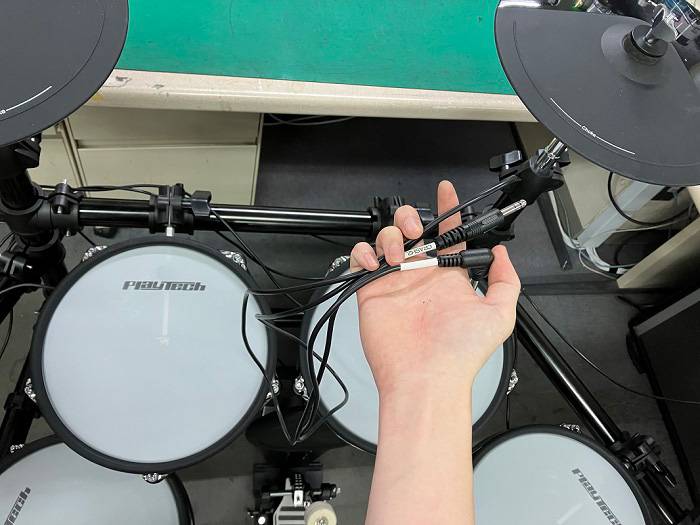
Attach the sound module to the far left and connect the cables. Ensure the cables are fully inserted and secured with screws on both sides.
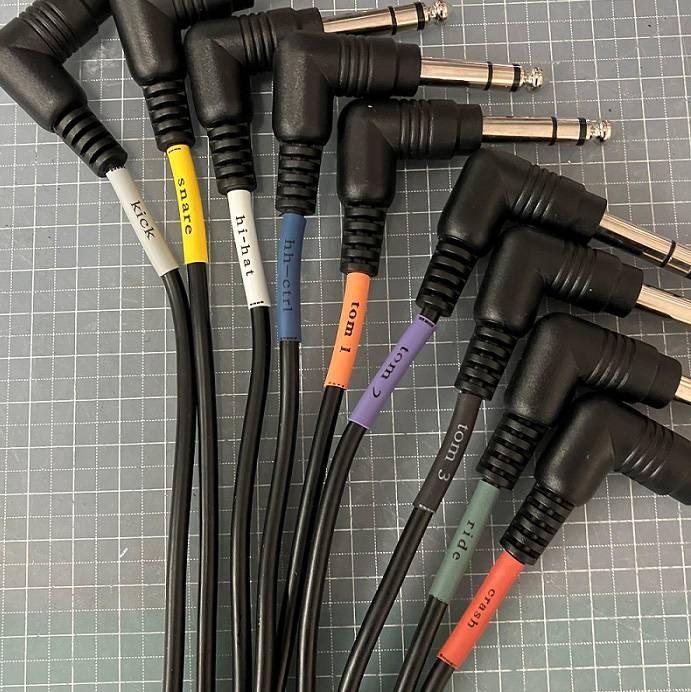
Connect the corresponding cables to the pads. The right crash cymbal uses EXT1, so connect it to the sound module with the included separate cable.
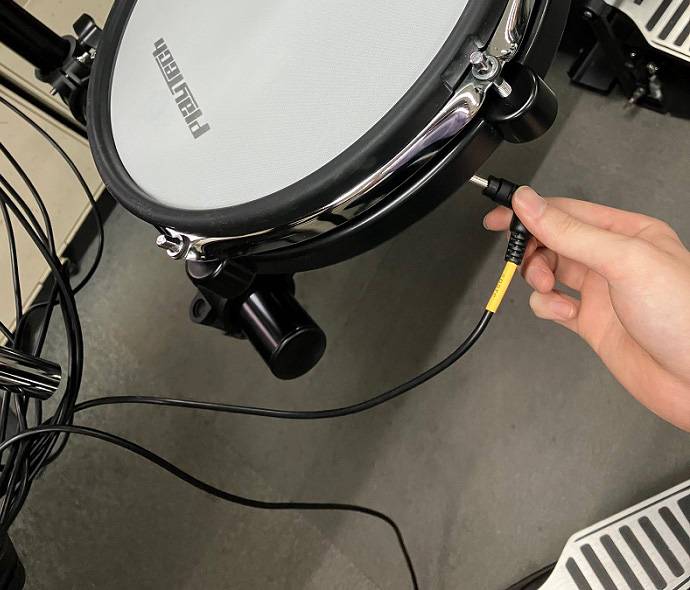
Here’s the color coding for the cables:
- Gray:Kick
- Yellow:Snare
- White:Hi-hat
- Blue:Hi-hat control
- Orange:Tom1
- Purple:Tom2
- Black:Tom3
- Green:Ride
- Red:Crash
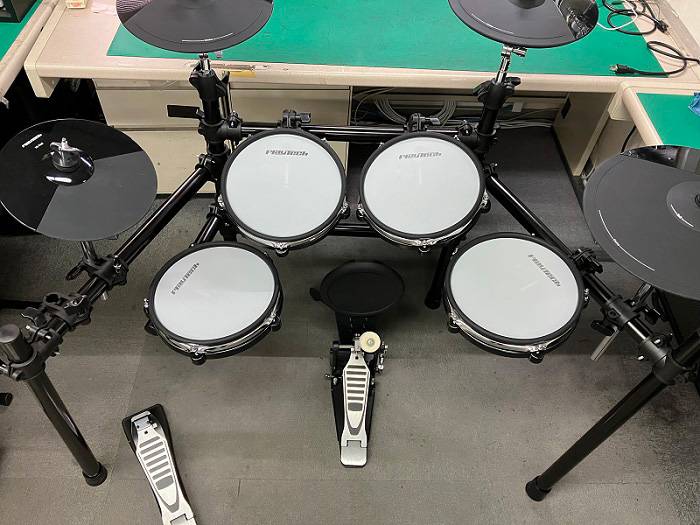
And that’s it! Assembly only took about an hour from unboxing.
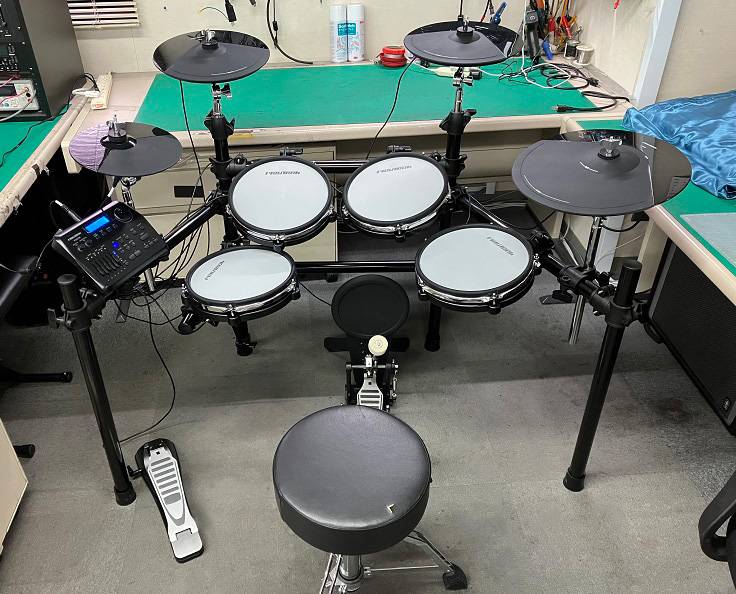
*The drum stool is sold separately.
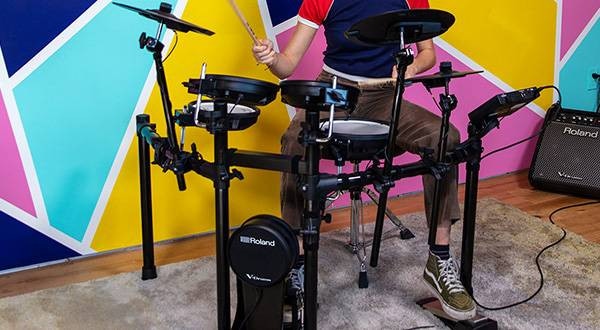
- Size and Fit -
The overall dimensions are approximately 160cm wide and 100cm tall.
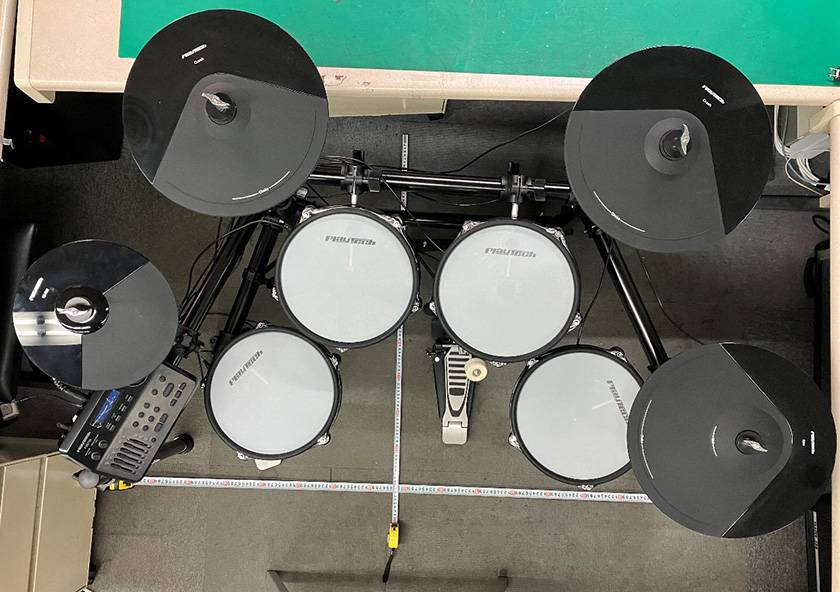
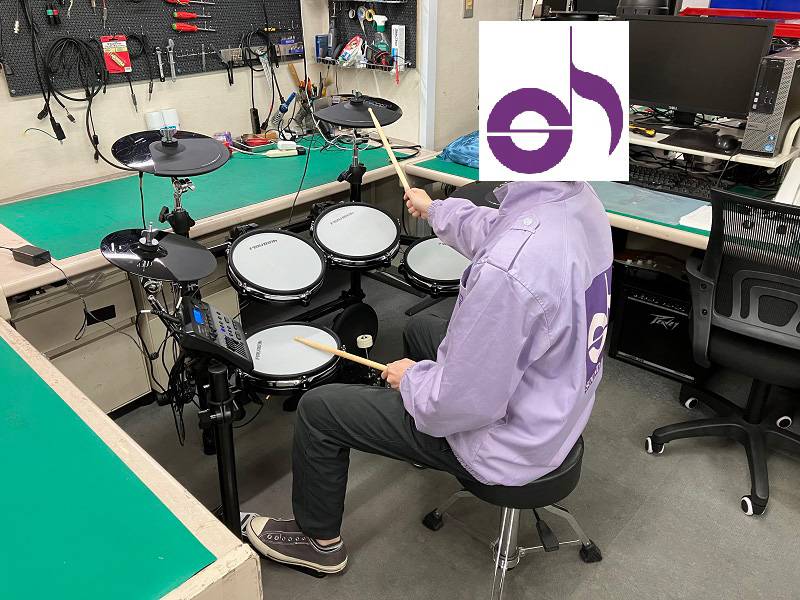
*The person in the image is a 170cm tall staff member.
That’s all for my guide to assembling the electronic drum set!
The parts are lighter than they appear, and no additional tools are required, making it easy for one person to assemble.
I hope this gives you a good idea of how practical and easy it is to set up this electronic drum kit.
ではでは。


 初心者にもおすすめ 電子ドラム
 電子ドラムに必要なもの
 電子ドラムパッド対応チェッカー
 PLAYTECH 電子ドラム特集
 おすすめ電子ドラムセット
 電子ドラムの選び方