Hello.
The other day I found myself at home cheering alone, shouting “Alright!! Bucciarati did it!!” without a care about whether I was acting my age or not.
While shopping at the supermarket, I thought, “I should buy some gummies,” and headed to the snack aisle, where one particular item caught my eye: JoJo wafer snacks with collectible stickers.
I thought to myself, “No, no, wasting money isn’t good. It’s these little expenses piling up that eventually turn into a big stresser… and by the way, what ever happened to that Blue-Eyes White Dragon sweatshirt I impulse-bought a few years ago in a similar situation? It’s sitting in my dresser like a ‘sealed card.’” And while thinking all sorts of things like that, I still went, “Well, just one should be fine♪” and deceived myself as I put it into the basket.
On the drive home, filled with excitement, I kept thinking, “Part 5 really is all about Bucciarati. Bucciarati would be great,” and when I opened it at home, it turned out to be Fugo in the box…
Fugoooo… Fugo, huh…
No, I do like Fugo.
He’s scary when he snaps, but Purple Haze is incredibly strong.
But my feelings were completely set on Bucciarati, and for me personally, Part 5 really is all about Bucciarati.
Then time passed, and the following week when I went to the same supermarket, there were only three JoJo wafer packs left. I thought, “These must be the last ones in stock—should I buy all three?” but I figured that buying them all would be childish, so I bought just one.
Well, this whole behavior is less about being childish and more like me questioning how old I actually am though.
And then, when I opened it at home, my long-awaited Bucciarati appeared, and I celebrated alone.
I thought to myself, even as an old guy, I’m still doing childish things.
But you know, JoJo really is fun, and no matter how old I get, I just can’t resist the charm of shiny stickers and Bucciarati.
Now then, although this piece started with a small anecdote from an old guy’s daily life, the main topic is that the Roger Mayer VOODOO-1g has been completed.
So, the effects pedal I had been working on little by little over the past few months is finally finished. I will go through the process step by step, starting from where I left off last time after finishing the color coat, all the way to completion and sound testing.
First, I applied the top coat for the final paint finish and let it dry for about two weeks, as shown here.
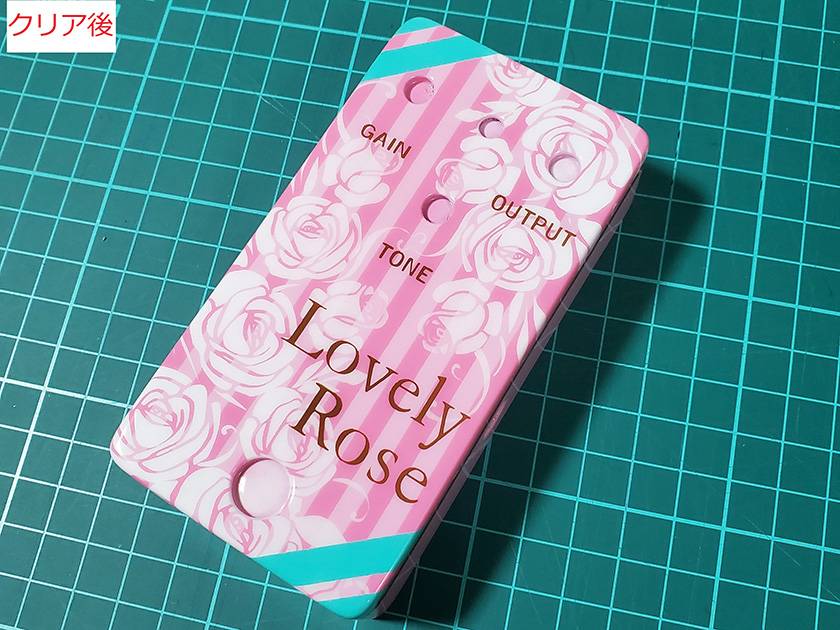
It’s a bit hard to tell from the photo, but it has become nicely glossy and shiny.
Next, just like when I sprayed the surfacer, I did wet sanding with waterproof sandpaper to level the painted surface.
This time, taking the final polishing stage (buffing) into consideration, I sanded in the order of #1000 → #1200 → #1500 → #2000 → #3000.
For wet sanding itself, going up to around #1500–#2000 is usually sufficient, but since it’s the middle of winter right now, I’m worried about static electricity.
What I mean is that the final buffing process involves applying compound (abrasive) to a rotating round cloth and pressing the object against it to make the surface shiny, but doing this during the dry winter season generates an unbelievable amount of static electricity, and buffing it actually cracks it and causes damage.
On top of that, at the very end, there is a polishing step using a felt buff cloth without compound, and at that point the static electricity is so bad it hurts about as much as when Npochamu puts on a sweater. To shorten that process, this time I did wet sanding all the way up to finer grits.
Here is how it looks after wet sanding.
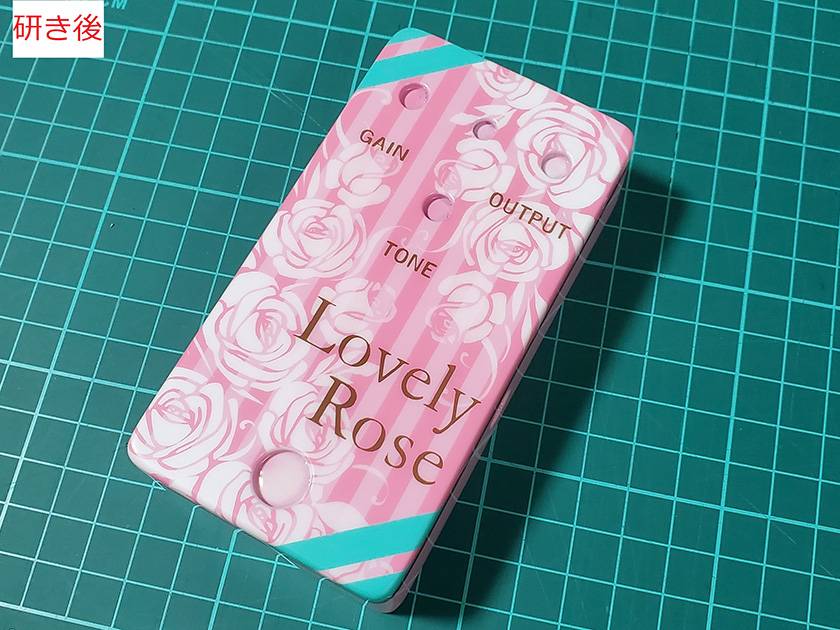
This is also a bit hard to see, but it has a matte finish.
Here is a photo after buffing.
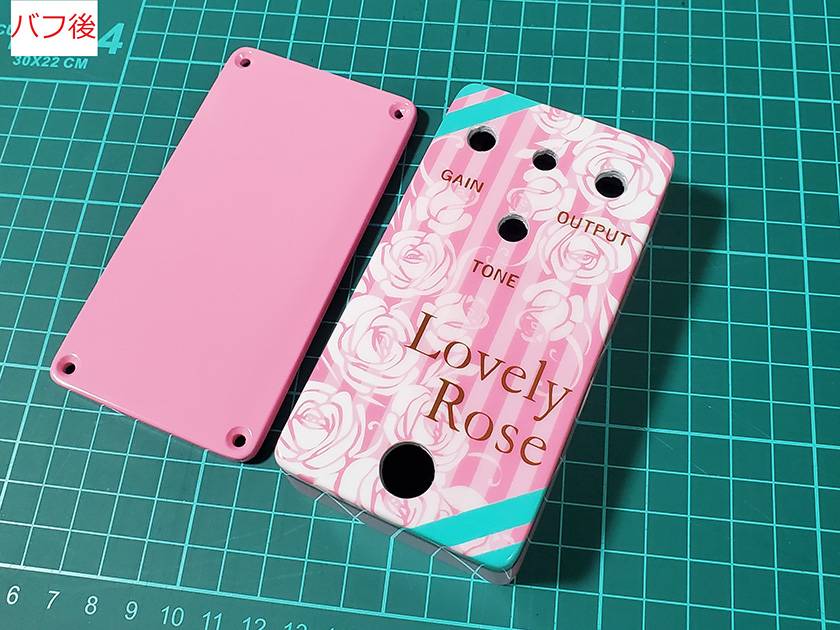
The lid was also wet-sanded and then buffed in the same way, resulting in a nice glossy finish.
With this, the enclosure itself is finished for now.
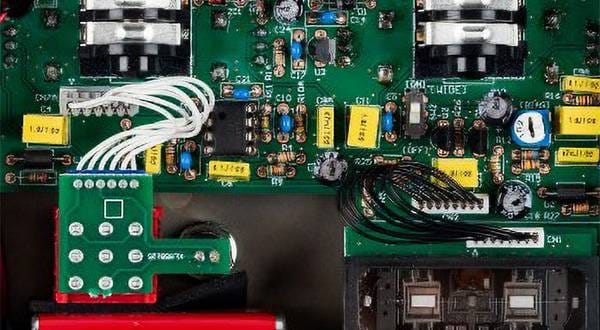
Next, I got out the parts to be used in building the effects pedal, and applied pre-solder to each part.
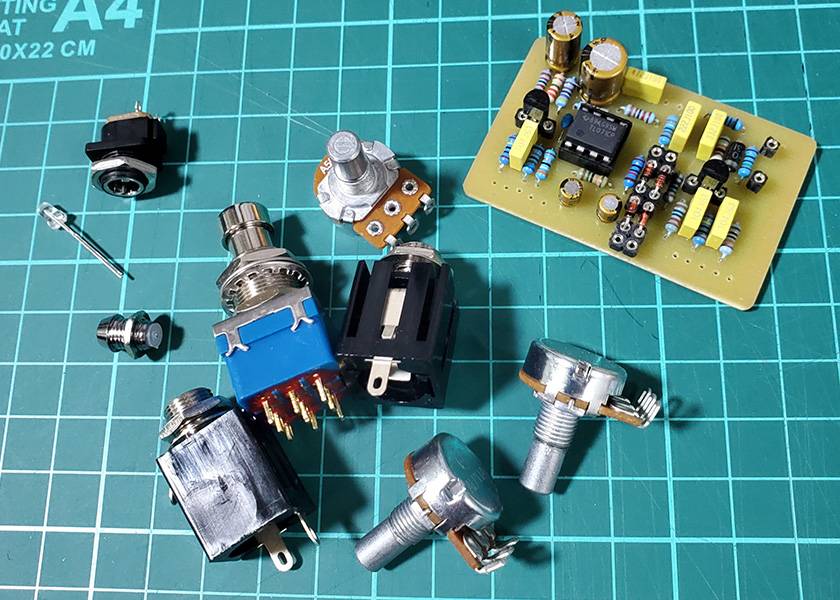
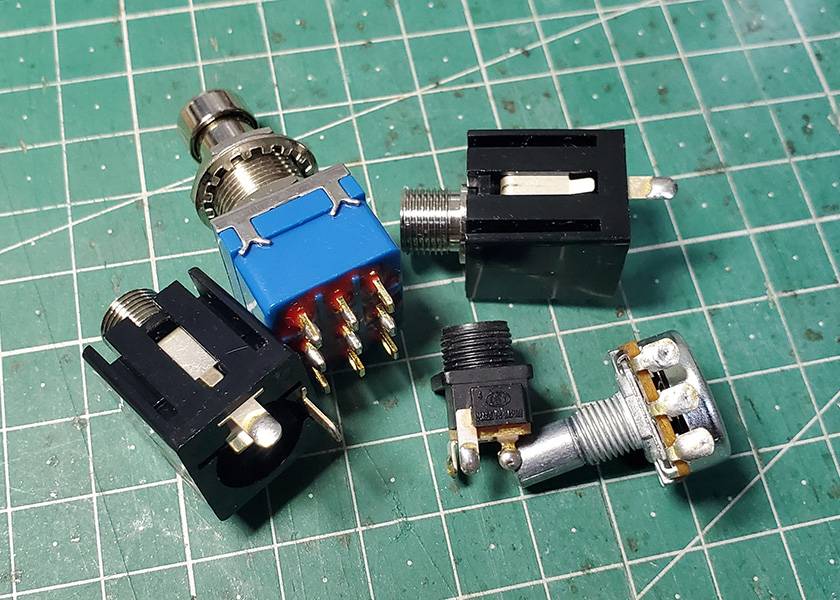
Then, before wiring and assembling everything, I did a temporary assembly to measure the approximate length of wiring needed, and cut the wires to a good length.
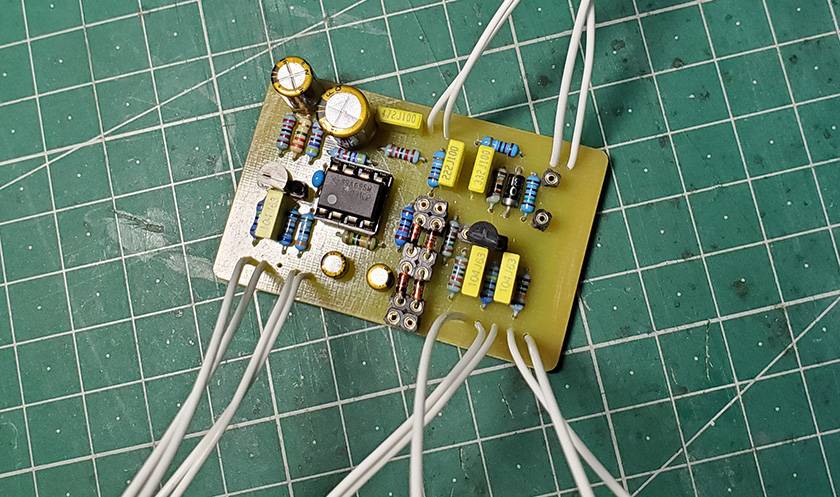
Once that was done, I soldered the wires to the circuit board, and it looked like this.
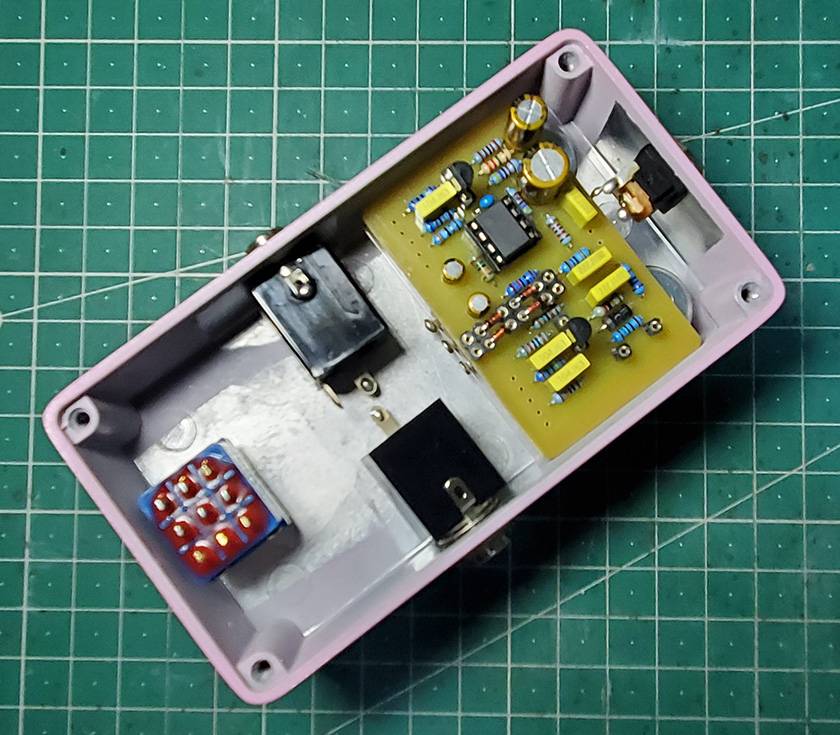
Then I wired up each part as well, and once all the wiring is completed, it looks like this.
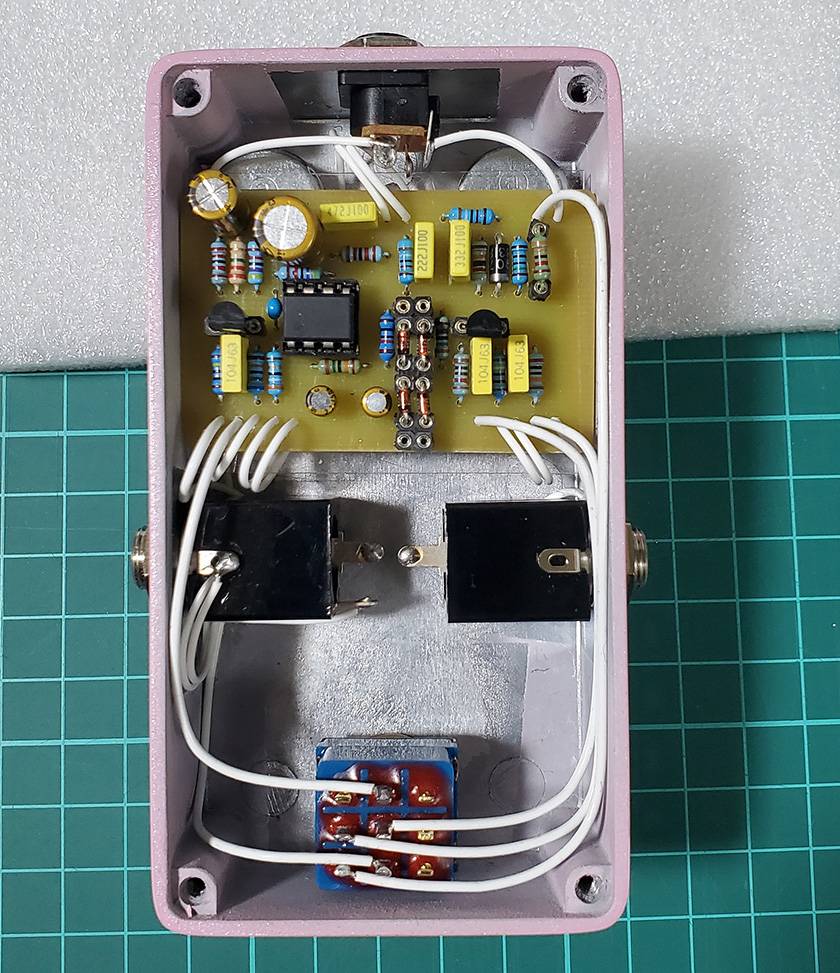
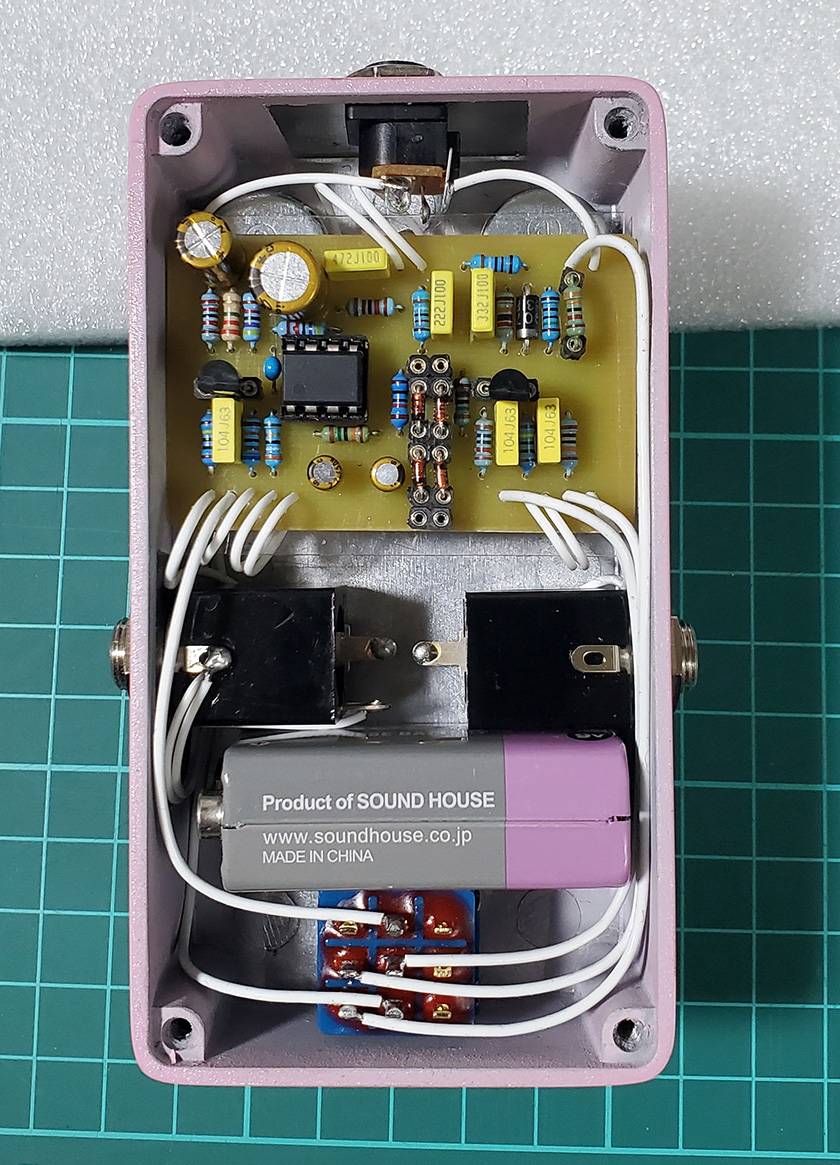
Since I personally don’t usually use batteries to power my effects pedals, I simplified the wiring this time, but it is still designed so that a battery can be installed if needed.
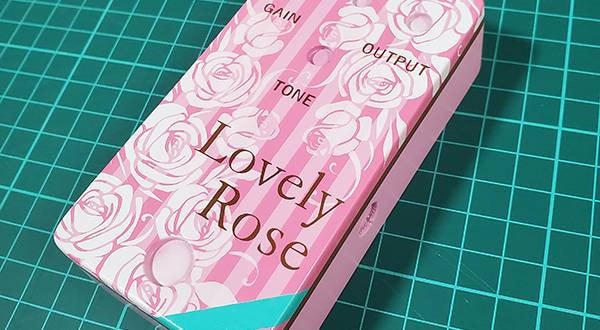
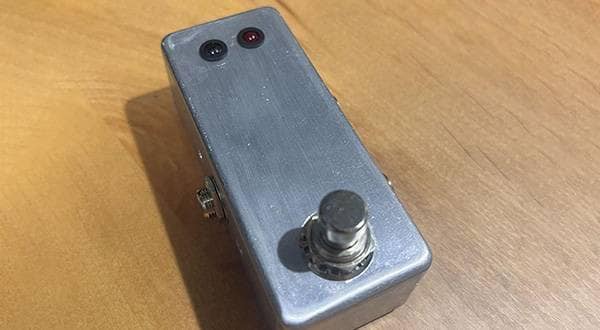
Finally, after attaching the knobs and other parts, this is what the completed unit looks like.
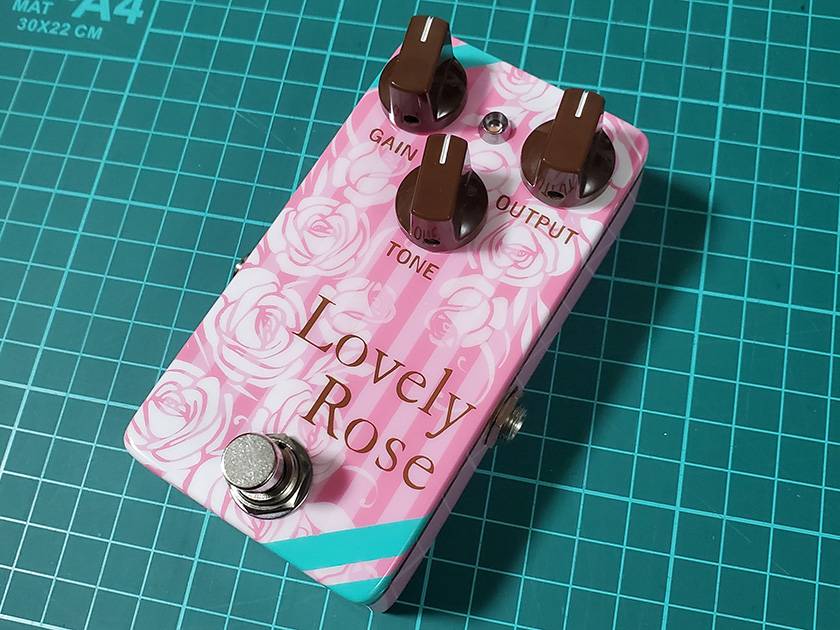
Well, as for the appearance, I’d say it turned out decent enough.
After finishing assembling the parts, I checked the sound, and something felt off.
The behavior of the gain felt kind of strange.
Thinking I might have used the wrong pot taper, I checked, and sure enough, I had used an A-taper where a B-taper 50kΩ should have been used.
With effects pedals, even a single small part like this can change how it feels, so checking is really important.
As for the sound itself, it ended up being quieter than the original and kind of boomy.
Compared to the real unit, the low end feels crushed.
I think sound quality is something each person can decide for themselves, so I’m not overly concerned, but the only changes I made from the original circuit were the pull-down resistor value, the op-amp, and the decoupling capacitor values in the power section, so I wondered if it could really change this much.
The clipping was also done pretty roughly, so that might be the cause as well…
Anyway, even when things don’t go as planned, thinking through possibilities like this and investigating the causes is part of the fun of building things yourself.
It almost never turns out exactly the way you imagine.
I did record a comparison video, so I’ll include it here.
*In the video, the gain on the DIY version is set higher to make the volume and distortion level sound roughly the same to my auditory perception.
How did you find it?
As a result, this time I ended up with something that is similar to the VOODOO-1, yet not quite the same.
Well, I plan to treat this as its own thing—tweaking parts to bring it closer to the original, or experimenting in my own way and having fun with it.
Actually, building it like this really makes me realize once again that if you want the exact same sound as the real thing, buying the original is the best option rather than building it yourself.
That said, it’s a great way to learn about the structure of effects pedals and electronic circuits, so I think it’s worth trying at least once as part of your general musical knowledge education.
Or rather, even without thinking about it that deeply, building things is simply fun.
Well, this ending feels a bit unfocused, but I’ll wrap it up here for this time.
Thank you very much for reading to the end.
See you again on the Sound House staff blog.
Arrivederci!


 ギターパーツの沼
 【初心者向け】エフェクター講座
 あなたのエフェクターボード見せてください
 ベース用エフェクターの種類
 エフェクターのつなぎ方
 エフェクターの種類