Hello!
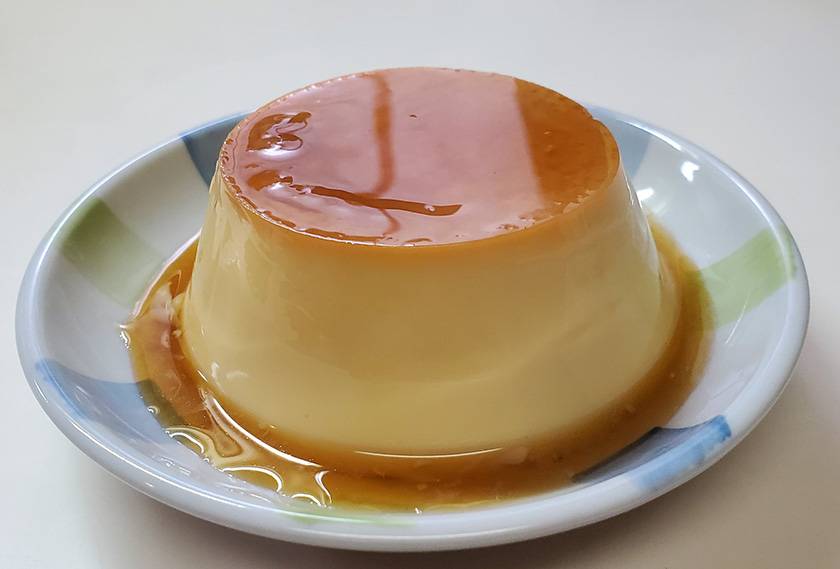
I’ve been making pudding on the day before my day off since the beginning of this year.
The reason for this was that while I was eating pudding after a meal, I thought, "If I can make this myself, I can eat a lot more pudding for a lot cheaper." So, I immediately searched online, and I found a ton of videos that showed how to make delicious pudding easily in the microwave!! As I watched the videos, I got the feeling that it seemed doable, so I decided to give it a try.
What I ended up with was a rather indescribably awkward pudding. I had no choice but to eat it, but I was kind of disappointed, so I tried again several times. Unfortunately, every time, the results were still equally unsatisfactory. It didn’t go well at all, so I decided to change the method and started steaming it with a frying pan. That’s when it turned out somewhat decently, but still, there were some bubbles on the surface... Well, it wasn’t quite the result I was hoping for.
However, once I start something, I want to keep at it until I can do it properly, so I kept repeating the process several more times. By around the middle of February, I was finally able to make a pretty good quality pudding.
Once that happened, another one of my bad habits kicked in—I started upgrading the quality of the ingredients.
Even though I originally tried making it myself because I wanted to eat a lot of pudding cheaply, the result was that after repeatedly failing and eating packs and packs of eggs’ worth of mediocre pudding, I ended up ignoring how much I was spending entirely and making pudding like a madman… Honestly, it was pretty foolish of me.
But that’s what hobbies are like!! As long as it’s fun, that’s what matters.
The one thing that concerns me, though, is how surprisingly much sugar you use when making sweets.
When I first saw 100 g of sugar, I was a bit startled and thought, “Wait, there’s this much in 100 g!?”
Making it is fun, but still—sweet things are best in moderation.
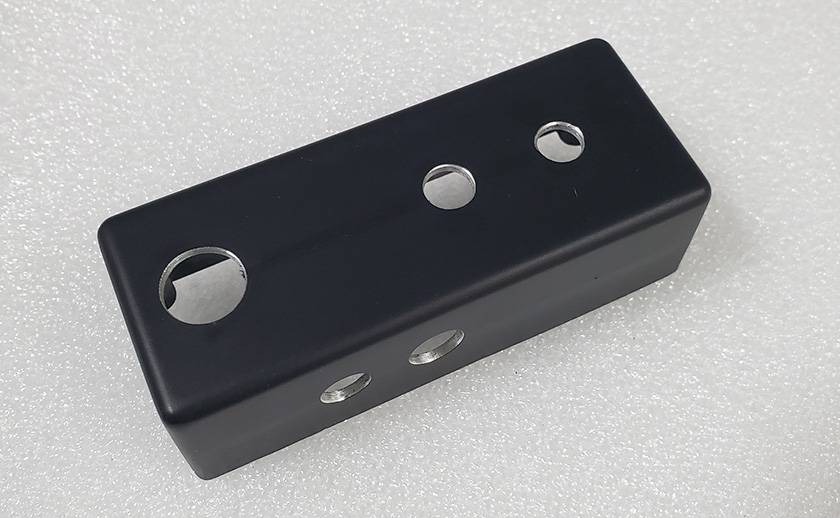
Now then, this time I’ll be doing the painting work.
Before spraying the color, I usually prepare the enclosure by doing the surface leveling → marking → drilling holes → spraying surfacer, in that order. However, this time I happened to have an enclosure at home that had already been prepped to a certain extent, so I’ll be using that.
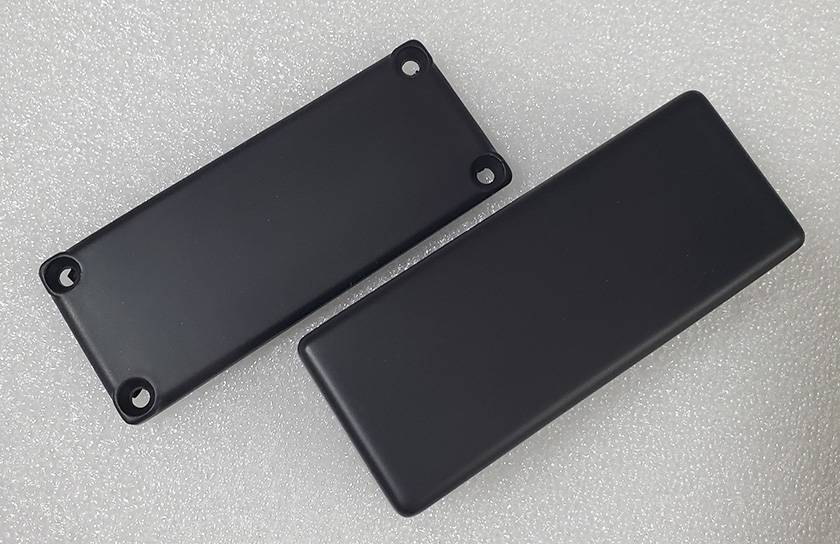
The order of drilling the holes and spraying the surfacer will be the reverse of what I did last time, but I won’t worry too much about that and will just keep going.
By the way, when I made my previous effects pedal, I used gray surfacer, but this time I’m using black.
What difference does that make? It changes the tone of the color when you spray the paint.
If the base is bright, the color sprayed on top will also appear brighter; if the base is dark, the color sprayed on top will appear darker.
Also, when spraying metallic paints, using a darker base can give the color a heavier, richer tone. Changing the base coat can have various effects.
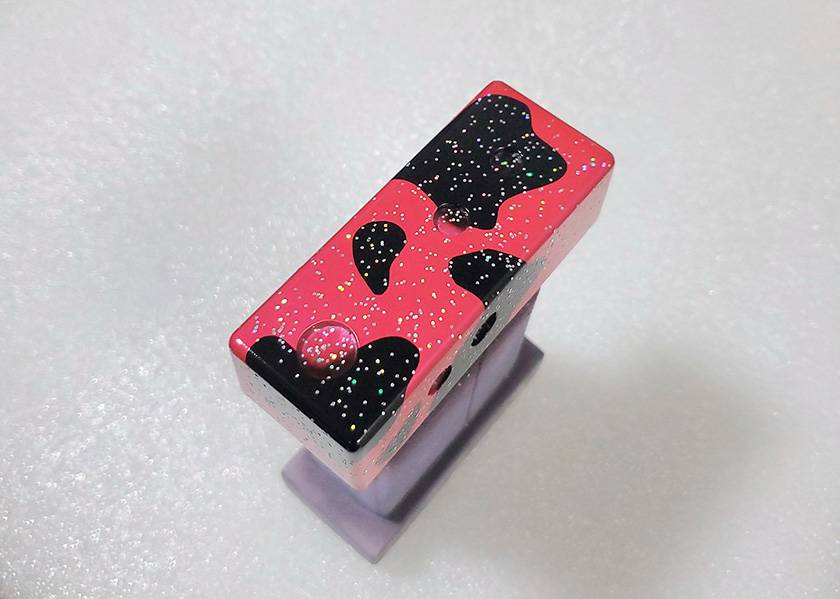
So, here is the enclosure with the holes drilled.
Next, here’s the result after spraying the color.
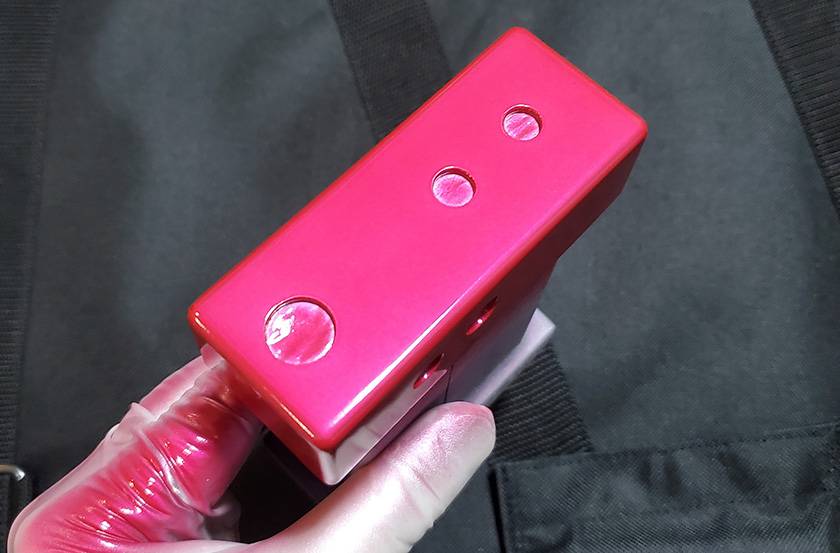
It suddenly went from black to pink!! The sequence I painted it is silver → see-through pink. I forgot to take a photo after spraying the silver, so I’ll be more careful next time to make sure I don’t forget to take it.
Next, I’ll be adding a pattern, so I’m preparing the masking.
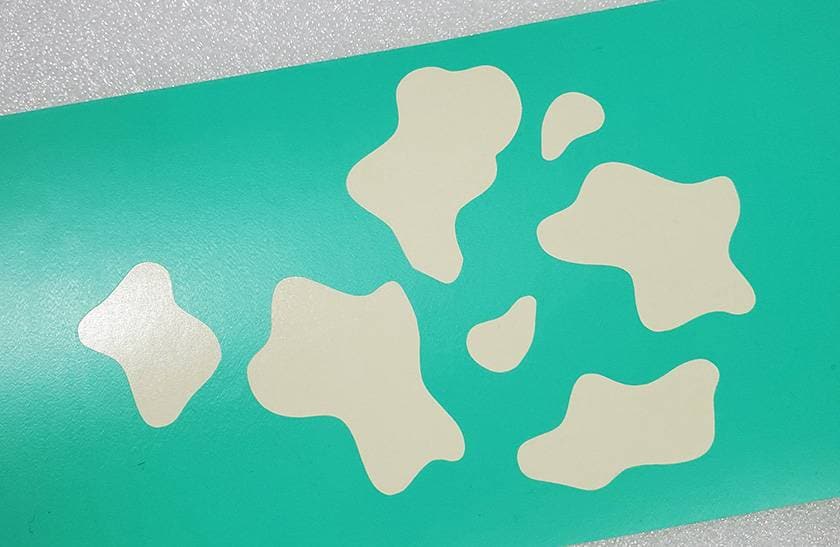

I’m applying the masking tape neatly, but the corners of the enclosure can be quite tricky to apply masking tape, and sometimes the tape lifts. So, I’ll reinforce it with another strip of masking tape.
Then, I’ll start spraying the black.
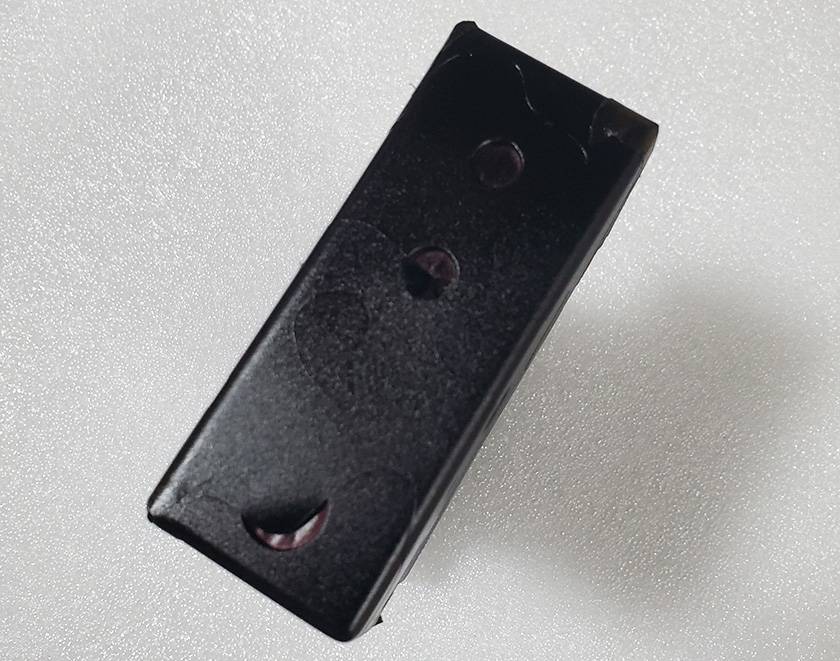
Up until the pink, I was spraying to get a smooth, glossy surface. However, when spraying over the masking tape, due to the surface tension between the paint and the tape, the paint can lift and form little burrs, or the paint may not adhere well to the corners. So, I spray it a little rougher to avoid that.
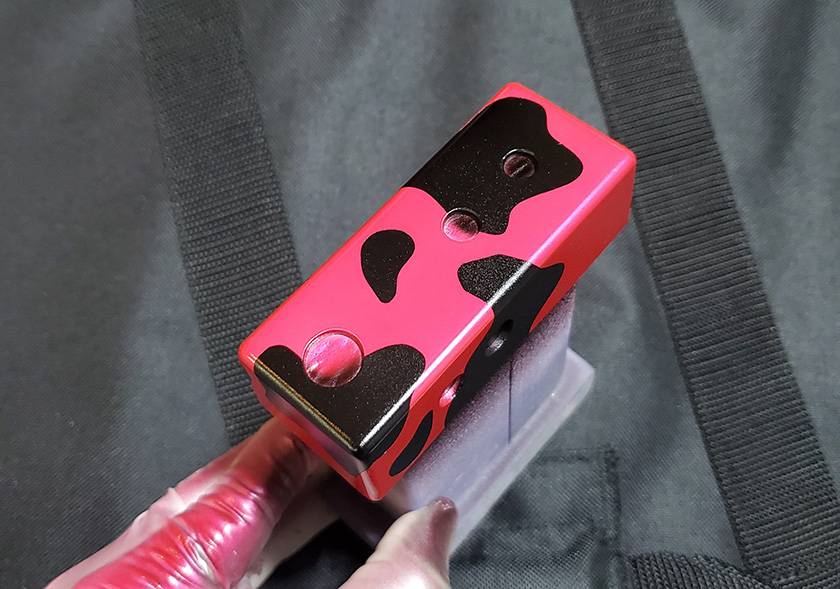
When I peel off the masking tape, it looks like this.
It turned out to be much more bling than I expected.
It’s supposed to be a Holstein pattern, but looking at the photo again with the bright base, it kind of looks like something you’d find on a poison dart frog.
But let’s put that aside for now. To finish, I sprinkled some glitter, and here’s the final result.
At first, after finishing the work, I felt a sense of accomplishment and thought, "This is looking good!" But as I looked at the photos while writing this blog, I started to wonder, "Hmm, is it really okay? Maybe it’s a bit off?"
Well, I haven’t added the text yet, so I’m not sure. Anyway, this is where the work ends for now.
How did it turn out?
As for this work, I personally feel like it’s a bit hard to say—it’s neither here nor there. But I hope that just showing you the process of painting, and conveying that I’ve been working on it, was enough for those of you reading to get a sense of it.
Next time, I’ll continue with the painting, add the text, and proceed with various tasks.
Thank you for reading until the end.
I’ll see you again on the Sound House staff blog.
Goodbye!


![[Guitarist’s Perspective] Equipment that is Thought to Improve Sound Just by Passing it Through Part 2 - Clean Boosters](/contents/uploads/thumbs/2/2023/3/20230307_2_21607_1.jpg)

 【初心者向け】エフェクター講座
 プレイテックのギターを最強に改造!!
 あなたのエフェクターボード見せてください
 パーツの配線を知ろう
 エフェクターのつなぎ方
 エフェクターの種類