After wrapping up my The Mystery Behind Restoring This Guitar series , I found myself a bit lonely… and frankly, itching for something new to work on.
That’s when a colleague approached me with a request:
“I’ve got this beat-up Jaguar that’s been sitting around for nearly two years… Do you think you could take a look at it?”
And so, I ended up taking in this neglected Jaguar for some much-needed TLC.
Just a heads-up: I actually started writing this blog after the repairs were already done, so there aren’t many photos of the work in progress.
Starting next time, I’ll make sure to properly document the “before” shots too!
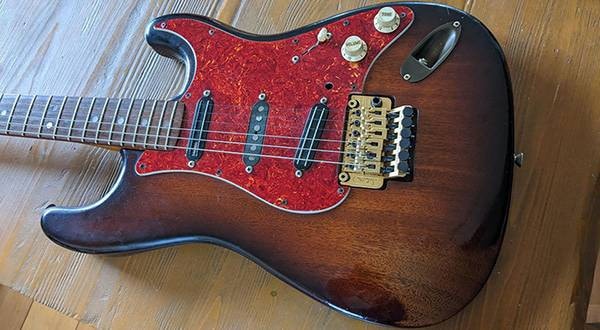
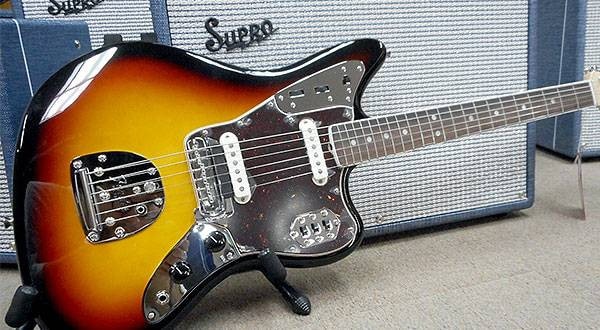
Anyway, enough with the excuses—let’s take a look at the guitar post-maintenance:
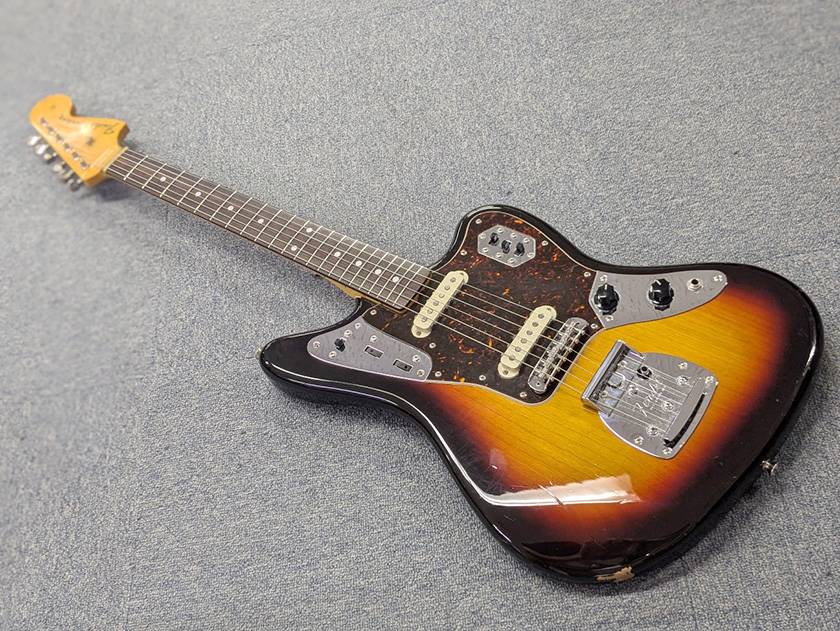
It looks good, right?
This classic-looking Jaguar is a Fender Japan JG66, a model that just oozes that unmistakable Jaguar vibe. Guitars like this, with such authentic character, really make you want to add one to your own collection.
Here's a rundown of the maintenance and custom work I did this time:
- Nut replacement
- Fret sprout removal and buffing/polishing
- Swapped to Mustang-style saddles
- Installed a buzz stop bar
- Quick fix on the slide switch
I’ll go over each of these issues briefly!
Nut Replacement
First up—here’s the old nut I removed. (Granted, just looking at it won’t really show you what’s wrong with it...) But the string slots had been cut too deep, causing open strings to buzz. Also, the slots were poorly shaped, so whenever you bent a note, it made these unpleasant squeaking and creaking noises.
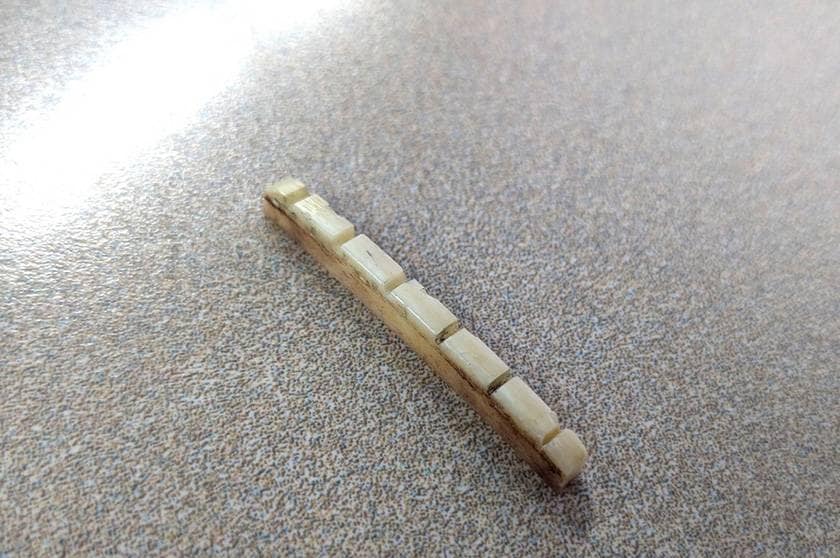
In that condition, it wasn’t functioning properly as an instrument, so this was the first thing I tackled.
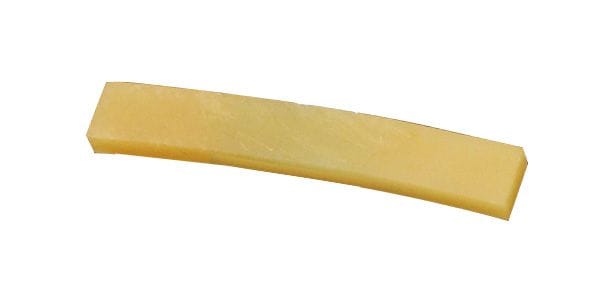
Here’s the nut I used for the replacement:
SONIC / OB-01 OILED BONE NUT – Fender Style
There were two key requirements when choosing the new nut:
1. The bottom of the nut must have a pre-cut radius. There are two types of nuts—flat-bottom and radius-bottom—so be careful not to mix them up! (Carving a radius into the bottom yourself is a real pain…)
2. It had to be oil-treated. Oil-treated bone nuts help the strings move more smoothly at the contact points, which tends to improve tuning stability. And let’s be honest—they look really cool. (Yes, looks absolutely matter.)
Since I’m not a full-time repair tech, I’ll skip the detailed step-by-step process.
But here’s how it looked after replacing it:

Of course, the nut replacement made a big difference in functionality.
But more than that—just look at it. Switching to an oil-treated bone nut adds instant character and a premium feel. It really changes the whole feel of the instrument.
Fret Sprout Removal & Buffing
Since this guitar had been sitting unused for quite some time, the strings were rusty, and the frets were so dull they barely reflected any light. Naturally, the fret edges were also sticking out and catching on the fingers.
Here’s how it looked after the work was done!
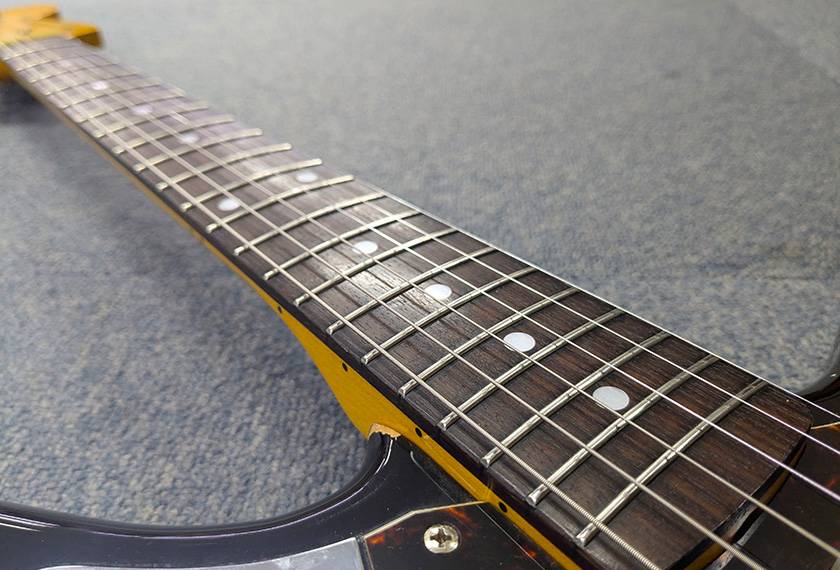
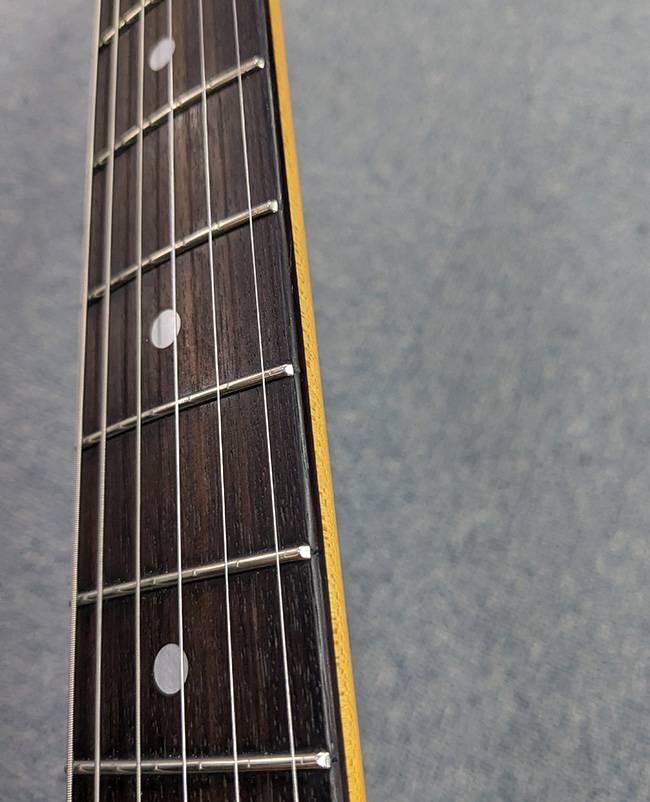
Thanks to buffing it out, the frets now have a mirror-like shine, and the sharp fret ends have been smoothed out—making it so much more comfortable to play.
If you look closely at the edge of the fretboard in the second photo, you’ll notice that it’s been slightly chamfered (rounded off). Originally, the edges were quite sharp, which made it uncomfortable to grip the neck with a more wrapped-around hand position.
But just a bit of edge rounding made a huge difference, resulting in a much softer, more natural feel in the hand. This kind of subtle touch pairs especially well with a C-shape neck profile!
Swapping to Mustang-Style Bridge Saddles
Here are the original saddles that came with the guitar that are infamous among Jaguar and Jazzmaster players for causing frustration.
Because these guitars tend to have lower string tension and the saddle grooves are quite shallow, it's common to experience string slippage or shifting, especially during aggressive strumming or string bending.
If you've ever had strings pop out of place mid-performance, you know exactly what I’m talking about. That’s why one of the most popular and proven mods is to swap in Mustang-style saddles.
MONTREUX / Mustang Saddle Set [9720]
![MONTREUX / Mustang Saddle Set [9720]](https://www.soundhouse.co.jp/images/shop/prod_img/m/montreux_9720.jpg)
Once installed, you'll notice that the grooves on the Mustang saddles are deeper and more secure than the stock ones. This results in much better string stability.
And when you combine them with a buzz stop bar (which I’ll talk about next), the string slippage and movement issues are drastically reduced.
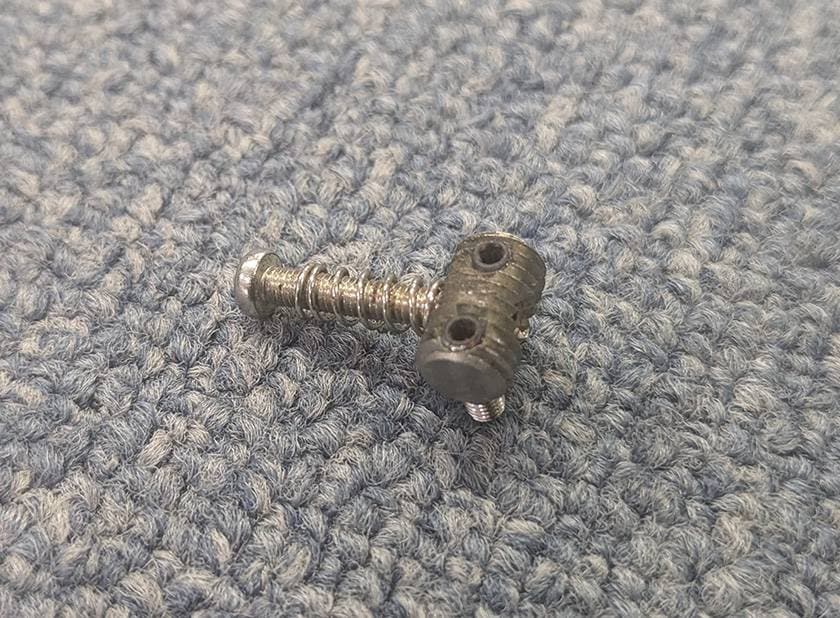
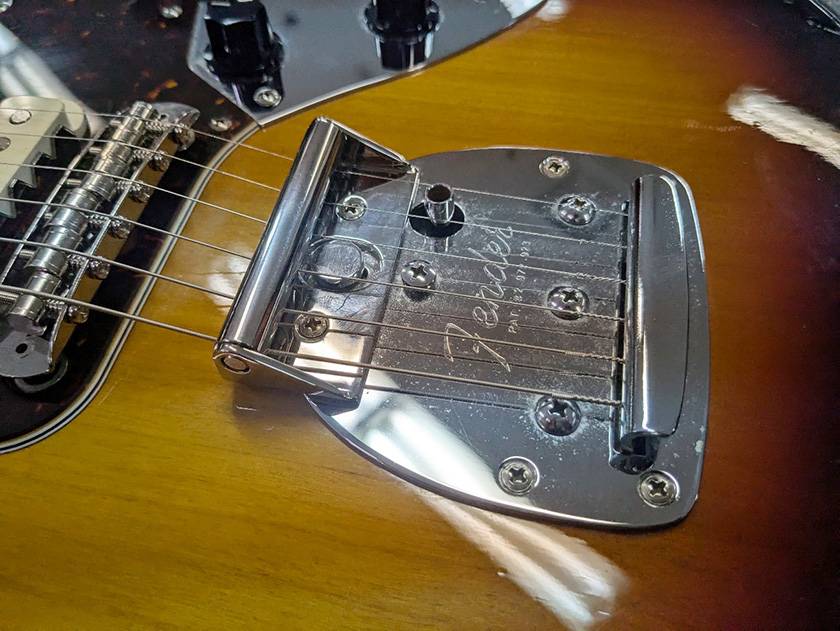
Installing a Buzz Stop Bar
Next up is the buzz stop bar installation.
This mod is very simple to install—just remove the two screws from the base plate and fasten the buzz stop bar in place using the pre-drilled holes.
So, what’s the benefit of this part? As I mentioned earlier with the saddles, it increases string tension by changing the break angle between the bridge and the tailpiece.
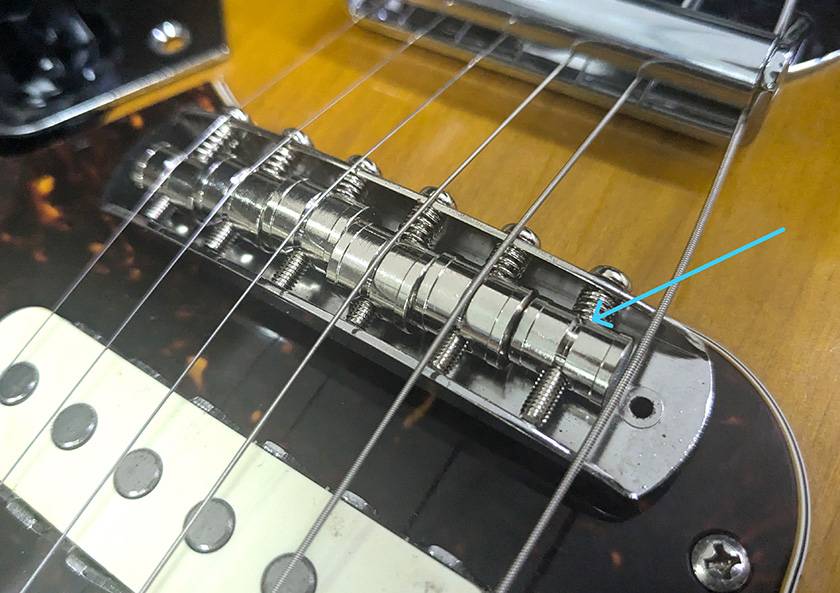
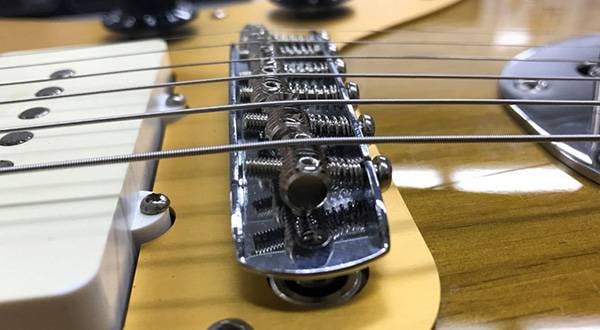
Let’s take a look at the image to make this easier to understand.

The red line in the photo shows the string path before the buzz stop bar was installed.
The blue line below represents the string path after the buzz stop bar has been added.
When the strings follow a gentle slope down toward the saddles, as shown by the red line, they exert less downward pressure on the saddles. This can lead to problems like string slippage and unwanted resonance.
In contrast, with the blue line, you can see that the strings begin to angle more sharply at the point where they pass over the buzz stop bar. This increased break angle results in more downward force on the saddles, improving both string stability and vibration control.
So in short, the buzz stop bar is a highly effective mod for reducing string slippage and minimizing unwanted resonance or noise.
If you’re dealing with similar issues, I definitely recommend giving this a try!
MONTREUX / Buzz Stop Bar [8057]
![MONTREUX / Buzz Stop Bar [8057]](https://www.soundhouse.co.jp/images/shop/prod_img/m/montreux_8057.jpg)
Emergency Fix: Slide Switch
And lastly, I performed a quick emergency fix on the slide switch.
Apparently, the switch had poor contact and wasn’t reliable. Unfortunately, I didn’t have a replacement switch on hand this time, so I opted for a temporary fix and plan to swap it out for a new one later.
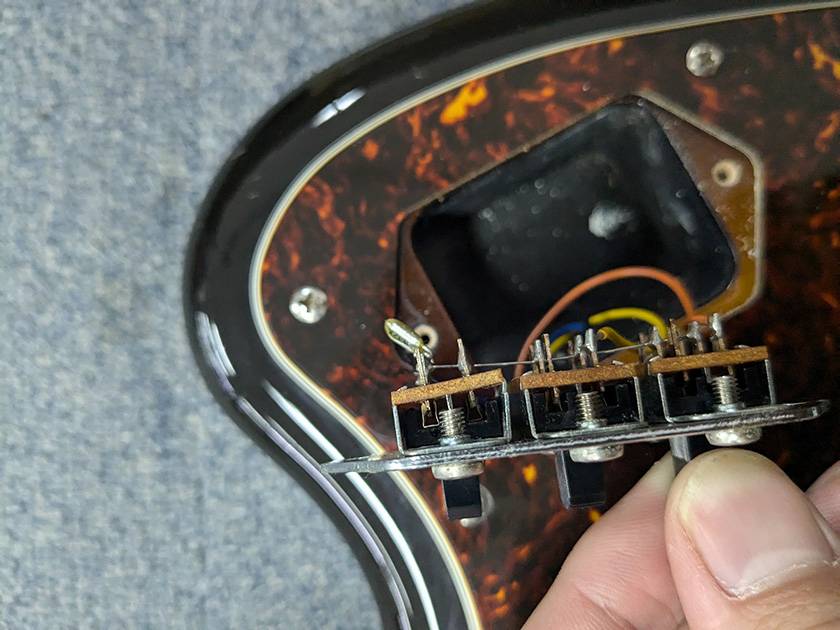
If you look at the leftmost switch, you’ll see the circuit board had come loose from the crimp and was sitting at an angle.
When it lifts like that, the internal contact point between the terminal and the plate doesn’t connect properly. So I carefully bent the tabs back into place with pliers and secured it again.
This improved some of the issues, but ideally, these kinds of parts should be tossed out and replaced.
So, this time around I took on the task of restoring my colleague’s long-abandoned Jaguar.
Once you dig this deep into a guitar, it’s hard not to feel the urge to replace everything—pots, switches, maybe even the pickups. Starting next time, I’ll be diving into the electronic upgrades and customizations, so stay tuned!


![MONTREUX / Buzz Stop Bar [8057]](/images/shop/prod_img/m/montreux_8057.jpg)


![MONTREUX / Mustang saddle set [9720]](/images/shop/prod_img/m/montreux_9720.jpg)


 DIY ギターメンテナンス
 プレイテックのギターを最強に改造!!
 愛されたフェンダーギターたち
 ピックアップの種類(エレキギター)
 ギターのお手入れ
 ギタースタートガイド