Hello,
I’m that guy who manages to mess up my spring wardrobe switch every single year.
Once the temperature climbs above 20°C for 3–4 days straight, I think, "Alright, it's finally time!"—so I shove all my Heattech gear to the back of the drawer and send my down jacket off to the cleaners.
And then... the following week it's back down to 5°C.
Cue the "nooooo..." moment.
I feel like I've been repeating this cycle for the past 10 years.
Switching from spring → summer → fall → winter usually goes pretty smoothly.
But going from winter → spring? That one's tough.
Whenever I complain about it, people around me always say, “Just check the weekly weather forecast!”
But here's the thing—if you don’t already have the habit of checking the weekly forecast, it’s not like you’re suddenly going to start, right? That’s just how it is. Well, no use whining about it now. Next year, I really need to get into the habit of checking the forecast so I don’t repeat the same mistake. 😅
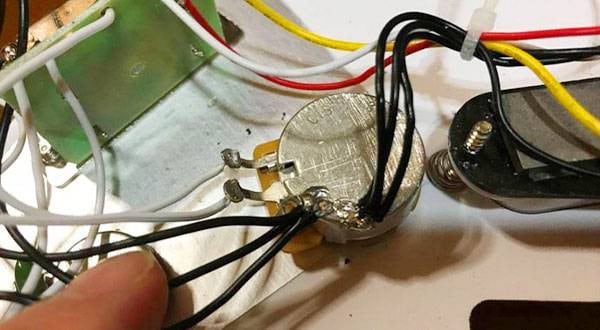
Anyway, last time I posted about potentiometer volume wiring and I tried to keep it as simple as possible to make the mechanism easy to understand.
But in the end, I feel like it still might have fallen short, so this time I would like to follow up with a bit more explanation.
There will be some overlap with the previous blog post, but thanks in advance for sticking with me!
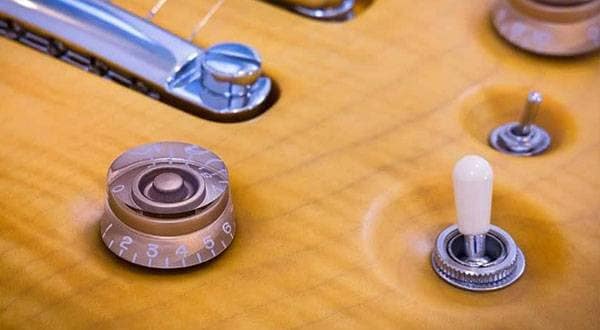
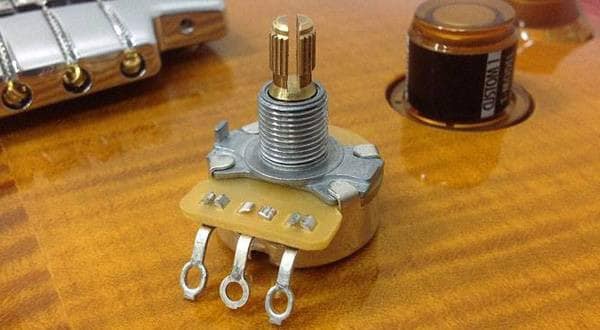
◯ When the Volume is Turned All the Way Up
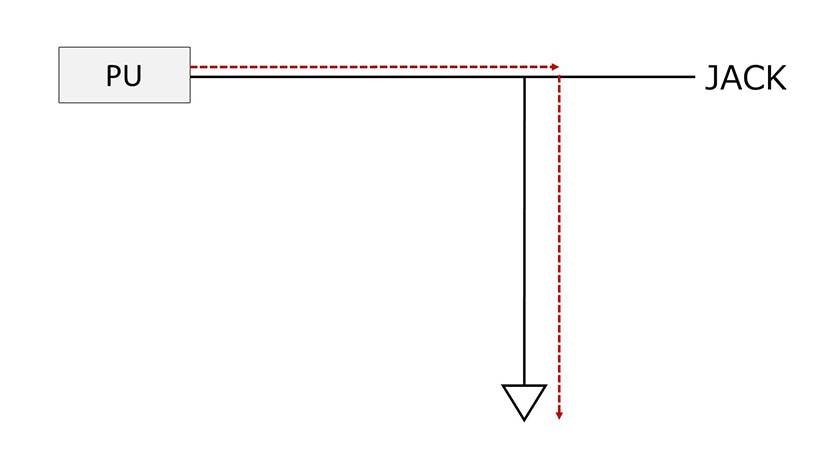
Let’s take a look at this diagram first:
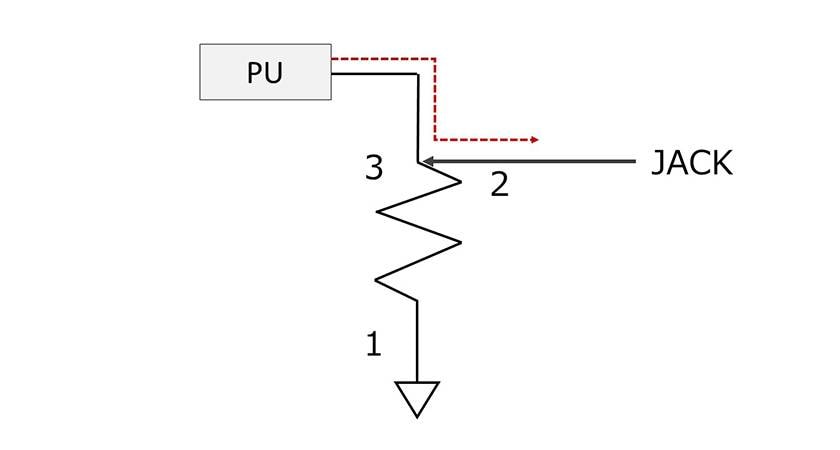
This is the same diagram I used in my previous blog post—it shows how the output from the pickup interacts with the potentiometer when the volume knob is fully open (i.e., not turned down at all).
Last time, I explained it as:
"Since the potentiometer isn’t being turned down, the pickup’s power is going through at full strength."
But… that’s not entirely accurate.
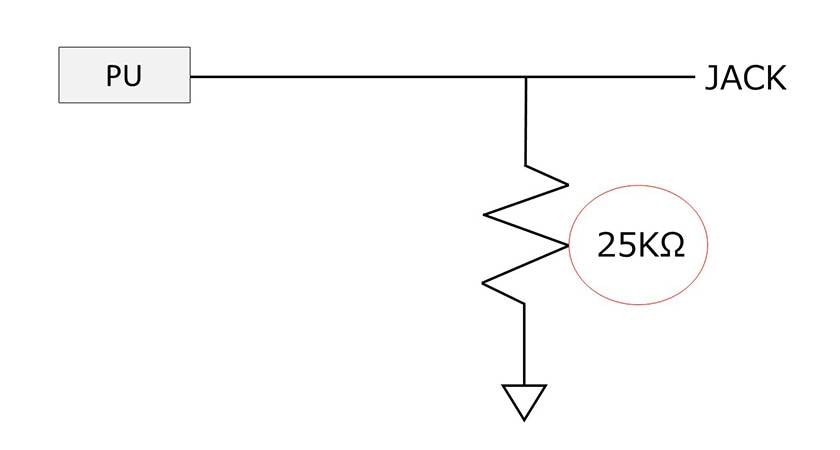
So with that in mind, here’s another diagram to help clarify what’s really happening.
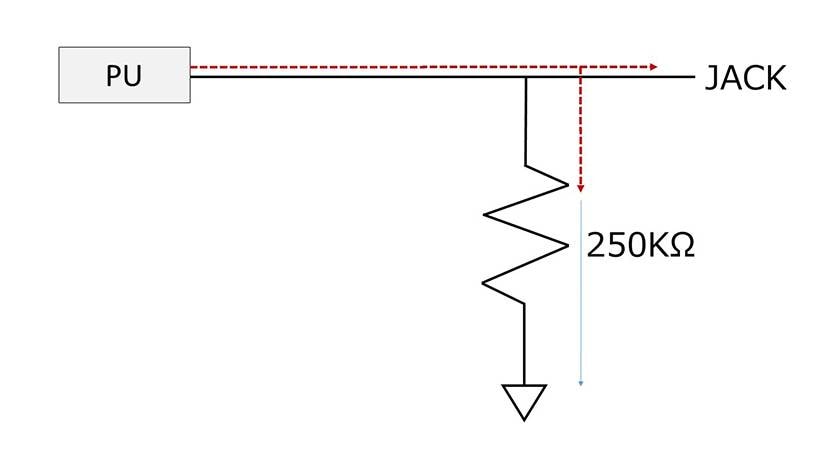
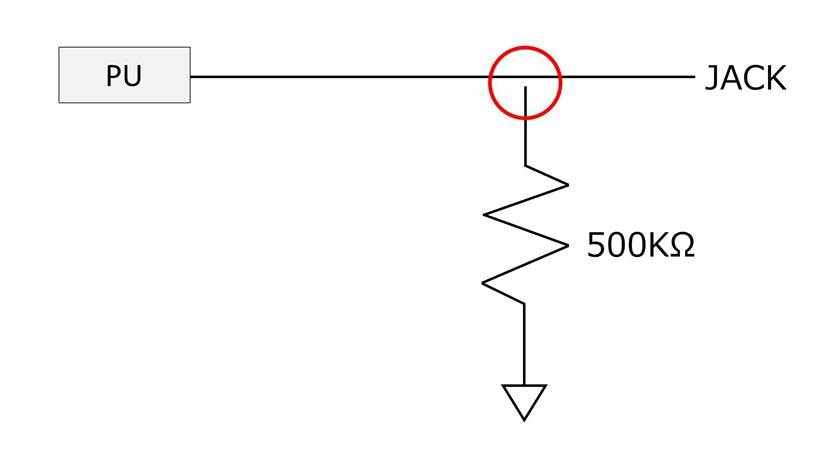
This diagram is electrically the same as the previous one, but it represents the situation with the volume pot fully open in a slightly different way.
You’ll notice that there’s a 250kΩ resistor connected to ground between the pickup and the output jack.
This 250kΩ resistor represents the resistance value of the potentiometer.
At first glance, it might seem like the pickup’s output is going through at full power because the volume pot isn’t turned down—but that’s not entirely the case.
In reality, even when the volume pot is wide open, the potentiometer’s own resistance is still connected to ground just before the jack.
So, what does all of this mean?
Essentially, a small portion of the pickup’s power is lost to ground before reaching the output jack.
This means that even when the volume is turned all the way up, the signal is only slightly reduced due to this resistance path to ground.
Now that you understand this, a natural question arises:
What happens if the potentiometer’s resistance (the one sitting between the pickup and the jack) is changed?
As a quick review from the last post: a resistor, as the name suggests, works to impede the flow of electricity.
In this case, the resistance is what prevents all of the pickup’s power from being lost to ground.
If, as shown in the diagram above, there were no resistors between the pickup and the output jack connected to ground, all of the pickup's power would flow straight to ground.
However, when there is a resistor in the path to ground, that resistor helps prevent the pickup's power from being completely lost.
As a result, most of the pickup’s power makes it to the output jack, with only a small portion being diverted to ground.
Now, here comes the main point:
When the resistance value of the potentiometer changes, the circuit changes accordingly, like in the diagram below.
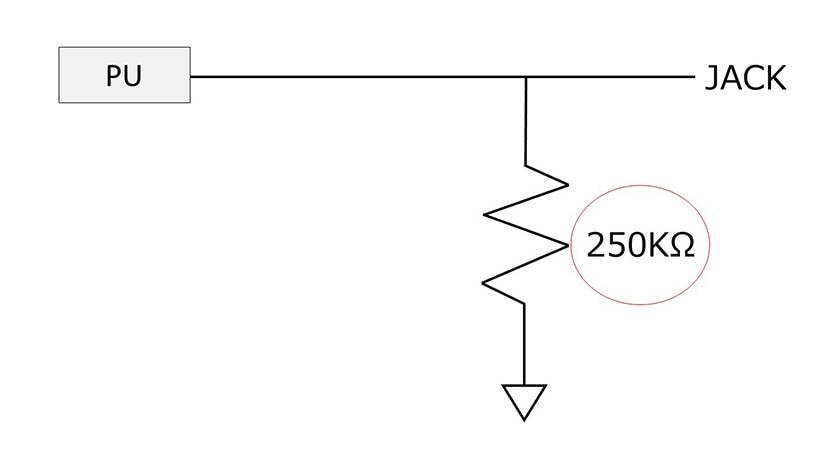
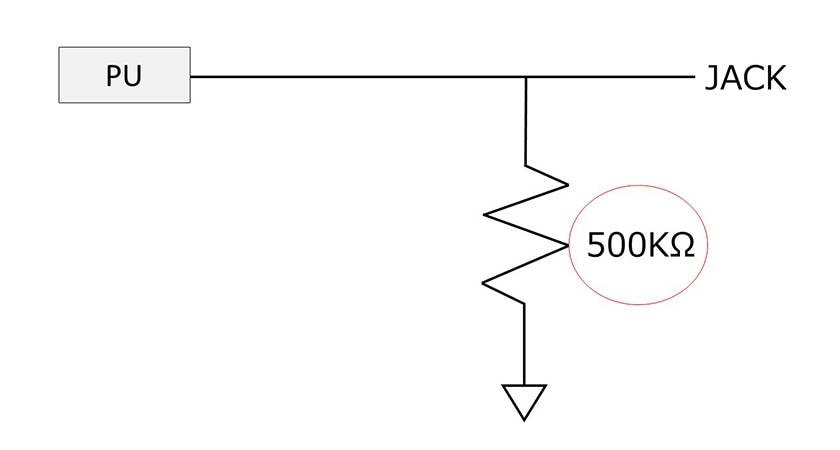
When the resistor connected to ground increases in value, it reduces the loss of high frequencies in the guitar’s tone.
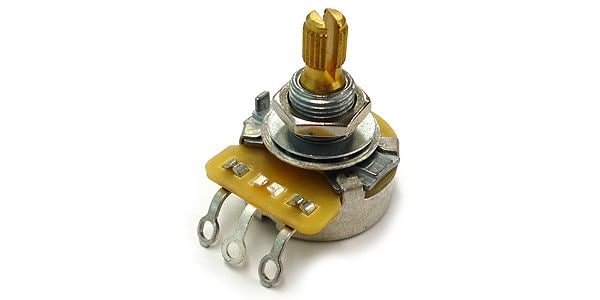
Typically, 250kΩ potentiometers are used with single-coil pickups, while 500kΩ are used with humbuckers.
This is done to match the characteristics of each type of pickup.
For example, single-coil pickups are known for their bright, shimmering high frequencies.
If you want to emphasize that brightness and decide to increase the potentiometer’s resistance value, it can actually overemphasize the highs, resulting in a harsh, piercing tone that can be unpleasant to the ears.
This is why, as a general rule, 250kΩ is considered an appropriate value for single-coil pickups.
That said, some guitars like the Telecaster or Jazzmaster actually use 1MΩ potentiometers even though they have single-coil pickups.
This choice takes into account that it’s not based on just the pickups, but it’s also the guitar’s body material, shape, and pickup output, so the decision on what value to use is made with the whole instrument in mind.
So while it's common to say "250kΩ for single coils" and "500kΩ for humbuckers," it's not always that simple or fixed.
If you're interested in modding your guitar, experimenting with different potentiometer values can be a fun and affordable place to start.
Replacing pickups can cost around 10,000 yen per pickup, but a potentiometer designed for guitars can be had for around 1,000 yen, making it a much cheaper mod to try.
Example:
SONIC / FT-01 FULL-UP TONE POT 250kΩ 3/8-inch
There’s also a component called the Full-Up Pot, which is designed so that when the volume is turned all the way up, the circuit is disconnected, meaning there’s no resistance leading to ground from the pickup.
As a result, you can get a sound similar to when using a direct switch (a switch that sends the pickup signal straight to the output jack without passing through the volume/tone circuit).
If you're not familiar with what a direct switch is, don't worry—I'm going to write a blog post about it sometime in the future, so please stay tuned.
For now, it's enough to just think: "Oh, I guess there are lots of different kinds of potentiometers these days."
◯ When Volume is at 0
Now let’s look at what happens when the volume knob is set to 0.
First, let’s take another look at the diagram we used in the previous blog post.>
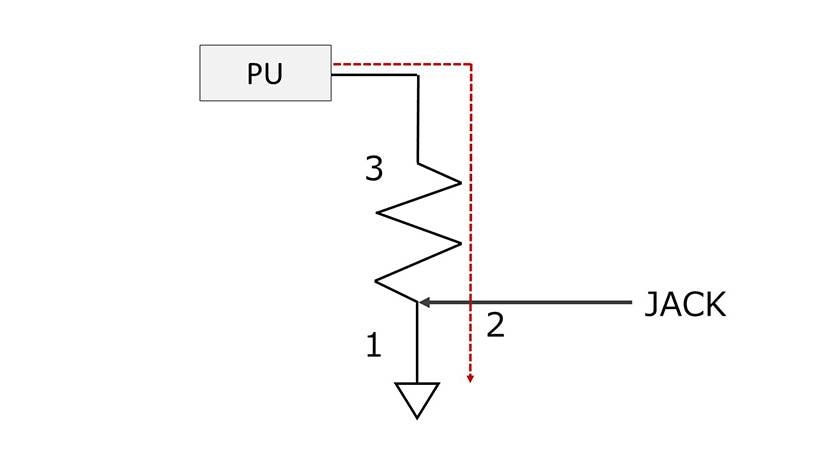
As shown in the diagram, the ground has a lower potential than the jack, so the signal flows entirely to ground, and nothing comes out of the second terminal—hence, no sound.
That was how I explained it last time...
But actually, that’s not quite the full story either.
Let’s take another look at the diagram.
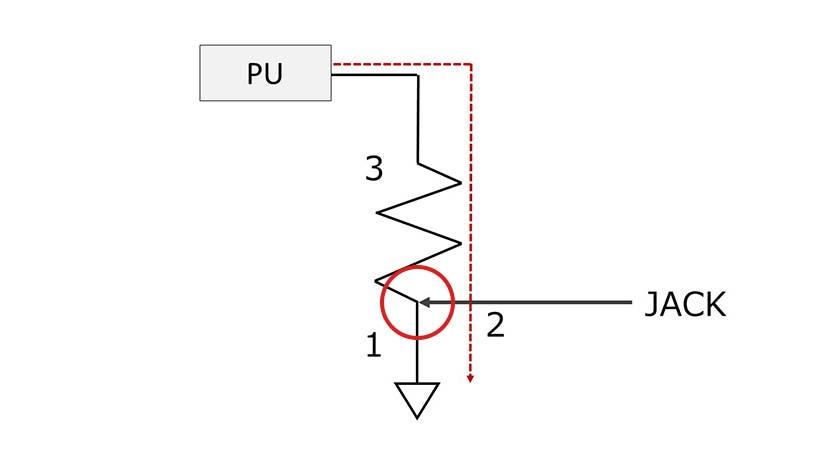
The part circled in red is also connected to the path leading to the output jack, right?
Since it's connected, while most of the signal flows to ground due to the difference in potential, there's actually a tiny bit of resistance at the point where they're connected—this is called residual resistance.
Because of this, a small amount of signal is actually still flowing to the output jack.
However, when you turn the volume pot all the way down, no sound comes out of the amp, right?
So, what’s really going on?
It’s simply that the remaining signal is at a level that’s inaudible to the human ear.
Hard to believe? It’s true.
This is why, in some guitars with built-in preamps, you might still hear a faint sound from the amp even when the volume is fully turned down.
This isn’t a defect—it’s just a characteristic of how potentiometers work.
In general, Japanese-made pots tend to have lower residual resistance values compared to overseas-made ones.
So, if you’re bothered by this slight "leakage" of sound, it might be worth it to try a different pot.
There are also pots specifically designed to prevent this kind of leakage, such as the CTS Custom Control Pot:
CTS / Custom A250 Custom Control Pot
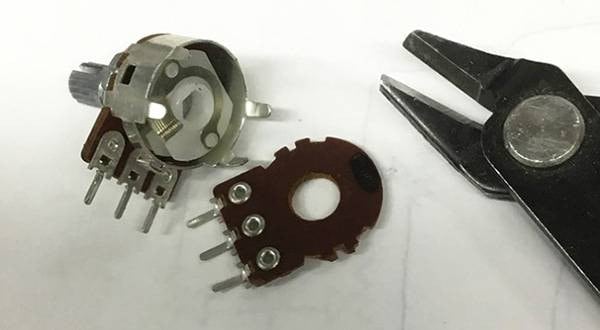
This potentiometer uses a resistor made from a blend of carbon and special metals, and its residual resistance value when turned fully down is under 4Ω.
For comparison, a standard (non-custom) CTS potentiometer typically has a residual resistance of around 20Ω on average, so in terms of actual numbers, this custom pot significantly reduces signal leakage.
So, how was it?
I think this wraps up the basic explanation of how a potentiometer works as a volume control.
Of course, if we dig deeper, there’s still more to explore—like taper curves and other finer details—but for now, I’ll save those for another time.
Next time, I would like to talk about how potentiometers work in tone control circuits. If time allows, I’ll also write a follow-up blog post to cover those additional aspects.
Thanks again for reading this blog post!
I’ll be more than happy if you can join me again next time.
Until then, see you on the Sound House Staff Blog!
Bye!


 ピックアップ交換大作戦!
 プレイテックのギターを最強に改造!!
 ピックアップの種類
 配線カスタマイズ 第1回
 パーツの配線を知ろう
 ピックアップの種類(エレキギター)