


Cheena: Our talk with Mr. Parazio turned into a discussion about instrument making. This time, we are bringing it to you as a three-person collaboration.
Parazio: I made my comeback as a bassist at 30! I’m working hard every day to keep it going this time! But in reality, I’ve been enjoying collecting and repairing gear. I’m studying every day with the hope of someday making my own original equipment. In short, I’m an amateur. Nice to everyone.
Twitter https://twitter.com/k_parazio
→ Read Parazio’s article here
Eru: After starting work, I wanted a new hobby and began playing bass in 2018. I continue studying bit by bit on my own. Bassist for the three-piece band “Line 1”. For now, it’s just a cover band for practice, so creating original songs is my goal for the near future. Recently, I’ve also started playing guitar and drums.
Twitter https://twitter.com/L_bass0213
→ Read Eru’s article here
Cheena: I joined the brass band in middle school, and when I bought an electric bass in my third year, I became fascinated with the world of modification and DIY. I work on instrument customization and building, as well as effects pedal creation, using tools like 3D printers and laser cutters.
Twitter twitter https://twitter.com/on_8va_bassa
→ Read Cheena’s article here
Nemoto: A fan of multi-string basses who insists on thumb-style playing. Previously handled bass and PA. After quitting music for about 10 years, he restarted. Though he has a long musical history, he’s not particularly skilled due to not being active—please be kind. Lately, relicing (aging instruments for aesthetic effect) has been fun.
Twitter https://twitter.com/amaze3551
→ Read Nemoto’s article here
Parazio: This time, I’ll be asking for guidance on how to build instruments. I’m an amateur at woodworking.
Nemoto: I seriously did repair and craft work in my teens. During my roughly 10-year music hiatus, my passion mostly faded. I’ll participate properly, but it’s really just drawing on old experience.
Cheena: As usual, this discussion will probably spiral into instrument-making. No matter how busy I am with studies, I continue crafting, modifying, and writing.
Parazio: Once you learn how to make instruments, you’d probably also gain the technical know-how to specify detailed requests when ordering a custom-made one, right?
Cheena: True, but if you get too specific, the additional charges quickly start to add up…
Oh, right — should I introduce some small tools or accessories that have been useful in instrument modification?
Parazio: Please tell me about all of them!
Cheena: First up, conductive adhesive.
It has a slightly higher resistance value than regular soldering and is a bit more expensive, but its advantages far outweigh those downsides.
For example, it’s perfect for spots like a Stratocaster’s spring hanger in areas where solder doesn’t stick well and where it won’t significantly affect the sound quality.
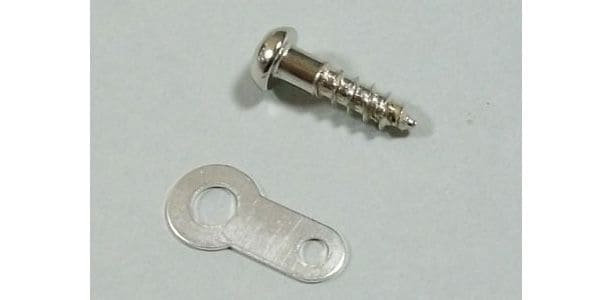
For wiring hacks, I also recommend using a lug terminal to group together conductive paint, string ground, and wiring ground with a single screw.
![MONTREUX / Lug Set [8387]](https://www.soundhouse.co.jp/images/shop/prod_img/m/montreux_8387b.jpg)
Parazio: You could also use that for repairs, right?
Cheena: Yeah, but using conductive adhesive in repairs definitely divides opinions. I can’t say it has absolutely no effect on the sound quality, and there are plenty of people who are very particular about that, so it’s best to use it only where it won’t be an issue.
Oh, another thing is that room-temperature shrink tubing. This one’s good for anyone.
It costs about a hundred times more than regular heat-shrink tubing, but when you don’t want to apply any heat around wiring or paint, it’s really convenient — you just pull out the core wire and it shrinks. However, it doesn’t adhere well unless you’re using thick wire that’s about the size of a shielded cable…
Parazio: I’m lazy — I always end up using electrical tape instead of shrink tubing.
I’ve always wondered, though, can’t the electronics around instruments be standardized?
For example, EMG is standardized and uses a solderless (connector-based) system that anyone can handle.
With others, you still have to do soldering and all that.
As a beginner, EMG feels like the norm to me. Everything else looks like some kind of weird setup. lol
Cheena: Reference →”Talking About Manufacturers’ and Builders’ Obsessions – Part 2” [Nemoto × Cheena Collaboration Article]
One definite thing about connector-based systems is that proprietary standards make it easy to exclude parts from other brands.
From their perspective, they want you to use as many of their components as possible.
So for example, EMG doesn’t want you to use their pickups with a cheaper preamp made by a competitor. That’s part of the reason for the system.
On the other hand, with parts that don’t use connectors, soldering gives you infinite compatibility. It’s easy to create your own custom wiring.
Also, electrical tape is generally fine, but don’t use it in places where you don’t want to leave sticky residue, like on high-end wiring materials.
Parazio: True, I can see how the change in connectors could be used that way, but if the industry would only just standardize the connectors, that would make things so much easier for us users.
Sure, soldering does give you that “I’m really doing this” feeling, though.
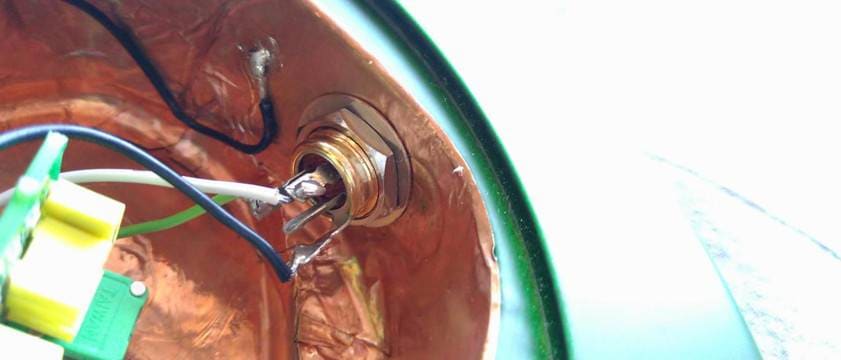
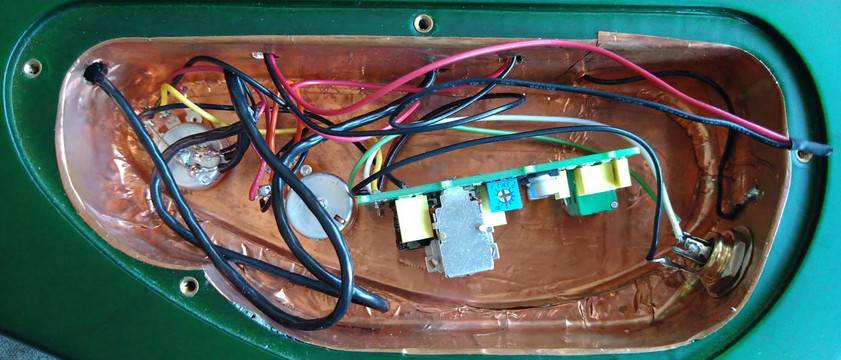
Also—sorry to jump topics—but the cavity where the wiring goes in basses and guitars is often coated with some kind of carbon paint, right?
And sometimes there’s copper tape or an aluminum cover.
Which of those is actually the best?
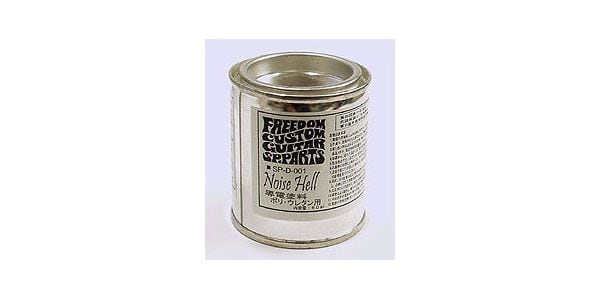
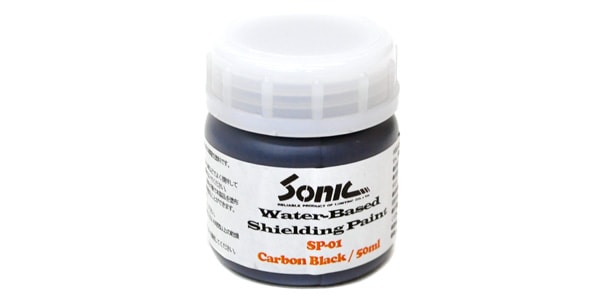
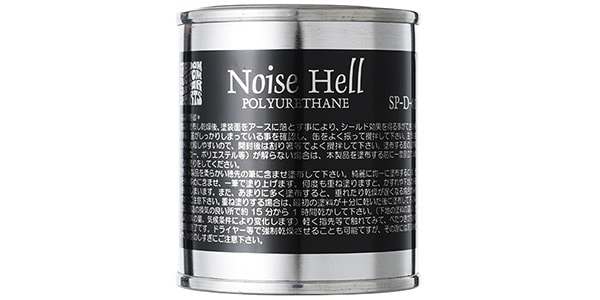
Cheena: The “carbon paint” you’re referring to is conductive coating.
Freedom Custom Guitar / Noise Hell SP-D-0
SONIC / SP-01 Water-Based Shielding Paint
MONTREUX / Copper Shielding Tape 200mm x 370mm [8642]
![MONTREUX / Copper Shielding Tape 200mm x 370mm [8642]](https://www.soundhouse.co.jp/images/shop/prod_img/m/montreux_8642.jpg)
SH / Guitar & Bass Noise Reduction Set Aluminum Shielding Tape
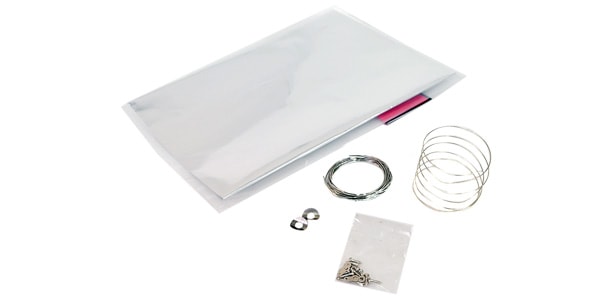
All of these use conductive materials to block surrounding electromagnetic waves. There isn’t one that’s particularly better. As long as the inside of the cavity and the pickguard or backplate are properly shielded, that’s what matters. Each of them does cause a slight change in tone, so you can choose based on how it interacts with the finish.
Parazio: This is something I learned from work, but I was recently told that the combination of copper and aluminum is the worst.
Apparently, that combo can sometimes cause corrosion around the contact points and gives machinists a lot of headaches.
So, I’ve made sure that all of my precious basses are shielded only with copper tape. LOL
Cheena: That would be galvanic corrosion, right? Yes, that combination isn’t exactly ideal. In this case, pairing copper with stainless steel or solder would be the best choice.
※Galvanic corrosion: When two different metals are in contact and an electrolyte adheres to that point, the metal with the lower potential (the base metal) corrodes faster, while the one with the higher potential (the noble metal) is protected. The peeling of gold plating is mostly caused by the same phenomenon.
※Detailed explanation of plating corrosion: Base metals such as iron or brass have a lower potential compared to the plated material, gold. When a small scratch or plating defect comes into contact with sweat, the sweat acts as an electrolyte, causing the base metal to ionize and dissolve into the liquid. As the base metal weakens, the thin layer of plating naturally peels off, and the corroded area continues to spread.
Parazio: Thank you for the detailed explanation.
That’s exactly right — corrosion occurs due to the potential difference between metals.
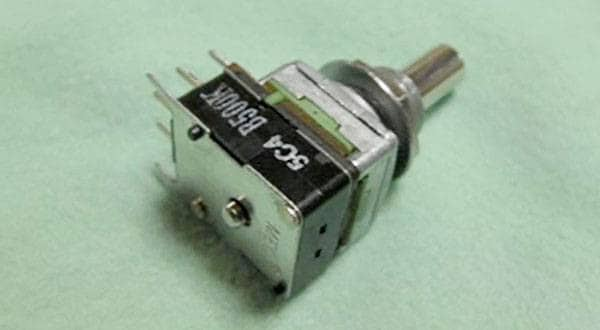
Also, I really wanted to ask this — aside from Kester 44, do you have any other solder recommendations?
Cheena: I personally don’t have any particular preferences for audio-use solder, so… Nemoto-san, please take this one.
Nemoto: Somehow I got called into this.
If not Kester 44, then Oyaide’s SS-47, I guess because it’s a classic. Compared to Kester 44, it requires a slightly higher working temperature, but it’s easy to handle.
Kester 48 is also quite user-friendly among lead-free solders.
Using these will make experienced people think “Ah, you know your stuff,” and for those who don’t, you can confidently say “This one’s good,” which is convenient.
As for tone, I don’t have the confidence to be able to tell the difference in a blind test. If you have a refined ear, an analytical system, or gear that uses a lot of solder like an effect pedal or amp, you might notice.
The tonal differences in solder really depend on the skill of the person doing the work, so it’s a tricky topic.
Broadly speaking, solder comes in lead-based and lead-free types. I personally prefer lead-based solder. I don’t do soldering all the time, and since I work alone, I’m not too concerned about health risks.
Cheena: Ah, should we go ahead and outline the differences between leaded and lead-free solder?
Leaded solder is basically the “traditional” type. It melts and flows easily, making it simple to work with, but of course, there are health and environmental concerns.
Its composition is about lead to tin at a 5:5 to 4:6 ratio, and if you’re using a low-wattage soldering iron, this type is easier to handle.
On the other hand, lead-free solder has a higher melting point than leaded solder and is a bit more difficult to work with.
It’s made by adding silver and copper, or sometimes zinc and bismuth, to tin — and it tends to be more expensive. For DIY hobby-level use, I think leaded solder is just fine…
There are also silver- or gold-containing solders made for working with silver or gold wire, but they’re not common, so I’m just gonna skip that.
Also, diving deep into the pure audio world is… complicated, so let’s not go there.
Nemoto: Capacitors require soldering, and even though they’re pretty expensive, they’re relatively heat-sensitive, which makes them kind of annoying to work with.
That’s why I like leaded solder that wets quickly. As long as you don’t directly touch them with a super-hot tip, you won’t damage them.
By the way, having a D-shaped tip on your soldering iron helps a lot.
Cheena: I also like eutectic solder — it hardens cleanly and crisply.
Pairing it with a Hakko soldering iron is the best combination.
Parazio: Soldering is a lot deeper than I thought. I’ve been hearing about Oyaide Denki quite a bit lately.
When it comes to electric basses, I feel like wiring and soldering are really important elements.
Hearing all this has been really educational.
Also, there’s something I’ve been wondering —
Is it okay to remove the tone pot and wire the pickup directly to the volume?
It’s just that I almost never use the tone knob…
I guess I just don’t really understand when or how to use tone properly.
Nemoto: There are even people like that, after all. Not limited to the tone control, but generally any control slightly thins out the sound and can introduce some noise just by existing. We only keep them because they provide benefits that outweigh those drawbacks. If you’re not going to use it, you can cancel it. For now, I’d recommend leaving the pot in place but not wiring it, and see how it feels.
Cheena: Even no controls can be great, actually. You’ll need to be more mindful — maybe put a volume pedal or kill switch at your feet — but the sheer romance of it more than makes up for any inconvenience. You could even get rid of the jack entirely and wire the pickup directly to the cable… (It’s a wiring style that brings out the performer’s nuance directly — paradoxically, that makes it something suited for high-end instruments, kind of like an acoustic bass.)
Nemoto: Like Anthony Jackson who runs no controls and manages to balance out…
Parazio: Wow, that’s the ultimate setup! Well, in general, shorter wiring is always better, right?
Nemoto: Exactly. Less loss that way.
Parazio: So “shorter wiring is better” applies to instruments too.
I learned something new today.
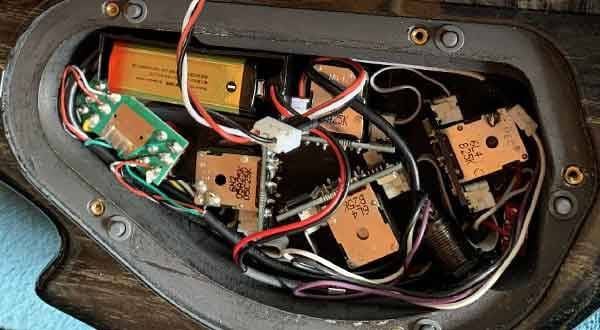
Parazio: Actually, right now my main bass has a serious noise problem, so I’m planning to swap out the stock circuit for an aftermarket one.
I’m debating whether to go with simple passive wiring or a 2-band active setup...
In the end, the most important factor between active and passive is whether the output becomes high-impedance or low-impedance, right?
Cheena: Active vs. passive is just a means of shaping tone, so you should decide based on your purpose. If you improve the instrument’s noise resistance, you can play without issue even at high impedance. And if you run it through effects, it’ll get converted to low impedance anyway.
Nemoto: The reason I like active systems is because you can craft a wider range of sounds right from the instrument. As for differences, passive setups are more affected by the cable, have less compression in the sound, and better touch response. Of course, there are some actives out there with insanely good response too. Maybe it’s because I used to work in PA, but I care more about converting unbalanced to balanced than about impedance values. So, I always keep a DI or an effect pedal with DI functionality at my feet — and I always bring a balanced cable too.
Parazio: I see. So basically, it’s fine not to be too hung up on active vs. passive.
But what caught my attention was what you said about cables.
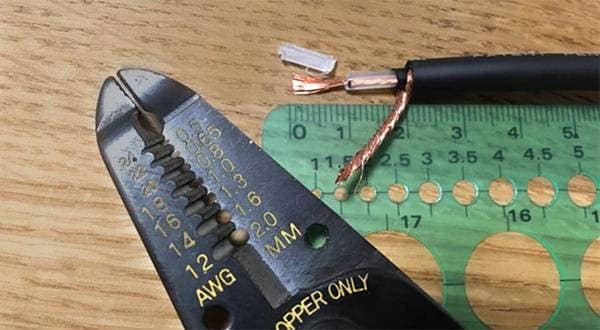
For example, when building an instrument, that means it’s also important to pay attention to the wiring inside the circuit, right?
Nemoto: It’s absolutely true that it’s better to be selective.
With that said, the impact of wiring materials on sound quality is actually quite small.
Focusing only on that won’t necessarily make things better.
It’s the combination of wiring, capacitors, pots, and other components that finally results in better sound.
If you’re going to compromise on something, it’s actually more rational not to obsess over it.
Decide the direction you want to aim for first, then make your selections accordingly.
Parazio: I see. So, the overall balance is what really matters. That’s really professional work, isn’t it?
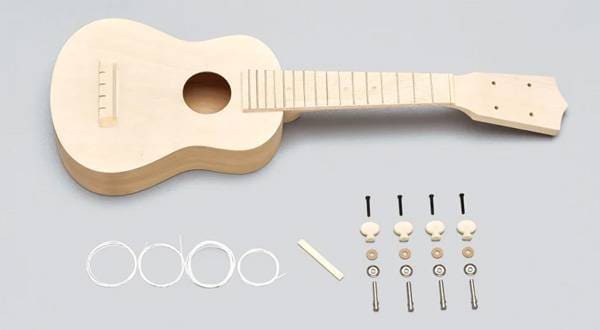
When building an instrument myself, I can’t do anything too flashy in an apartment like mine, but I can manage assembly kits or repairs.
So, I think the areas where you can really focus on are electrical components, pickups, and also bridges and tuning pegs.
Considering that, when it comes to making an instrument, how you select the components becomes just as important, right?
Nemoto: Exactly. You need to select parts based on the sound you want to achieve.
Here’s a trap that quite a few people fall into:
If you use conductive paint or metal foil to do thorough noise reduction, you might end up with high-frequency loss due to the cavity’s capacitance.
Even today, Strat and Tele pickups are often wired with single wires without shielding, because it’s considered worse to lose highs than to risk noise (though there are now noiseless pickups, so there’s also an element of differentiation).
Noise reduction is important, and many people do it carefully, but you should understand the potential drawbacks as well.
For bass, high-frequency loss might not even be a big concern, and if your sound is too bright, noise reduction can actually be beneficial.
Cheena: Focusing on the quality of the parts — I like that…
A word of advice to student luthiers like me: don’t start building without a parts list. Especially if you plan to use expensive components. Running out of funds could leave your instrument missing essential elements, ending up as dead wood or a failed instrument…
Parazio: So, what you mean is cavity capacitance…
Does that mean it’s better not to overdo conductive paint inside the cavity?
Also, is this the same if the instrument is active?
Nemoto: Conductive paint also has a capacitance (F), so the more you apply, the higher the capacitance. I think the official sites might have that info… maybe.
If you insulate areas that shouldn’t touch the paint with tape, it’s almost no problem. I’d recommend trying it once and comparing the results.
It’s the same for active circuits. Though for active, even with highs drop, you can always boost the treble, so most people don’t worry too much.
Cheena: I checked the Freedom C.G.R. and Sonic sites via Sound House, but they don’t list the F-values. I was curious about doing the calculations…
Parazio: Wow, building an instrument really requires a lot of prior knowledge…
I learned a ton from this discussion.
It seems there’s still a lot to learn, but I have a feeling that after making my first instrument, I’ll have even more questions.
Nemoto: You’ll definitely learn a lot through actually doing it. It’s challenging, but also fun—so definitely give it a try.
Parazio: Yes, since I’ve met such great mentors, I really want to try making one myself.
Cheena: Absolutely!
Before you start, here are some useful sites:
- ATLANSIA
- Offers necks, original parts, and some specialty tools. Their OEM Fender-compatible necks come with a 3-year warranty. Access parts via the PARTS SHOP or MACHINE SHOP links on the left banner (PC recommended).
- StewMac
- Stocks a wide range of supplies, including kits for instruments, amps, and pickups. Almost everything you need is available, though strangely, there are no bass kits. Prices are generally higher than Sound House.
- Electric Herald
- Useful if you need plans/drawings. The GUITAR TEMPLATES section has major guitar and bass templates; some even include 3D data. Plans cost around $20.
- Guitarfetish
- Offers inexpensive instruments, original parts, and supplies. Their Clearance list includes very cheap necks and bodies, but shipping times can be unpredictable, so order with plenty of lead time.
- Thomann
- (Although not detailed here, they are widely known as a major EU retailer for instruments and parts.)
- Warmoth
- Mainly custom orders for Fender OEM and original design necks and bodies. You can contact them via email for detailed specifications. A strong point of this store is that truss rods can be purchased individually. They also carry 2TEK bridges, but other hardware is often cheaper from Sound House.
- GUITAR WORKS
- Specialized tools and genuine Fender/Gibson parts. They have items like Micro-Tilt mechanisms and Telecaster toggle switch plates. Prices are high.
- Fret Wire
- Inexpensive kits and niche supplies, though items often sell out depending on timing. Automatically displays prices in Japanese yen.
- Baguley Guitars
- Known for Fender-compatible aluminum necks and bodies; also sells high-end pickups (~30,000 JPY each). For those who want premium components.
- RockMusicStore
- Offers many unique kits. Fewer supplies than Fret Wire, but prices including shipping are similar. Japanese support is available.
- aimoku
- Specialty woods. NC routing options for Strat, Tele, P-bass, and Jazz Bass. Can also buy joint blocks or low-grade fingerboard materials for small parts projects.
- True Temperament
- Wavy frets necks available for Strat, Tele, and acoustic guitars; fingerboards can also be purchased separately. Neck ~80,000 JPY, fingerboard ~50,000 JPY.
- Jockomo
- Offers many inlay and design decals, processes for custom rod covers, and cigar box guitar kits, which are good for fingerboard customization.
…That roughly covers the relevant sites. It’s a long list.
Additional notes:
- Be aware of CITES regulations restricting the import/export of rare woods.
- Shipping liquids can be tricky; some conscientious sites will stop you from ordering items like Titebond or orange oil if international shipping is selected. Otherwise, sea freight may be used, which could take several months.
Parazio: Thank you very much, Cheena and Nemoto-san. I appreciate it all the way to the end.
The “sound & person” column is made up of contributions from you.
For details about contributing, click here.


![MONTREUX / Copper Shielding Tape 200mm x 370mm [8642]](/images/shop/prod_img/m/montreux_8642.jpg)


![Diving into the Abyss of Weight Reduction in Instruments [Nemoto x Cheena Collaboration Article]](/contents/uploads/thumbs/5/2021/9/20210930_5_14340_1.jpg)
 DIY ギターメンテナンス
 ギターケーブルの作り方
 超オススメのフレーズ道場 ギター
 配線カスタマイズ 第1回
 ギターのお手入れ
 ギター名人ラボ


