Hello.
Lately, I’ve been really into Chinese-style iced noodles.
I used to think it was kind of a hassle to make just one serving, so up until last year, I’d maybe eat it once a year at a restaurant—if that.
But recently, with all these hot days, I really started craving it, so I tried making it myself… and it turned out delicious!
It’s fun because you can use all sorts of different toppings, and making it didn’t feel like much work at all, so now I’m hooked!
Then I realized something: the colder the noodles, the better it tastes!! Whether or not it’s good for your health is another matter, but when it's ice-cold, cold noodles are absolutely delicious!
So, to test the limits of just how cold I could make it, I spent a day off making cold Chinese noodles in the morning,made sure it completely cooled in the fridge, and then took it even further by putting it in the freezer—right up until the point just before it started to freeze. Then I ate it.
The result? It was so cold, I could barely taste anything.
Mmm… turns out, overdoing anything isn’t such a great idea after all.
Taking that failure into account, I tried chilling just the noodles and sauce until they were icy cold. Then I added room-temperature toppings, and it turned out to be incredibly delicious. Strange how that works, isn’t it? Every time I make it, I discover something new. At this rate, I don’t think my obsession with cold Chinese noodles is going to cool down any time soon.
Now then, this time we’re diving into the topic of direct switch wiring. Direct switches were a staple mod for heavy metal-style guitars back in the '80s, but these days, you don’t see them around as much anymore.
For those who might be unfamiliar, let me explain what a direct switch actually does: it bypasses the volume knob and outputs the signal directly from the pickup. That’s it! It’s simple, right? But it’s also got this bold, no-nonsense, kind of macho vibe to it.
Strictly speaking, since the tone circuit is usually tied to the volume pot, the switch ends up bypassing that as well. So saying it "bypasses the volume" might not be technically precise, but conceptually, that’s the general idea.
A few years ago, a variation called the rear direct switch gained some popularity in certain circles as an improved version of the direct switch, but even that seems to have faded away lately.
Well, since all it really does is bypass the volume, it might not be as versatile as something like coil tapping. But personally, I’ve always liked this feature quite a bit.
If you’re someone who’s thinking about diving into wiring mods, I think understanding how this kind of switch works is a great place to start. I hope you’ll stick with me to the end!
○ How the Switch Works
A direct switch simply bypasses the volume knob—that’s really its only job,
But if you’re new to guitar wiring, this might not mean much yet. So let’s start by talking about the kind of switch you need to make this bypass happen.
There are actually a lot of different types of switches out there, and there are even ones that look identical but actually function very differently.
This is why, in this section, I’ll explain the mini toggle switch, which is the type most commonly used for direct switches by many manufacturers.
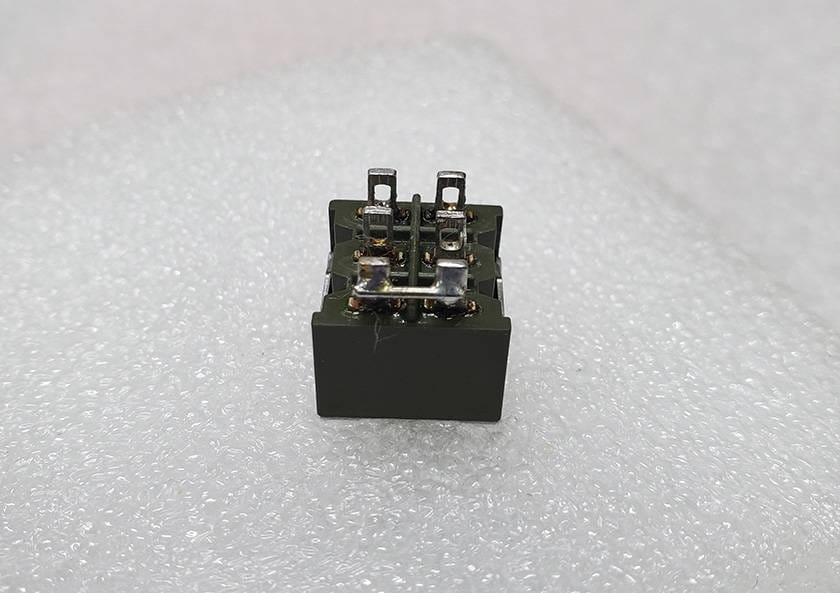
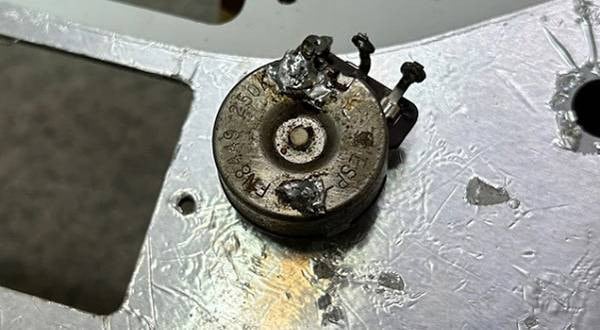
For a basic direct switch setup, I typically use an on-on mini toggle switch, like the one shown below.
ESP / MINI SW ON-ON Black Nickel
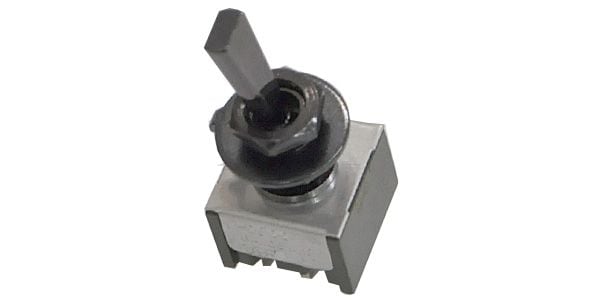
This is a switch with 6 terminals, and it's a double pole, double throw (DPDT) switch.
In the guitar world, it's often labeled as a “6-pin on-on mini toggle switch,” but more generally, it's referred to as a DPDT or 2-pole, double-throw switch.
These are all just different names for the same basic function, so keep that in mind when you’re shopping for parts. Just don’t let the terminology throw you off!
Now, I get it. if someone suddenly starts talking about on-on mini toggles or DPDT switches, it probably doesn’t mean much yet. So, let’s take a look at the actual structure with a diagram.
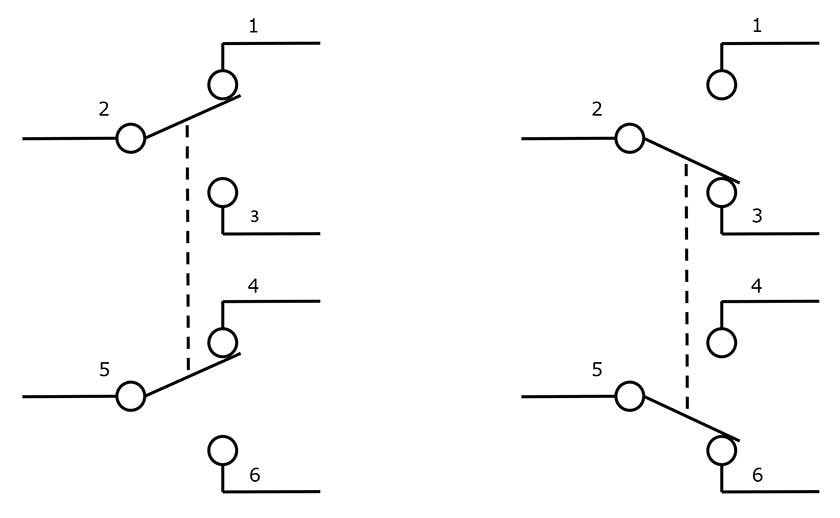
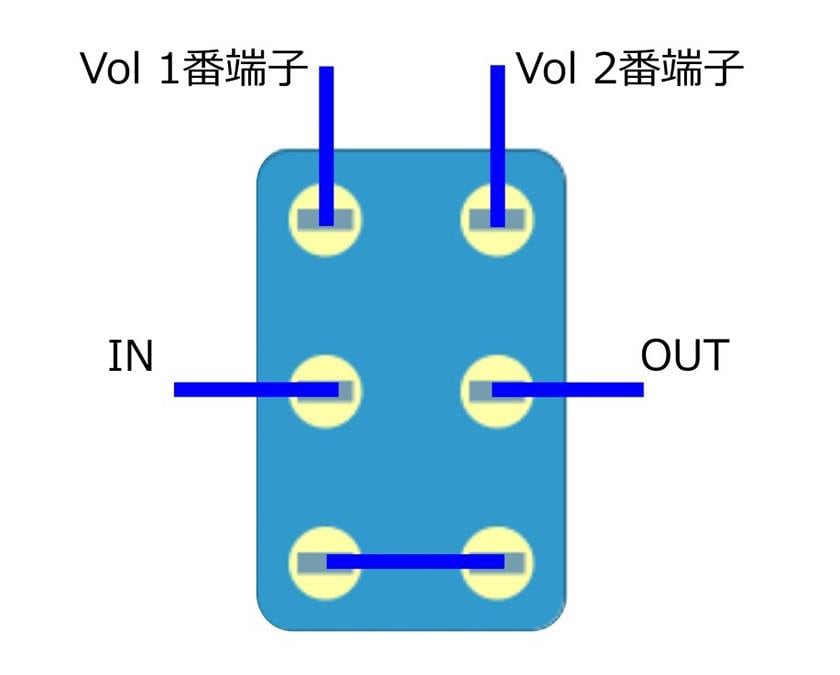
In switches like these, terminals 2 and 5 typically act as common terminals, and when you move the lever, both commons shift at the same time and connect either upward or downward, depending on the position.
It’s still a bit confusing, right? So, let’s take a closer look with a diagram…
I think that probably made things a lot clearer.
Basically, the idea is that the terminal on the opposite side of the lever’s direction connects to the middle (common) terminal.
○ The Mechanism Behind Direct Switch Wiring
Now that you have a better understanding of the type of switch being used, let’s move on to how the actual wiring for a direct switch works.
When you use an on-on mini toggle to bypass the volume knob, the wiring setup looks something like this:
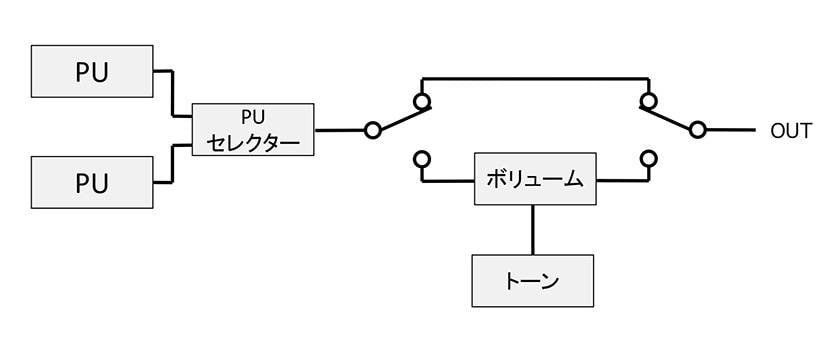
So basically, what the switch does is just determine whether the signal goes through the upper path or the lower path, and that’s it!
Super simple, right?
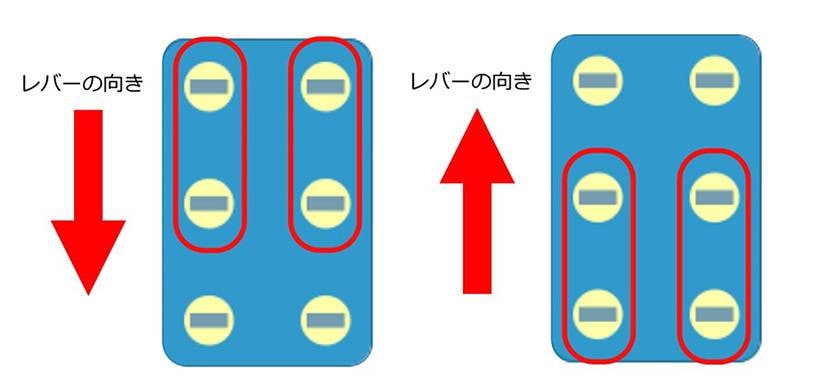
Here’s a diagram of what the actual switch wiring looks like:
When the lever is flipped down, the signal from the selector passes through the volume pot before going to the output.
When flipped up, the signal goes through the alternate path connected by the switch, bypassing the volume pot entirely.
In other words, you’re just cutting the volume pot out of the circuit.
It’s so simple, it’s almost laughable.
And that’s how direct switch wiring works!
〇 Direct Switch Wiring
This part is kind of a bonus, but I tried wiring it up to show what it looks like in practice.
When you’re doing real-world wiring, there are always little things to think about, like how to route the wiring, where to ground the cold (negative) wire, and so on. I hope this article can serve as a helpful reference, even just a little bit.
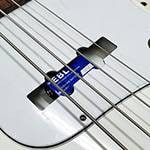
I used the components I introduced in the previous blog post.
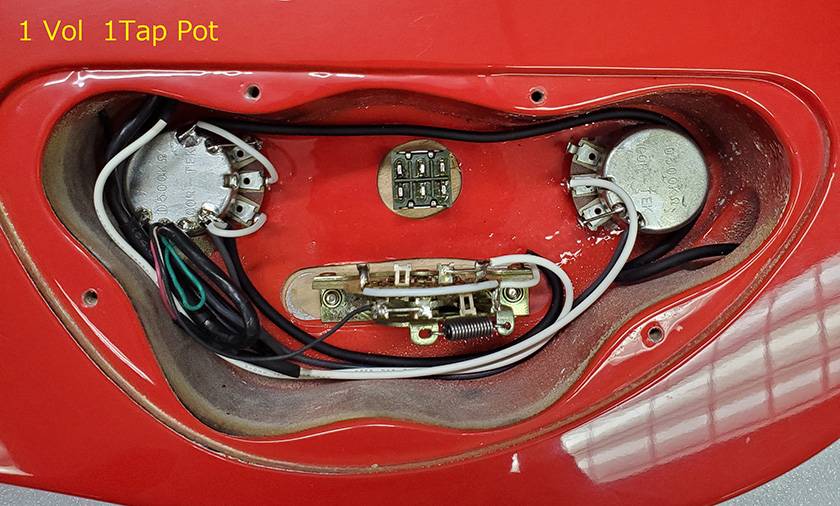
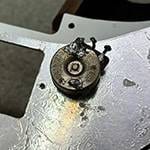
Here’s what it looks like after wiring the direct switch.
This time, I extended the single-core hot wire from the jack and selector parts to do the wiring. Because of this, I used quite a bit of heat shrink tubing, so it doesn’t look very neat. Just think of it as “this is roughly how it looks” and you’ll be fine.
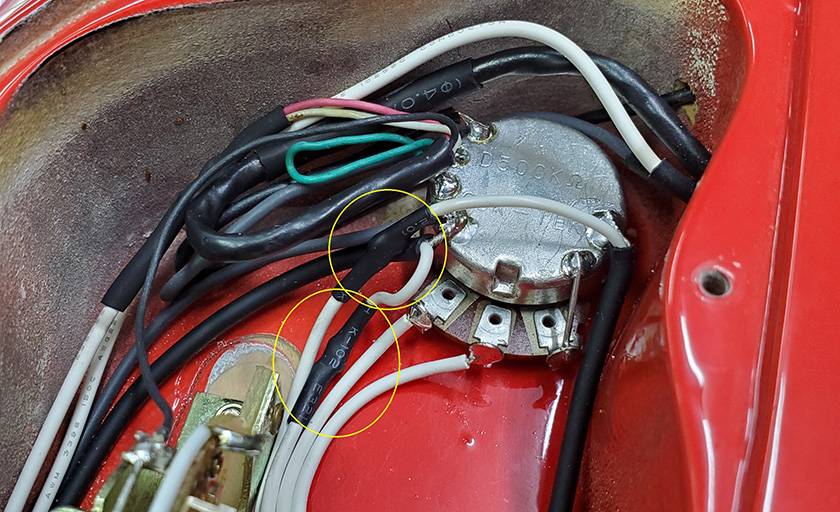
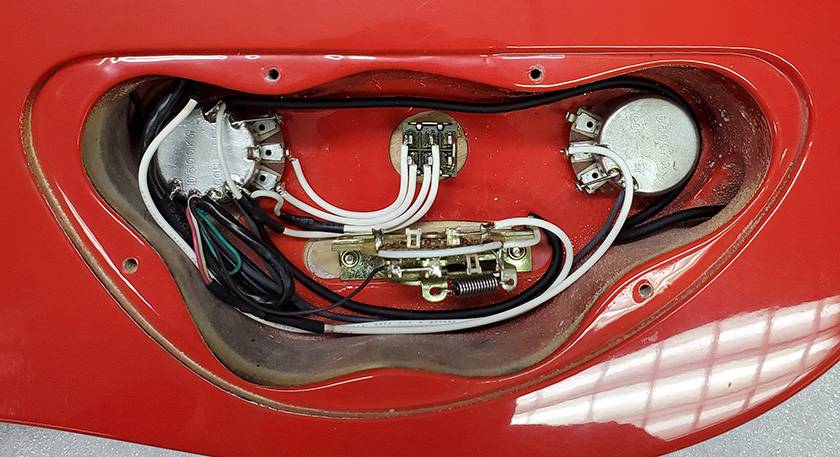
The parts circled in the diagram are where I made the extensions.
Extending these parts is less work than preparing new wiring from scratch, so if you’re not too worried about the appearance, this method is easier and more convenient.
Personally, I don’t fuss too much over the wiring of the switch bypass section, so I just attached the diode legs somewhat casually.
As long as this part is connected, it doesn’t really matter what you use. Even short pieces of lead wire will work fine.
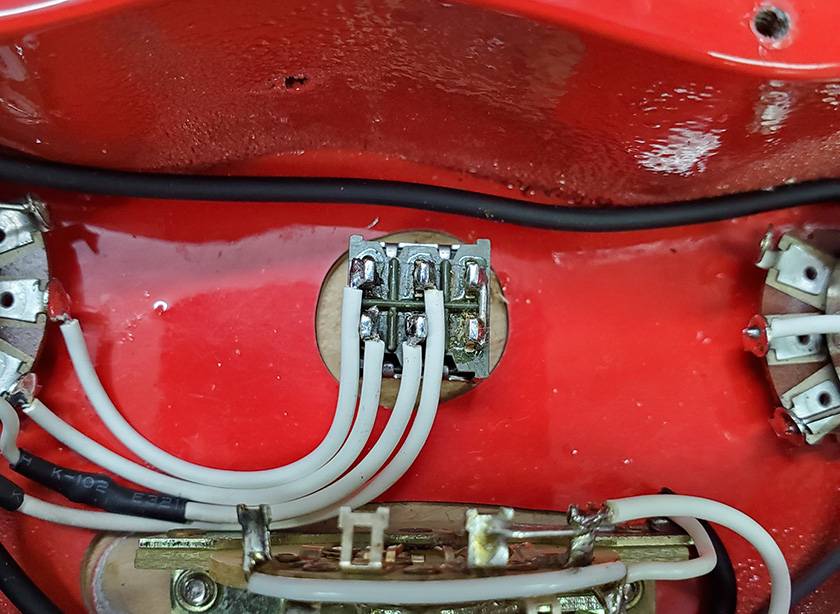
When wiring the switch, attaching the wires before and after the terminals helps prevent the wires from interfering with each other, making the job easier.
Summary
How was it?
The same information about direct wiring is actually available on our company’s website, so making a blog post about it might seem a bit redundant.
⇒ Sound House Insider! “Guitar remodeling course (wiring) Part 1”
But I thought that understanding the circuit and switch mechanism a bit better would make the work more enjoyable, so I added some extra explanation here in the blog.
That aside, the main thing I want to say this time is: everyone, please enjoy some cold Chinese noodles!
Summer will be gone before you know it!
Well then, see you again at the Sound House Staff Blog.
Goodbye!


 配線カスタマイズ 第1回
 パーツの配線を知ろう
 ピックアップの種類(エレキギター)
 ギターのお手入れ
 お手入れに必要な道具
 ギターの各部名称