
Hello.
The other day after work, I stopped by the supermarket to pick up some things. I suddenly had an intense craving for something sweet, and I ended up buying some snacks that I hadn’t planned on getting. On the way home, I couldn’t resist the urge and ate one pack out of the two-pack box. But when I got home and opened the box to eat the second one, I found two empty wrappers inside. Apparently, I had eaten the entire box without even realizing it. I kept trying to recall what happened, and I could’ve sworn I only ate one pack.When I noticed, I was shocked. But then I thought that maybe this wasn’t just mindless snacking. Could this have been a state of unconscious enlightenment? In the hazy daze of post-work fatigue, perhaps my brain had awakened, and I accidentally experienced my first ever moment of being “in the ZONE”.
This time, as the title suggests, we’re going to take a look at how to use a potentiometer in a slightly unusual way. So, what kind of use am I talking about? To get straight to the point—it’s coil-tap wiring for a humbucker pickup. At first glance, you might think, “Oh, it’s just coil-tapping?” and brush it off. But here’s the twist: instead of using a mini-switch or a push/pull pot, which are commonly used for this kind of wiring, the idea here is to do it using a regular potentiometer.
This kind of setup is rarely seen on production-model electric guitars, and even among hobbyists, it’s not very common. This is why this approach is perfect for those who are looking to try something a bit out of the ordinary with their guitar mods.
Also, you usually don’t need to modify the guitar body or pickguard to add a mini-switch with the wiring method I've introduced here, which is often required for traditional coil-tap setups. Additionally, since you don’t have to buy a relatively expensive push/pull pot, this mod is easier on your wallet as well. If you’ve read this far, you might be getting a little interested, right? Well then, let’s dive into the wiring itself. However, some of you might not be familiar with coil-tap wiring, so I’ll start with a brief explanation before getting into the main topic.
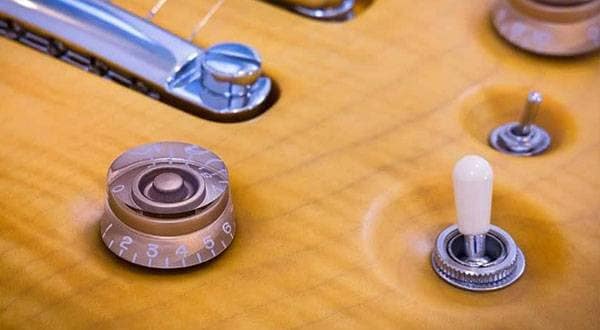
◯ Coil-Tap Wiring for Humbucker Pickups
So, what exactly is coil-tap wiring? Let’s take a look at a diagram first.
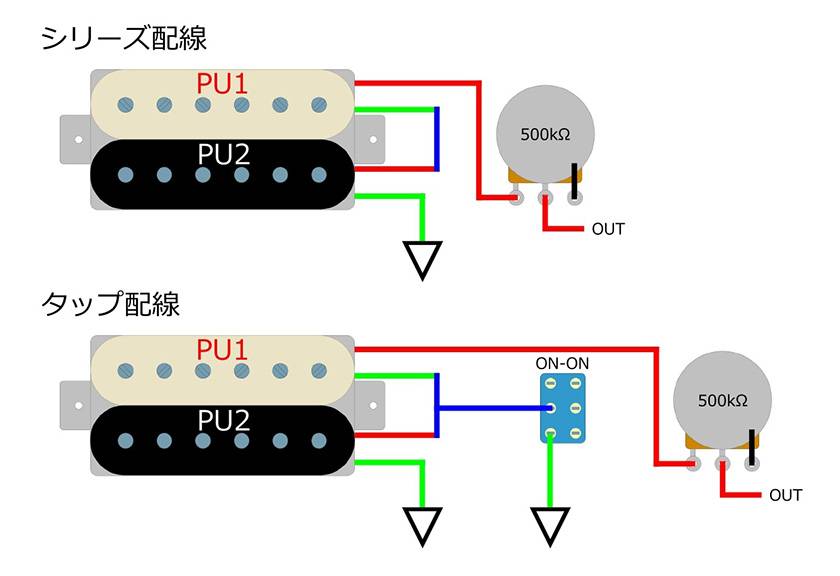
Basically, it looks something like this: the cold lead of Pickup 1 (PU1) and the hot lead of Pickup 2 (PU2), which are connected in series, are routed through a switch that grounds the connection. When you toggle the switch, only the signal from PU1—the pickup connected to the hot lead—is outputted. In other words, although it’s a humbucker, you can get a sound similar to a single-coil pickup.
There are various ways to implement coil-tap wiring, but the method shown in the diagram is probably the most common. Of course, depending on how you wire it, you can also output only PU2. On guitars equipped with multiple pickups, coil selection or combinations can be used to reduce noise via hum-canceling or to create phase effects. Essentially, the wiring method allows for a variety of tonal possibilities.
Until recently, this feature was mostly found on higher-end models, but in recent years it has become quite popular, appearing even on beginner-level guitars.
◯ Coil-Tap Wiring Using a Potentiometer
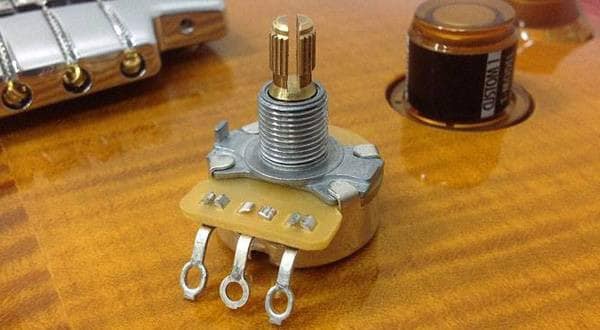
Now, here’s the main topic: how do you perform coil-tap wiring using a potentiometer? Please take a look at the diagram below.
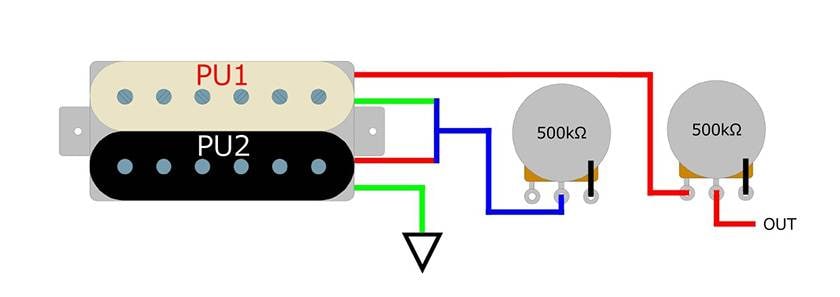
The circuit looks something like this.
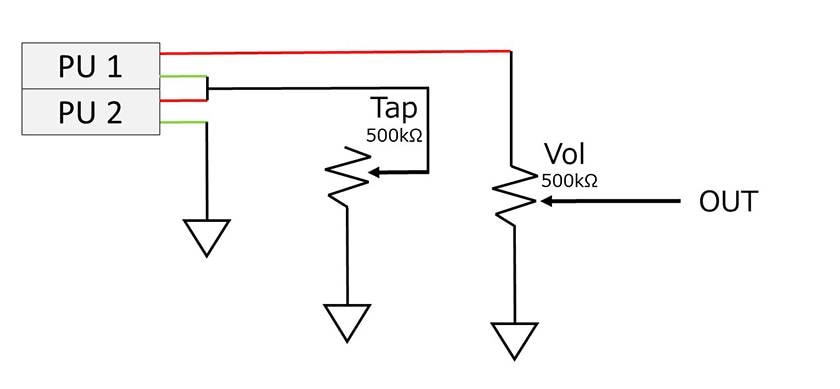
Basically, all you need to do is ground the signal from one of the coils. Just like when you use a potentiometer as a volume control, you connect terminal 1 to ground, and connect terminal 2 to the cold lead of PU1 and the hot lead of PU2 of the humbucker.
When you turn the knob of the potentiometer in this setup, the signal from one of the coils gradually gets grounded, and eventually, it reaches the same state as a coil tap.
There are two main advantages to this wiring method. First, the signal gradually decreases until it reaches the tapped coil state. This allows you to produce tones in the transition between full humbucker and tapped coil, which gives you a wider range of sound options compared to simply switching the tap on and off with a switch. The second advantage, as mentioned earlier, is that you can perform coil-tap wiring without adding extra holes for switches. Drilling additional holes in the pickguard or guitar body can be a real point of hesitation for many players, so this method offers an easy way to do coil-tap wiring without worrying about this issue.
One the downsides is, since this involves rewiring a potentiometer that typically functions as a tone control, you’ll lose that tone functionality if you have a simple setup like one volume and one tone control. For guitars like Stratocasters or Les Pauls that have multiple tone controls, it’s personally recommended to consolidate the tone functions into one control and use the remaining potentiometer for this coil-tap wiring.
For reference, here’s what the wiring looks like in practice.

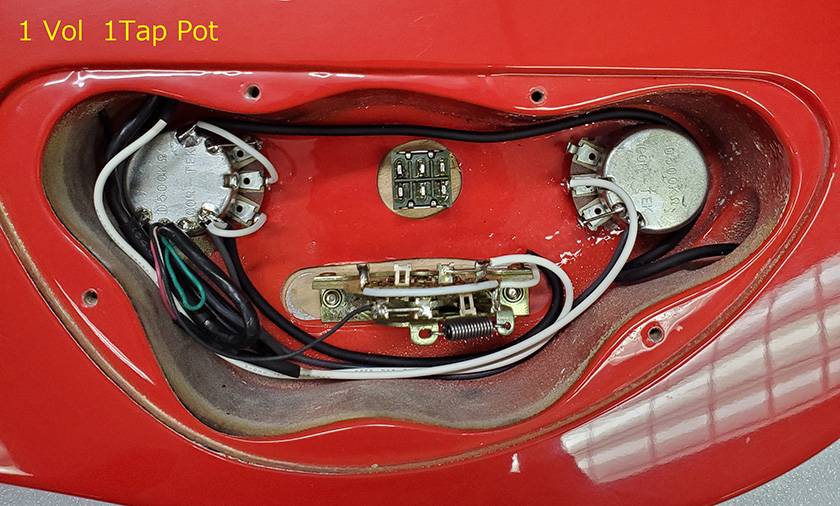
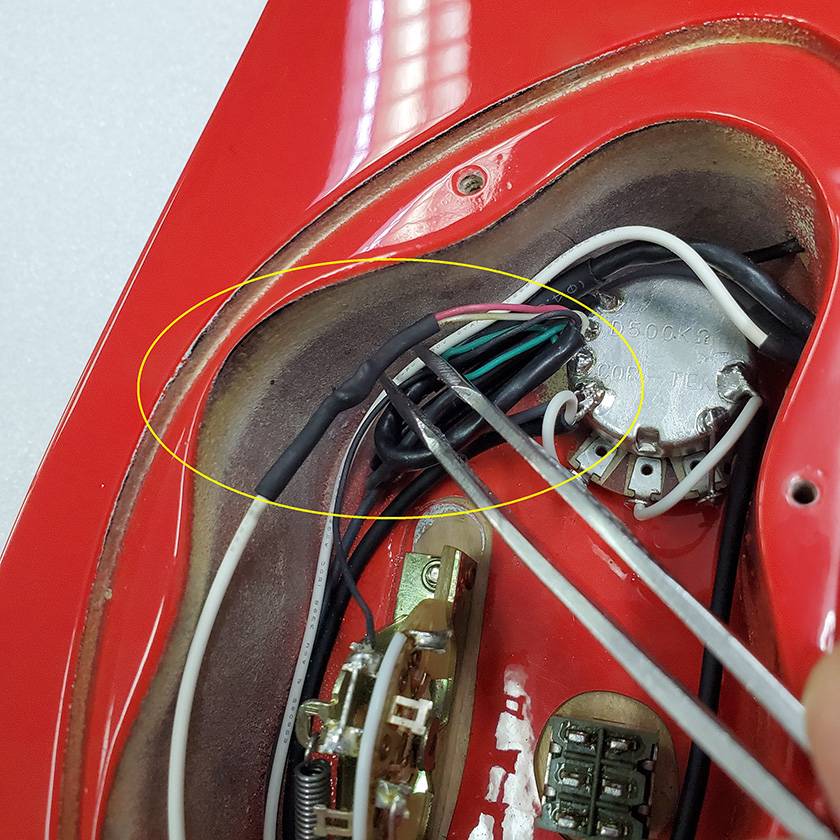
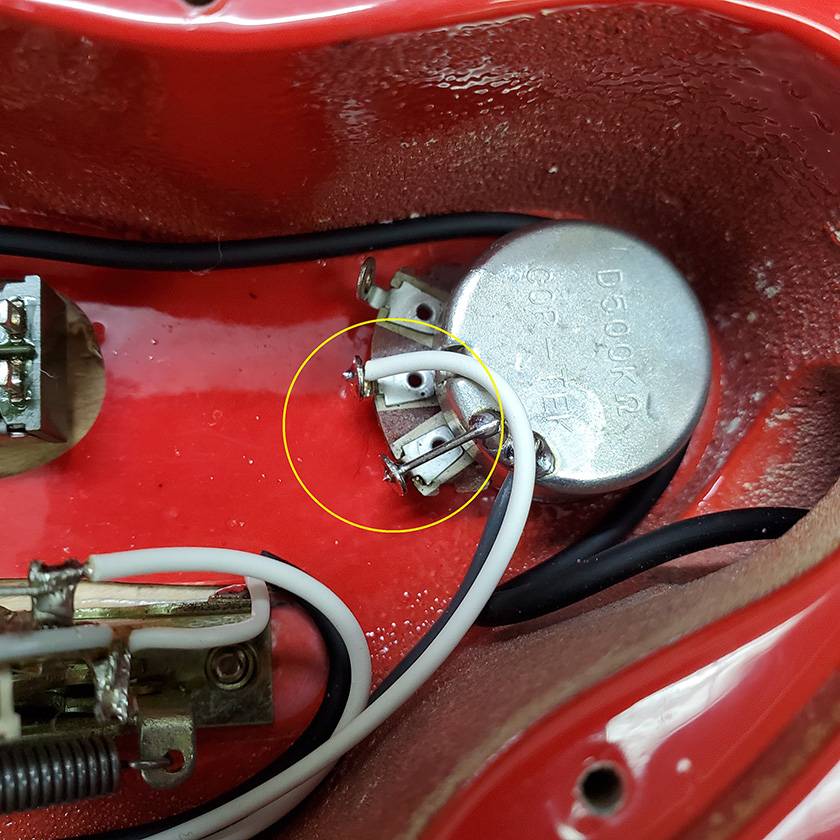
Due to the length of the pickup wiring in this case, I have extended the wires, but as you can see, it’s a very simple wiring setup where you just connect the coil-tap wire to the second terminal of the potentiometer in which the first terminal is grounded.
How did you find this? Personally, I think this wiring method is quite interesting, so if you’re curious, consider giving it a try. Thank you very much for reading this blog post all the way through. I hope you’ll enjoy reading the next blog as well. Until then, see you again on the Sound House staff blog. Bye!


 ピックアップ交換大作戦!
 ピックアップの種類
 ギターの種類
 配線カスタマイズ 第1回
 パーツの配線を知ろう
 ピックアップの種類(エレキギター)