Take a look, everyone.

Take a closer look.
The strings are rusted.

I would like to show you how to replace the strings on a guitar that has been turned into a piece of interior art since there was no chance to play it, and now it's in terrible shape.
The first thing to do is to cut the strings, but if the strings are tuned and tight, it is very dangerous to cut the strings. Before cutting the strings, loosen the strings first.

Loosen the strings first and then they will be safer to cut out.
After loosening the string, cut the string. You can cut the strings anywhere that is easy to work with.
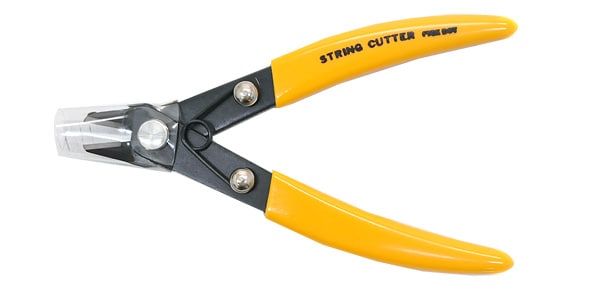
I use a bite cutter to cut the strings, but you can of course use a string cutter from Sound House.

Pickboy / SC-150 String cutter for steel strings
The strings have been cut.

After cutting the strings, remove them from the pegbox and bridge.


In rare cases, the strings may not come out from the bridge due to the ball end getting caught, but in such cases, poke it with a thin stick. In the picture, a 1.5mm wrench for adjustment is needed.
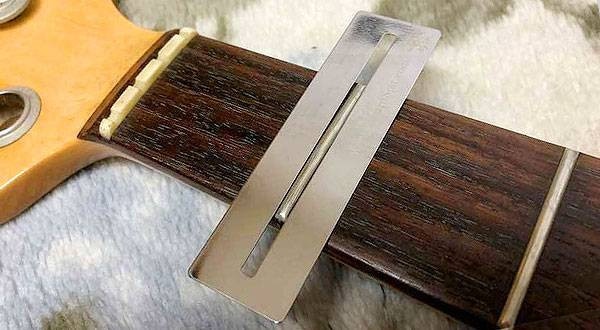
Since the strings have been removed, now is a good time to take care of the fingerboard.
Click here for an article on fingerboard maintenance.
Related Articles:
⇒ Keep your Guitar Clean!
⇒ Introducing Sago products Recommended for Fingerboard Maintenance!
⇒ Let's Clean Around the Neck While Changing Strings ★3 Recommended Cleaning Products for Guitars and Basses
After the strings are removed, let's put new strings on.
This time, since the guitar is an ST type, I'll put the strings on from the back and pull the strings up to the pegbox. The key is to make sure that the ball end is firmly fixed to the bridge as you move the string up to the pegs.

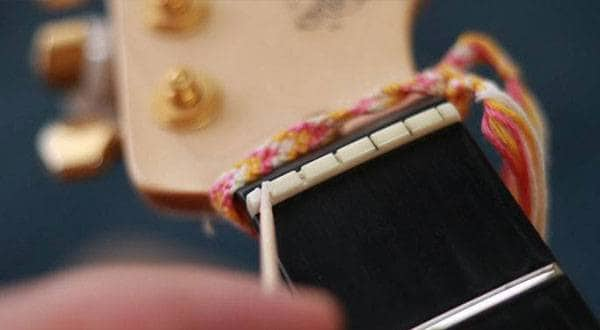
Once the string has been brought to the pegbox, it is time to wrap the string around the peg.
In order to wrap the string around the peg post, first decide on the length of the winding.
This winding length affects the tension at the 0-fret (nut). If too few windings are used, the tension at the zero fret will be weak, resulting in open string buzz and resonance.
In my experience, I do not see many defects with a large number of windings.
Generally, 40 to 50 mm, 2 1/2 to 3 1/2 coils are recommended, but there are various theories, so I will use a distance of two peg posts for the purpose of this article.

I will first wrap it around the 6th string, so I will mark the pegbox position two strings ahead = the 4th string.
After putting the string through the peg, wind the string around the peg while keeping the string tight.

The 6th string has been wound. The winding of the pegbox looks like this.

Let's cut off the excess strings.

Finish stringing the remaining 1-5 strings in the same way.

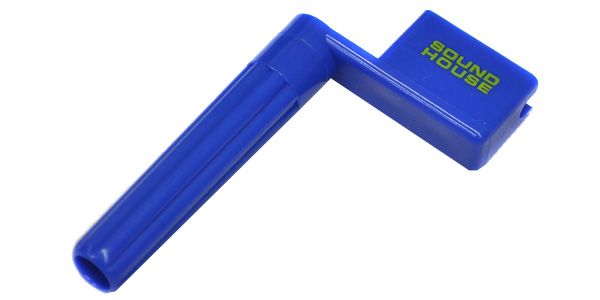
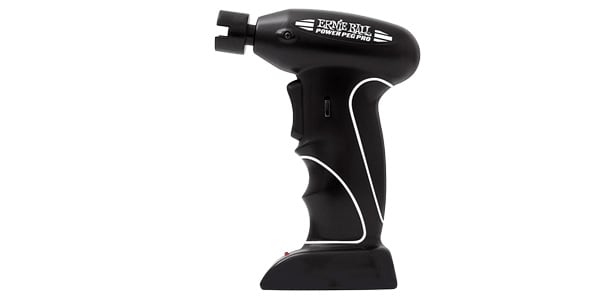
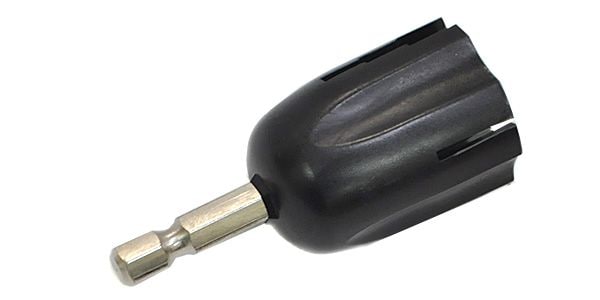
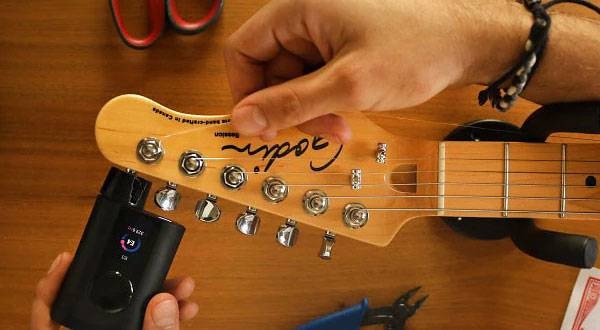
When changing strings, it is recommended to use a string winder, which is a convenient item that allows you to wind strings comfortably.
At Sound House, we offer not only the type that can be turned by hand, but also the drill bit type winder that can be attached to the tip of an electric screwdriver,
D’Addario / Drill Bit Peg Winder [PW-DBPW-01]
![D’Addario / Drill Bit Peg Winder [PW-DBPW-01]](https://www.soundhouse.co.jp/images/shop/prod_img/p/pw_dribitpegwine.jpg)
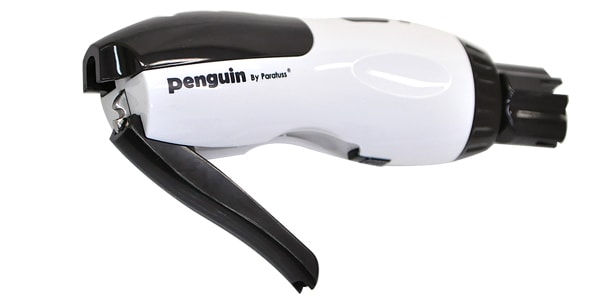
We also offer electric string winders.
We also handle many other useful goods that can be used for string changes and daily maintenance, so please take a look.
⇒ Maintenance Goods > Tools
⇒ Maintenance Goods > Other Convenient Goods


 エレキギター弦の選び方
 ネックの調整方法
 弦の張り替え(アコースティックギター)
 弦の張り替え(エレキギター)
 ギターのお手入れ
 お手入れに必要な道具