


The other day, I wrote an article suggesting that you should simulate your board before building it, but I imagine many people still don’t really know what to put on a board or how to arrange it.
Honestly, there’s no single correct answer, so I hope people just let their individuality explode and experiment while creating their boards. That said, it’s also true that having some sort of guideline of the fundamentals can help avoid unnecessary struggles.
With that in mind, I’d like to introduce a few patterns for assembling a board spread across several installments that won’t stifle your personality, but it will make it easier to avoid getting lost. It might be a long journey, so please bear with me.
This explanation will primarily use Pedaltrain boards, because their sizes are easy to understand.
Ah, there’s one thing you absolutely should not think while reading this series:
“Shouldn’t one multi-effects unit be enough?”
Now, for the first installment: let’s build a small, straight-chain board using the Pedaltrain Nano!
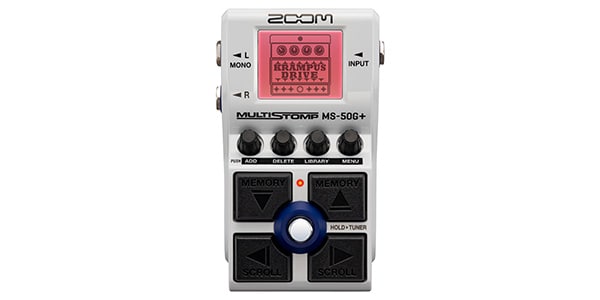
PEDALTRAIN / PEDALTRAIN NANO SC
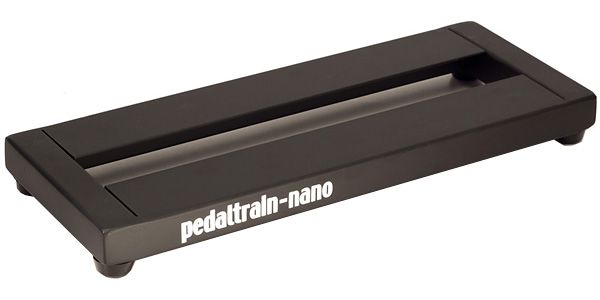

Wow, that’s compact. 36cm × 14cm. Small and light is truly a virtue.
Being small doesn’t mean I’m compromising. This is exactly how I would shape a small board for live use. I’ll explain the concept behind this board and the considerations I had while assembling it.
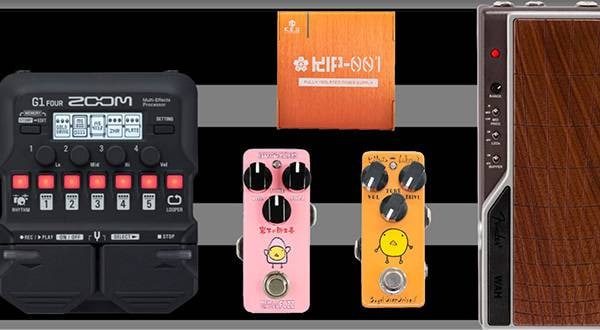
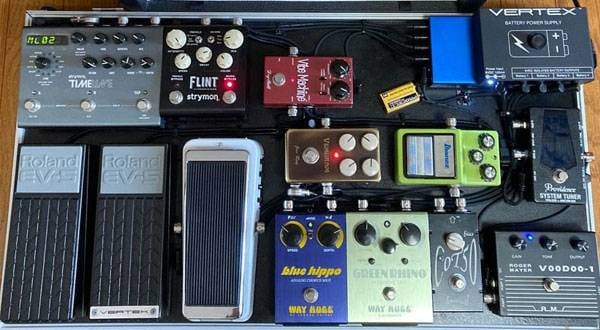
First, the contents of the board are as follows:
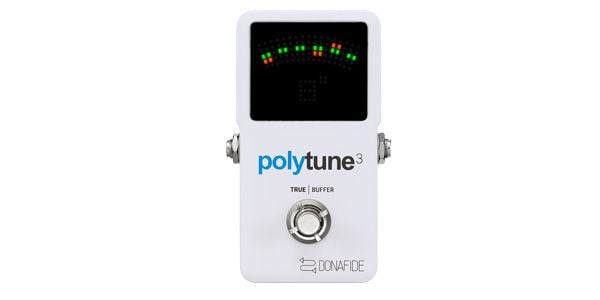
- TC ELECTRONIC / Polytune 3 (Tuner)
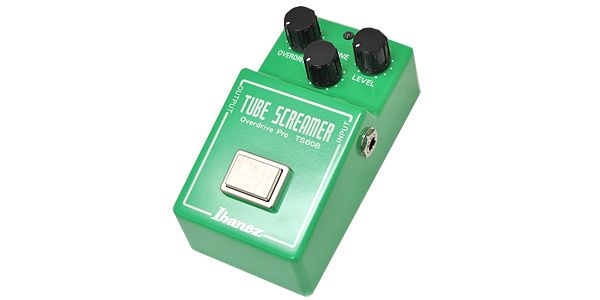
- Ibanez / TS808 (Overdrive)
- VEMURAM / Jan Ray (Overdrive)
- ZOOM MS-50G+ (Digital Multi-Effect)
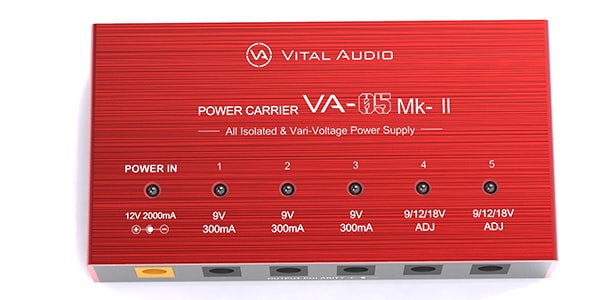
Just four items. Ah, if you want to add power, you can tuck something like the VITAL AUDIO / VA-05 underneath. This leaves one empty spot, so you can add an external pedal like a wah wah if needed.
Now, regarding the core idea: all the boards introduced in this series are built with versatility, convenience, and stability in mind. Even this minimal setup leaves nothing to chance.
The Polytune 3 is, of course, a tuner. I often lose clip-on tuners, so I feel more secure with a pedal tuner. I can hear some saying, “Well, if you don’t lose it, you could skip it.” Fair enough. But pedal tuners have several advantages. I’d like to write a separate article explaining all the benefits in detail, but in short:
- You can tune in one go.
- Many are more accurate than clip-on tuners.
- Excellent visibility.
- Can mute your signal in case of trouble.
It may seem like a small list, but these are significant benefits. A performance starts with tuning, so it’s important to do it carefully and reliably.
Next is the TS-808, which I use as a booster. I set the gain around 9 o’clock, adjust the tone slightly higher to match the guitar, and crank the volume all the way up. Step on it at the right moment, and it handles most situations—pure power.
Now, here’s the Jan Ray. If I were stranded on a desert island, I would bring this pedal, my beloved unit… well, maybe I’d choose differently on a real desert island. I might have exaggerated a bit, but still, it’s a pedal I truly love. Naturally, I set it for low-gain backing. I adjust the EQ so the mids feel just right and set the trimmer based on how sweetly I want the tone to respond. Ah, I want to buy it again.
Finally, the MS-50G+, the jack-of-all-trades. Modulation, spatial effects, high-gain anything—you name it. This compact multi is my go-to when in a pinch. It’s addictive. Without much explanation, this pedal can become anything, and by including it, you can compromise slightly if needed, but still maintain a wide palette for tone creation and reliably get whatever sounds you want.
In other words, the configuration is:
“Tuner + Two favorite overdrives + Versatile multi”
This is my minimal setup answer, but it’s not the only correct one. It’s just one example.
Let’s consider a few other possible setups:
- Replace one overdrive with a compressor if you plan to rely on a clip-on or multi-tuner.
- Use two boosters instead of overdrives if you’re switching amp distortion.
- Replace the multi with a single delay if you don’t plan to craft complex tones.

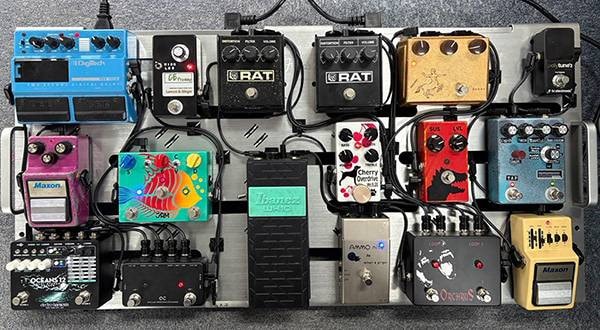
This is what the board looks like. This, too, is a valid setup.
In the end, it all comes down to what you’re aiming for and the environment in which you’ll be using it in. Honestly, I like this one.
It would probably suit genres with lower gain, like neo-soul while using it with clean amps like the JC-120 or Twin Reverb. On the other hand, having plenty of overdrive options would be really fun with Marshall-type amps or a Deluxe Reverb. You’d want to stomp everything and shred leads to your heart’s content.

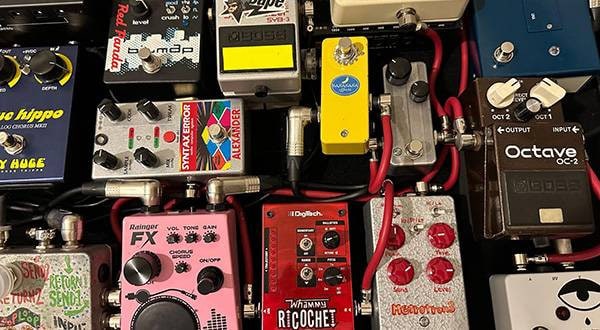
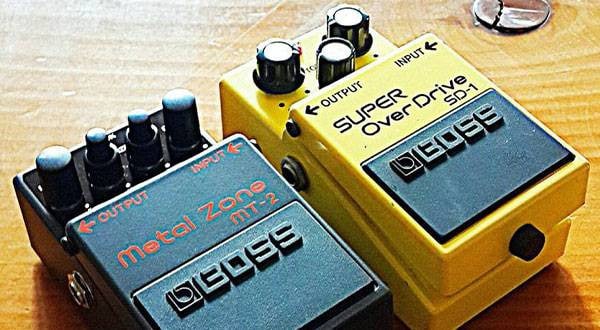
I came up with another setup, tailored to the current line environment.
The idea is to set the Dream with a bit of overdrive and then add gain with the SD-1 and RC. It may not look very distorted at first glance, but you can really crank up the gain. I made the SD-1 an Anniversary edition just because the color looks cool. I added the El Capistan because it seemed fun to pair it. That’s really all the motivation you need. For reverb, the one already built into the Dream is fine.
Surprisingly, even with just four pedals, you can cover a lot of sonic ground. It’s difficult to pack in every possible sound, but it’s definitely possible to hit the tones you want while leaving some breathing room.
This Nano size is incredibly fun. Just thinking about it makes me want to build it.
That wraps up this round of trial and error.
Next time, I would like to try building a board using the three-row Metro. From there, the number of options expands dramatically. Even writing about this small board has already made me go over 2,000 characters, so I’ll do my best to keep future articles concise, clear, and easy to read…
The “sound & person” column is made up of contributions from you.
For details about contributing, click here.


 zoom ブランドサイト
 UPDATETC ELECTRONIC ブランドページ
 【初心者向け】エフェクター講座
 あなたのエフェクターボード見せてください
 エフェクターのつなぎ方
 エフェクターの種類


