Hello, hello. Long time no see. It’s been a while — Saku here.
My motivation to write articles had dropped significantly, but it somehow came back, so I ended up writing a lot all at once. We’ll be seeing each other a lot, hehe.
This time, I’ll introduce two simulators that will definitely be useful when building an effects pedalboard.
Well then, let’s get started!
Pedalboard Planner

First up is this one. It’s a simulator provided by Pedaltrain, a brand famous for its slatted pedalboards, and it’s designed specifically for Pedaltrain boards.

For that reason, the boards you can choose from are limited to Pedaltrain only. You can’t use case-type boards like ARMOR or PULSE in the simulator, or slatted boards from other manufacturers such as Warwick.
That said, if you’re planning to build with Pedaltrain, this simulator is a reliable choice.
At first glance, this might feel a bit limiting, but this simulator is actually quite user-friendly in other respects. Let me list a few points that make it feel that way.

This is the screen for searching pedals to add to the board. You can narrow down results not only by model name, but also by manufacturer, and even by effect type.
Conversely, if you search only by effect type, you can discover pedals you’ve probably never heard of before.
For example, when you want a reverb pedal but don’t know much about them, this is a great place to look.

You can also add sticky notes to insert annotations like this, consider the rear-side layout that’s unique to slatted boards, and select multiple objects at once.
Being able to plan the underside layout is almost unfairly powerful. As expected from Pedaltrain, the pioneer of slatted boards.
And instead of just taking screenshots, you can save the board you made using a snapshot function, which is also very convenient.
Not having to crop images yourself takes the stress out of the whole process.
Pedal Playground

Next up is this one. Unlike the previous tool, it seems to be created not by a company but by an individual. Amazing.
Because of that, the selection of boards is very broad, with three sizes of Fender boards available and all sizes of Warwick Rockboard included—its’ quite an impressive lineup.
However, it does feel geared toward overseas users, so boards like ARMOR and PULSE are not provided.
But don’t worry.
As you can see on the left, as long as you specify the size, you can add a custom board.

As a test, I added a board sized 700 x 370 mm. It’s nice that the outer frame is properly designed.
Also, it’s not only custom boards that can be added, effects pedals can be added as well.
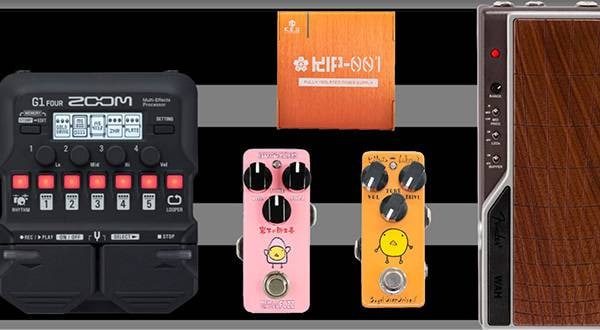
Of course, it’s impossible for the operators to prepare every single effect pedal, so users can create their own for domestic pedals or handmade ones.
With the pedaltrain simulator introduced earlier, you have to build with only what is provided, and if something isn’t available, you have no choice but to substitute it with something of a similar size.
This is probably what people mean by “scratching an itch”.
However, with this one, you won’t find pedals unless you know the exact model name when searching. You can search by manufacturer name, but there is no genre-based search.
In terms of usability, pedaltrain has the edge, but if you already have a clear goal and want to examine the layout precisely, this one might be more suitable.
Personally, it feels like the pedal images are higher resolution on this one…
Also, since the canvas scale can be adjusted freely, you can make full use of the screen to simulate both large and small boards. The usability here is quite good.
So far, I’ve introduced two simulators.
From here on, I’ll point out a few things to keep in mind when planning a board using a simulator.
1. Don’t pack it too tightly
Yes, just as it reads. Even if it looks like there’s enough room in the simulation, when you actually start assembling the real board, realizing “Wait… this doesn’t fit?” is just too depressing.
Of course, the simulation does match the scale properly, but it’s not guaranteed that every single model is prepared with absolute precision.
Taking possible discrepancies into account and leaving a bit of extra space when arranging things is a good idea.
For example, if you’re using solderless cables with small plugs, you can probably pack things in fairly tightly. However, if you’re preparing proper patch cables that require soldering and therefore have larger plugs, it’s better to leave noticeably more width than you might initially expect.

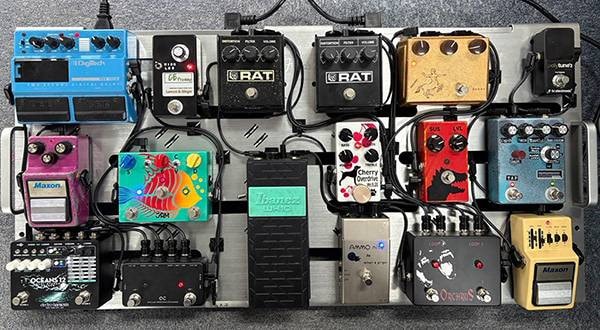
This is a board that I simulated and then actually assembled, and when you can put it together with this much precision, it feels incredibly satisfying.
So, while leaving a little breathing room, if you pack things in with cable routing space in mind, building a board like this is not just a dream.
2. Leave room for reconfiguring
In the end, this is still about leaving space, but effect pedals are things that get swapped out frequently.
It would be sad if you bought a new pedal and then found out you couldn’t fit it because of the size difference.
Even a 1 cm difference can have a big impact. If every time you swap out the pedal in the middle of three, you also have to shift the pedals on both sides, it becomes a real hassle…

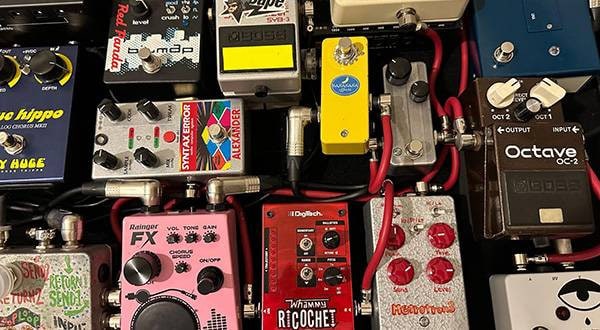
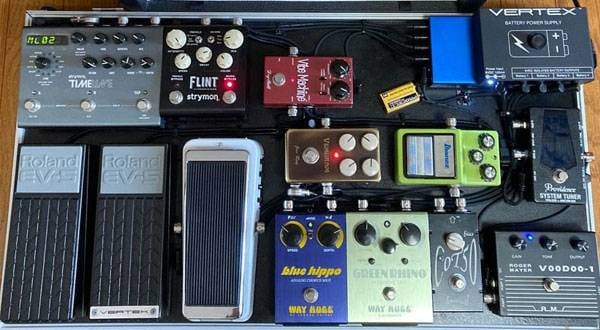
This is my current board, and you might think it actually looks like it has quite a lot of empty space.
Part of the reason is because MIDI cable plugs are large, but I hadn’t expected them to be quite that big at first, which gave me a brief cold sweat. Still, because I had left some extra space, I was able to assemble it without any problems.
Also, I would sometimes swap out the CALLION on the far left for a Jan Ray depending on my mood, and because there was plenty of space, I could do so without any stress.
The area above the AMPERO was originally planned as empty space, but as you can see, I succeeded in neatly organizing the power supply components there.
If I had planned from the start to place something there as well, every time I opened up the board I would have had to plug and unplug multiple power supplies, and then bundle up the cables when packing up… However, with this setup, I only need to handle the power strip, which also helps save time.
Even if I were to add one more effect pedal, having enough flexibility like this gives you peace of mind later on.
3. Compromise with balance
Not compromising at all can be tough, but compromising too much can make things difficult later.
Sometimes, insisting that your board has to be in an exact way can leave you without a board of the proper size, and thinking “this is fine” can result in a board that’s uncomfortable to step on.
Carefully examining each element with a moderate approach naturally leads to a well-balanced overall setup.
Of course, it’s easier to approach it assuming that individual pedals can be swapped out later. However, I don’t recommend compromising on the first try. After all, replacing pedals later or selling them won’t fully help you recover their original cost.
So, by making the best choices each time and taking the time to update toward the best setup, I think that’s ultimately the way to avoid regrets.
So, there’s a lot to consider, but even if you don’t actually plan to build a board, it’s quite fun to play with a simulator just out of curiosity—imagining what it would be like to assemble such a setup.
You can try cramming everything onto the largest board, or conversely, see how much you can fit on the smallest one.
It might even change your approach to building boards, so definitely give it a try.
The “sound & person” column is made up of contributions from you.
For details about contributing, click here.


 【初心者向け】エフェクター講座
 ギター初心者ゼミ
 あなたのエフェクターボード見せてください
 ベース用エフェクターの種類
 エフェクターのつなぎ方
 エフェクターの種類