Introduction
“I want to get a great sound when playing live.” If you’re a guitarist, chances are you’ve thought about this at least once. However, once you start getting serious about your tone, the list of gear you want—overdrive, delay, reverb, and so on—just keeps growing. Before you know it, it’s not uncommon to spend tens of thousands of yen, or in some cases well over ¥100,000.
Against this backdrop, PC-based amp simulators (plugins) have been attracting increasing attention in recent years.
What Is an Amp Simulator?
An amp simulator is software that can reproduce the sounds of guitar amplifiers, cabinets, and effects pedals on a PC. Simply connecting your guitar through an audio interface allows you to create tones by combining a wide variety of amps and effects. In recent years, both sound quality and usability have improved significantly, and more and more guitarists are using them not only for recording but also for live performances. In addition to offering sounds that come close to those of real hardware, another major appeal is the ability to keep your setup compact.
In this article, I’ll explain in an easy-to-understand way, drawing on real-world experience, the advantages and disadvantages of using amp simulators live, the equipment you’ll need, recommended plugins, MIDI controllers, and more.
*This article assumes that you already own a laptop (notebook PC).
Contents
- Who Is Suited to Using Plugins Live?
- Benefits of Using Plugins Live
- Equipment Needed for Live Use
- How to Connect Everything
- How to Approach Cab Simulator Settings
- Using a MIDI Switcher
- Points to Keep in Mind for Live Use
- What I Felt After Actually Using It
- Conclusion
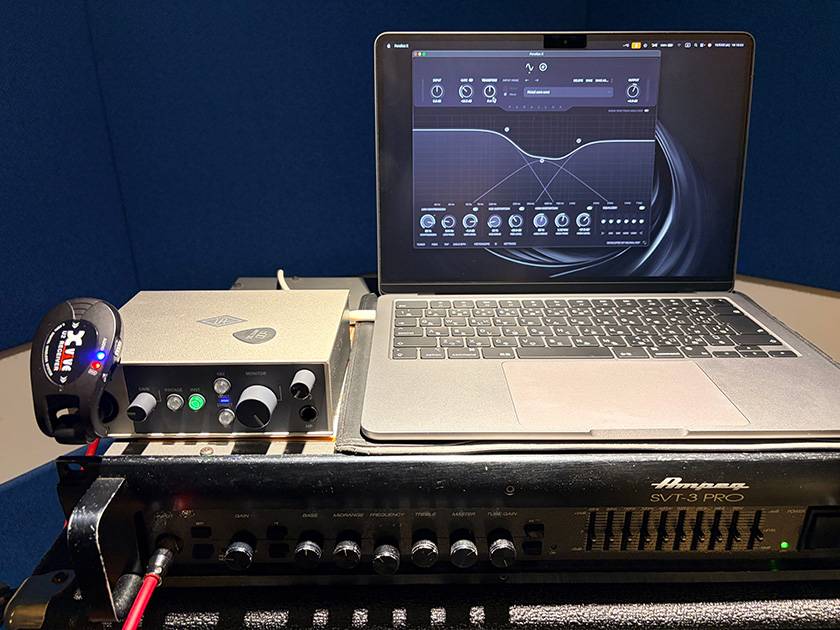
*Actual Usage Example
1. Who Is Suited to Using Plugins Live?
Using plugins live is recommended for those who:
- Already use an amp simulator at home
- Want to reproduce the same sound live as they use at home
- Want to reduce the cost of putting together a collection of effects pedals
- Want to reduce the amount of gear they have to carry
- Want to perform live with a simple equipment setup
2. Benefits of Using Plugins Live
① Affordable to Get Started
Compact effects pedals typically cost around ¥10,000-50,000, while high-end multi-effects units can easily cost well over ¥100,000. In comparison, plugins are software, so they can offer features and sounds that come close to those of real hardware while remaining relatively affordable. Of course, the cost of the PC is not included, but for those who already own a computer, plugins can be considered a cost-effective option.
② Reduce the Amount of Gear and Simplify Your Power Setup
With a conventional guitar system, you need to connect multiple pieces of equipment, from the guitar to the effects pedals and then to the amplifier. When using plugins, on the other hand, you can operate with a simple setup centered around a PC and an audio interface, significantly reducing the amount of gear you need to carry.
In addition, many audio interfaces support USB bus power, so unless you add effects pedals or other equipment, you don’t need to secure an additional power supply. This makes setup easier even at live venues or studios with limited power outlets, while also keeping the cabling neat and organized.
③ Bring Your Home Tone to the Stage
Because you can use the presets you’ve carefully created at home directly for live performances, there is less variation in your sound caused by differences in the environment. Another major advantage is that it can reduce the frustration of thinking, “It sounded great at home, but somehow it sounds different live...” Many plugins also allow you to manage presets in much the same way as you would with a multi-effects unit. Since you can operate them visually on a PC, you have greater freedom when creating tones, while making it easier to modify and manage your sounds later on.
3. Equipment Needed for Live Use
① Amp Simulator
This is the software at the heart of your tone setup. Here, I’ll introduce a few that I’ve actually used, as well as some that I’m interested in.
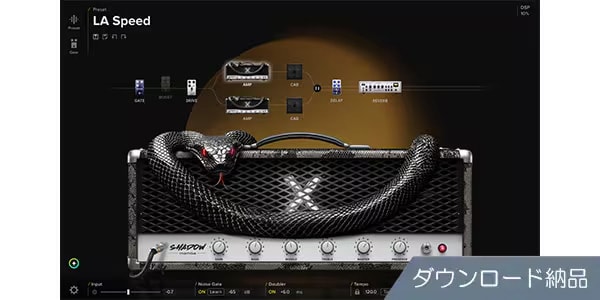
This is a new-generation tool that follows in the footsteps of the original BIAS FX. It offers an extremely high degree of flexibility for tone shaping, allowing you to create a wide variety of sounds. I spent quite a lot of time experimenting with the previous BIAS FX 2 as well, and it really makes the hours disappear.
IK MULTIMEDIA / AmpliTube 5 MAX v2
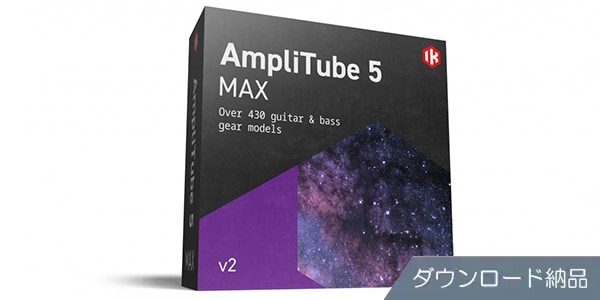
A classic in the AmpliTube Series. It includes a wealth of gear models, and its familiar UI and intuitive operation are also appealing. It’s perfect for anyone who wants to try out a wide variety of amps and effects.
Universal Audio / Paradise Guitar Studio
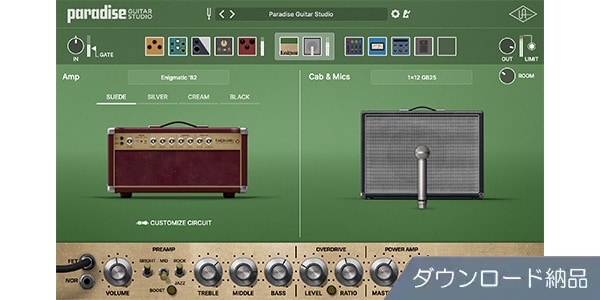
A guitar plugin that brings together UAD’s technology. It recreates a studio environment complete with amps, cabinets, and effects, making it easy to achieve high-quality guitar sounds. I haven’t used it yet, but it’s definitely something I’m very interested in.
② Audio Interface
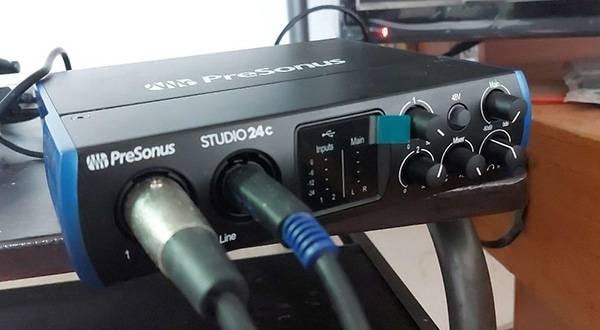
This is the equipment used to bring the guitar signal into your PC. For live use, compact and reliable models are recommended.
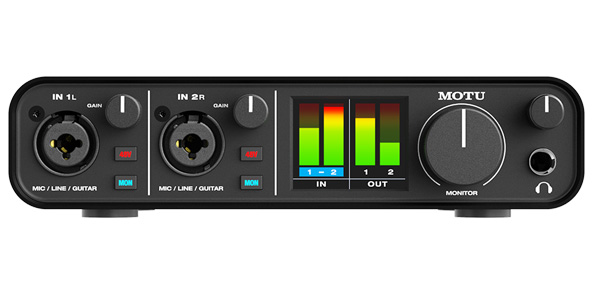
One of the standard models. I own the M4 from the same series, and its highly visible input/output meters are also useful for identifying problems during a live performance.
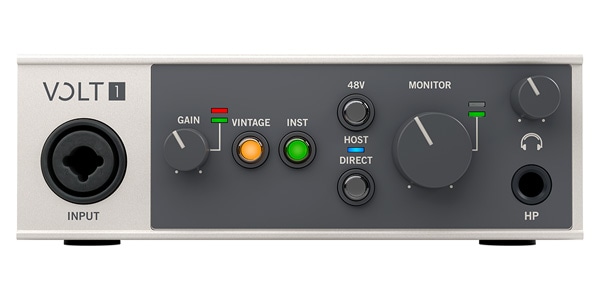
A compact and portable model with an appealing design. It also features a vintage preamp mode. Despite its small size, it has all the essential functions you need.
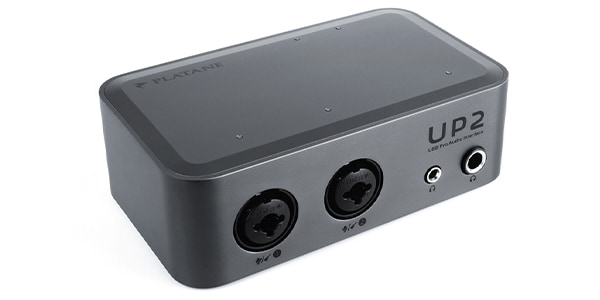
A very compact new product. Its sound quality is surprisingly high for its size, making it an audio interface that can truly be described as ideal for minimalists.
③ MIDI Switcher (When You Want to Change Tones During a Song)
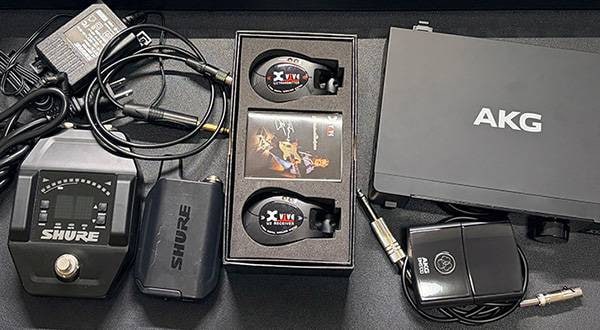
This is equipment used to switch tones during a live performance. Choosing a wireless-compatible model can also reduce the amount of cabling around your feet.
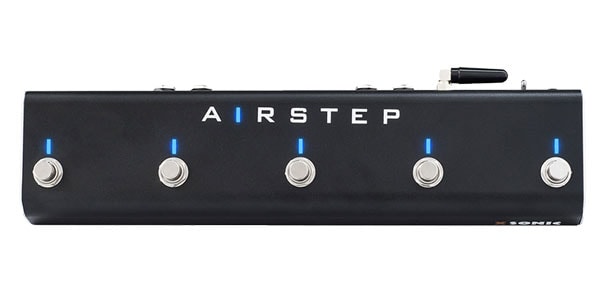
A highly convenient MIDI device that can be flexibly configured from an app. In addition to MIDI, it can also be assigned to control keyboard operations on a PC. It is rechargeable and has excellent battery life, making it an excellent choice for live use.

Despite its compact size, it can store a large number of MIDI settings. Recommended for those who prioritize a small footprint.
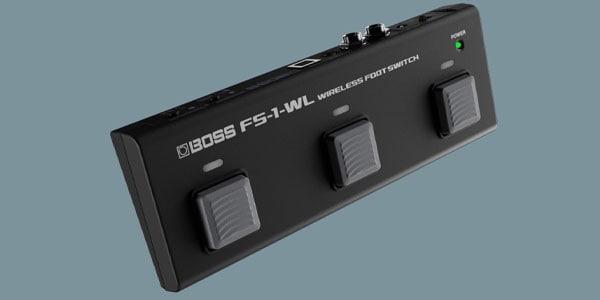
A solidly built wireless footswitch with the reliability you would expect from BOSS. Its ease of stepping on and operating is also a strong point.
④ Cables
- Instrument Cables
- USB Cables
Cables are an often-overlooked part of the setup, but they can easily become a source of problems. To prevent cable breaks and connection issues during live performances, it is a good idea to choose products that are as reliable as possible and keep spares on hand as well.
4. How to Connect Everything
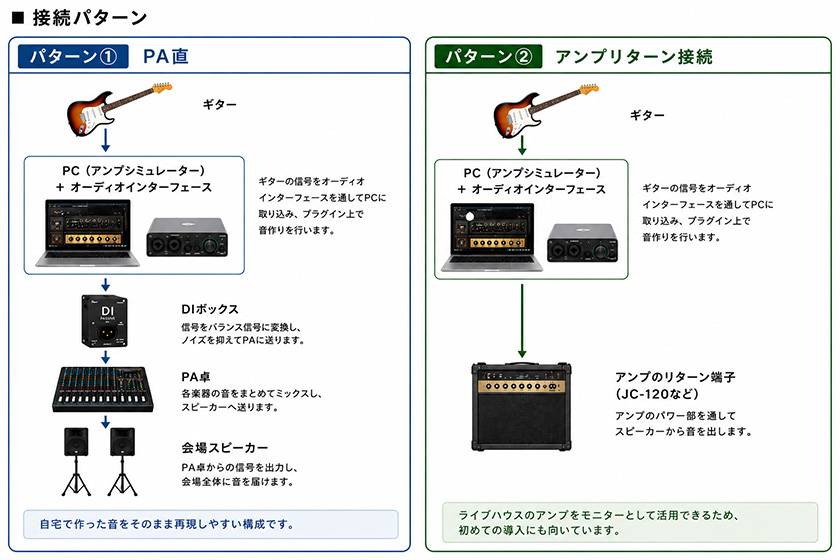
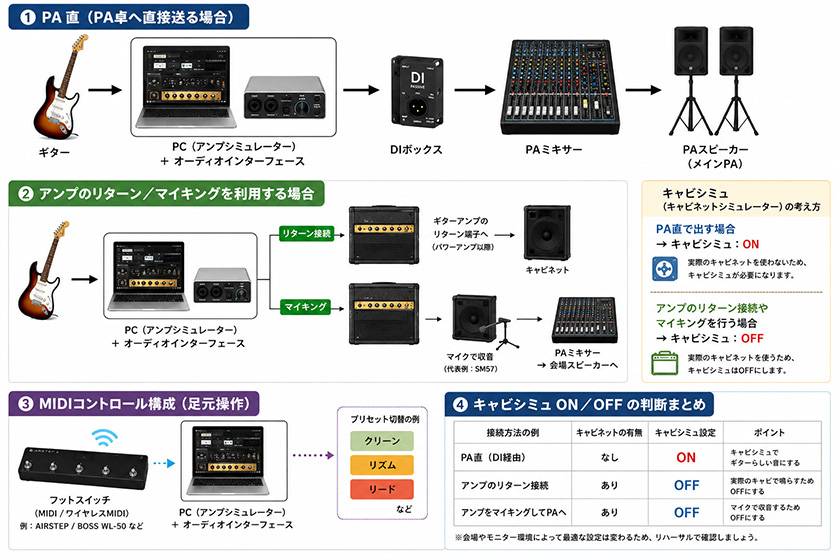
There are two typical setups.
Setup① Direct to PA
Guitar → Audio Interface + PC (Amp Simulator) → DI Box → PA Mixer → Venue Speakers
This setup makes it easy to reproduce the same sound you created at home.
Setup② Connecting to an Amp’s Return
Guitar → Audio Interface + PC (Amp Simulator) → Amp’s Return Input (Marshall, JC-120, etc.) → Mic’d to PA Mixer
Since you can use the live venue’s amplifier as both a monitor and speaker, this setup is also recommended for those trying this approach for the first time.
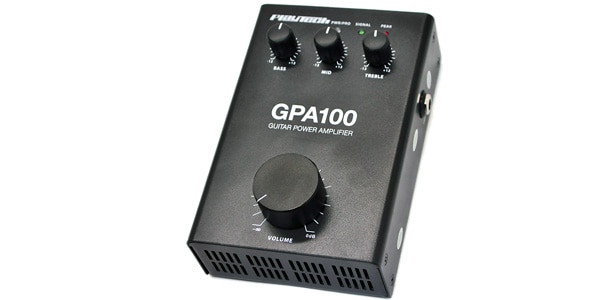
If you want to use your own power amp, the following product is also recommended:
PLAYTECH / GPA-100 Pedal-Type Power Amplifier
⇒ Related Article: Recommended Power Amps for Guitarists
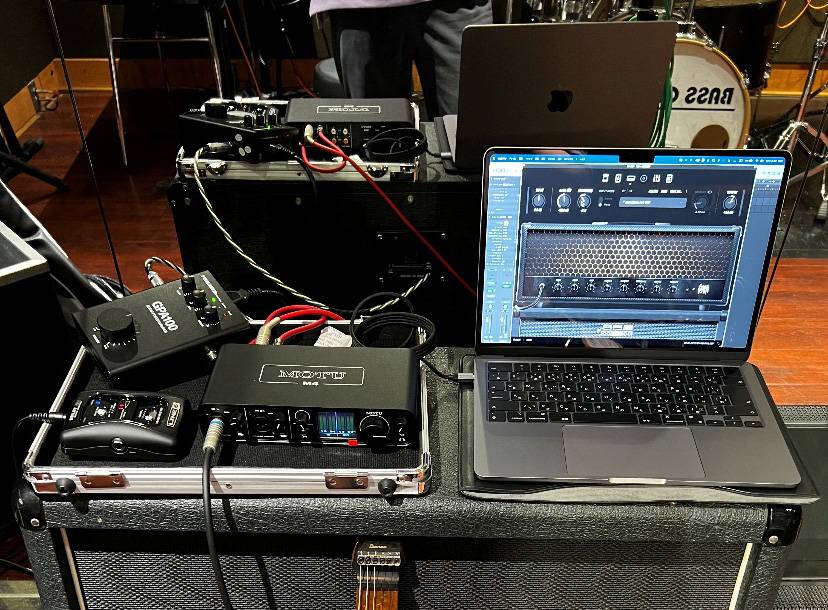
5. How to Approach Cab Simulator Settings (For Advanced Users)
When Connecting Directly to the PA
Turn the cabinet simulator ON. Since there is no physical cabinet in the signal chain, it plays an important role in creating a natural guitar sound.
I have also tried connecting directly to a PA, and while it has the advantage of allowing you to reproduce your home tone as-is, I felt that it can take some time to get used to the monitoring environment depending on the venue. For that reason, if you are trying this setup for the first time, I recommend starting with an amp return connection.
When Connecting to an Amp’s Return
Turn the cabinet simulator OFF. Since the signal passes through a real speaker cabinet, applying cabinet simulation as well can result in an unnatural sound.
(Diagram)
6. Using a MIDI Switcher
By using one of the MIDI switchers introduced earlier, you can switch between tones such as clean, rhythm, and lead from your feet during a song.
Recent wireless MIDI switchers have virtually no noticeable latency and can also reduce the amount of cabling, making them an excellent match for live performances.
Many amp simulators support MIDI control, allowing you to switch presets and turn effects ON/OFF using MIDI CC and Program Change.
A detailed explanation of MIDI would make this article quite long, so I’ll leave that for another time.
7. Points to Keep in Mind for Live Use
① Latency
Audio latency can be adjusted by changing the buffer size. A smaller buffer reduces latency, but it also puts a greater load on the PC.
② PC Notification Sounds
This is an easily overlooked point. Make sure to check your settings beforehand so that notification sounds don’t play during the live performance.
③ Backup
To prepare for unexpected problems, it is a good idea to have spare cables and alternative options ready.
④ Battery
Be careful not to let your PC’s battery run out.
If it is difficult to secure a power supply, a high-output portable power bank is recommended.
8. What I Felt After Actually Using It
When I was a student, I performed at numerous live shows with my band club using this setup.
What I particularly liked was the simplicity of the setup and the consistency of the tone. Being able to bring the exact sound I had created at home to a live performance was extremely appealing.
On the other hand, I also had some difficulty dealing with the cab simulator and configuring MIDI. Depending on the environment, fine adjustments were sometimes necessary. When performing at small venues on a club scale, even with a monitor feed from a floor monitor, nothing quite compares to the sound pressure from a physical cabinet and the comfort of monitoring it provides.
Even so, once you have the system set up, it is more than practical enough, and I still feel that it is a strong option today.
9. Conclusion
As I have explained throughout this article, amp simulators can be used effectively for live performances as well.
They are highly recommended, especially for those who:
- Want to keep equipment costs down
- Want to use the same sound live as they do at home
- Want to perform with a simple system
- Want to put a PC on top of their amp and look a little cool
By making good use of an audio interface and a MIDI switcher, you can build an affordable, compact, and comfortable live setup with sound that can rival high-end multi-effects units. So, if you’re interested, why not give it a try!















![[Professional favorite plug-in guitar amp simulator] GUITAR RIG 5 PRO](/contents/uploads/thumbs/2/2020/3/20200323_2_9694_1.jpg)
 BOSS ワイヤレス特集
 厳選!人気のおすすめオーディオインターフェイス特集
 MOTU オーディオインターフェイス
 IK Multimedia iRig特集
 機能で選ぶ オーディオインターフェイス
 エフェクターのつなぎ方
 Discount Sale
 Outlet
 New Arrivals
 Podcast (streaming)
 Headphones / Earphones
 Microphones
 Wireless Equipment
 Speakers
 Power Amps
 Mixers
 Processors
 Portable PA Systems
 Recorders
 Karaoke
 Guitars
 Basses
 Ukuleles
 Drums & Percussion
 Pianos / Synthesizers
 Wind Instruments
 Stringed Instruments
 Japanese Instruments
 Harmonicas, Other
 Software
 DJ & VJ
 Stands
 Cables & Connectors
 Racks & Cases
 Lighting
 Stage & Truss
 Video Equipment
 PC PERIPHERALS
 Power Supplies
 Studio Furniture
 Household Items, Other
 Alcoholic Beverages