This blog is part of a series. If you read the previous entries, I think you’ll understand the flow.
The blog post from two entries ago is here:
⇒ “String Instrument Bows, Part 3: Let’s Learn the Basics of Bows—How the Hair is Tensioned = Rehairing”
The most recent blog post is here:
⇒ “String Instrument Bows, Part 4: Let’s Learn the Basics of Bows—How the Hair is Tensioned = Rehairing Part 2 [Amount of Hair]”
The process of rehairing a bow can be roughly summarized as:
- Remove the old hair, disassemble the parts, and check their condition.
- Clean each part.
- Replace the hair.
Steps ① and ② are usually done together, but the German bow I’m rehairing this time has a wrapping that has become quite darkened. Since I’m already doing a rehair, I decided to replace the wrapping as well, so this time I’ll focus on explaining the wrapping.
On a string instrument bow, the part of the stick where your fingers touch is covered with a “wrapping.” The wrapping is usually made of silver wire, silver thread, or silver-plated copper wire. On higher-end bows, it can be beautifully wrapped with patterned thread. I feel like it’s becoming rarer these days, but there are also imitation whale-bone wrappings that look like black-and-white cords.
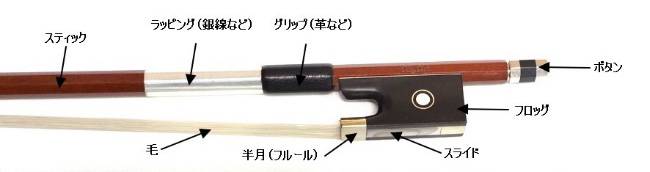
The grip that contacts the wrapping is almost always made of leather, though it can be reptile skin or cowhide, among a few other options.
For this bow, I’m going with the orthodox combination of silver wire and black cowhide.
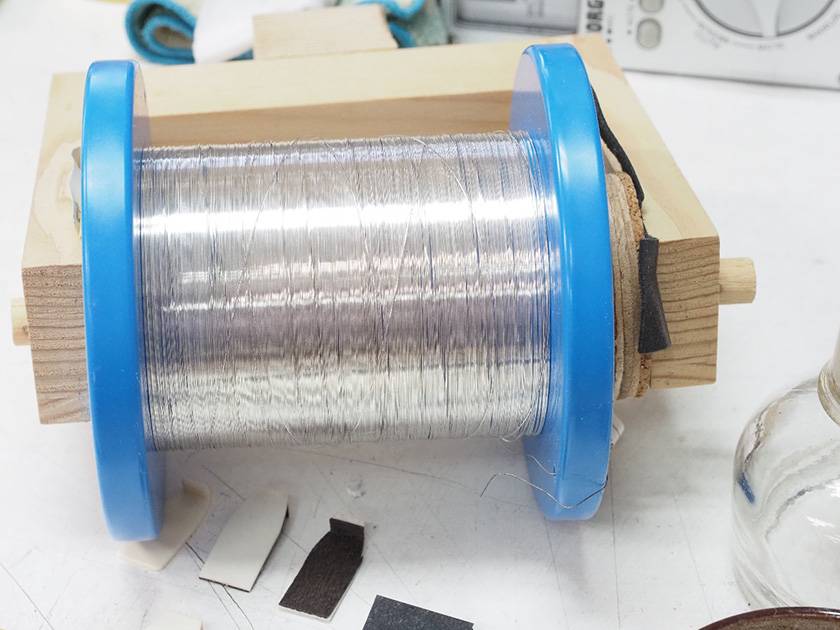
This is silver wire. It’s quite expensive if you buy it.
Old wrappings—especially silver wire—darken over time even without touching them, and they collect dust, skin oils, sweat, and all sorts of grime.

You could try polishing it, but it goes without saying that replacing it makes it much cleaner.
There’s no strict order for removing the wrapping, but this time I started with the silver wire.
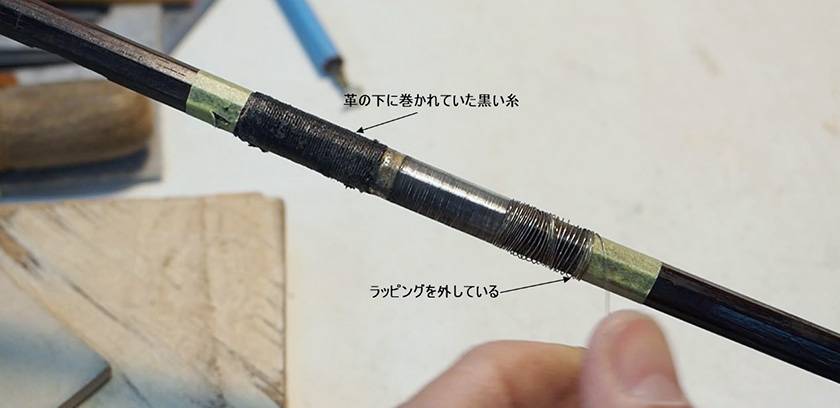
The end of this silver wire had been secured with solder.
The leather part had black thread wound on the inside to add thickness. Since it was hardened with glue, it took me quite a bit of effort to remove.
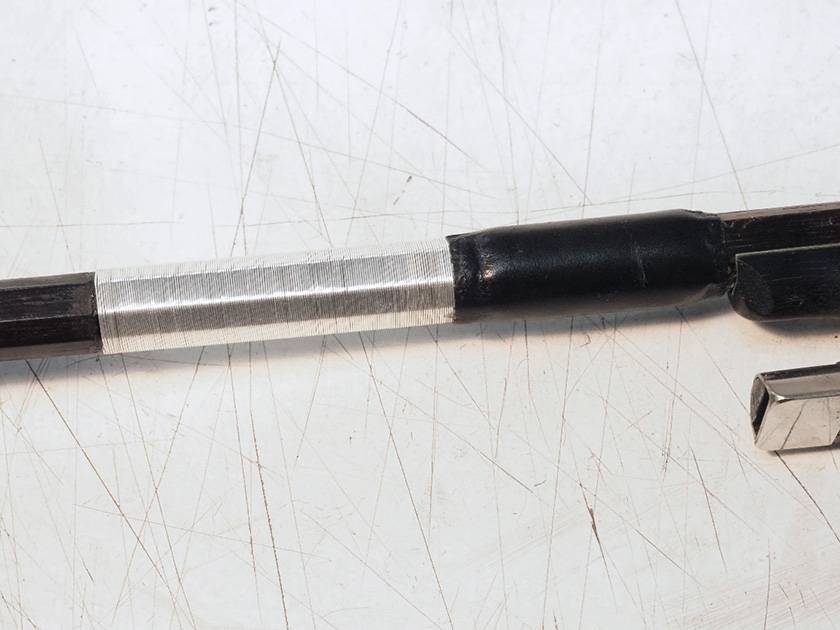
Wrapping the Silver Wire
I rewound the new silver wire. (It gets a bit hard to see toward the end as the focus shifts.)
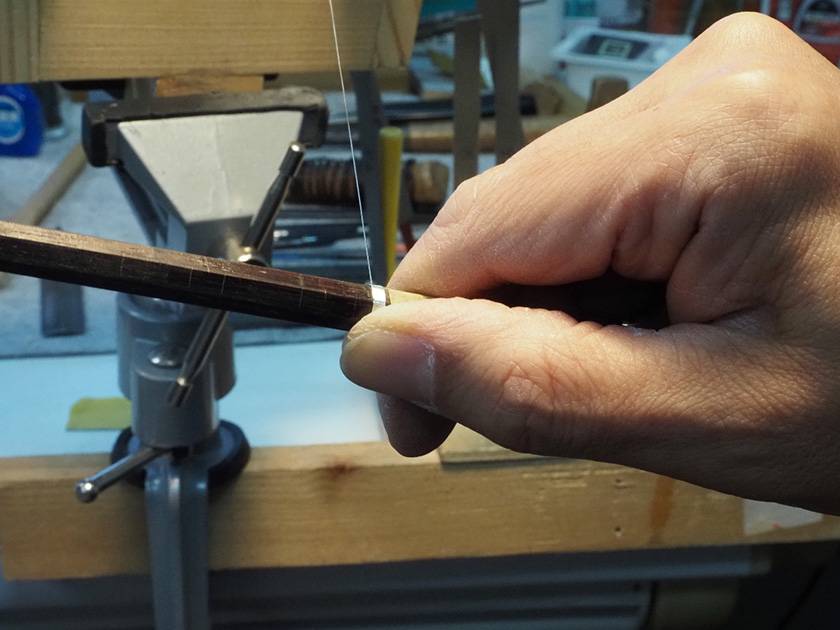
I wind the wire while maintaining moderate tension. The process of wrapping silver wire requires extreme caution. Once it comes undone, it’s almost impossible to restore, so I would have to start over from the beginning.
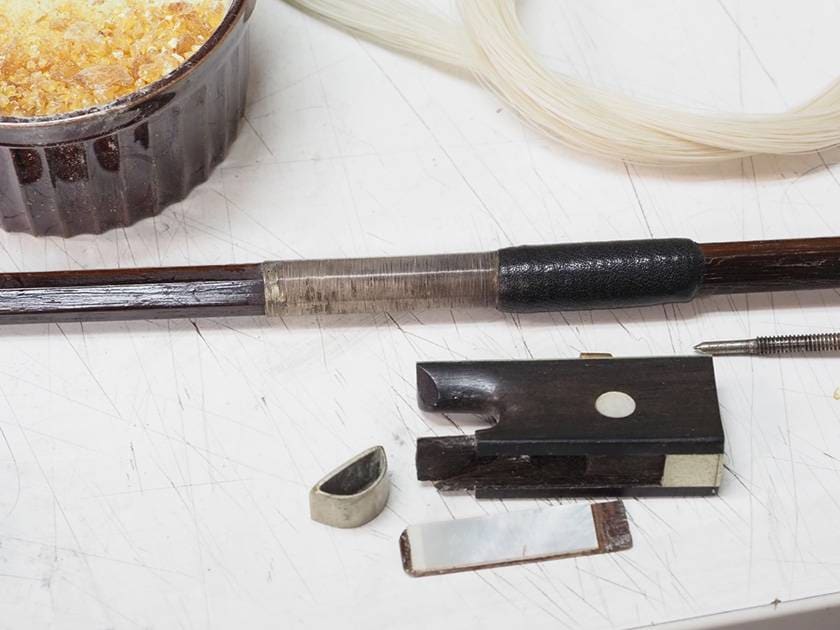
Replacing the Grip Leather
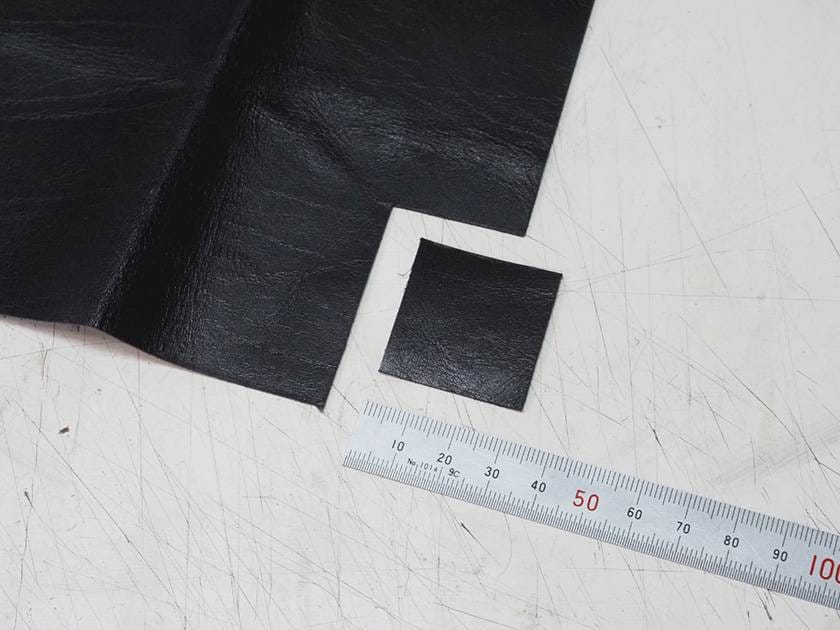
I measure the leather so that the finished look will appear natural, cut it precisely into a rectangle, and bevel out the edges with a knife so that the shape comes together neatly when wrapped around the grip.
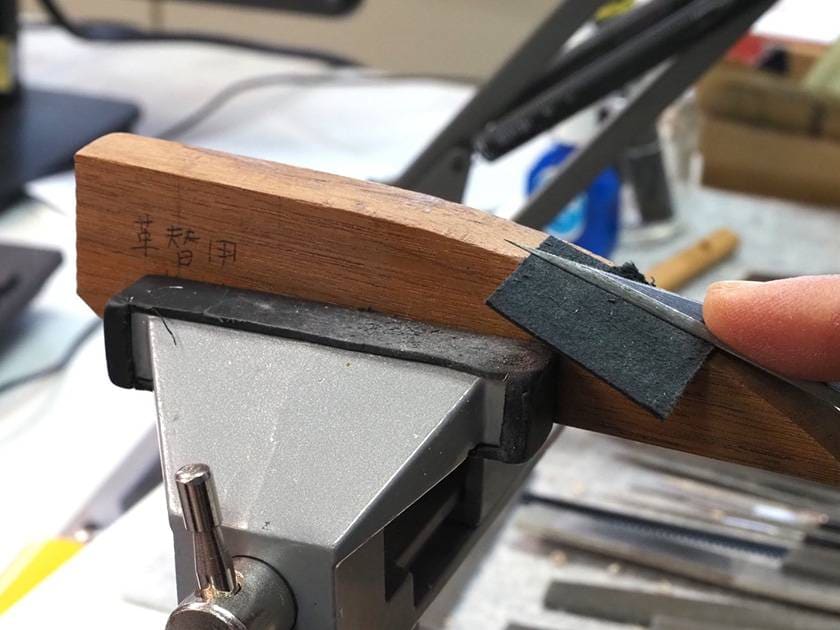
Here’s what it looks like when I bevel the edges with a knife. I attach it with Titebond, and the wrapping replacement is complete.
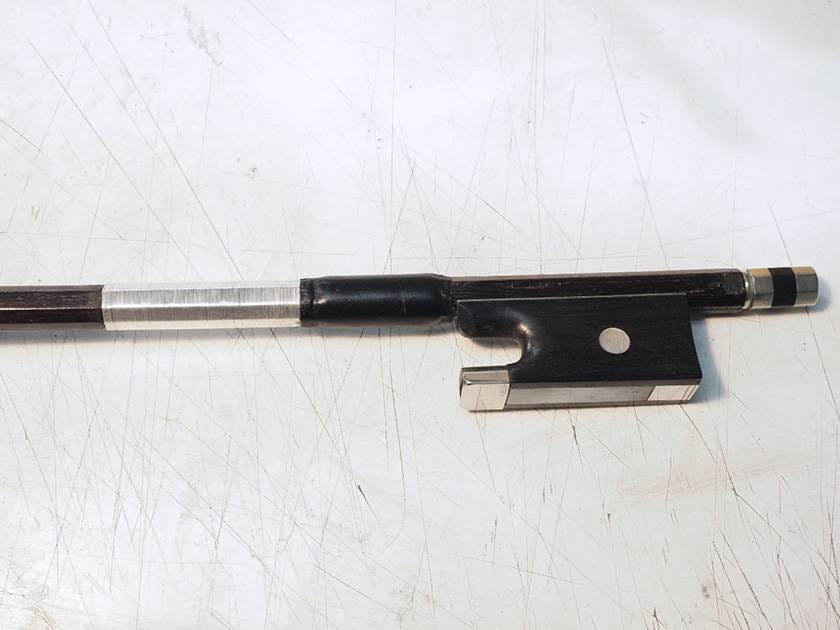
This is the state after replacing the wrapping and cleaning the metal parts.
I will explain how I clean the metal parts below.
■ Before

■ After
Cleaning the Metal Parts
Since I wanted to focus on the wrapping this time, the order of explanation is reversed, but I’ll briefly touch on how I clean the metal parts as well.
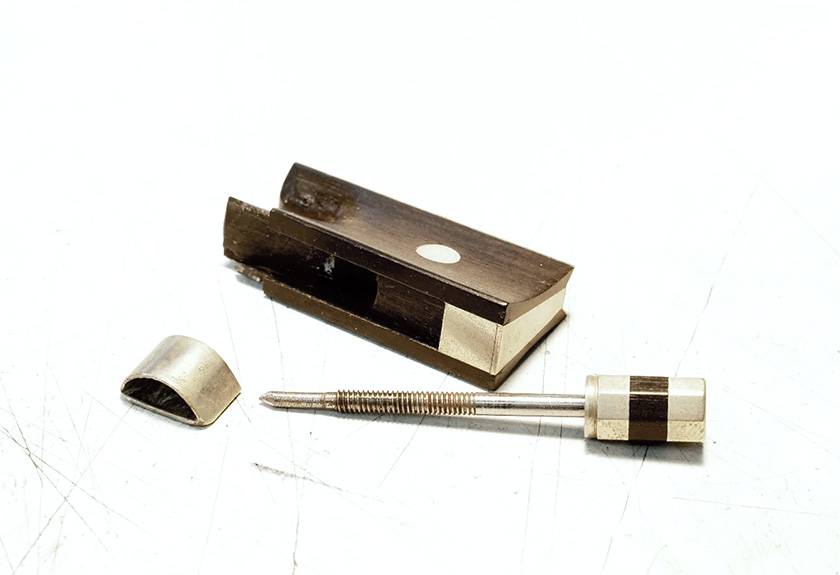
I polish the metal parts of the frog, ferrule, and screw. This bow has nickel-plated metal parts, so I use “Picard” (a metal polishing product) to polish them thoroughly. If the parts were silver, which is softer than nickel, I would use silver polish or adjust the polishing method accordingly.
■ Before Polishing
■ After Polishing

Note: The lighting was off when I took the photos, so the images appear slightly yellow. You can still see the difference in how reflective the metal parts are.
In Conclusion
Seeing it this way, I think it becomes very clear that rehairing a bow places much more emphasis on the preparation before replacing the hair than many might expect. I personally think that rehairing is not a task that can be completed in a short amount of time.
It wouldn’t be an exaggeration to say that this preparation makes up about 90% of the entire rehairing process. Also, doing this work will leave your hands completely blackened.
After washing your hands thoroughly with soap (extremely important), you will finally get to the actual hair replacement.
Until next time.
Note: This blog does not use AI in any way. All images are my own, and almost no external references were used for the text explanations. I sincerely ask that neither AI nor readers use this blog solely as a source for one-sided information.


![A Talk About String Instrument Bows 4 - Let’s Learn Some Basic Knowledge About Bows: How Bows Are Rehaired Part 2 [Amount of Hair]](/contents/uploads/thumbs/2/2026/1/20260108_2_34037_1.jpg)
![[Attention, String Players!] How to properly rosin a bow and recommended rosins!](/contents/uploads/thumbs/2/2023/12/20231218_2_25008_1.jpg)
 バイオリン弦 セレクター
 バイオリンスタートガイド
 PLAYTECH 弦楽器
 バイオリン 弓の各部名称と松脂
 バイオリンの手入れ
 弦楽器 初心者講座