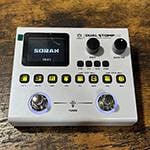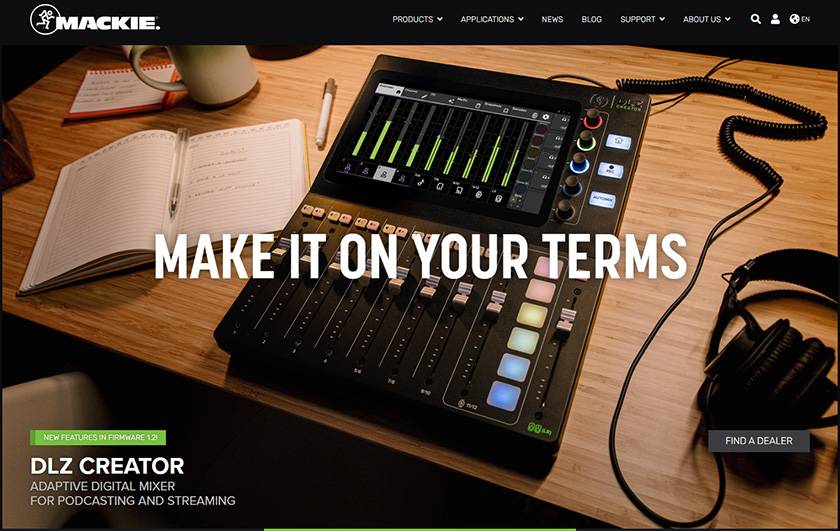
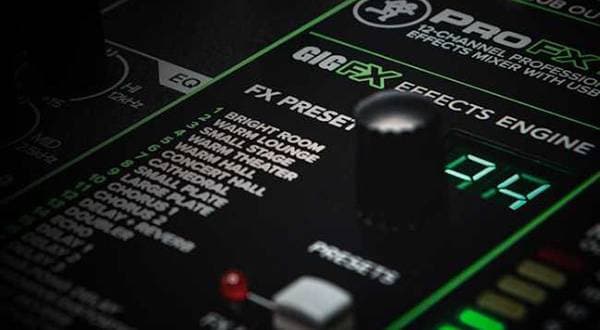
Among the many series of MACKIE mixers, I’ve long been curious about the streaming-oriented digital mixer DLZ CREATOR, so I wanted to jump right in and review what it can do compared to PA mixers.
My personal take is that if you can start without reading the manual, that means it’s easy and beginner-friendly, lol.
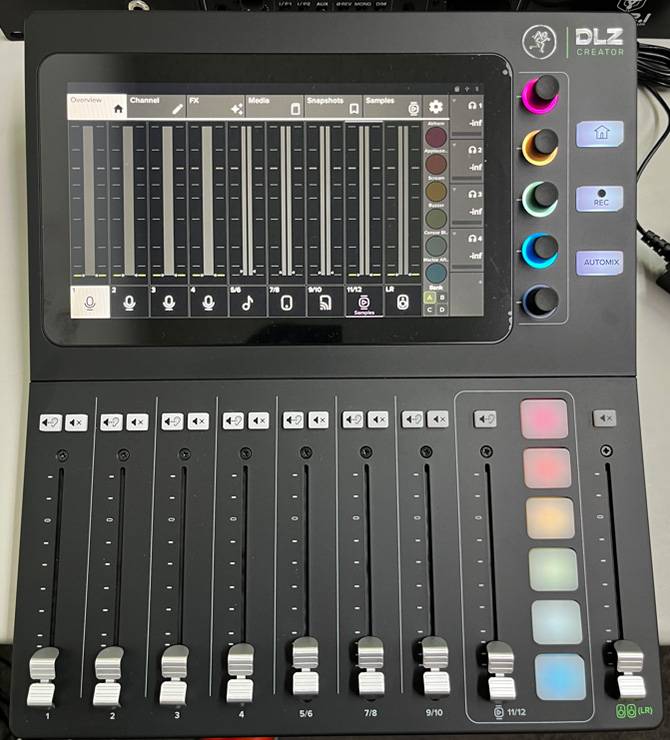
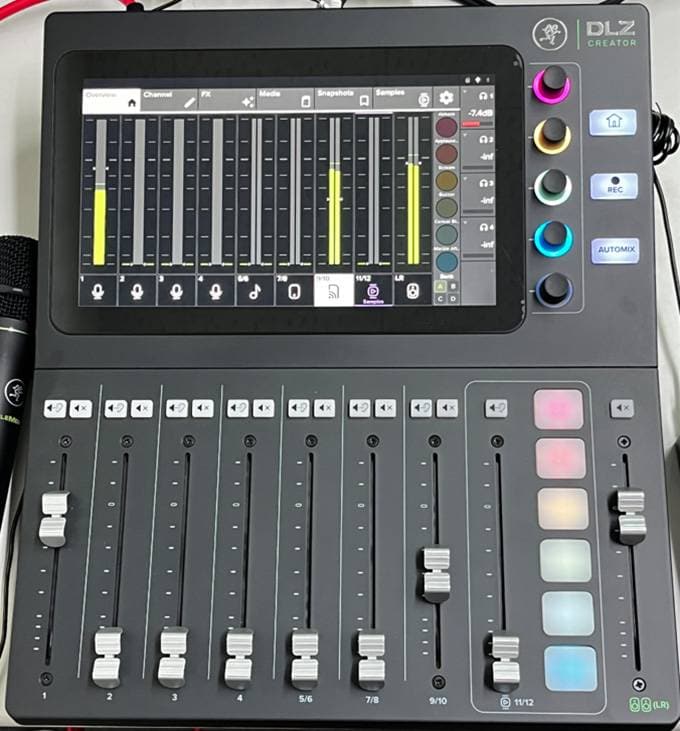
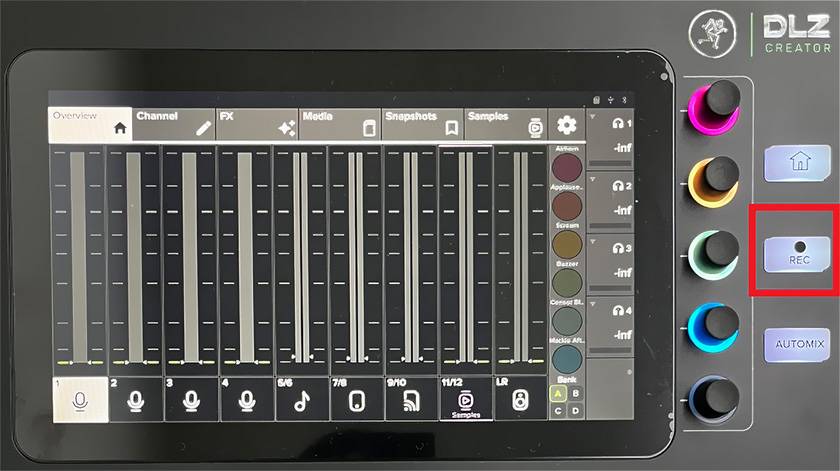
I turned the power switch ON, waited a moment, and the mixer displayed a screen similar to those found on digital PA consoles, with tags to jump to various functions. That part was expected, but I wasn’t sure what the four knobs on the right side of the screen and the vertically-aligned pads next to the main fader were for.
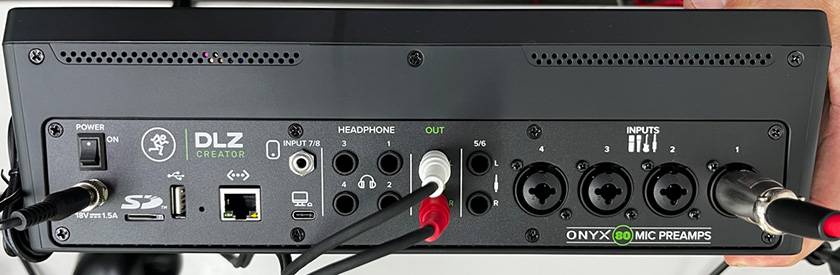
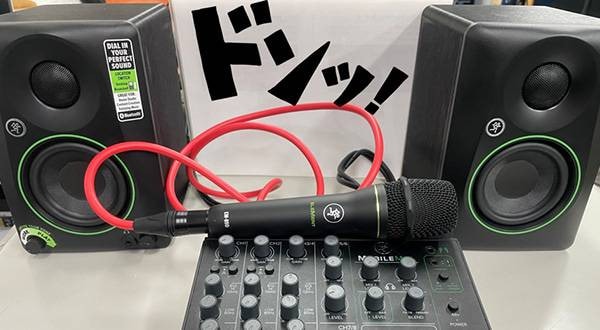
This time I simply connected a microphone to CH1 and connected OUT L/R to speakers.
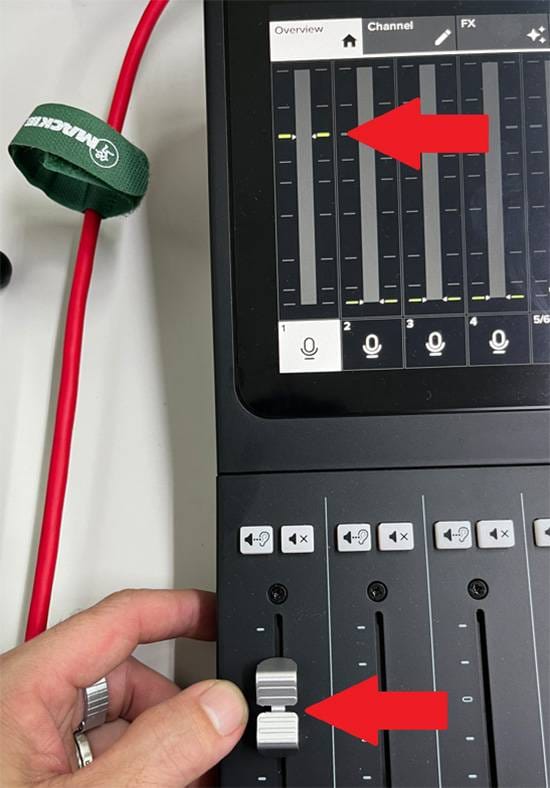
I tried raising the CH1 fader, and to my surprise, the bar on the screen moved in sync. This is typical behavior for digital mixers. However, I couldn’t move the fader by touching the screen.
More importantly, before even touching the fader, I wondered: where do I set the mic gain and EQ?
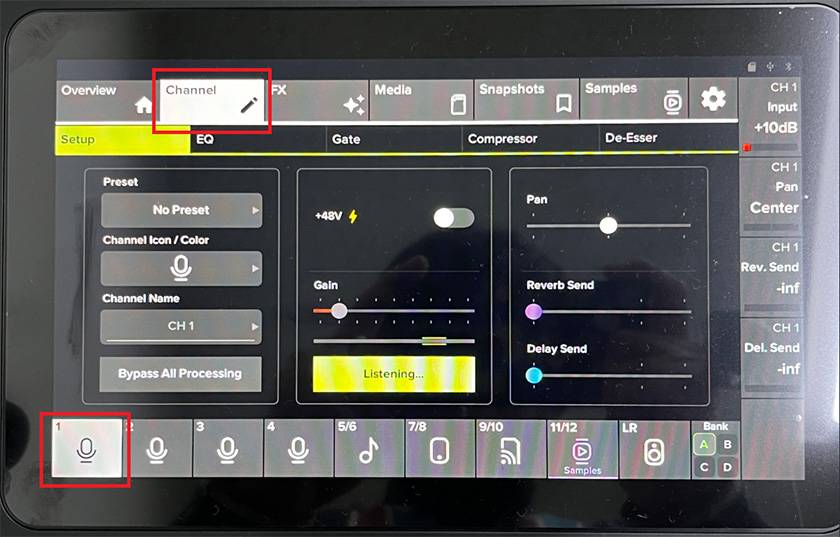
Touching the “Channel” button at the top of the screen takes you to a new screen, and I immediately discovered a very convenient feature!
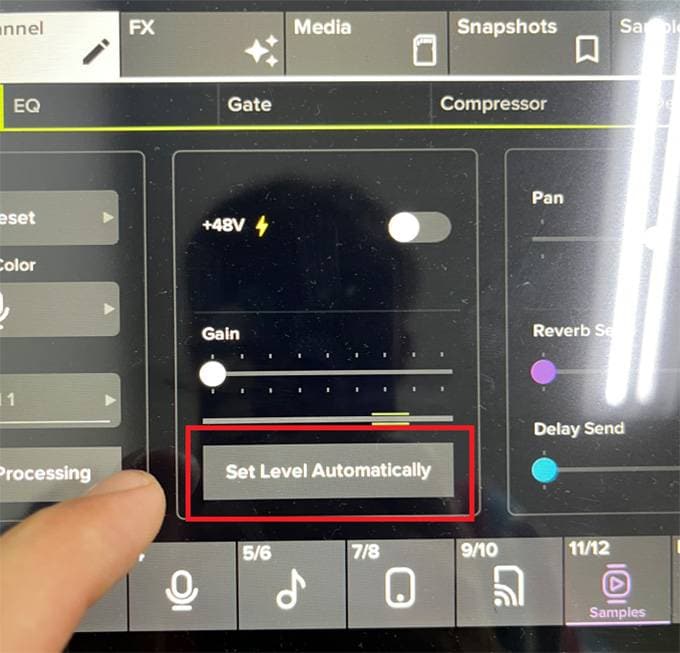
If you’ve ever struggled with what the proper mic gain should be, this is reassuring: just touch this section and speak into the mic for a moment, and it automatically sets an appropriate gain value.
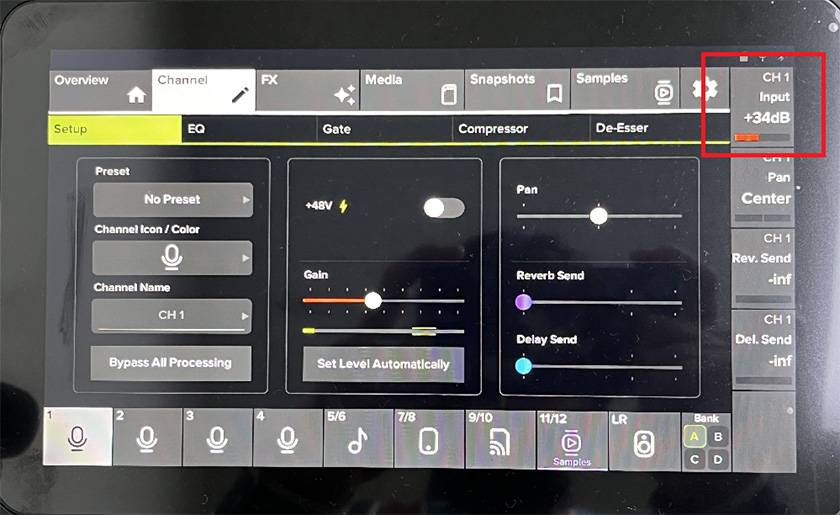
For reference, my speaking voice registered at +34dB.
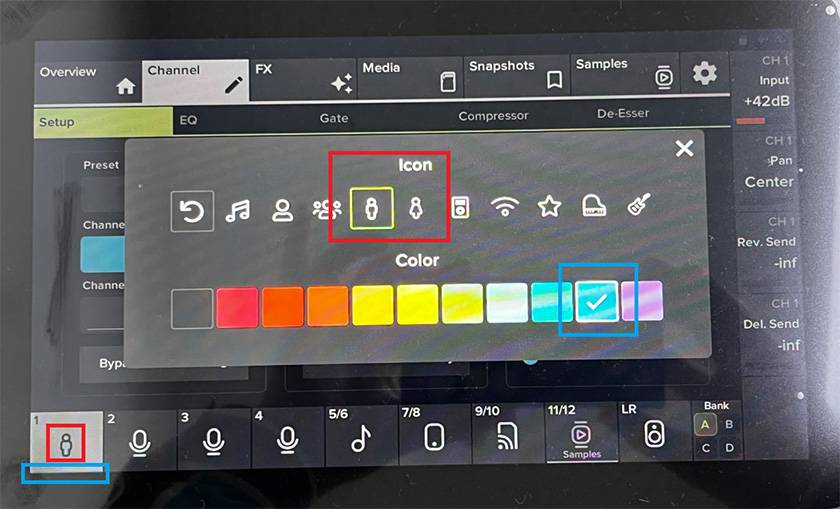
Additionally, you can change each channel’s icon (red frame) and, although it’s hard to see in the image, the color (blue frame) as well. Being able to visually see what kind of device is connected is a thoughtful and helpful touch.
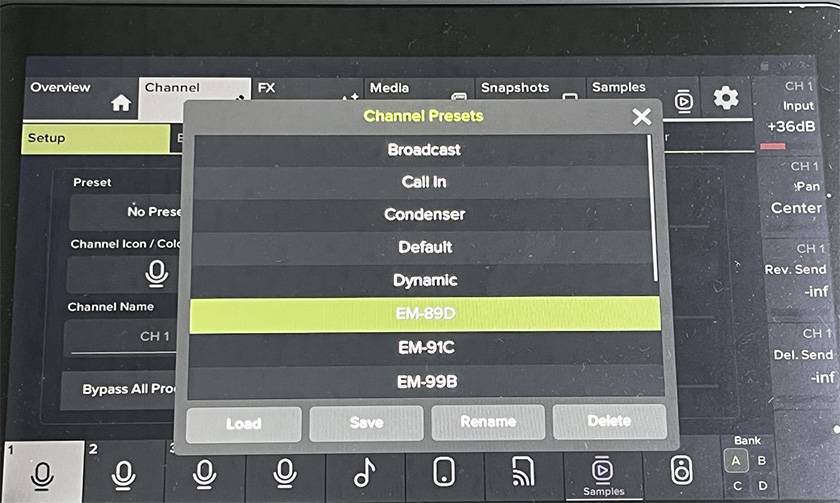
Next, I tapped “Preset.”
A large number of presets are available, and this time I selected MACKIE’s dynamic microphone “EM-89D” and clicked “Load”. Naturally, you’d be curious what changes when a preset is loaded. So, I started by checking the EQ.
Touching the red-framed area on the screen brings up the EQ settings.
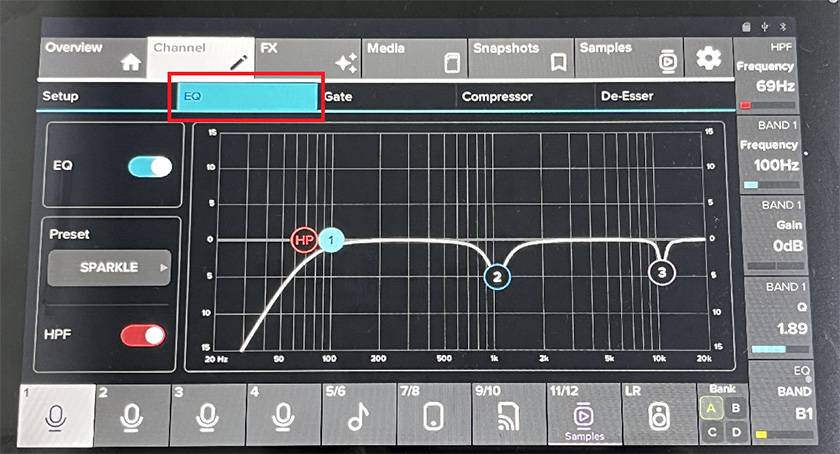
This shows the optimal starting settings for the “EM-89D”! You can adjust the HPF (high-pass filter) and three parametric equalizers (PEQ). With the PEQ, you can fine-tune the frequency, gain, and Q (bandwidth), allowing for adjustments that are difficult to achieve on an analog mixer.
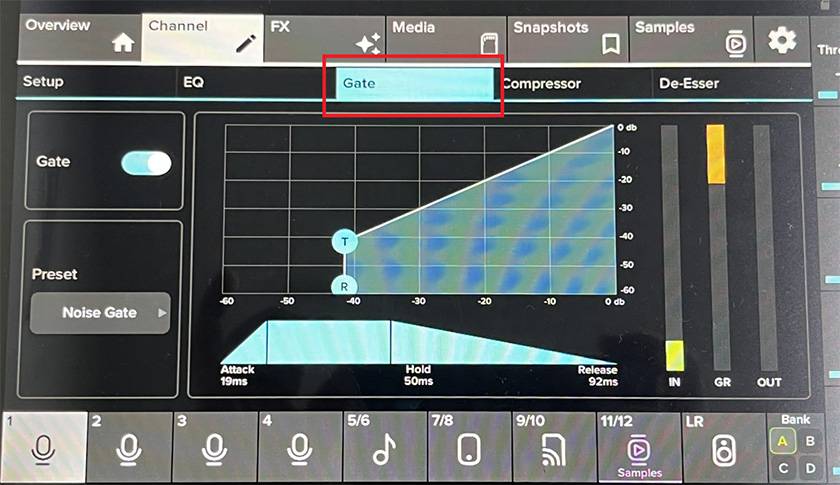
To the right of the EQ is the noise gate. This helps suppress the faint “hiss” noise that can occur when the mic isn’t being used. It’s also useful when using multiple mics with several people, preventing the voices of non-speaking participants from being picked up by other mics.
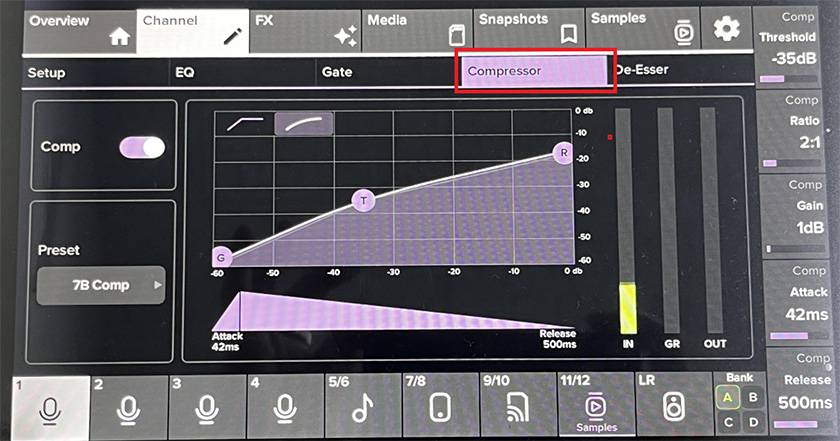
Here’s the compressor screen. You can adjust the standard compressor parameters: threshold, ratio, gain, attack time, and release time. As you change each parameter, the illustration also updates, making it easier to visualize what’s happening. Additionally, there are three presets—Heavy, Light, and Mid—so it’s convenient to start with one of these and then fine-tune to your preference.
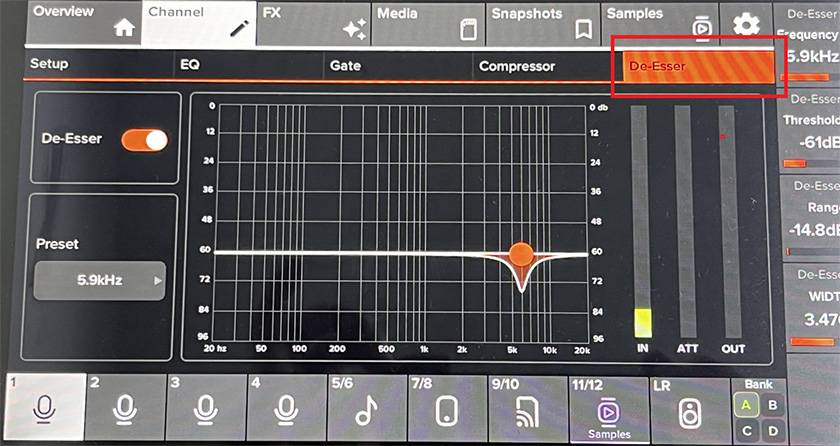
Finally, there’s the de-esser. This effect is primarily used to reduce harsh sibilance, like the “s” sounds in speech or singing. It’s useful for controlling elements that might otherwise be piercing during vocals or announcements.
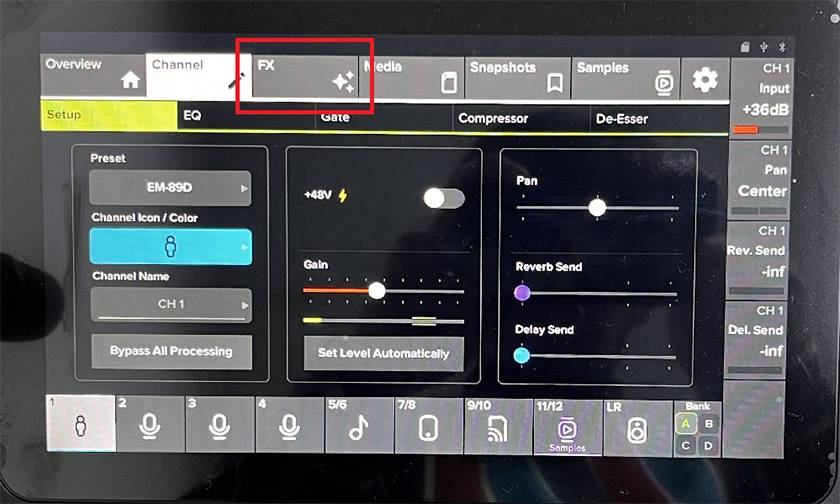
After checking the Channel settings, I moved on to FX (effects).
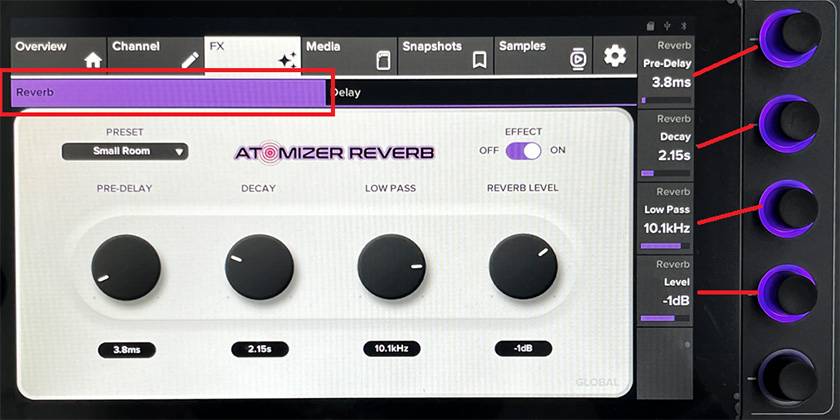
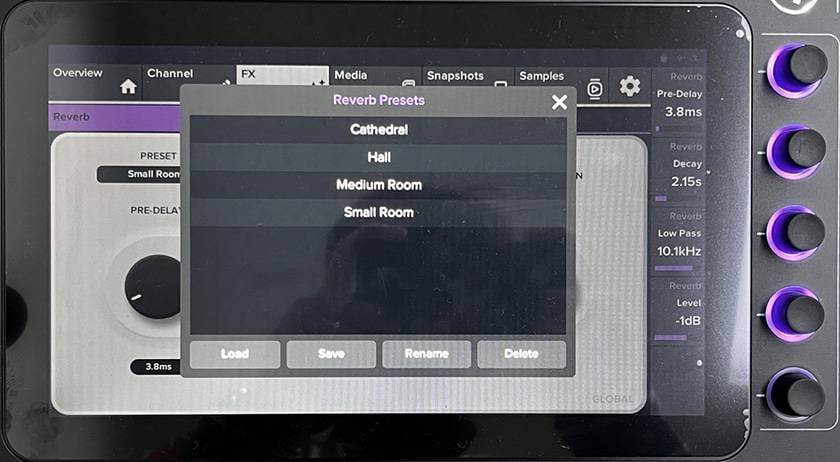
The REVERB is controlled via four parameters, using the vertically-aligned knobs to adjust each one. Since the mixer supports touch input, you can also adjust the knobs by touching the illustration and sliding your finger up or down. When in doubt, using a preset is always helpful!
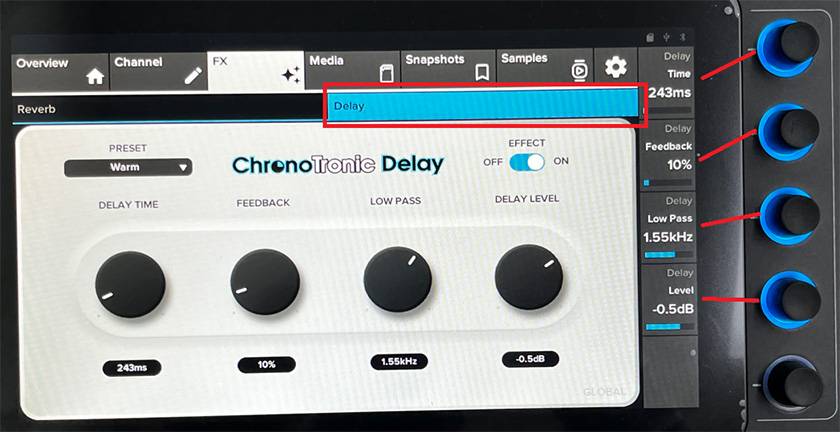
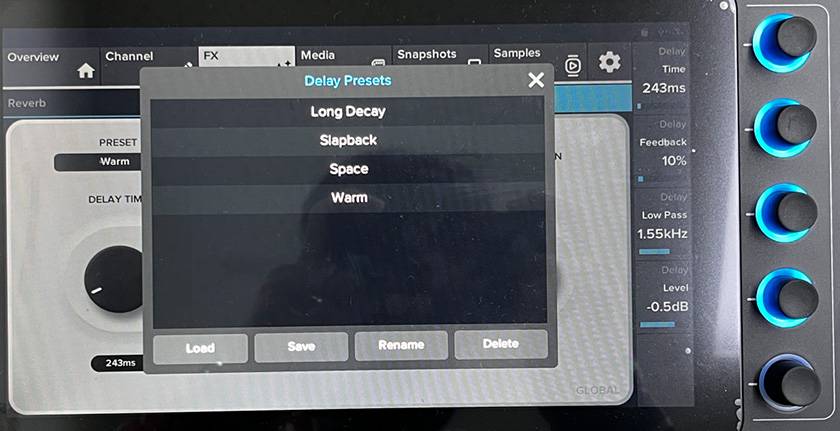
The DELAY works similarly, with four parameters and four presets. Moving each knob clearly changes the effect sound, making it easy to find the exact setting you like.
Next, I tried playing music from a USB memory stick.
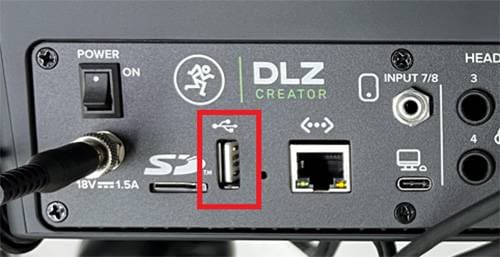
The USB port is located on the back of the unit.
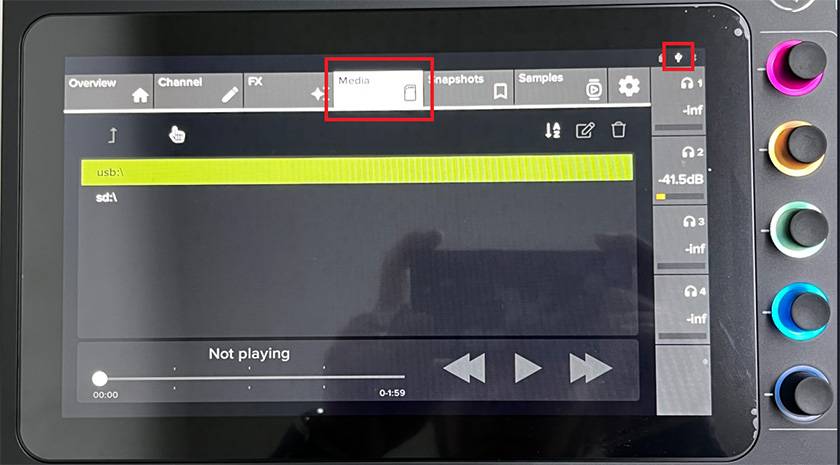
After inserting a USB stick and waiting a moment, the USB icon at the top right of the main screen changed from gray to white. Then, tapping “Media” at the top brought up a screen asking whether to select the USB or SD card, so I tapped USB.。

The track names appeared, and after selecting a song and touching the icon in the red frame, playback started. Everything seemed to be going smoothly until a problem occurred: no sound. The playback meter was moving, the track was playing, and the CH9/10 fader was up… yet still no sound. After messing around with it a little, I found the solution in the channel settings.
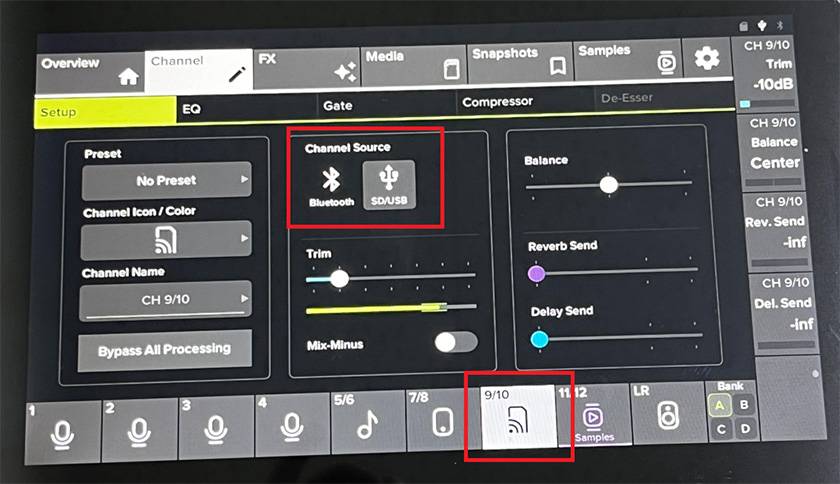
The issue was that the Source in CH9/10’s “Channel → Setup” (red frame) was set to “Bluetooth”. Changing it to “SD/USB” fixed the problem, and sound finally came through the speakers.
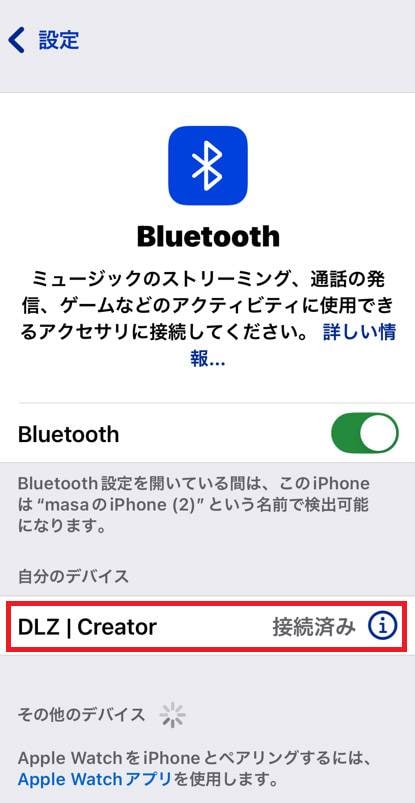
By the way, with Bluetooth, it works like this:
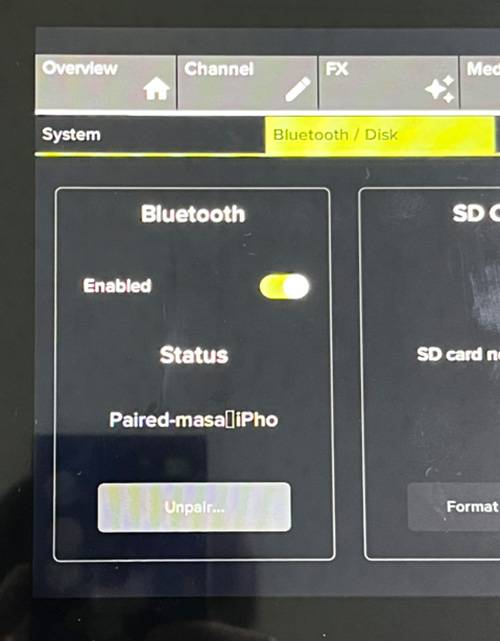
if you set Bluetooth to “Enabled”, “DLZ CREATOR” appears on your smartphone, and tapping it completes the pairing. It’s super simple.
Finally the pads are lighting up!
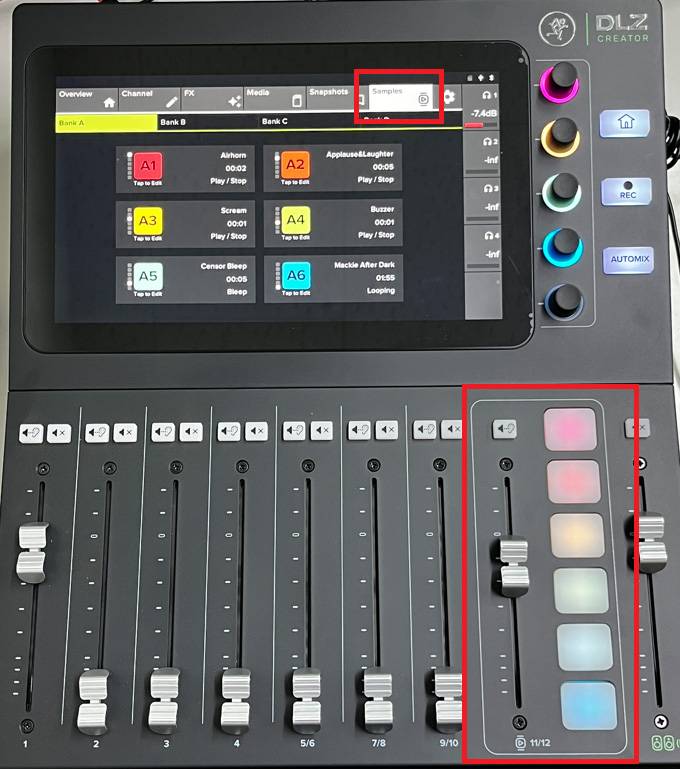
I raised the CH11/12 fader and hit the top pad, and immediately understood its function. This section lets you assign various sound sources to the pads, and by default (Bank A), sounds like horns, claps, and laughter are already preset. They’re just like the ones often seen in live streams.
There are also Banks B, C, and D, so I tapped Bank C to explore further.
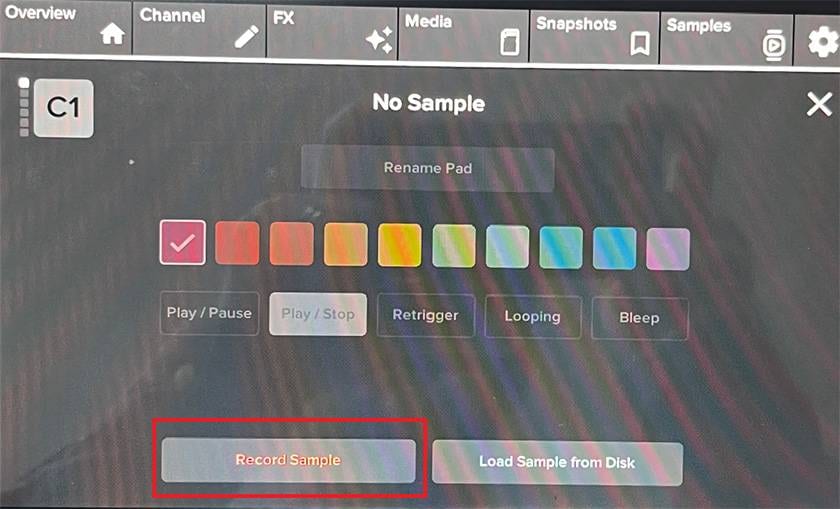
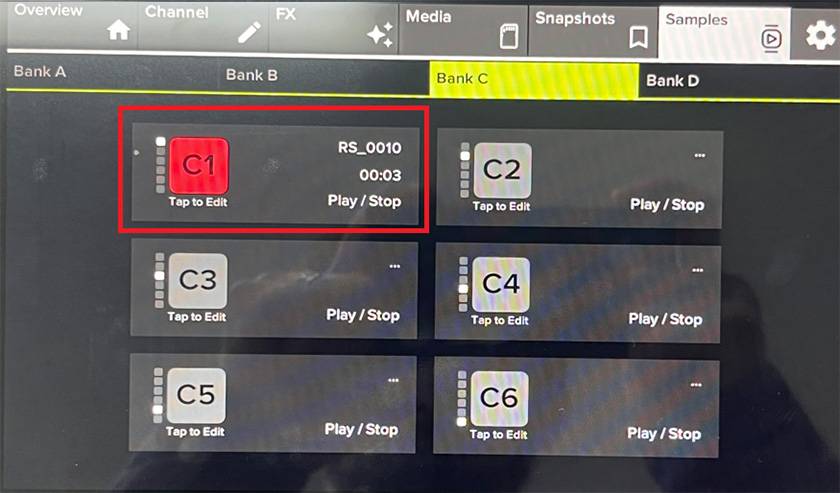
Then, I touched the grayed-out C1 pad and noticed the words “Recording Sample” on the screen.
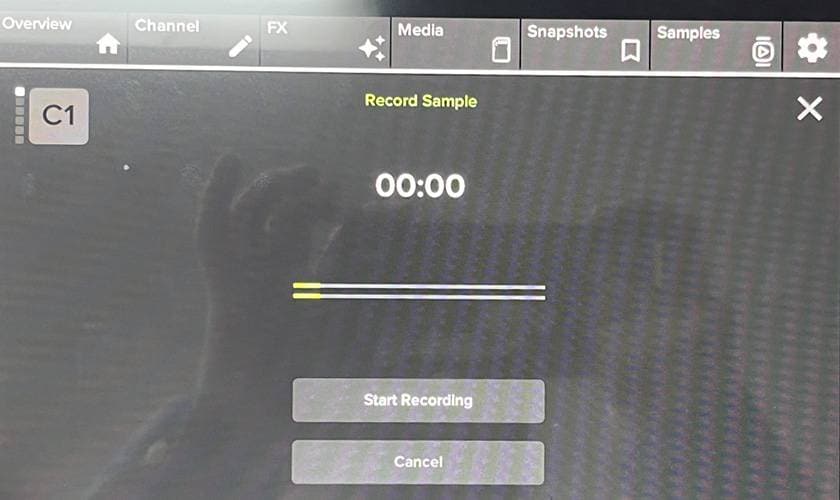
By pressing “Start Recording” and speaking into the microphone connected to Channel 1,
then stopping the recording, I was able to easily assign my own sound to the pad. In this test, I demonstrated creating sounds using devices connected to the mixer, but you can also select “Load Sample from Disk” to assign entire audio files. This makes the pads useful not only for streaming gimmicks but also for applications like theater performances.
It got a bit long, but finally, I was able to record.
Before pressing this REC button, you need to set the recording device and format!
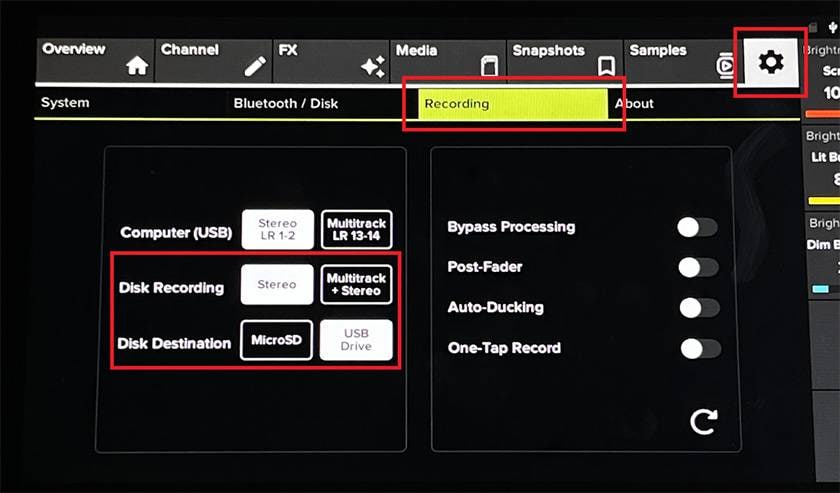
This time, I simply set it to “Stereo Recording to USB Memory”. After pressing the REC button, the screen looked like this.
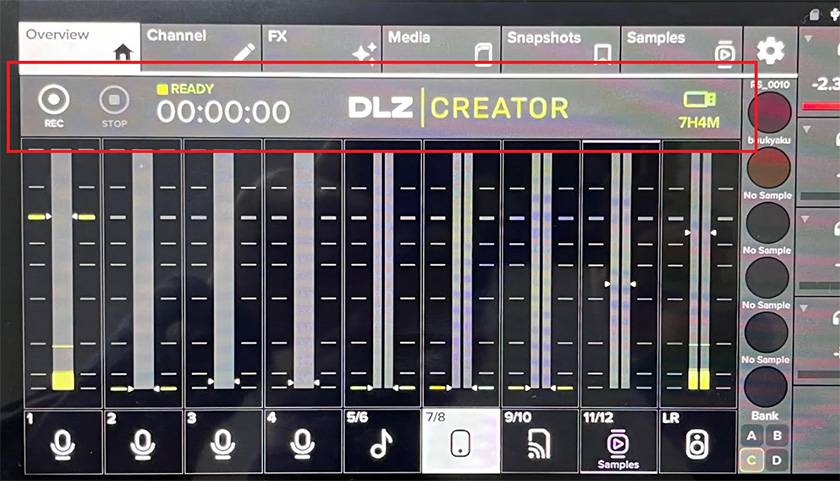
The recording status was displayed at the top of the screen.
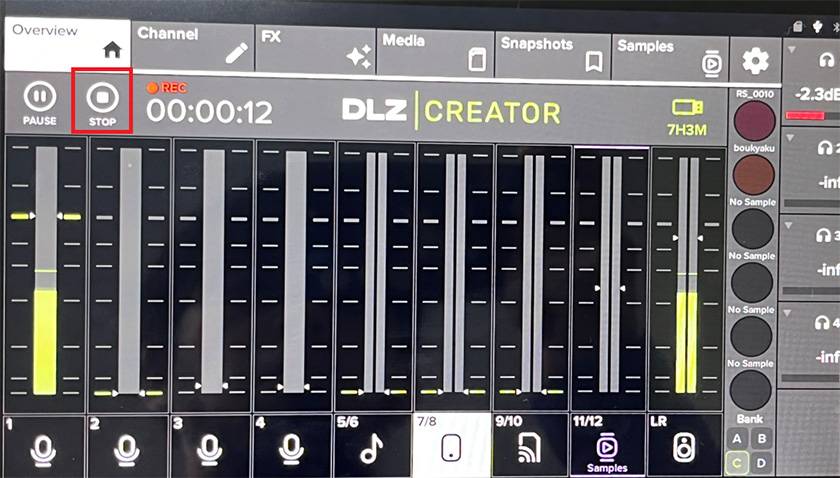
Touching “REC” starts the recording, and touching “STOP” stops it.
To play back the recorded audio, tap “Media”, then “USB”, and you’ll see a folder called “DLZ-Creator_Recordings” has been created.
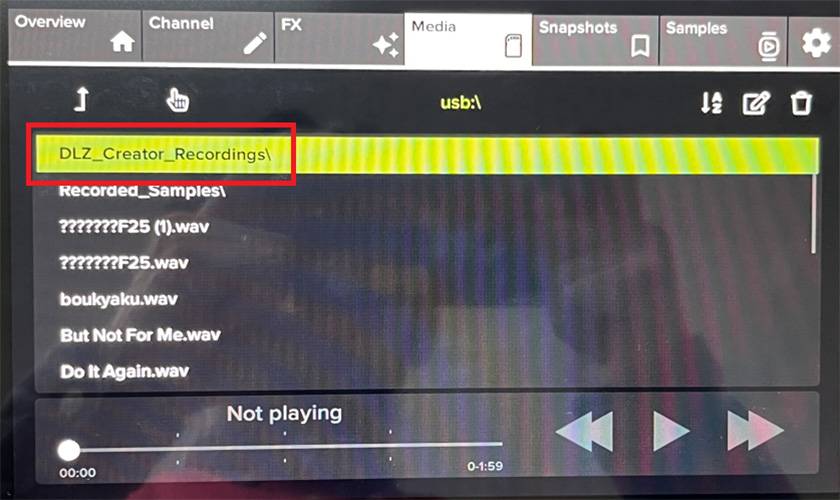
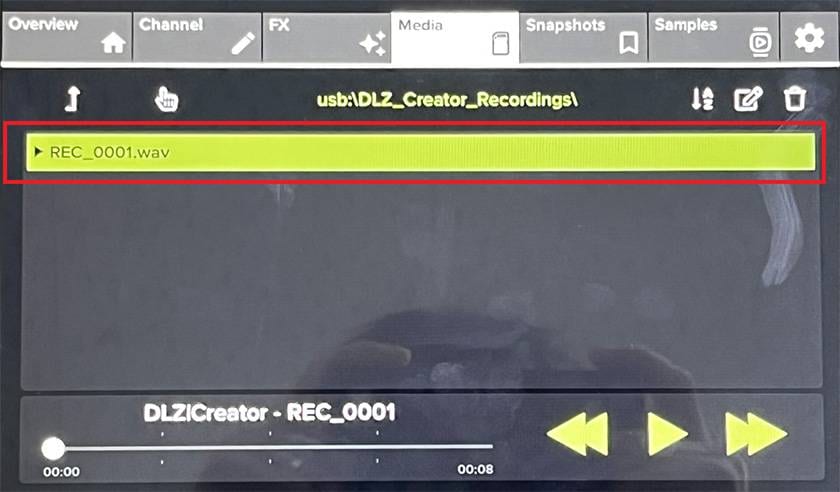
After that, simply tap a file starting with “REC_~”, and you can play it through the CH9/10 fader.
How was that? This time, I explored the mixer without diving too deep into menus, focusing on how much can be done with simple operations. The process for producing sound and adjusting settings is straightforward, making it a great model even for those who have never used a PA mixer before.
DLZ CREATOR also has plenty of standout features like Mix Agent™ and AutoMix, which I plan to introduce next time along with the actual interface screens!


![[Can Be Used Outdoors!] A Thorough Review of Mackie’s Portable PA Products](/contents/uploads/thumbs/2/2025/9/20250919_2_32914_1.jpg)

 MACKIE GOシリーズ特集
 MACKIE ブランドページ
 Mackie PAスピーカー比較表
 Mackie ミキサー比較
 DJミキサー編