This time, I’ll be painting the effect pedal case.
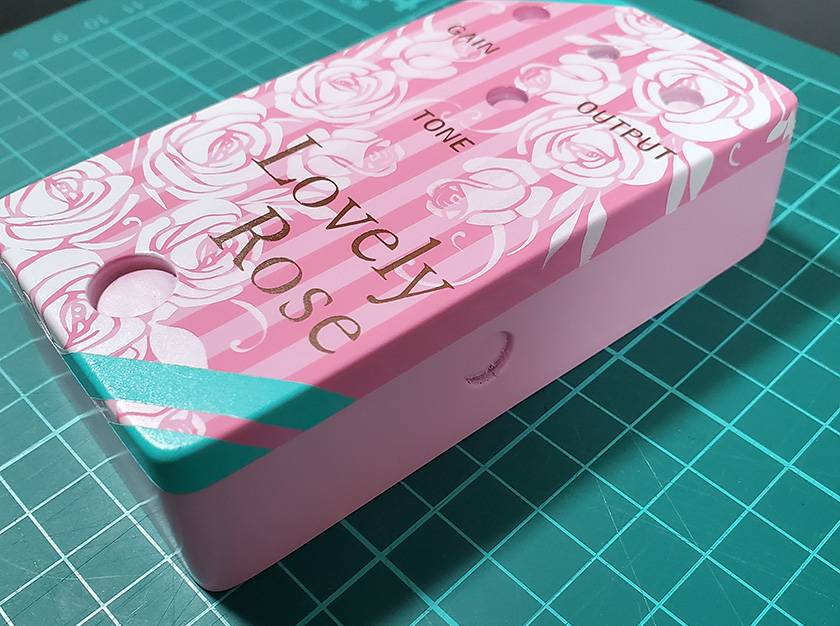
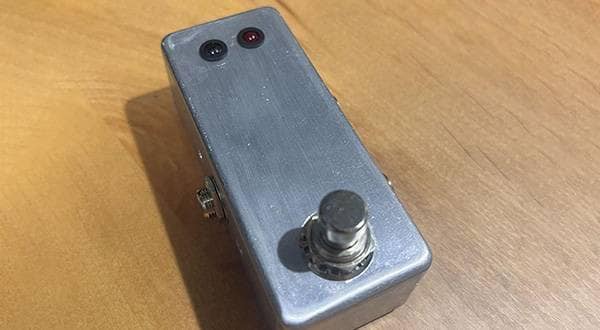
That said, the thumbnail photo already shows that it’s almost finished, so you can get an idea of how it turns out.
So for this blog, I’ll proceed with everyone knowing what the final looks like and focus on how I made it.
To be honest, painting is not something I’m particularly good at.
However, among all the steps involved in building an effect pedal case DIY, it’s also the one I enjoy the most, so I worked hard on it doing it my own way. Thanks for reading.
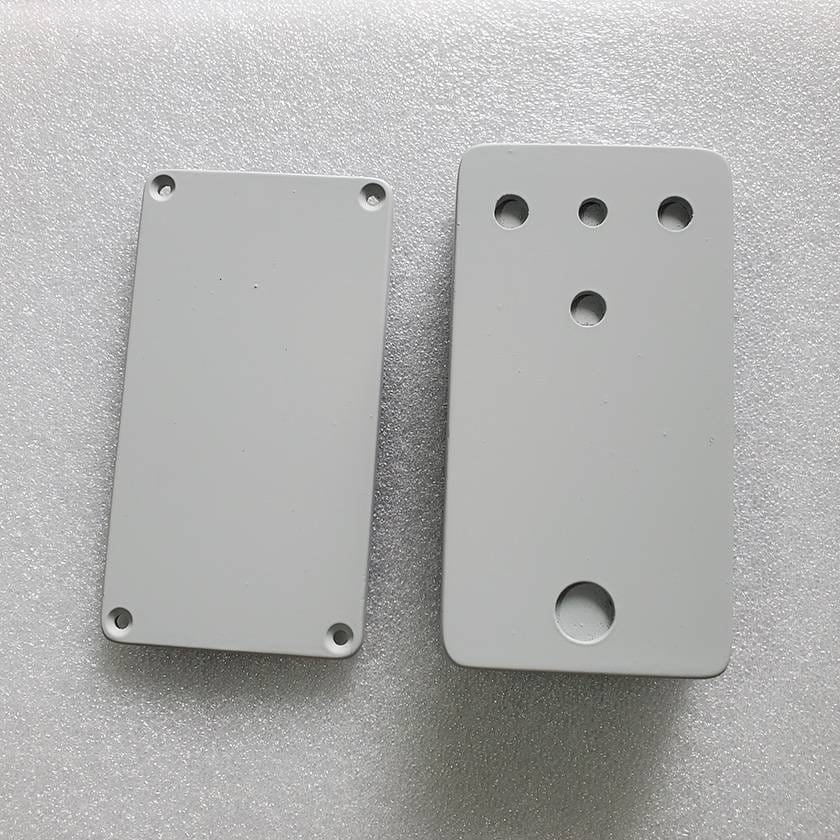
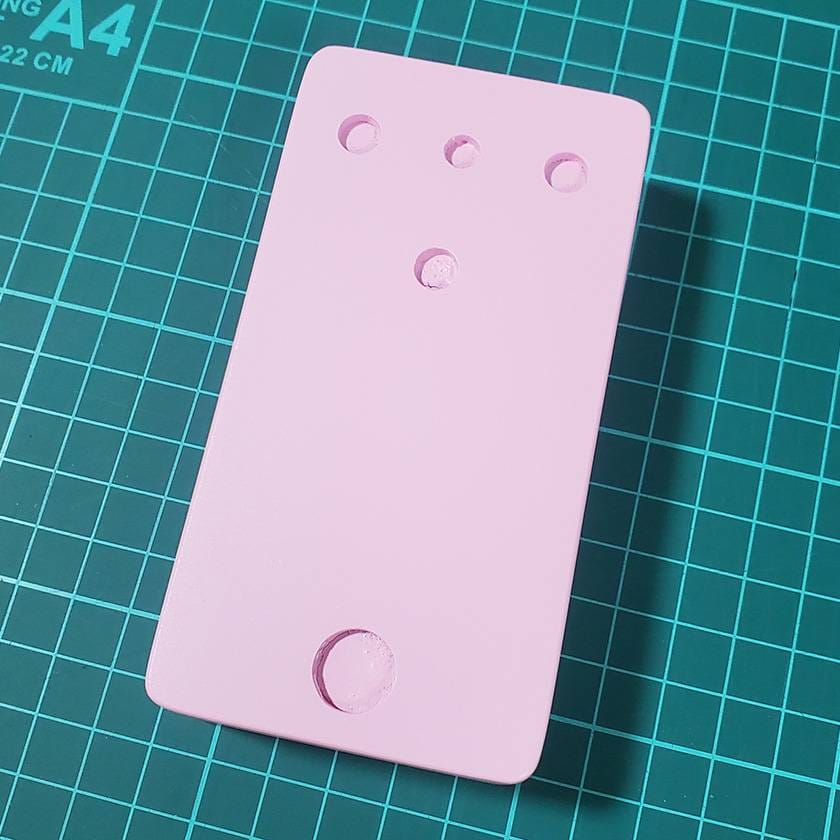
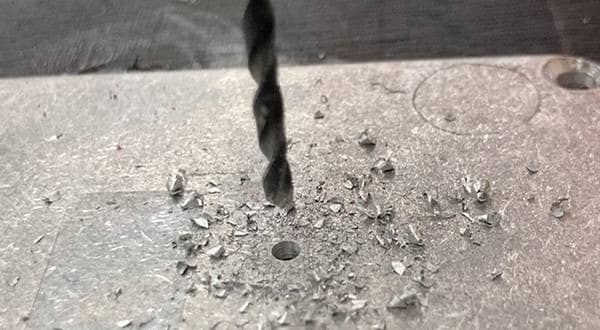
First, I sprayed surfacer spray onto the enclosure that I finished after drilling and adding masking tape in the previous step.
Simply put, a surfacer spray is a coating used to create the base layer before applying colored paint.
Most commercially sold effect pedals do not use it, but applying it makes the finish cleaner—or rather, makes the later steps easier—so I always use it when painting.
The photo below shows the enclosure after spraying.
There’s a bit of dust mixed in, but since I’ll be sanding and smoothing over the surface afterward, I’m not going to worry too much and just spray it on.
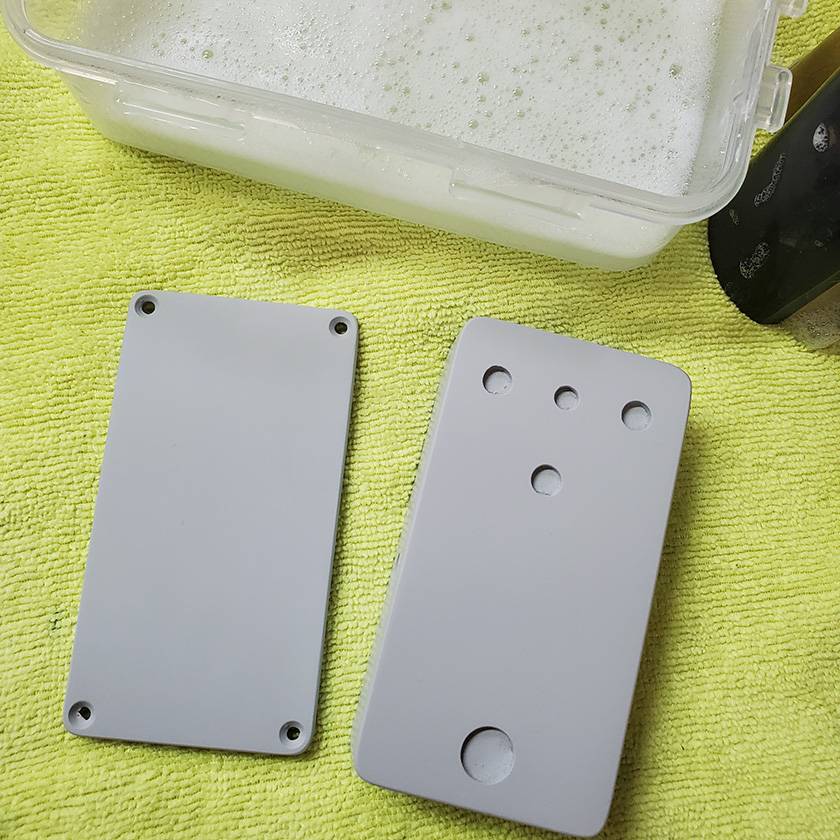
For sanding, I use #800 wet sandpaper.
The appearance in the photo doesn’t change much, but the surface becomes nice and smooth, and with this, preparation is complete.
Once the base is ready, it’s finally time to apply the color.
This time, the VOODOO-1 I’m making can vary depending on the amount of distortion, but basically it’s an intense fuzz distortion, so I figured I’d go for a cuter look, which is the opposite of its rough character.
And with that, here’s the next photo.
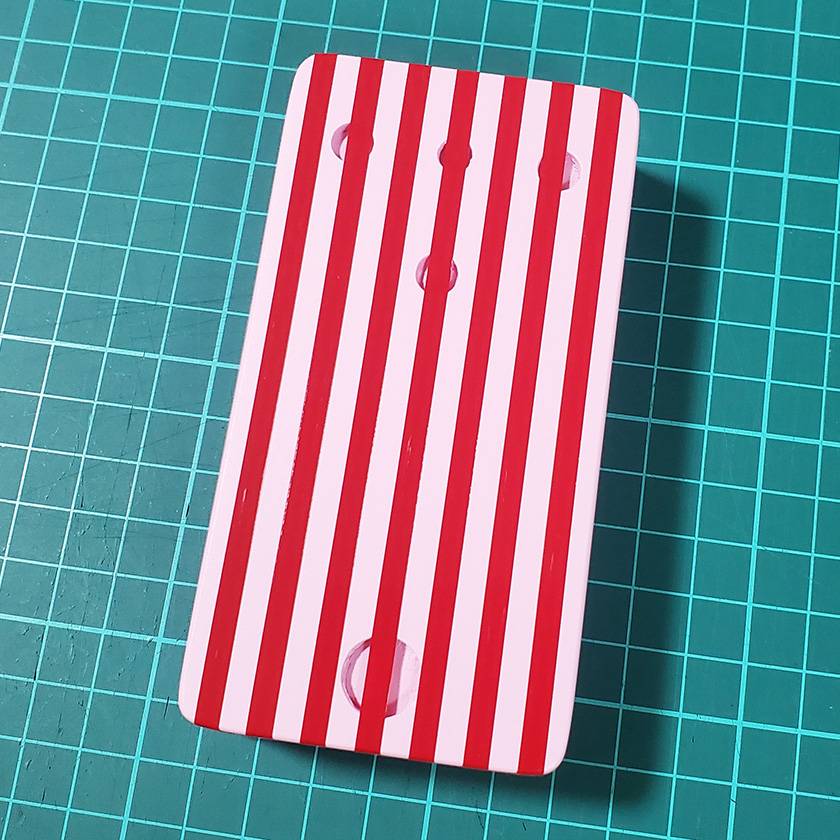

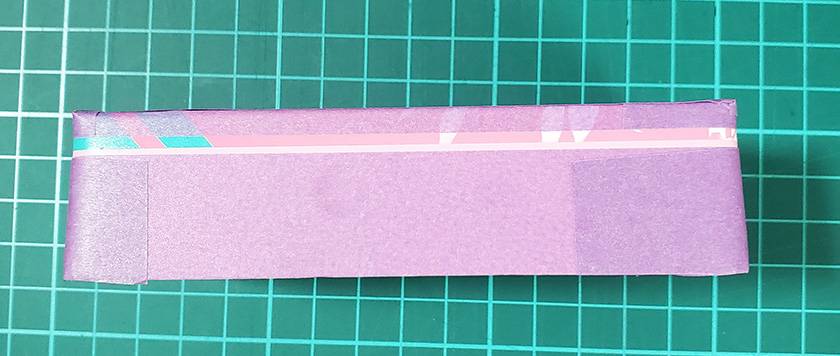
The workflow goes: pink → masking tape → dark pink.
Well, I’m not doing anything particularly special, but surprisingly, masking is the hardest part.
This time I went with a stripe pattern, but applying masking tape straight on a three-dimensional object is a lot trickier than it looks.
I stuck it on while squinting my eyes.
Now, let’s move on to the next step.
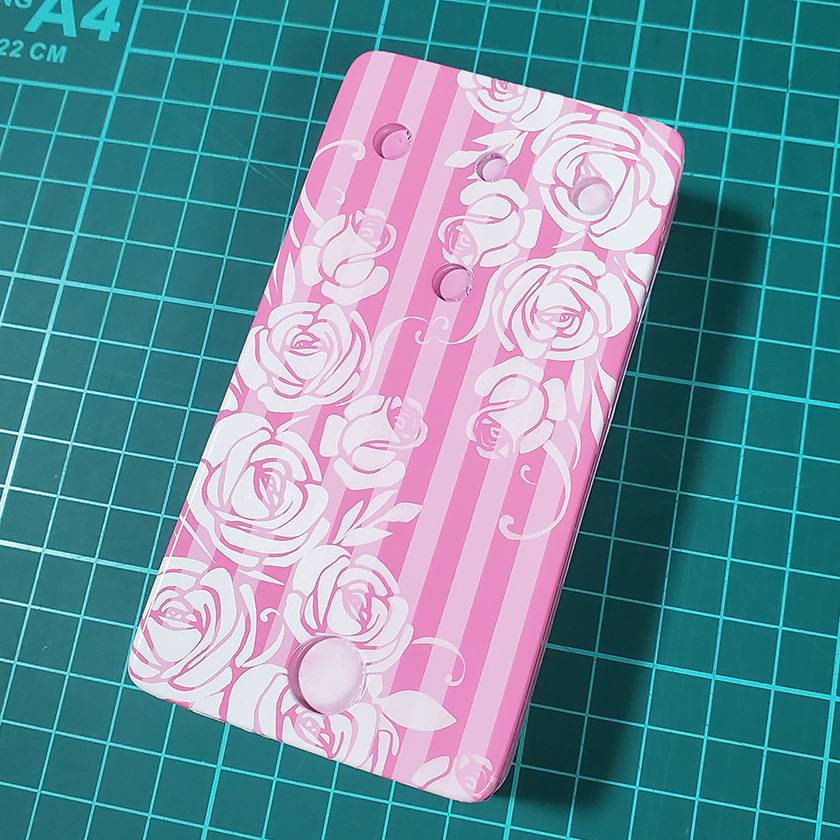
Sorry for suddenly jumping ahead.
I was so focused on the work that I forgot to take photos.
Here’s what I did:
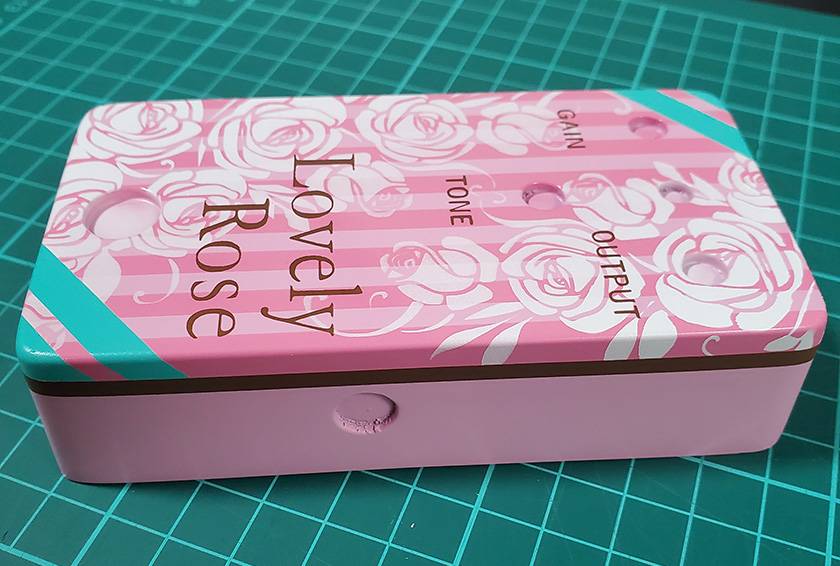
Clear coat → flower masking → white → line masking → green → text masking → brown
The reason I applied clear first was to fill in the steps created by the stripe painting.
The most difficult—or rather, the most tedious—part of this process was the masking.
Making the flower, masking, and applying it was a hassle, and adding the lines required paying attention to the angle, which was also pretty annoying.
And although it’s hard to see in the photo, the flowers have a slight gradient from the edges toward the center. The result is… well, subtle. I debated whether to redo it after spraying, but for now I decided to move on as is.
This is something to improve on in the next build.
And now, on to the next step.
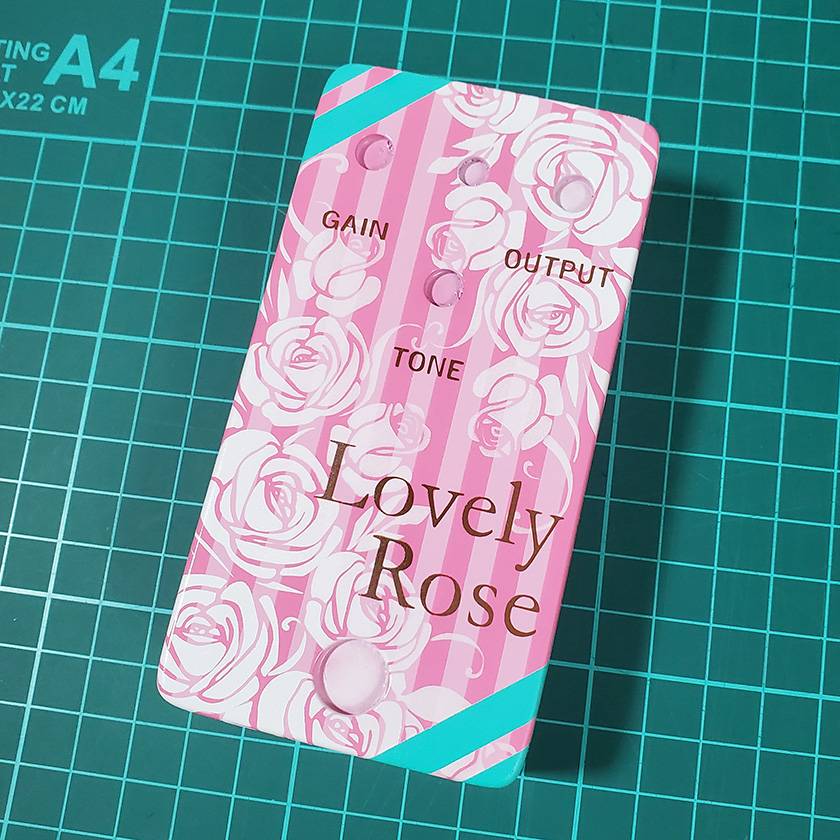
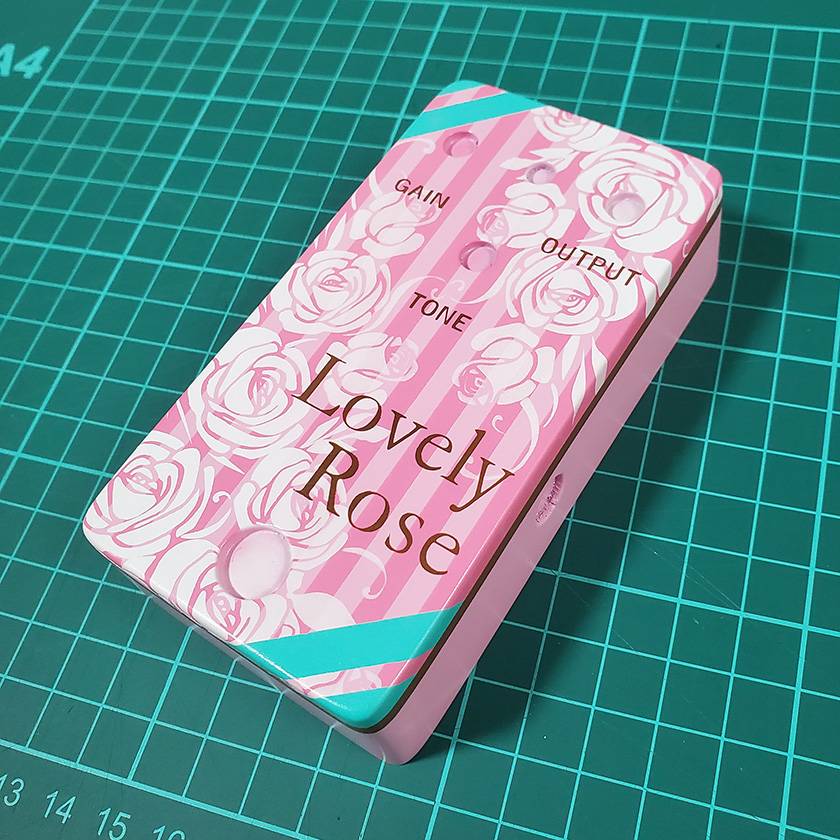
The paint job is mostly taking shape, but when you look at it from the side, the areas where the colors are divided look unfinished and kind of uncool.
So, I decided to add lines there to make the borders more defined.
Which means—more masking.
If I remember correctly, I masked it with 3 mm spacing.
This is also a hassle…
But doing it makes the appearance much better, so there’s no choice but to go for it.
And here’s the result after adding the lines.
I do think it looks better with the lines,
though this part is completely a matter of personal taste.
And here’s how it looks after working on it this time.
All that’s left is to apply the topcoat and polish it, and the painting process will be finished—but I couldn’t get that far this time, so that will have to wait for another day.
How was it?
As you can see, painting involves quite a lot of steps, and you also need to buy paint, thinner, and cleaning agents, plus prepare a place to spray and deal with waste liquid, so it’s pretty troublesome.
But even with all that hassle, painting is honestly really fun.
That said, it takes a lot of time and money to prepare, so I can’t really tell everyone, “You should definitely try painting!” — but if you build an effect pedal or some other DIY project, trying spray cans or brush painting can give it originality and help you feel more attached to what you made, which I think is nice.
Since I was putting this on the blog, I wanted to make it even more sparkly and super cute, but I’m still not skilled enough to fully bring the ideas in my head into reality. So I realized I’ll need to keep improving from here on.
I’ll keep working hard on the next article as well, so I hope you look forward to it.
Thank you very much for reading the blog all the way to the end.
Well then, see you again on the Sound House Staff Blog. Goodbye.


 ギターパーツの沼
 【初心者向け】エフェクター講座
 あなたのエフェクターボード見せてください
 ベース用エフェクターの種類
 エフェクターのつなぎ方
 エフェクターの種類