Hello everyone.
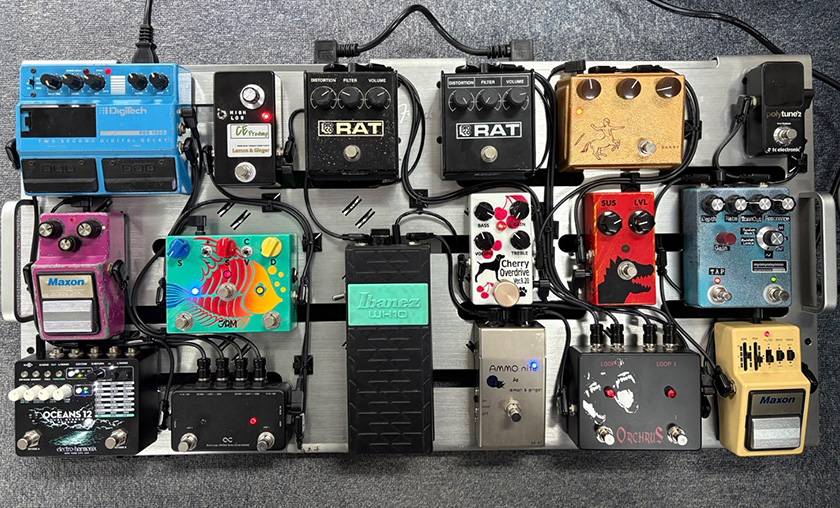
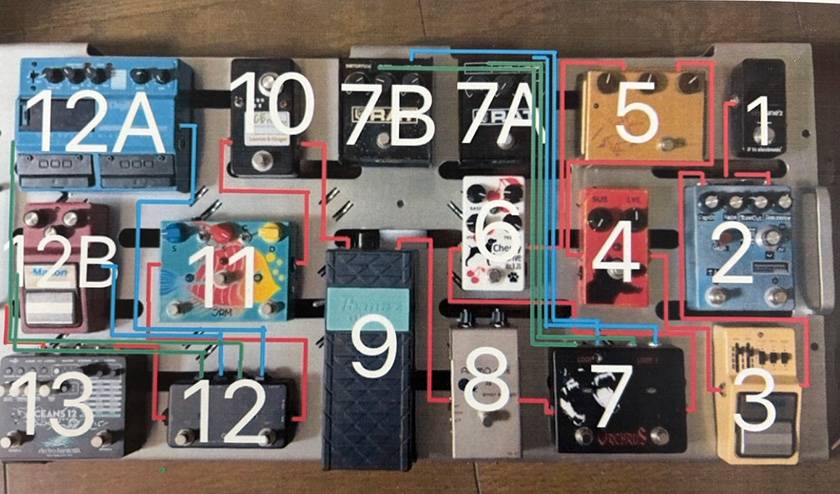
As the title suggests, this time I made a pedalboard that looks like this!
John Frusciante-Inspired Massive Pedalboard!
I built a huge pedalboard inspired by beloved guitarist from Red Hot Chili Peppers , John Frusciante.
Just to be clear, I made this out of respect.
I’m not going to read comments like:
“LOL, that won’t get you John’s tone”
or
“John never used that pedal.”
This board is packed with admiration to my liking, and I’m loving it.
Note: I’m not good at soldering, so a coworker built the board. This coworker said, “I don’t want to make another board this year…” — that’s how big it is!
Here’s the final result:
About John Frusciante’s Pedals
This isn’t directly related to the main topic, but it’s just a little side note.
When it comes to John Frusciante’s pedalboard, he’s known for a large, straight-chain (※) board, sometimes using over 15 pedals.
Also, many of the pedals listed below were used by John in various live shows. Because of that, lots of guitarists may be using the same gear.
※ Not sure if his board is truly wired in series — I’ve never opened it up to check!
Pedals Actually Used by John:
- BOSS: DS-2, CE-1, Delay
- Ibanez: WH10
- Moogerfooger (various types)
- Mosrite: Fuzzrite
- MXR: Micro Amp, Phase 90
- EHX: Big Muff, Holy Grail
- Line 6: DL4, FM4
…and many more I could list.
In this blog, I’m going to focus on the pedalboard I built and include the board itself, cables, plugs, power supply, and more. We’ll take a deep dive into John’s setup for another time!
Contents
1. How to Build the Pedalboard
i. Check the size
When building a pedalboard, the first step is to lay out the pedals and check the board size you’ll need.
■ How to check the size?
⇒ Use cardboard
Place your pedals on a cutout piece of cardboard to figure out the right board size. This makes it easy to measure and it helps to avoid scratching the floor or desk.
Also, make sure there’s enough space so patch cables don’t get in the way. It’s better to choose a slightly larger size than a perfect fit.
ii. Decide the Pedal Layout
Once you’ve got your board, next is deciding where to place each pedal.
Things to keep in mind:
- Signal order
- Ease of stepping on pedals
Think carefully about the layout while considering both the signal chain and usability.
This is the most important part of building a pedalboard!
■ About Signal Order
You’re free to connect pedals however you like, but there are some general guidelines based on how effects interact and stack.
Amp ← Time-based (delay/reverb) ← Modulation ← Drive/distortion ← Pitch ← Guitar
Since most pedals are designed for signal to flow right to left when viewed from the front, distortion pedals tend to go on the right side of the board, and time-based effects on the left side.
If you ignore this, your patch cables may end up unnecessarily long, and the build becomes more complicated—so be careful!
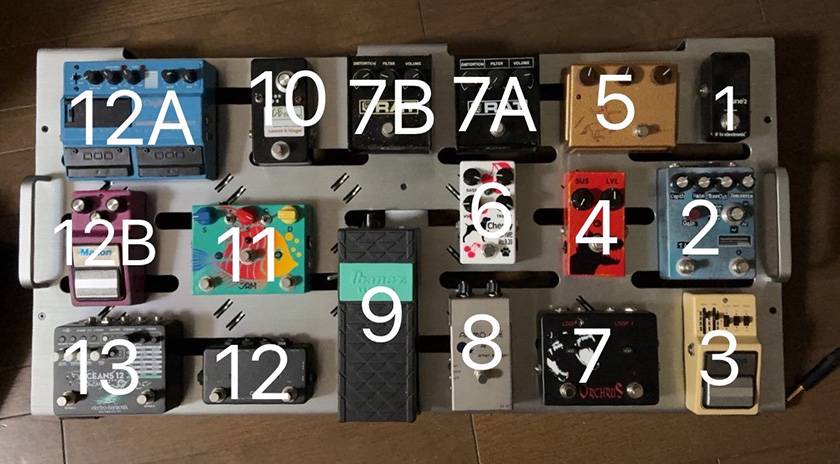
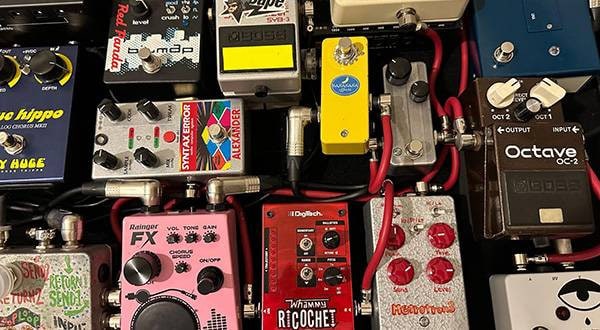
Signal Chain Used This Time
- Tuner:
TC ELECTRONICS / Polytune - Low-pass filter:
Lemon&Ginger / myomyomyooon - Auto-wah:
MAXON / AF-9 - Compressor:
Jam Pedals / DynassoR - Overdrive:
Lemon&Ginger / Kentarou - Overdrive:
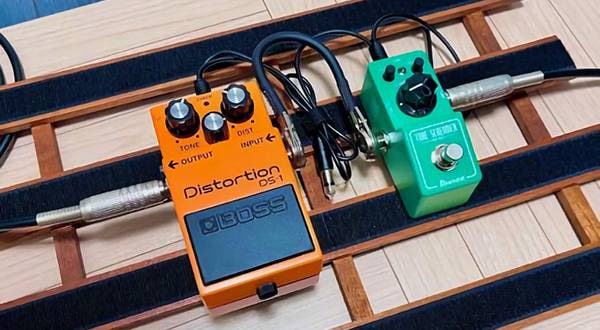
DIY Timmy clone - Distortion:
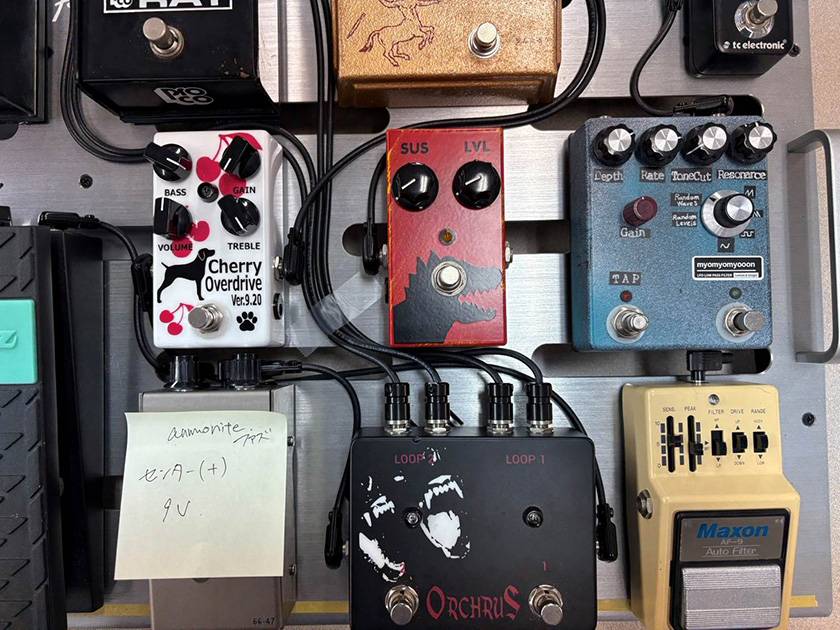
PROCO / RAT ×2 (controlled with AB loop box) - Fuzz:
Lemon&Ginger / AMMO nite - Wah pedal:
Ibanez / WH10V3 - Preamp:
Lemon&Ginger / CEpre - Chorus/Phaser:
JAM PEDALS / Ripply Fall - Delay:
Digitech / PDS1002, MAXON / AD-9 (controlled with AB loop box) - Reverb:
ELECTRO-HARMONIX / OCEANS 12
There’s always the question of whether to place the wah wah before or after the distortion, but the best way is to just try both.
Go with whatever sounds better to you. There’s no single correct answer. Though yes, impedance and other technical factors can affect the result.
■ About Making Stepping as Easy as Possible for Yourself
Place your most frequently used pedals toward the front.
If the pedal casing is low and a pedal in front gets in the way, making the switch hard to press, or there are other pedals you want to place in front, or the switch itself is difficult to press, placing a loop box or switcher at the front can make ON/OFF management easier.
Once you decide the layout, creating a wiring diagram will be helpful later!
iii. Assembly
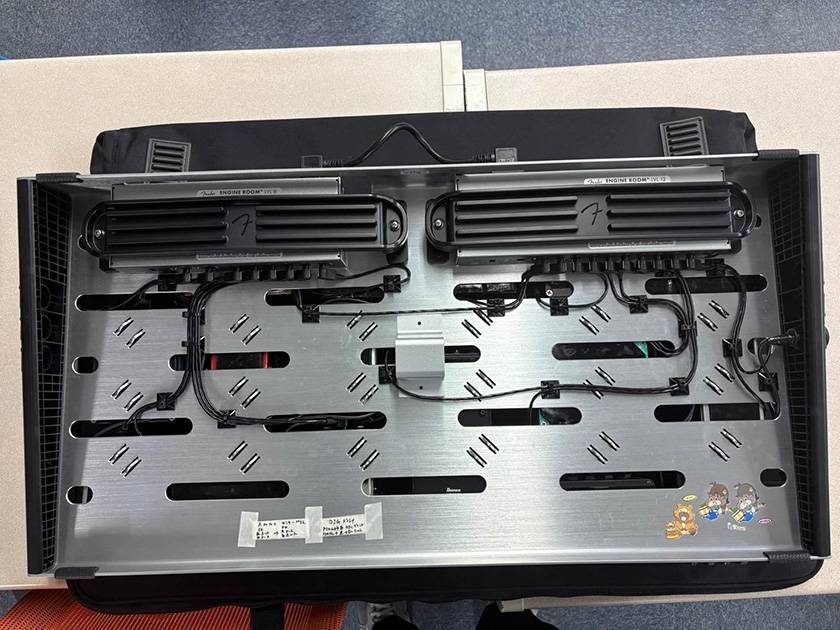
Basically, you connect everything by making patch cables and DC cables or using pre-made ones. This time, since it’s a slatted board with the power supply mounted underneath, the wiring is more complex. The general flow is as follows.
■ Procedure
- Attach plugs to the effect pedals only (recheck that plugs don’t interfere with each other)
- Temporarily fix the effect pedals in place
- Make and test patch cables
- Make and test DC cables
- Connect all cables and firmly fix the pedals in place
- Secure the cables
■ Key Points to Consider When Building the Board
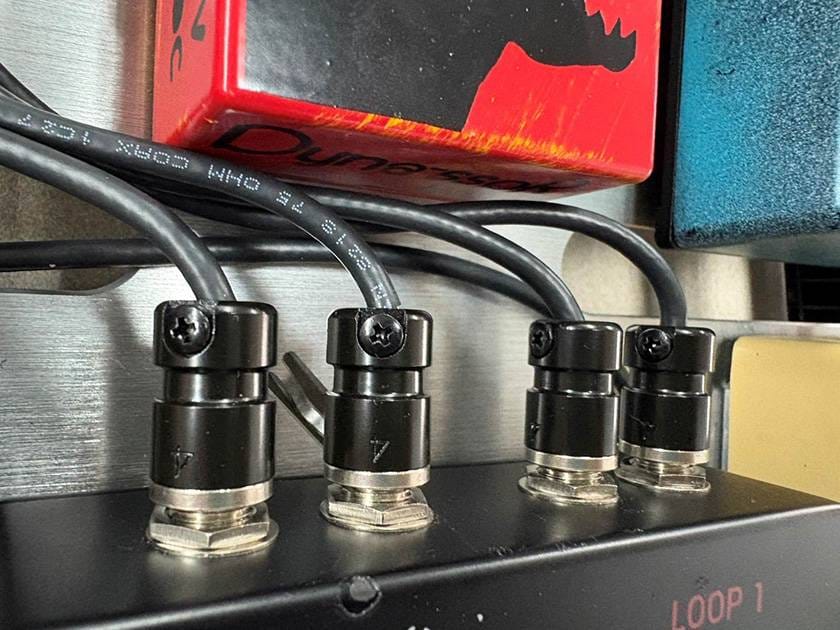
- Considering the vertical placement of the three pedals, I chose pancake-style plugs.
- Also, taking into account the spacing between the pedals’ jacks, choose plugs with a width that won’t interfere.

- For pedals where width interference is unavoidable, use straight plugs. I also chose plugs to be as small as possible, considering the depth.
- When wiring cables, I first mapped out the layout temporarily fixed with cellophane tape. Then I adjusted the cable lengths before finally fixing them into place.
- I noted special power supply specifications on sticky notes that I stuck to pedals to avoid mistakes.
- Both DC and patch cables were mounted on bases and secured with cable ties.
- The reverb pedal at the end has its OUT jack on top, so I installed a phone-style receptacle jack on the board to add an extra OUT jack. (Center-right in the photo)
- P*kémon stickers were stuck on without permission. For some reason, all three are rodent P*kémon.
This is how the board was built. I hope this blog can be of some help to those building large boards.
Finally, I’ll introduce the gear I used this time along with some of my impressions.
See you soon!
2. Gear Used
i. Effect Pedalboard
FENDER / PEDALBOARD W/BAG, LARGE
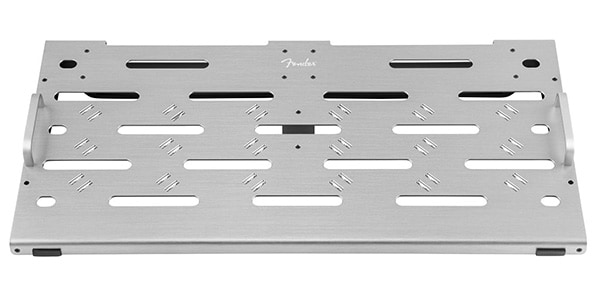
This model allows mounting with the same manufacturer’s power supply (introduced below) on the back of the board.
It’s quite large, measuring 81.3 cm wide by 40.6 cm deep.
One slight drawback is that the holes on the board don’t perfectly align with the jack positions of some effect pedals.
・Dimensions: 81.3 cm x 40.6 cm x 7.5 cm
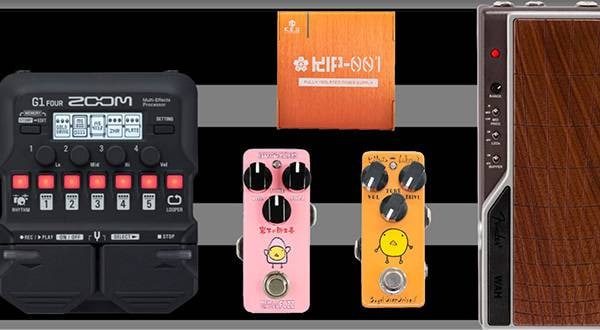
ii. Power Supply
FENDER / Engine Room LVL12 Power Supply, 100V JPN
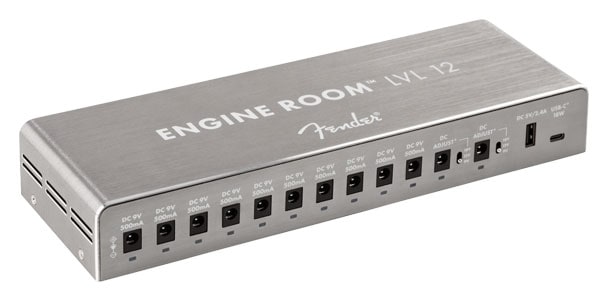
Chosen for its perfect compatibility with the FENDER board. This is an isolated type and can be linked via power cables with the LVL8 and LVL5 units. It can supply power to many effect pedals from a single outlet.
*Please be mindful of the current consumption of your effect pedals.
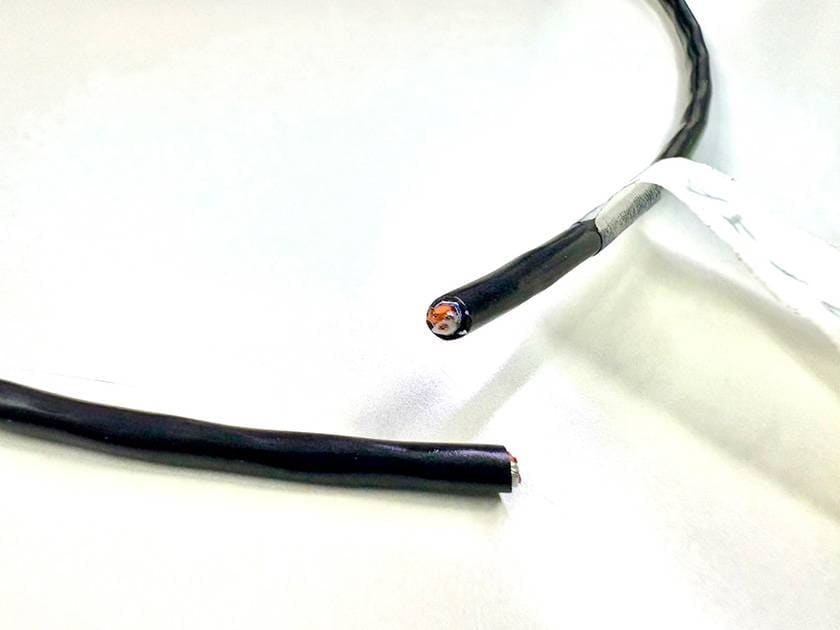
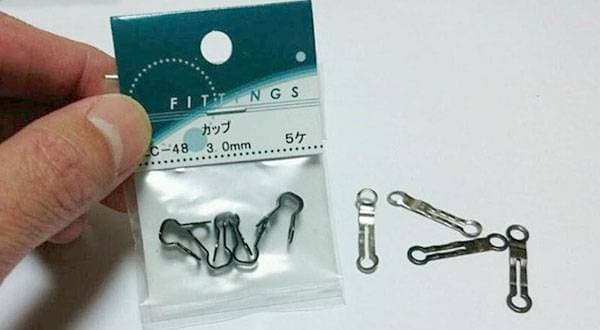
iii. Patch Cables
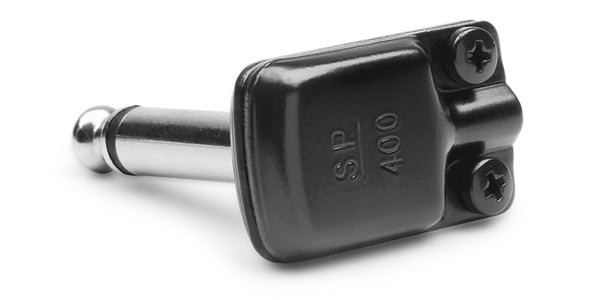
These plugs are compact both vertically and horizontally, making them ideal for saving space. It wouldn’t be an exaggeration to say that Sound House started carrying them specifically for this project.
They frequently appear in popular short videos from overseas showcasing neat pedalboard builds.
■ Size
・Height: 28.4 mm
・Width: 17.3 mm
・Compatible cable diameter: 4.0 - 4.6 mm
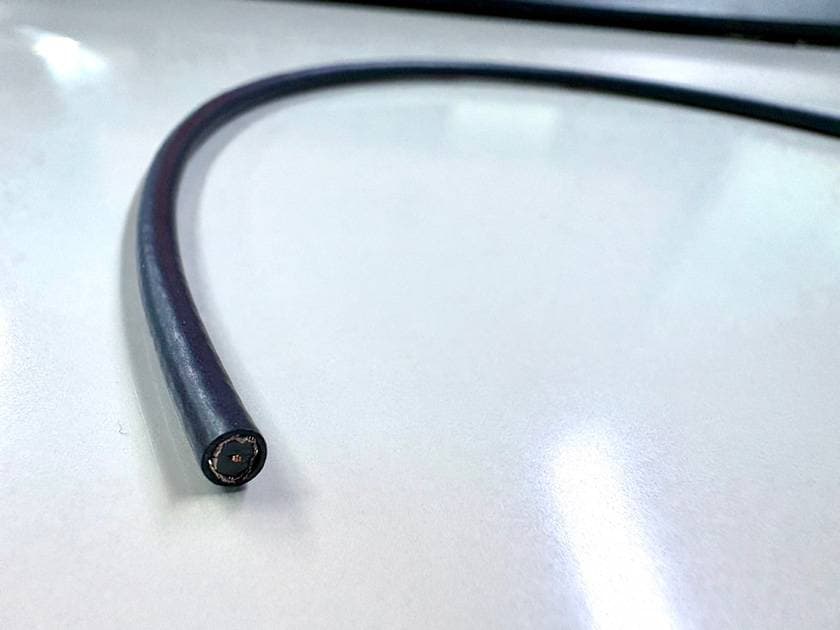
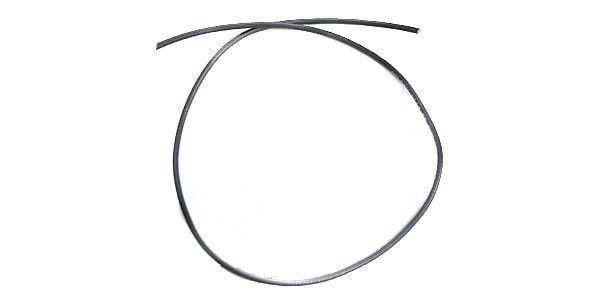
Since the maximum compatible cable diameter of the above plugs is 4.6 mm, I used the 4.0 mm diameter BELDEN cable here. I wired nearly 20 cables this time and didn’t notice any particular noise issues. The cable is slightly stiff but thin and easy to handle.
DC Cable
This time, I also made my own DC cables. The low cost and length customization are definitely big advantages. I felt these cables produced less noise compared to the ones that come with the power supply.
For the DC plugs, we purchased commercially available ones.
iv. Other Accessories
Additional IN/OUT receptacle phone jacks
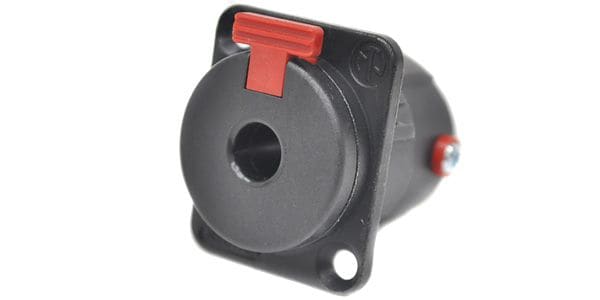
These can be installed on the FENDER board without any modifications. The locking mechanism to prevent cables from unplugging is also excellent.
If you prepare two jacks including one for INPUT, you can unify the IN/OUT jacks on the right side of the board.
Velcro Tape
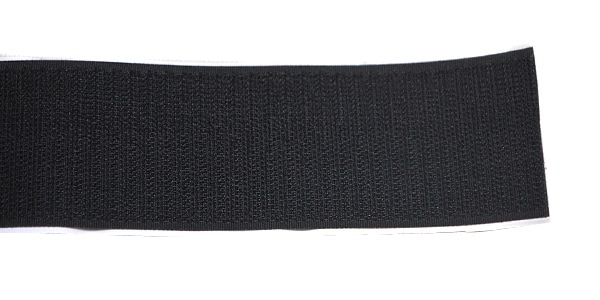
This velcro tape has strong adhesion, and the bond between the hook and loop sides is impressively tight.
If you want an easy, cost-effective, and reliable way to build your pedalboard, this is the one!!!
(It even has a ★5 review from the legendary Takayoshi Ohmura himself.)


 はじめてのエフェクターは GT-1 にしよう
 【初心者向け】エフェクター講座
 あなたのエフェクターボード見せてください
 ベース用エフェクターの種類
 エフェクターのつなぎ方
 エフェクターの種類