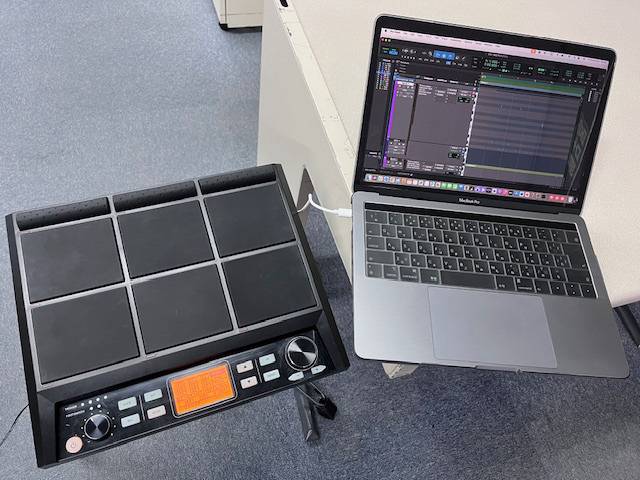
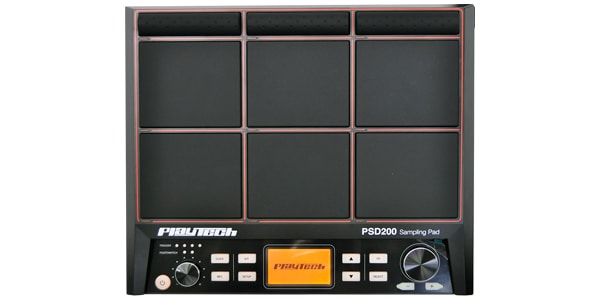
PLAYTECH's popular PSD200 is a sampling pad that offers drummers a great value for money. While electronic percussion products like this product are popular with many people, we often hear that people have a hard time learning how to use them.
In this article, I will explain how to import sounds, which is the key to mastering this product, with step-by-step instructions.
01 Preparing for Import
First, let's prepare the necessary items for import.
In addition to the PSD200 itself and a USB memory stick, of course, you should first save the sound files to be used on your computer. Sound files have specific extensions and formats. It is a bit complicated, but be sure to select the correct one when creating the sound file.
〇 What you need
- PSD200 Main unit
- Computer (with sound files)
- USB memory
- Sound file you want to import
(WAV file, EXFAT/FAT32/FAT format, 48K sampling rate, 16 bits, 1 channel)
02 Putting sound files onto USB memory
First, save the sound files onto a USB memory stick. The sound file is saved in a specific location, so please make sure to save the sound file in the correct location…
■ Procedure
- ① Connect the USB memory stick to the computer.
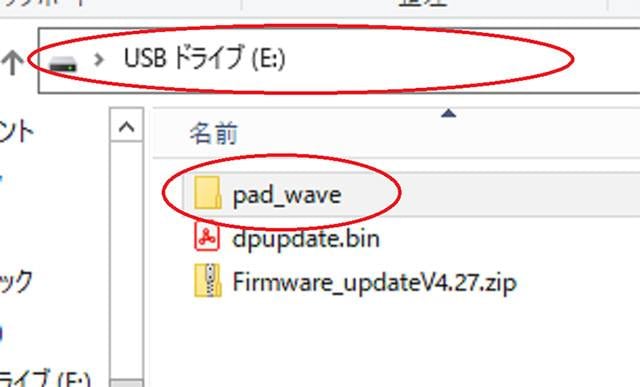
- ② Create a folder named "pad_wave" in the root directory (top level) of the USB memory.
- ③ Put the WAVE file into "pad_wave" that you created in the root directory.
If the "pad_wave" file is created as shown in the picture, it is in the correct state. Please pay attention to the part circled in red.
03 Importing sound files into PSD200
Next, import the sound files into PSD200. The procedure is clearly described on p. 15 of the following manual, which you may also refer to.
■ Step
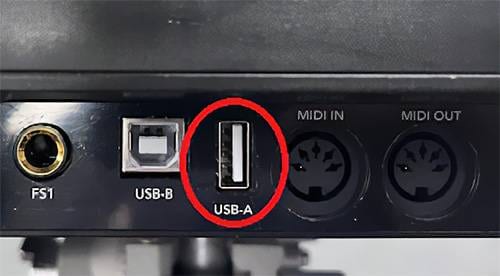
- ① Connect the USB memory stick to the USB-A port on the rear panel of PSD200.
- ② Press and hold the “SETUP” button and the “OK” button on PSD200 at the same time.
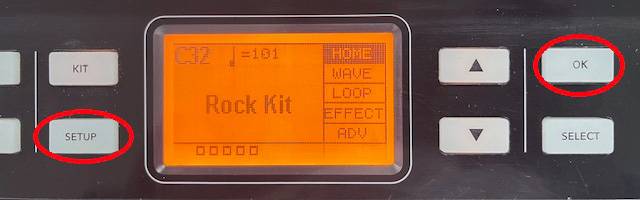
- ③ Select the LOAD-Kit option and press the “OK” button after confirming that the USB connection icon is displayed in the upper left corner.

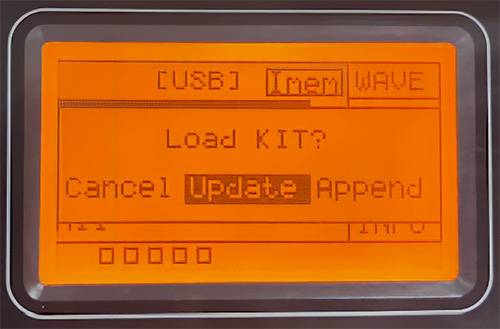
- ④ When the three options “Cancel, Update, Append” are displayed, select ‘Append’ with the SELECT button and click “OK” to start the import process.
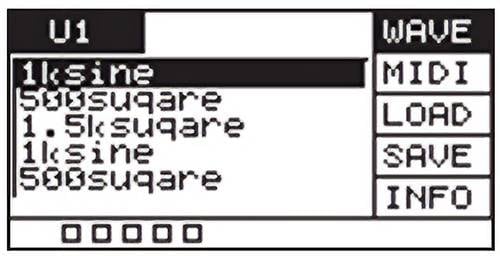
04 When importing is complete, check that the sound files are displayed in the “WAVE” column where none were displayed, and finish.
The WAVE screen also allows you to delete selected files with the SELECT button, so use it to manage files where there is no computer.
05 Troubleshooting
Here are some common issues.
If you are working correctly and still cannot import, there is a reason, so please check if any of the following applies to you.
USB icon does not appear
Some USB memory sticks that do not display the icon to confirm USB connection may not work properly. Use a USB memory stick that does work, or try multiple USB memory devices.

If sound cannot be imported
the sound file must be appropriate.
Please check again if the following items meet the requirements.
Extension: .wav
File format: EXFAT/FAT32/FAT format
Sampling rate: 48K sampling rate
Number of bits: 16bit
Number of channels: Must be 1 channel (mono)
Folder name: Create a folder named “pad_wave” in the root directory of the USB memory and save the sound file in it.
If the imported sound does not play properly
the sound file may be corrupted. Delete the imported sound file, check the sound file again on the computer to make sure it is normal, and then try importing it again.
06 Summary
Importing sounds into the PSD200 may be a bit time-consuming, but once you are able to do it, you will be able to use the sampling pad to expand your performance range.
Try importing your favorite sounds into the PSD200 and have fun playing around with them!


![[Event Report] Toso Art Music Festival Vol. 4 - Rock in Asahi](/contents/uploads/thumbs/2/2023/6/20230619_2_23043_1.jpg)
 ドラム音源に最適なMIDIパッド・コントローラー
 おすすめサイレント楽器特集
 おすすめ電子ドラムセット
 ブラジリアンパーカッション編
 パーカッション編
 電子ドラムの選び方