Hello!
When the weather gets cold, if I’m not careful, my lips and fingertips dry out so badly that they crack and bleed. So here I am, slathering on oil and cream every single day.
I’m guessing many of you reading this blog can relate, right?
Once you let it get to the point where it starts bleeding, it’s so painful, and healing takes forever.
It’s no fun! Let’s make sure to crank up those humidifiers during winter!
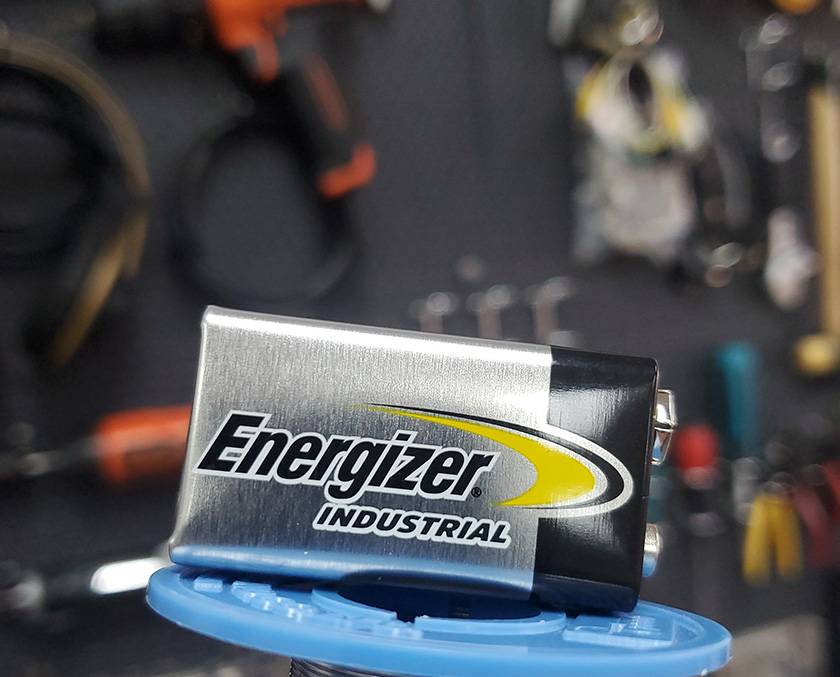
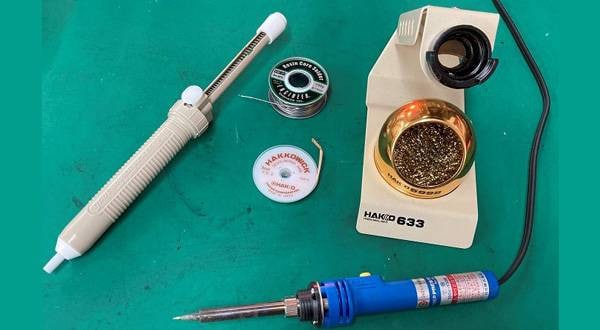
Now then, as I mentioned in my previous blog, today’s topic is all about soldering wiring materials.
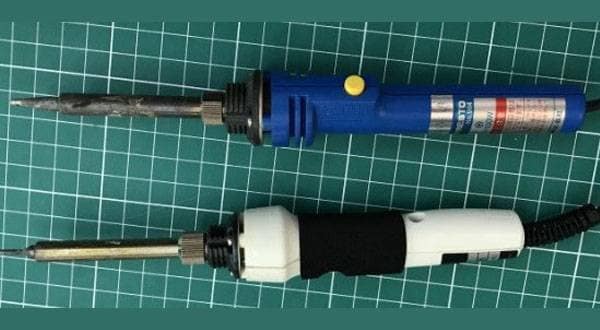
○ Pre-Tinning Wires
So, what exactly is pre-tinning?
If you try to solder a wire directly to a pot, the solder doesn’t adhere well, making the process more difficult. Pre-tinning makes the wire easier to work with by ensuring the solder bonds smoothly.
Something like that.
The method is super simple:
Just strip the insulation from the wire and apply solder to it.

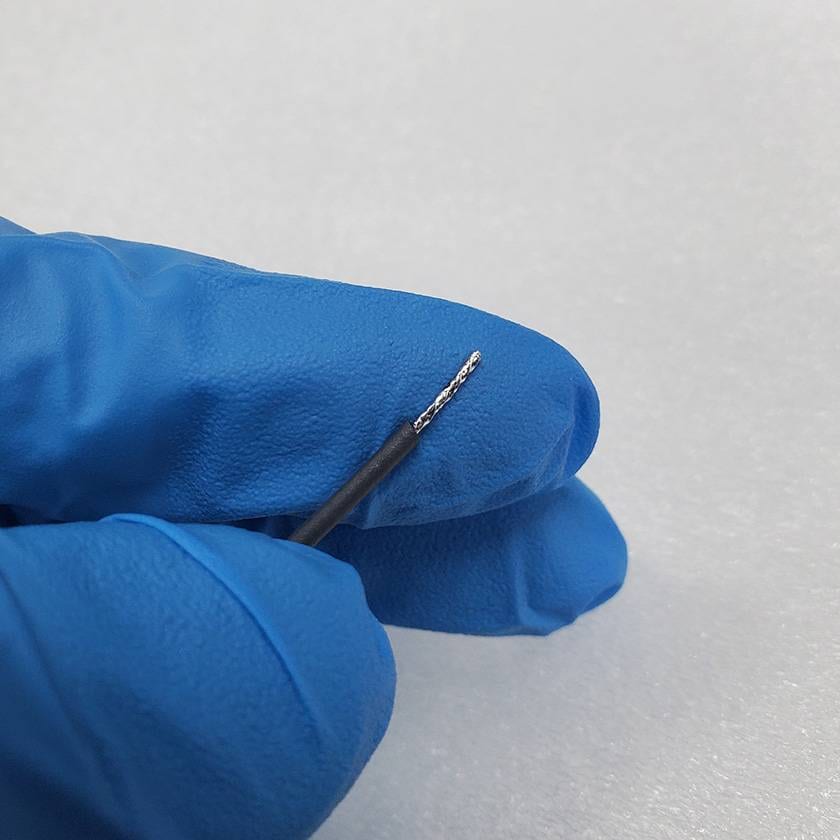
However, there are a few key points to keep in mind to achieve optimal pre-tinning results.
Heat the wire with the soldering iron before applying solder
This is a fundamental rule of soldering. If the base material isn’t adequately heated, the solder won’t adhere properly.
Ensure the stripped portion of the wire is fully pre-tinned
If you don’t properly pre-tin all the way to the base of the stripped section, there will be areas without solder, which weakens the connection and increases the risk of disconnection.
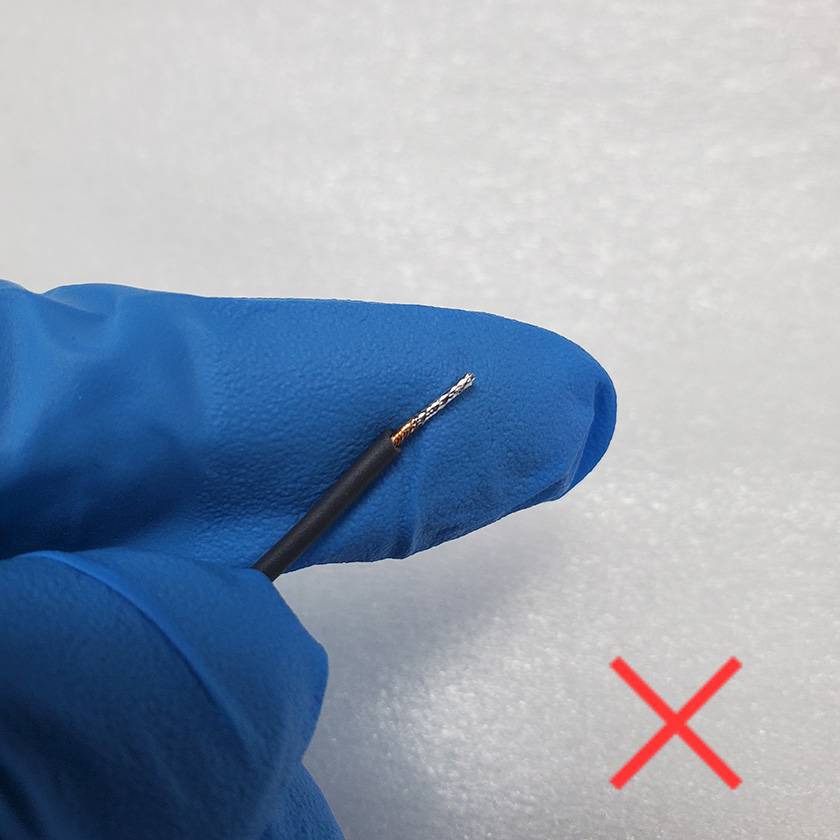
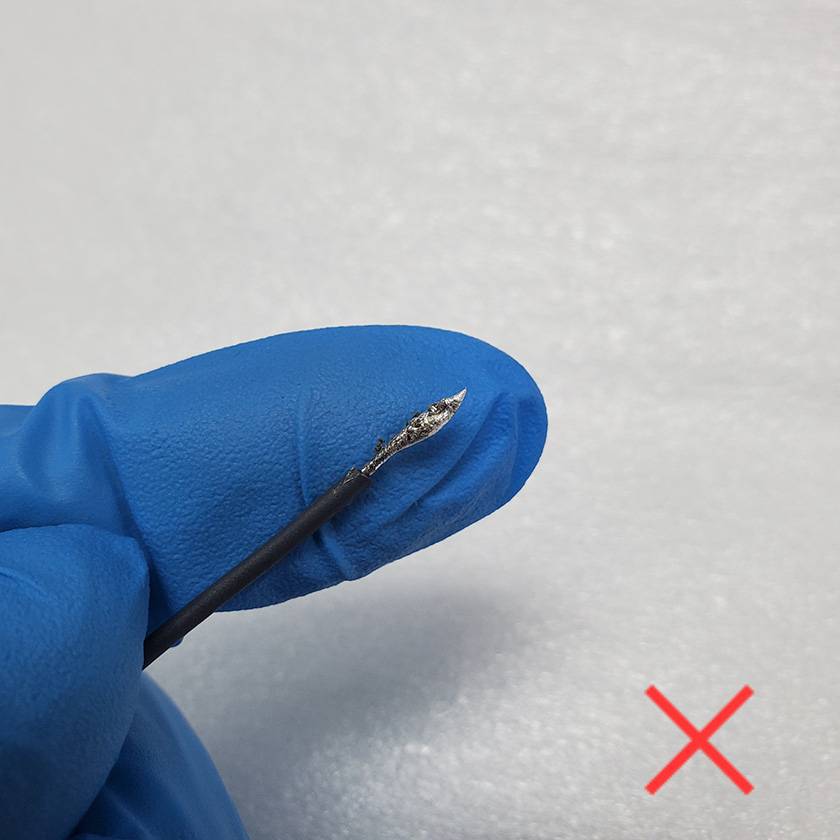
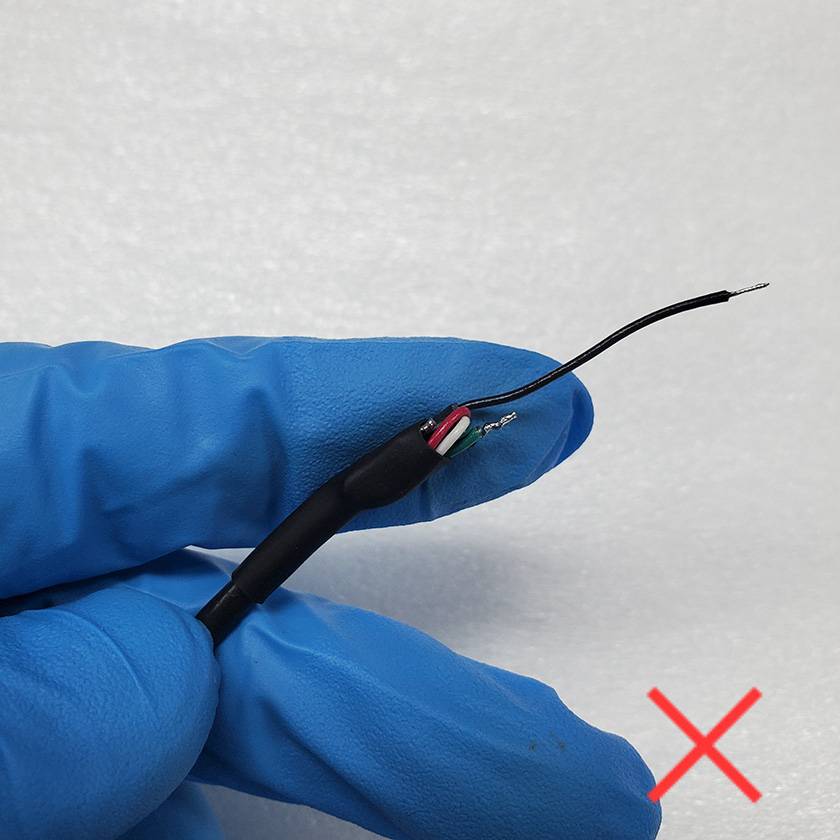
Remove the soldering iron immediately after applying solder
If you apply too much solder or overheat the wire, as shown in the example photo, the flux will completely burn off. This makes future soldering work difficult and prevents proper connections.
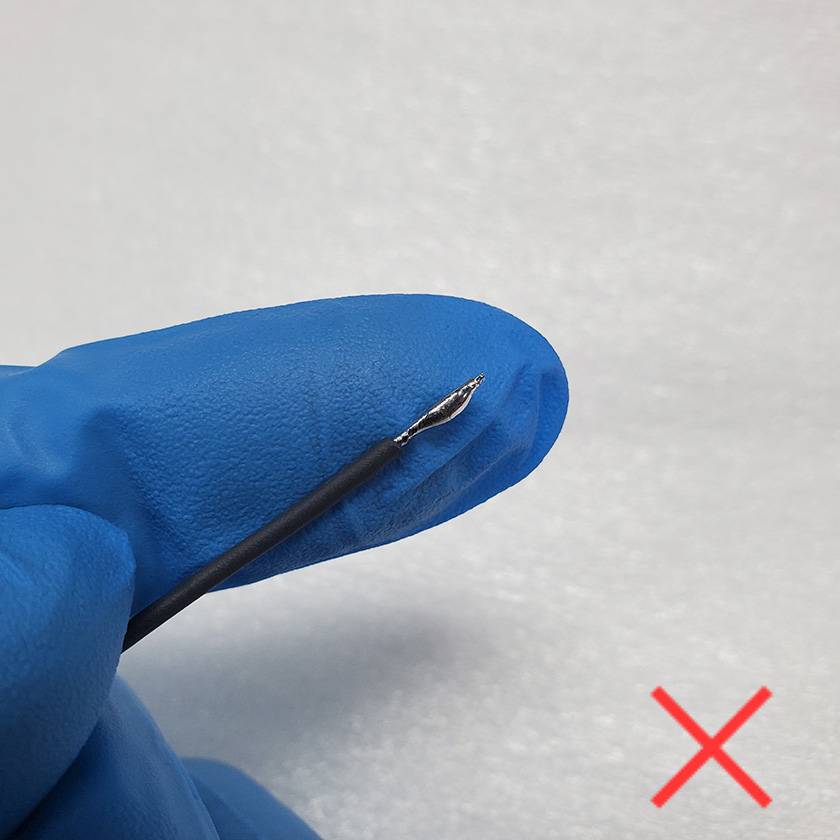
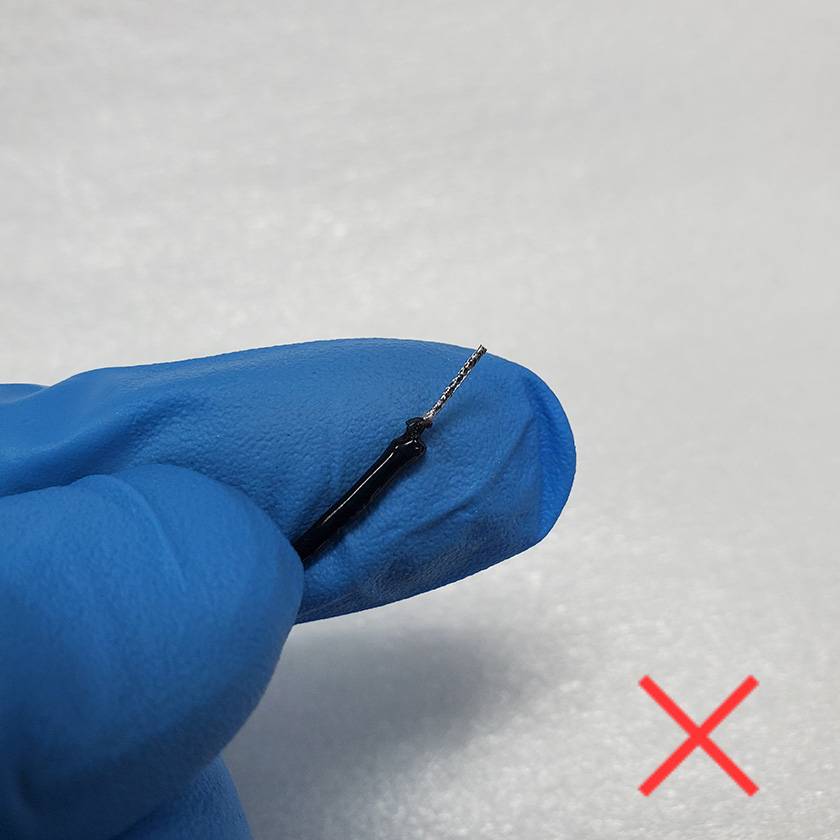
Avoid overheating
If you overheat the wire to ensure solder flows smoothly, the insulation may melt.
While fabric-based insulation is generally more heat-resistant, vinyl insulation is more problematic.
Depending on the material, it can become warped or deformed with minimal heat, as shown in the photo below. If you’re using a new type of wire, it’s a good idea to test how much heat the insulation can withstand beforehand.
Work on a clean and organized workstation
This may seem obvious, but it’s extremely important.
Soldering irons reach very high temperatures, and an accidental tip-over can cause burns, scorch or melt nearby items, and, in the worst-case scenario, lead to a fire.
Additionally, some solders produce flux that can scatter easily. If the workspace is cluttered, scattered flux could land on surrounding objects and damage them.
Secure the base material firmly before starting
Properly securing your workpiece is a crucial step in any project.
Without a stable base, it’s difficult to produce quality results.
In fact, whether your finish looks clean or messy is often determined by how well the material is secured at the outset.
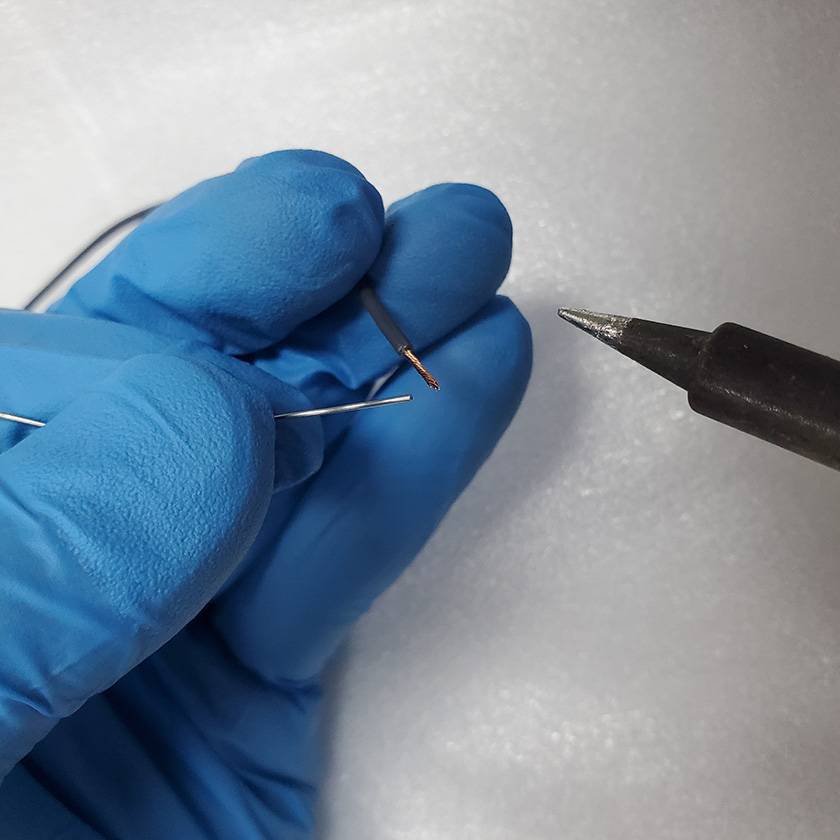
A recommended pre-tinning technique is to use your ring and middle fingers to hold the wire steady, while your thumb and index finger manipulate the solder.
This might feel a bit awkward at first, but once you get used to it, your workflow will become significantly more efficient. Give it a try!
○ Pre-Tinning for Pickups
When it comes to pickups, single-coil pickups with two or three wires or humbuckers with one or two conductors are relatively simple to handle. Therefore, rather than focusing on pre-tinning for 4-conductor humbuckers, I’ll explain the preparatory steps for wiring them.
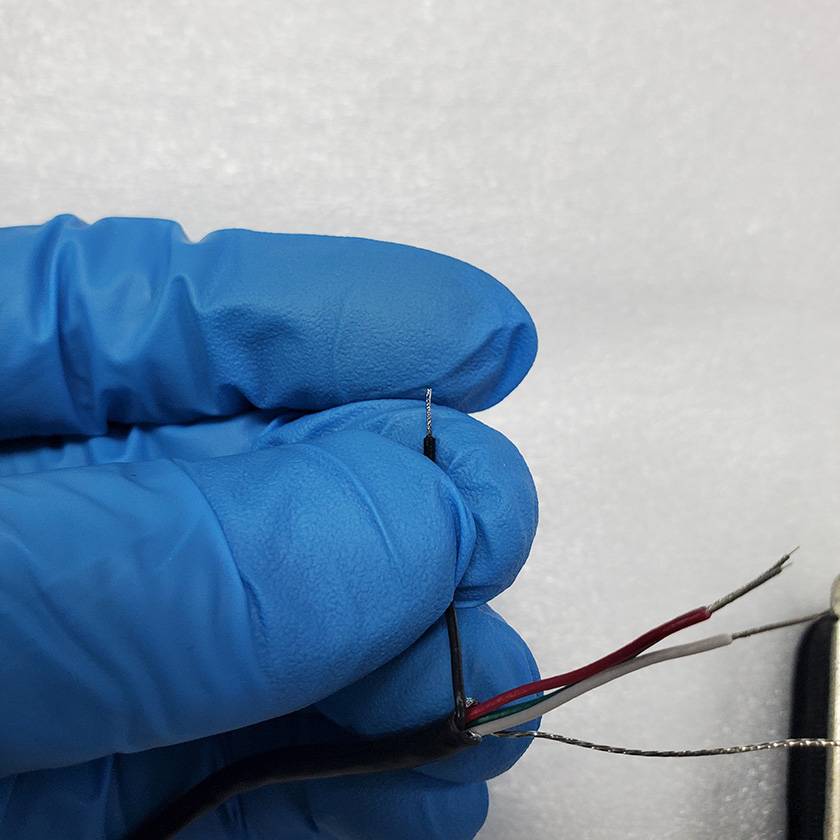
For this example, I’ll be using my personal Seymour Duncan JB pickup and wiring it in a series configuration. As with wires, the first step is to carefully strip the insulation.
For detailed instructions on how to strip wires, please refer to my previous blog post:
⇒ Related Article: “Things to Know Before Pickup Wiring - Part 2”
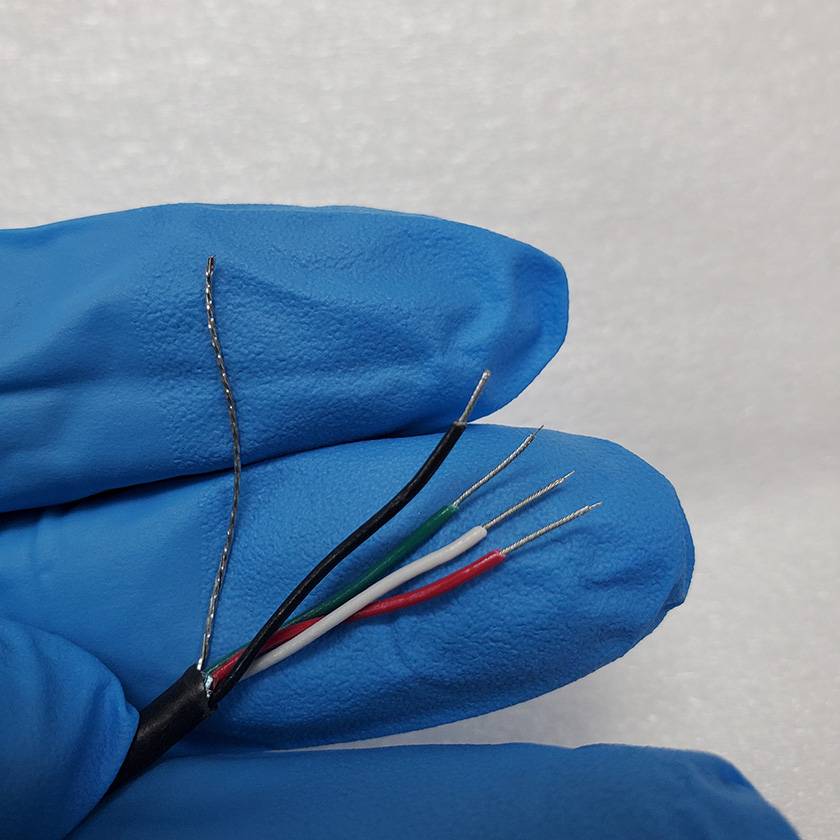
Next, just like with the wires, pre-tin the black wire (the hot lead for the upper coil).
This will serve as the main hot wire.
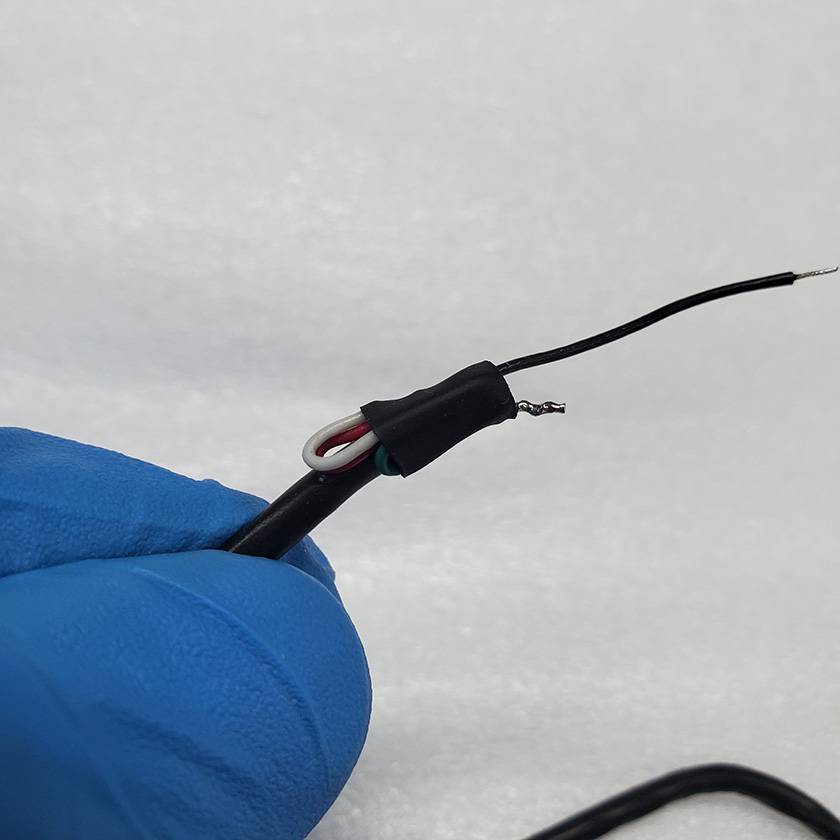
Since this is a series configuration, twist the white and red wires (the cold lead for the upper coil and the hot lead for the lower coil) together and solder them to combine.
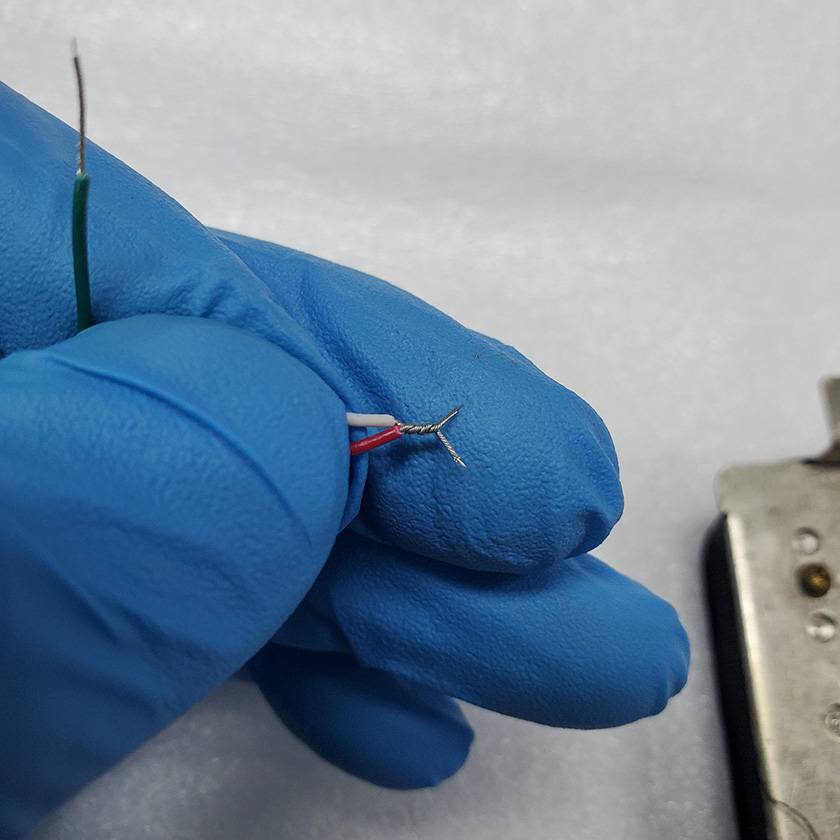
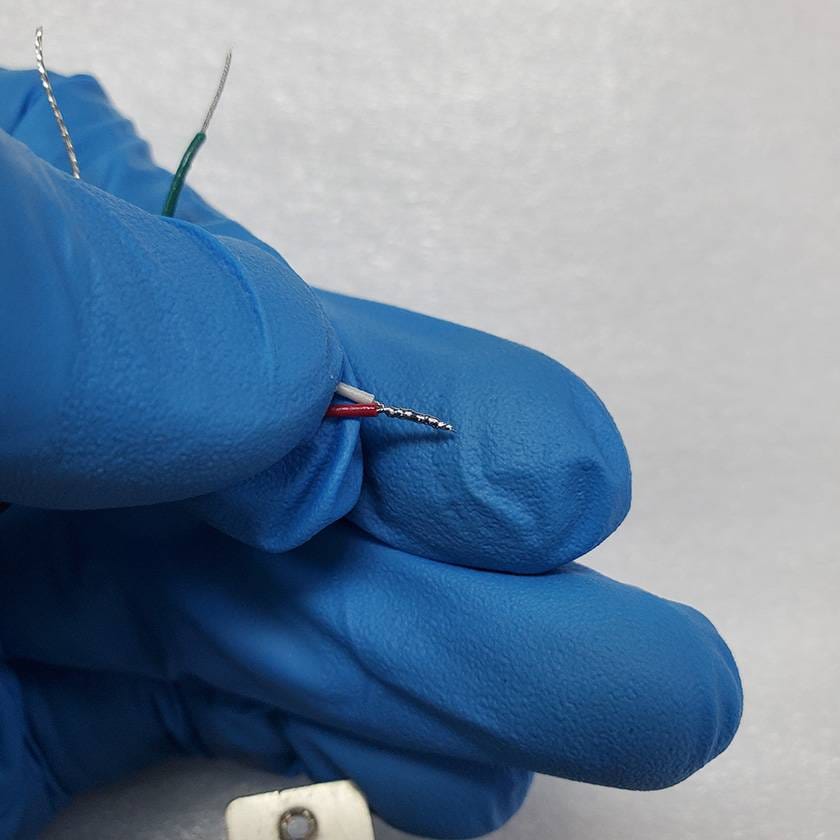
The wires in the photo are shorter, but you may want to leave them longer so you can use them later for coil-tapping or parallel wiring.
Next, twist the green wire (the cold lead for the lower coil) together with the pickup’s ground wire sticking out and solder them to combine.
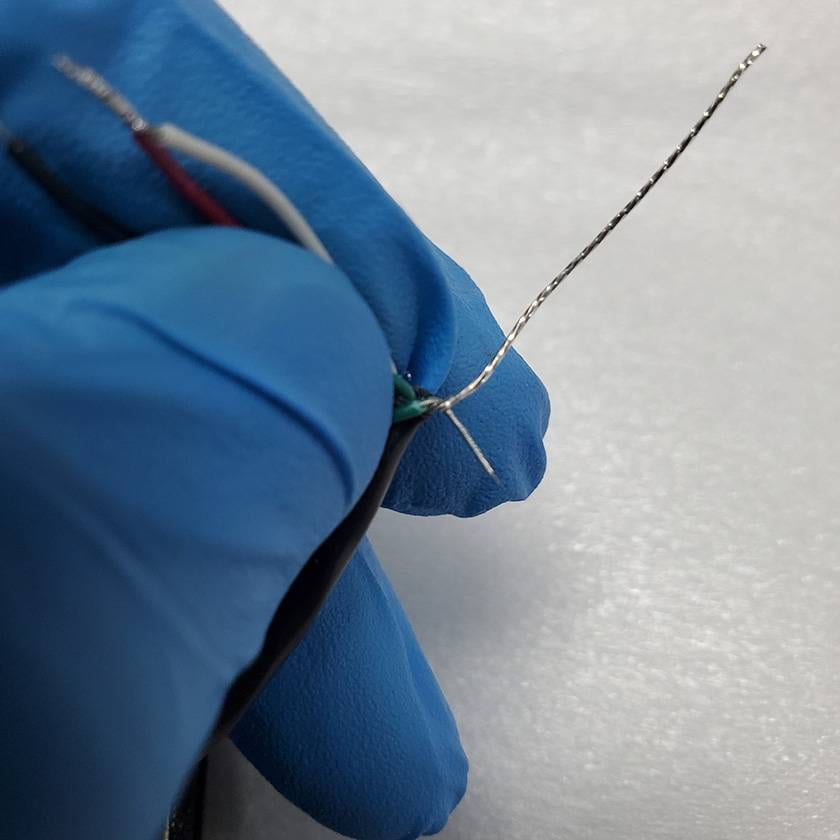
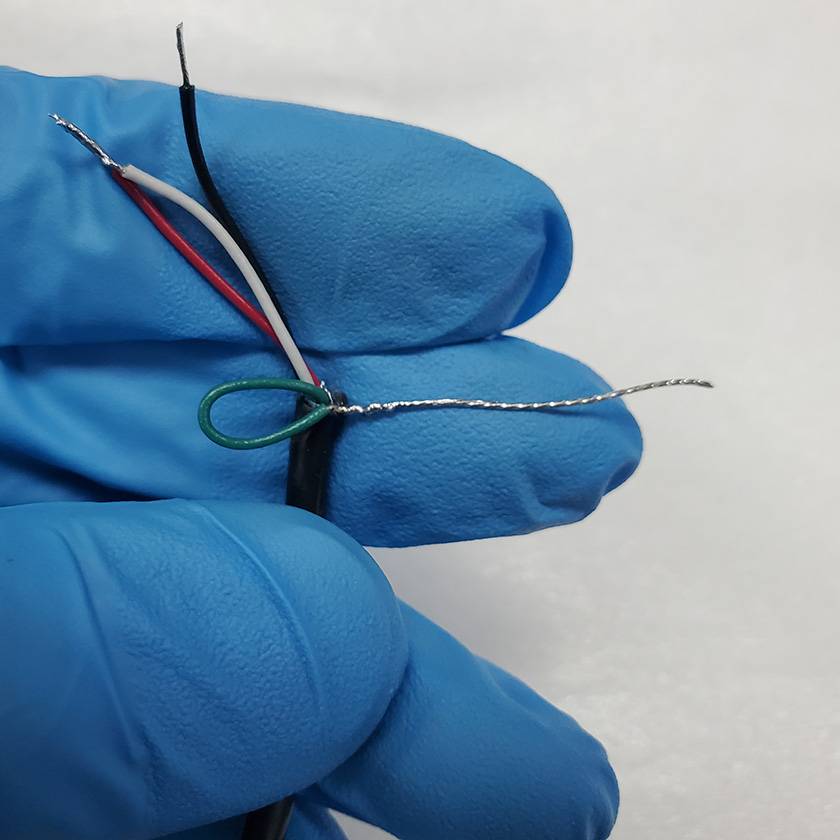
As with the red and white wires, it’s a good idea to leave the green wire a bit longer for future flexibility.
This wire will eventually be connected to the back of a potentiometer to ground it.
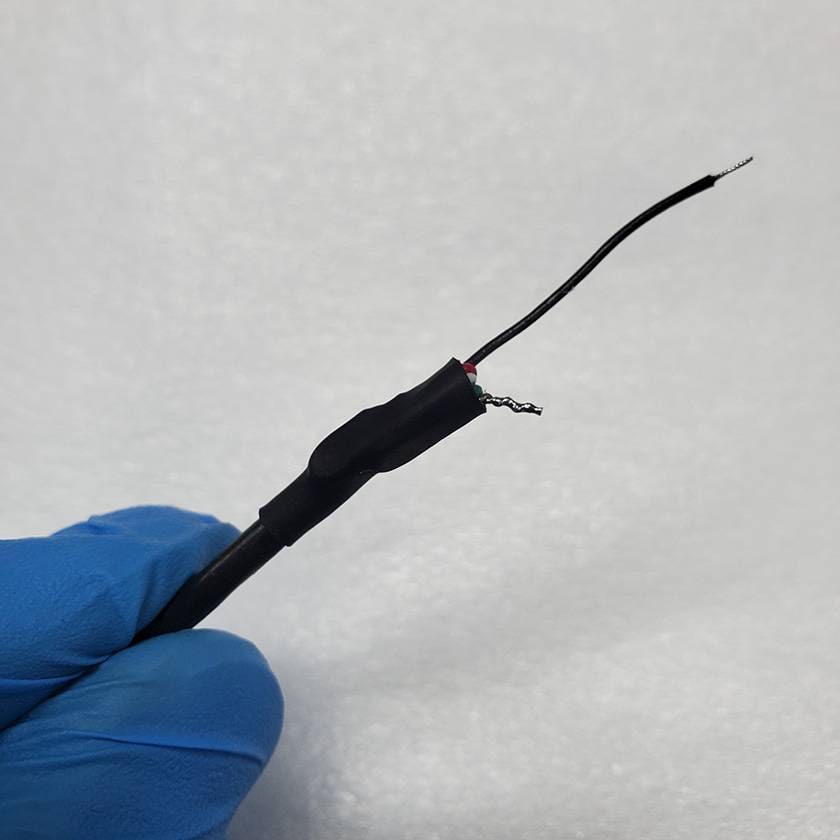
Finally, fold the white, red, and green wires neatly, cover them with a shrink tube of an appropriate length, and use a lighter to apply heat for a snug fit. With that, you’re done!
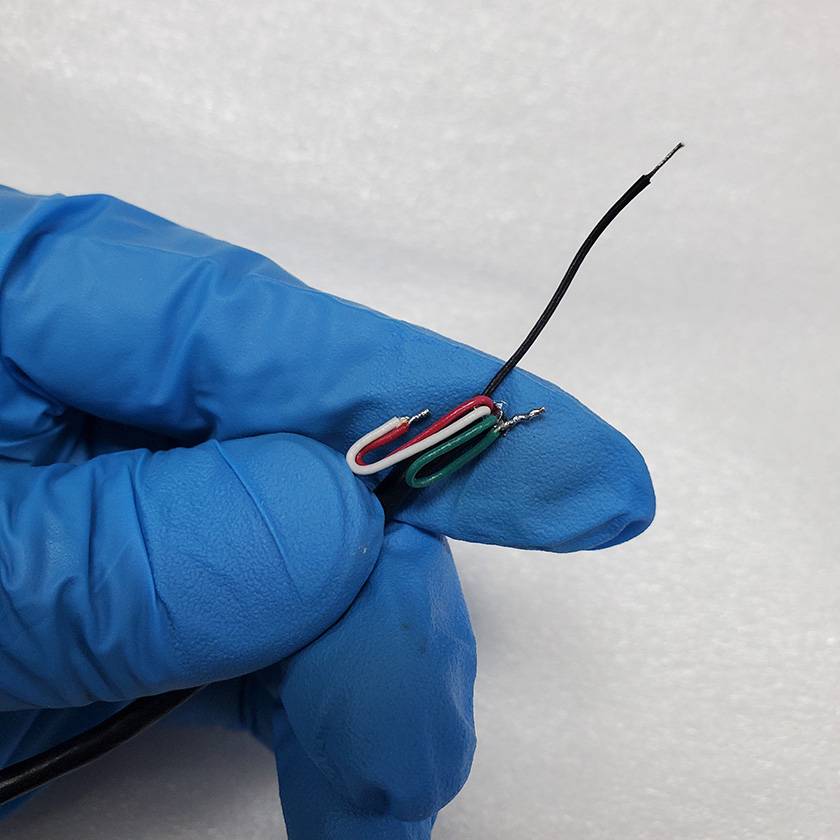
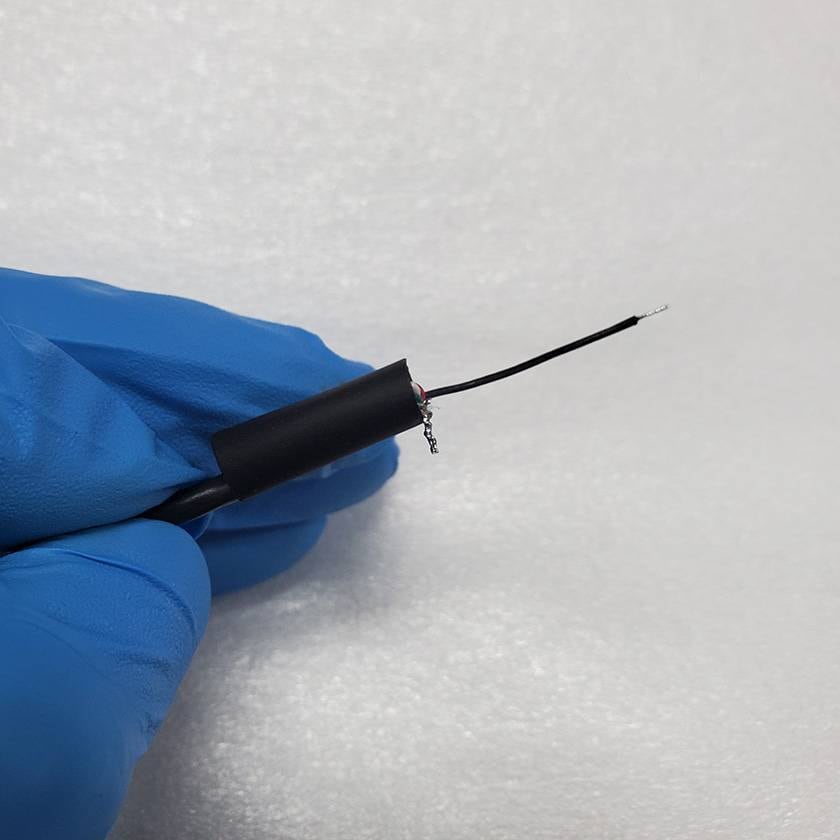
Make sure the ends of the red and white wires don’t stick out from the shrink tube.
If they do and come into contact with the ground wire, the pickup will always be in a tapped state, so be careful about that.
As for the other end, it’s okay if it sticks out.
With this, the wiring preparation is complete. I’d like to explain the soldering process for the potentiometer, but as usual, this blog has gotten quite long, so I’ll cover it in the next post.
I wish I could summarize things more concisely...
Oh, and one more thing I almost forgot!
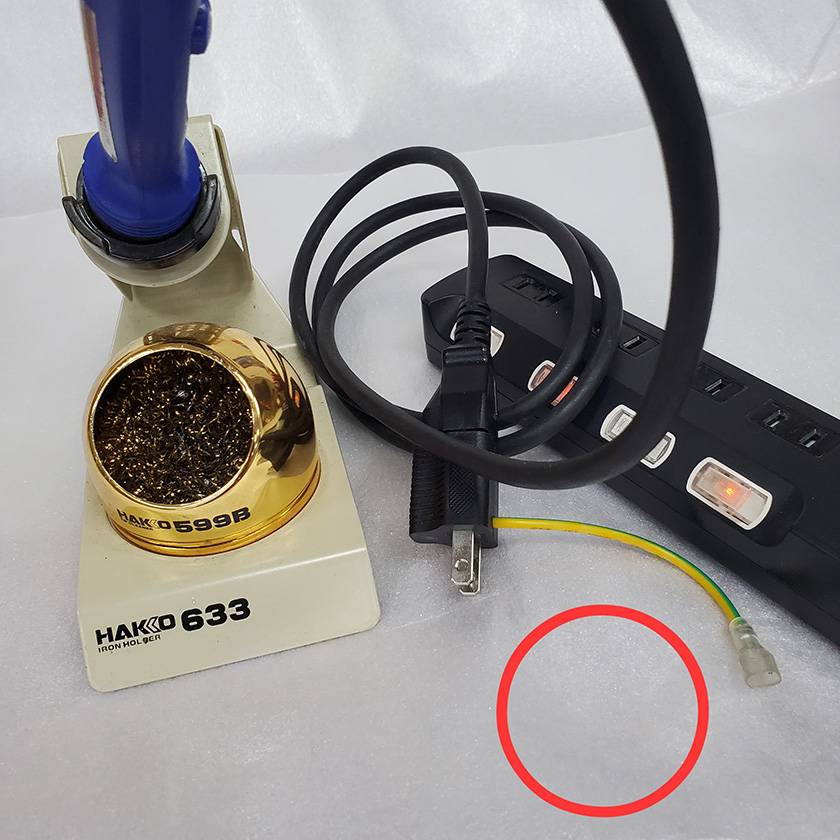
Always unplug your soldering iron after use!
Just flipping the switch on a power strip isn’t enough!
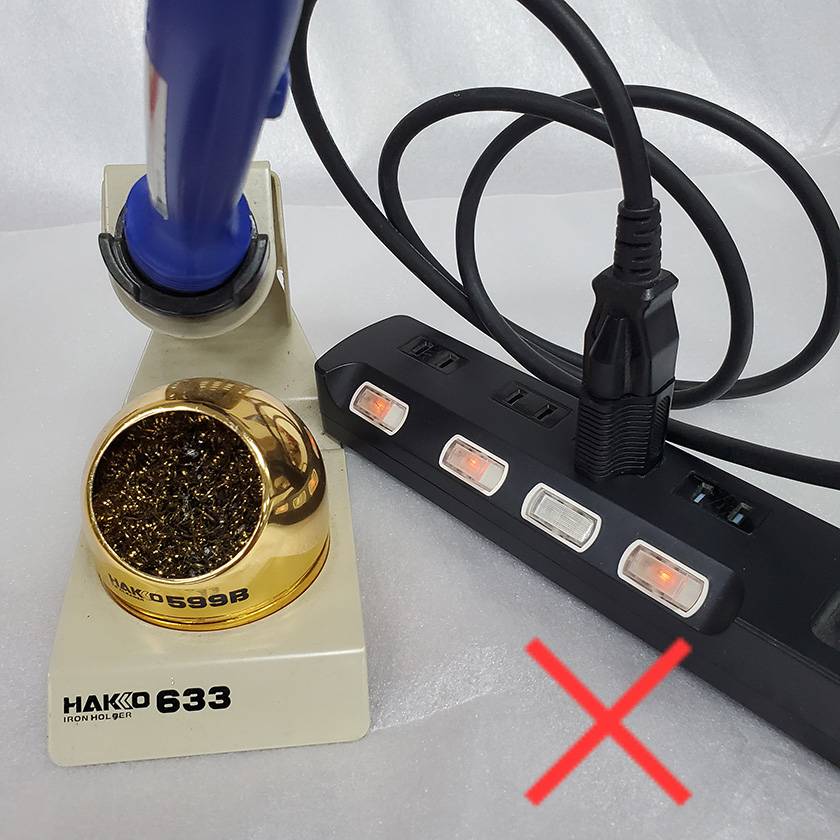
If you rely on that, you’ll inevitably forget to turn it off someday.
I’ve done it myself—waking up in the morning to find the iron still on and breaking out in a cold sweat.
Leaving a hot soldering iron unattended is a serious fire hazard, so it’s incredibly dangerous!
I’ll say it one more time:
Always unplug your soldering iron!
With that, I think I’ve covered everything for this time.
See you again on the Sound House Staff Blog.
Goodbye!


![How to Make a Shielded Cable for Beginners - An Easy-to-Understand Guide on Soldering [Implementation]](/contents/uploads/thumbs/2/2022/4/20220411_2_17445_1.jpg)
 ギターパーツの沼
 プレイテックのギターを最強に改造!!
 配線カスタマイズ 第1回
 パーツの配線を知ろう
 ピックアップの種類(エレキギター)
 お手入れに必要な道具