Hello there!
While listening to music on my commute, I had a moment where I thought, “Ah! ‘Marie-Anne’—wait, no, it’s ‘Separate Ways’.”
I also had the opportunity to attend The Alfee 2024 Wind of Time 50th Anniversary Summer Festival in August. The spectacular performances and powerful vocals at the concert were simply awe-inspiring!
With two of the band members now in their 70s, their energetic performance and impressive hair volume truly transcend humanity.
And as a guitar tech, I can’t forget Takamizawa’s Angel Guitar and the Shinkalion Guitar!
They were incredibly cool.
Now, continuing from my last blog post, today’s topic will cover what to check before installing your new pickup, part 2. I apologize that the previous entry only covered appearance checks.
This time, we’ll dive into something equally important—measuring the pickup’s resistance.
This is critical, so I hope you stick with me until the end!
○ Checking the Resistance Value
Multimeter
One of the most important things to check before installing a pickup is its resistance. You’ll need a multimeter for this.
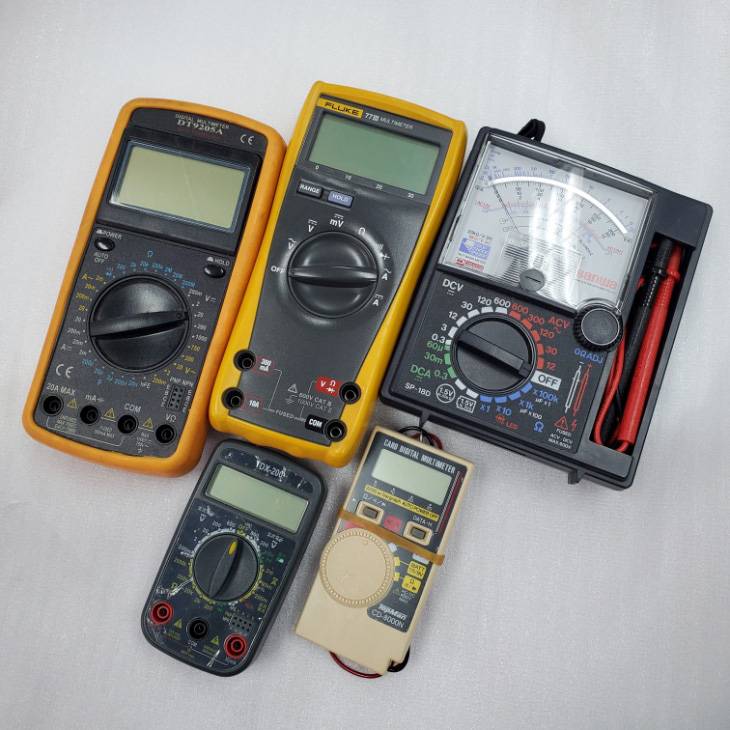
There are many kinds of multimeters, both big and small, and they look pretty cool too.
A single multimeter can measure current, voltage, resistance, continuity, and some can even measure capacitance.
You might be thinking, “Do I need to buy a multimeter along with the pickup?” Well, it’s worth having one, even if it is an inexpensive one.
Since many people who replace their pickups eventually get into modifying or building their own effects pedals and tube amps.
A multimeter will be incredibly handy for those projects!
There are both digital and analog multimeters, but for today, we’ll focus on using a digital one. I’ll talk about the difference between digital and analog multimeters sometime soon.
Measuring a pickup’s resistance with a multimeter is super simple. As shown in the photo, set the multimeter to the Ω symbol and connect the pickup wires to the probes of the multimeter.
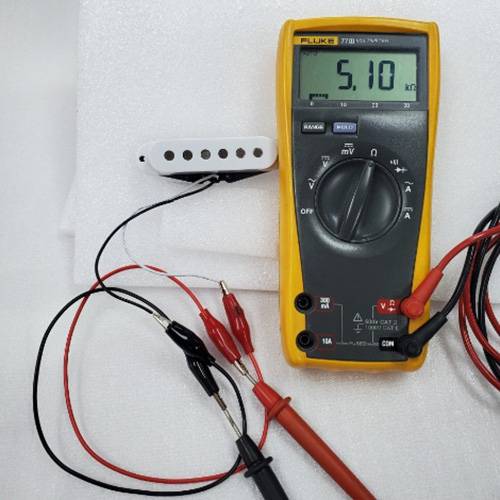
Having alligator clips to secure the probes to the wires is recommended for a more stable connection.
Correct Resistance Values
Now, after taking your measurements, you’ll need to compare them to the correct values.
Most pickups will have the resistance value listed on the box, in the manual, or on the manufacturer’s website. If the measured value matches the specified one, then you’re good to go!
It’s easy!
However, the story doesn’t end with the pickup’s resistance value.
In fact, the measured resistance and the listed resistance value will almost always have some discrepancy.
This is because of the nature of the pickup’s construction—it’s simply a magnet wrapped with enameled wire. Even if the same magnet and wire material are used, and the same number of windings are applied during production, slight variations in the wire’s thickness or slight shifts in the winding position can cause differences in resistance.
The temperature of the environment where the measurement is taken can also affect the resistance slightly.
There’s even a saying that hand-wound pickups have a unique sound, and this variation might be part of the reason why.
For example, I measured the pickup below:
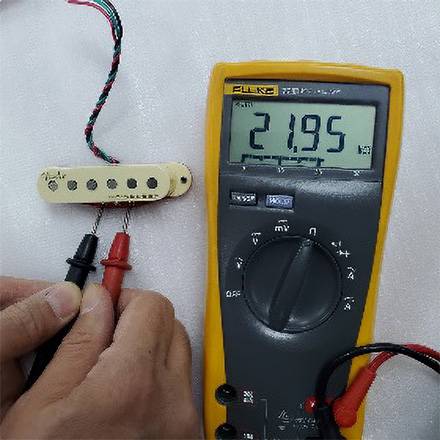
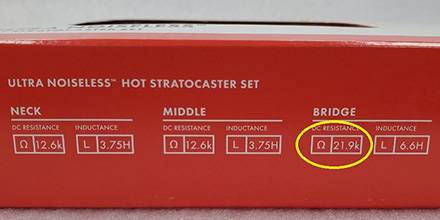
There’s a small variation (+0.5kΩ), but it’s still within the acceptable range.
You can expect a typical variance of about ±0.2-0.3kΩ from the manufacturer’s listed value.
Identifying Faulty Resistance Values
It’s also important to know what bad resistance values look like.
Let’s measure a pickup that isn’t producing sound.

Here, the multimeter isn’t giving any reading, which indicates a clear issue.
Upon inspection:
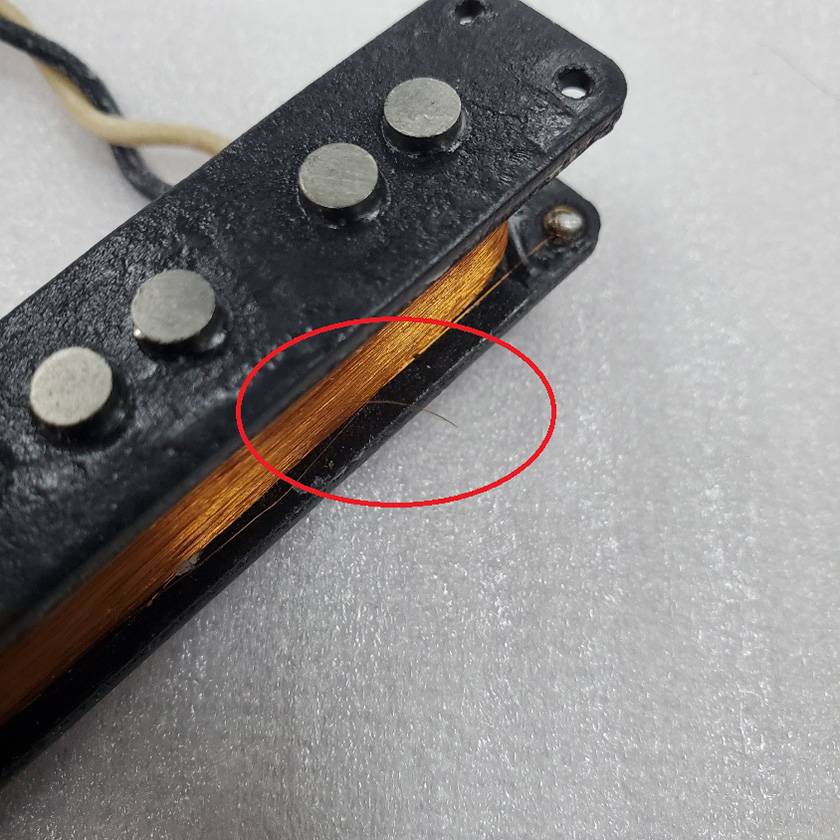
The wire is broken.
It’s a classic example of a faulty pickup.
Here’s another example:
This is a stacked single-coil pickup.
Measuring it with the multimeter:
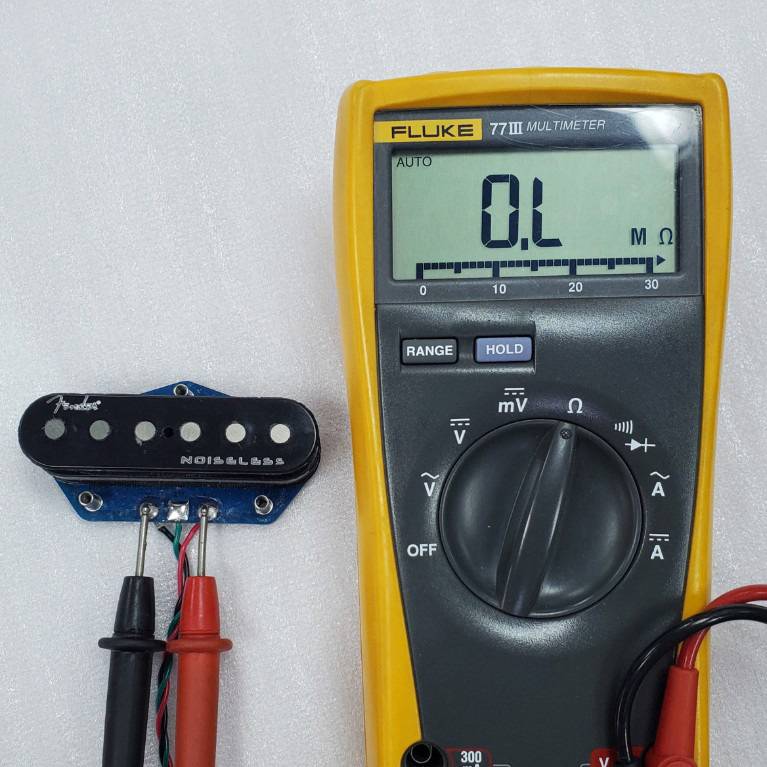
Again, no reading.
It seems like a defective unit, but let’s investigate further.

When testing one of the coils, it seems fine:
Measuring the other coil:
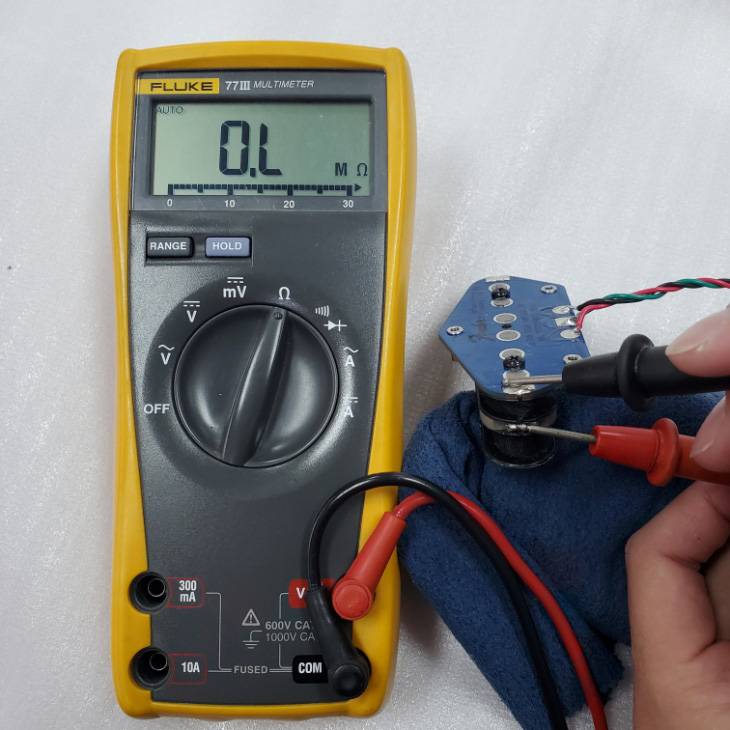
There’s no reading.
This is a rare case where only one of the coils has a broken wire.
Here’s the result.
This time, I didn’t have any examples on hand, so I couldn’t take pictures, but other patterns of initial defects include pickups showing resistance values that are significantly higher or lower than the official values, or cases where the resistance value reads as infinite.
A Final Note
This is a side note, but some people choose pickups based on the belief that humbucker pickups, which have two coils, have a higher resistance and therefore higher output compared to single-coil pickups. They use resistance as a reference to estimate the output.
However, this isn’t always the case, especially with stack-type single-coil pickups.
For example, pickups like the Fender Noiseless Pickups or DiMarzio HS-3, which were measured earlier in this article, fall into this category.
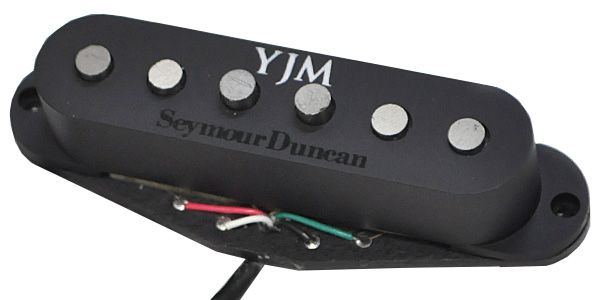
When I measured this wild Duncan YJM I encountered at home...
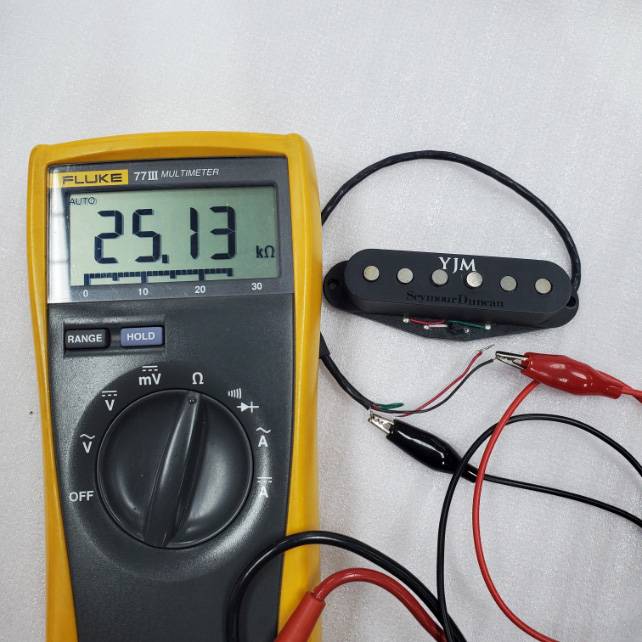
I got quite a high resistance value. The Invader, known for being a high-output pickup from the same manufacturer, has a resistance of 16.6KΩ, so this is quite high.
However, when you actually play through these two pickups, there’s a surprising difference in volume.
Particularly with the YJM pickup, if you buy it expecting the heavily distorted, intense guitar sound that Yngwie Malmsteen is known for on stage, you’ll be shocked at how quiet it is.
But on the plus side, it’s much lower in noise, and when you crank up the amp and effects, the pickup seems to say, “This is the limit of my output!” That character really shines in its tone.
In other words, resistance value does not directly equate to output. It’s better to think of resistance as just one factor to consider when selecting a pickup.
So, how was the explanation about checking pickup resistance?
While using a tester might not be the most casual approach, it’s a really handy tool. I recommend considering purchasing one for future use as well.
There’s one more important aspect of checking pickups.
As I mentioned in Part 4 of this blog series, it’s about phases.
Next time, let’s dive into how to check a pickup’s phase.
See you again on the Sound House Staff Blog.
Goodbye!








 ピックアップ交換大作戦!
 ピックアップの種類
 配線カスタマイズ 第1回
 パーツの配線を知ろう
 ピックアップの種類(アコースティックギター)
 ピックアップの種類(エレキギター)
