


You Guys!!!
Do You Want to Hear the Sound of My Custom-Built Pedal?!
“Woooooo!!”
Or at least, that’s how I imagine the response, even though there probably aren’t that many people out there. Hello, I’m S, a high school guitarist.
It’s been quite a while, hasn’t it!?
To those who may have been looking forward to this (if you exist), I’m so sorry for the delay.
Between school festivals, competitions, live performances, creating original songs, and attending open campuses—basically, typical high school activities—I’ve had little time to write.
But now that summer vacation is over and the new semester has started, things have calmed down, and I can finally get back to writing.
Now then, where were we last time...? Oh right, we had just finished painting the pedal casing.
In this final part of the series, it’s time to assemble the pedal and do a sound check. What kind of sound will a pedal built by a high school student with zero knowledge of electronic circuits produce? Let’s find out.
Assembly Process
The assembly this time involved the following steps:
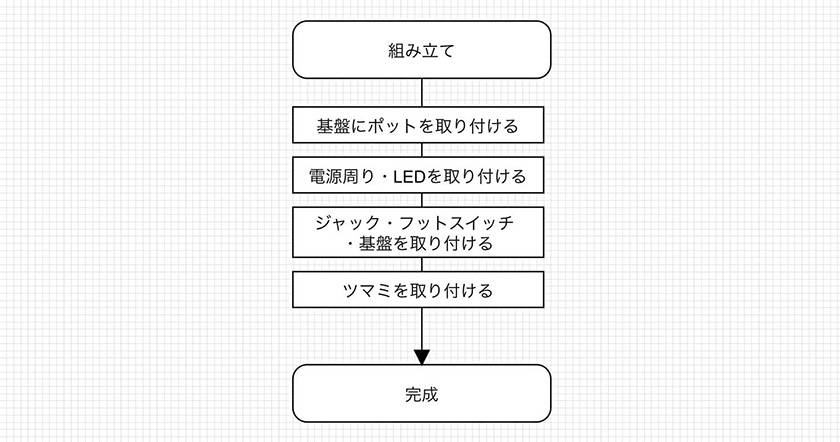
Now, we’re finally attaching parts that make it look like an actual effects pedal.
With the end in sight, I’m filled with both excitement and a slight sense of sadness.
I’m sure once it’s completed, those feelings will be overwhelmed by joy, though.
By the way, this time around, there’s going to be as much soldering as there was in the circuit board creation phase.
Speaking of soldering, I’ve picked up a few tips during this pedal-building process, which I’ll share along with a picture of me attaching the potentiometers.
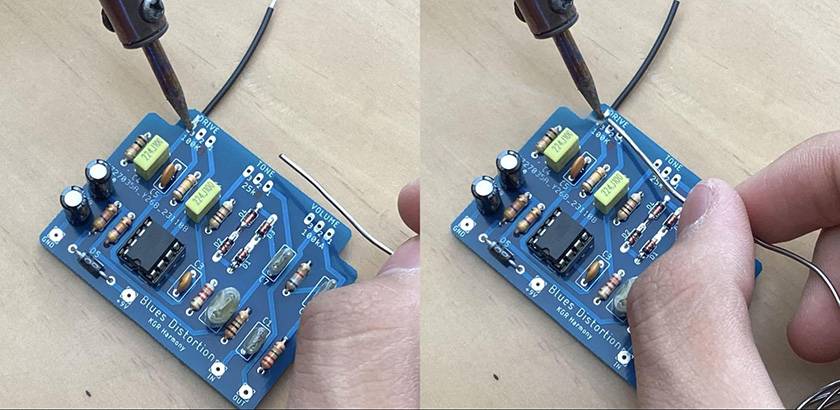
When soldering, first press the iron against the part of the board you want to solder to heat it up, then move the hand holding the solder to make the connection.
The hand holding the iron doesn’t need to move that much.
In fact, keeping it steady while pressing the solder against the board is more stable and faster.
The key here is to make sure you give the board enough time to heat up!
If it’s properly heated, the solder will sit neatly on the board.
This is a tip that I’m glad I figured out—it’s crucial for creating a trouble-free pedal.
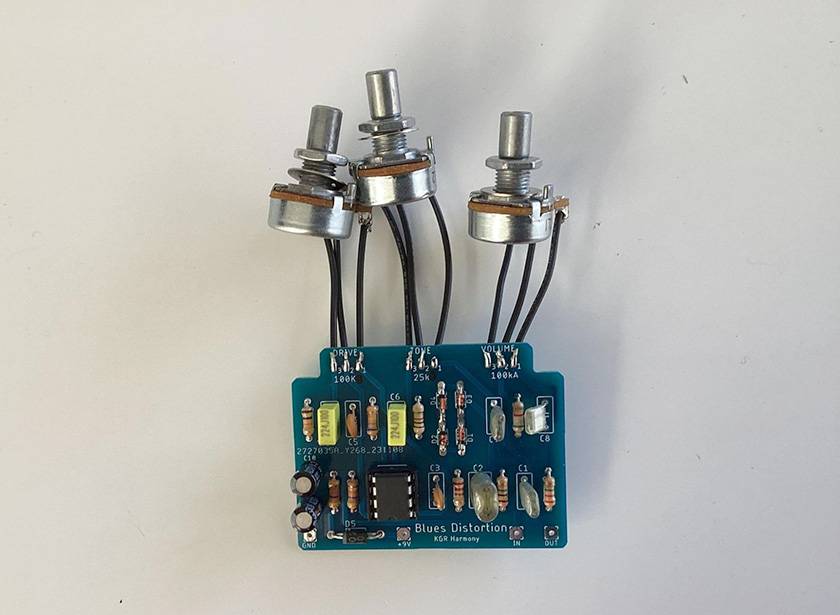
With that, I attached the potentiometers to the board!
Then I went ahead and soldered the power connections and attached the LED as well.
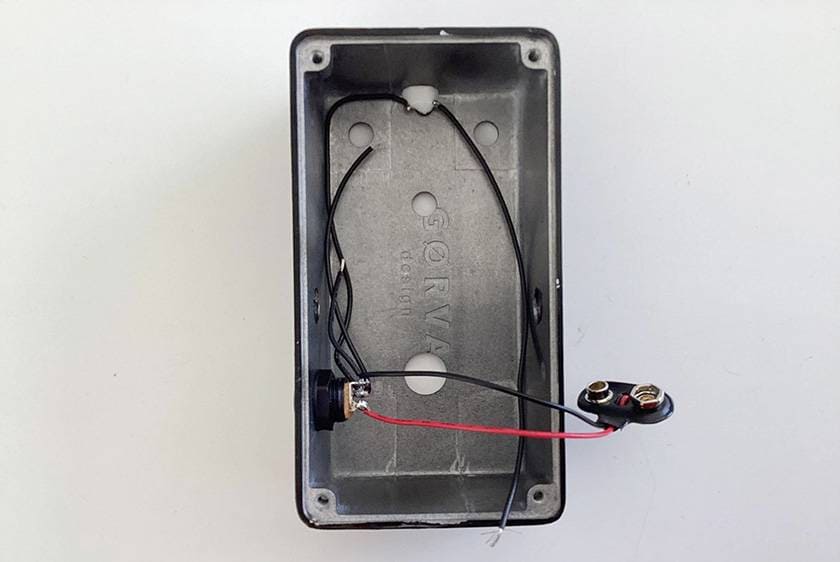
Next, I connected the circuit board, jack, and footswitch...
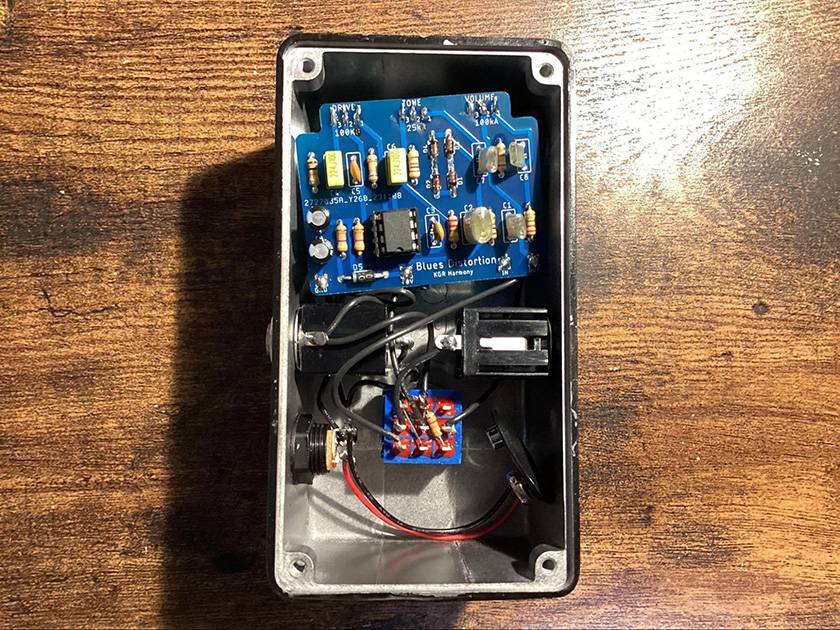
And now, the inside of the pedal is really starting to look legit!
The mechanical look is pretty cool...
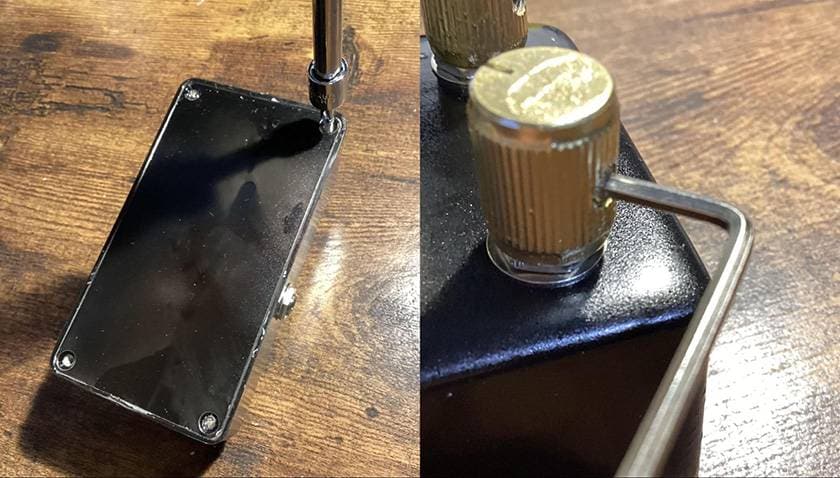
I put on the lid, attached the knobs...
and finally, stamped the name on it with an eraser stamp!
Behold, Astra is complete!
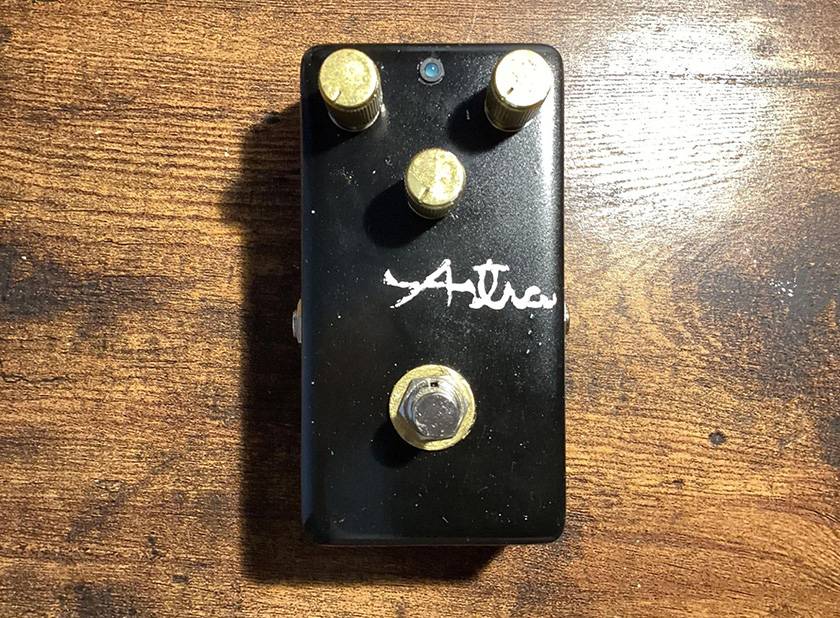
After five days of building, my custom pedal is done, and I feel an incredible attachment to it. There were some failures along the way, but through trial and error, I managed to complete it!
That said, the most important part is the sound. As a beginner who made this with no prior knowledge, I’m sure you’re just as curious as I am about how it sounds.
So, let’s check it out!
Soundcheck
Here’s the setup for the sound check:
- Guitar: Gibson Les Paul Special
- Amp: JCM 800 modeling amp simulator
Guitar pickup is set to mix and amp settings are: gain=1, bass=4, mid=7, treble=6, presence=6.
First, let’s hear the bypass (effect off) sound.
Now, let’s engage Astra with the settings gain=4, tone=8.5, level=6...
Whoa!!!
It’s got some seriously nice distortion!
It’s warm like a Marshall amp, with that signature sharpness in the high end. The distortion has slightly bigger grains, and the sound matches the Les Paul perfectly for a rock vibe!
I also turned up the reverb later to get a shoegaze-like sound, which was just amazing—thunderous noise that overwhelms the listener.
Personally, I liked the sound with the gain dialed down a bit, giving an overdrive-like tone that’s versatile and easy to use.
Since I play in a school band where we cover a lot of different songs, this sound is really useful.
Final Thoughts
Honestly, I was surprised at how good the sound turned out. I was able to enjoy building this pedal at a price even a student like me could afford, and now that it’s done, I can actually use it in live settings.
This experience alone is worth more than what I spent.
For guitarists who are interested in electronics, I can confidently recommend making your own pedal—it’s totally worth it.
Looking back, even though the build time was short—just five days—I still vividly remember the entire process, even now, six months after its completion. That’s how much this pedal means to me.
And with that, this long pedal-building series has come to an end. Thank you so much for reading all the way through!
Here’s to a great guitar life!
The “sound & person” column is made possible by your contributions.
For more information about submissions, click here.


![[Part 2] A High School Guitarist Wants to Build a Pedal - Enclosure Painting](/contents/uploads/thumbs/5/2024/4/20240423_5_26567_1.jpg)
![[For Students] How to Create Compact Pedal Sounds with the ZOOM G3n!! - Overdrive Edition](/contents/uploads/thumbs/5/2023/8/20230821_5_23671_1.jpg)

 【初心者向け】エフェクター講座
 あなたのエフェクターボード見せてください
 ベース用エフェクターの種類
 エフェクターのつなぎ方
 エフェクターの種類
 ギター演奏に必要なものは?


