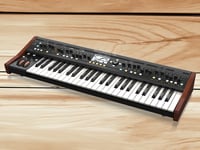
There’s a piece of gear that, when you play it in front of people, makes the audience stare in amazement—but you still want to hold onto it carefully.
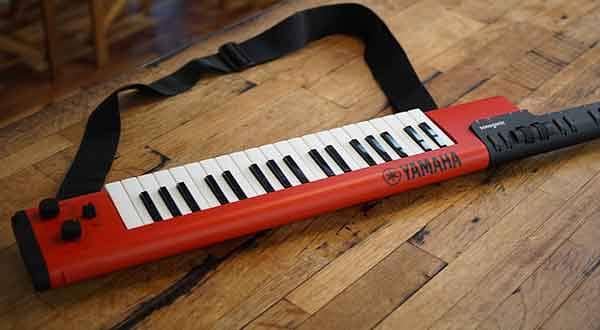
That is the YAMAHA shoulder keyboard, the KX5.
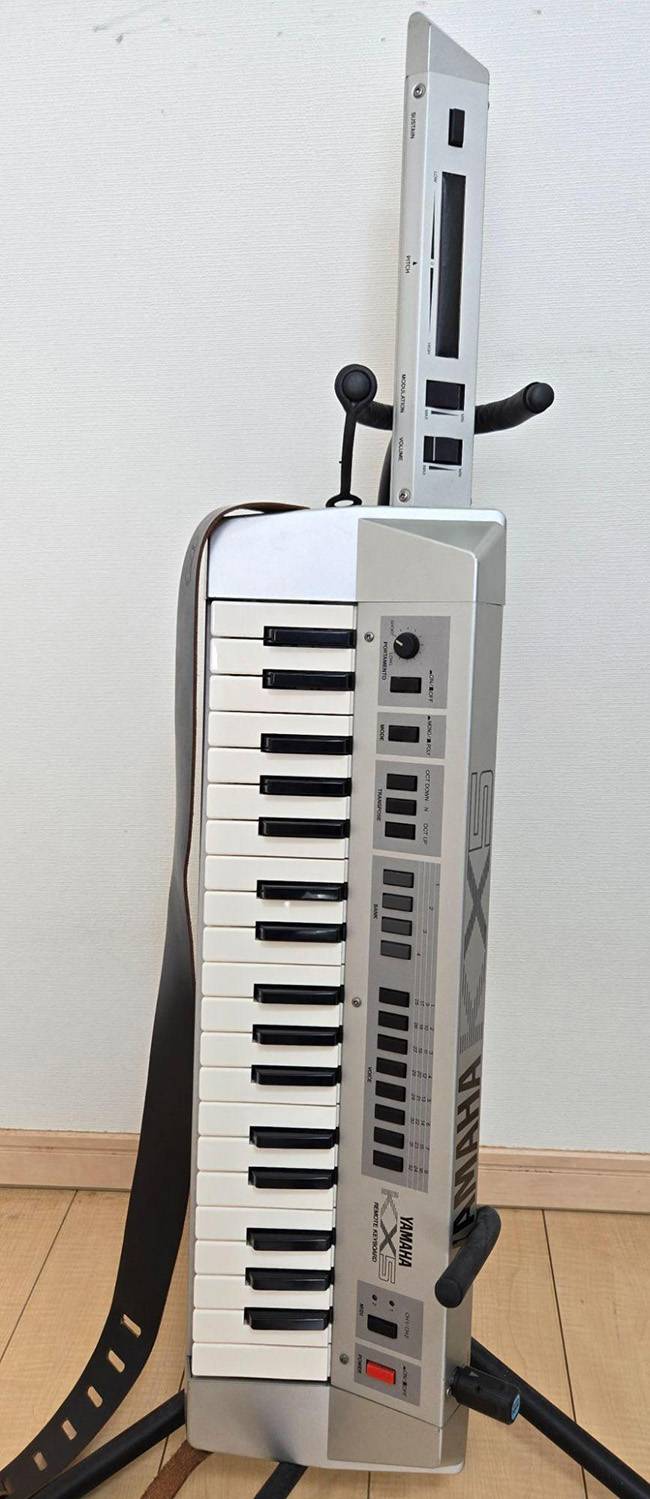
The KX5 was released in 1984, which was over 40 years ago.
1984 was just one year after the release of the original Famicom and the legendary FM synthesizer, the DX7.
The internet wasn’t even widespread yet, and it would still be a year before the appearance of shoulder phones and the hit of Bikkuriman chocolate.
Thinking about it like that, even though it’s “just” 40 years ago, it really feels like a long time ago…
At that time, the music industry was riding the wave of digitalization. Guitars were transitioning from pedalboards to massive digital rack systems, and analog synthesizers with countless knobs were evolving into digital synths with LCD screens. It was a period of rapid and dizzying change.
Amid that era the KX5 appeared, artists who loved new technology eagerly adopted it. In Japan, notable users included:
- Ryuichi Sakamoto
- Tetsuya Komuro
- Daisuke Asakura
- Minoru Mukaiya
…among others.
It seems that the KX5 is mainly used by people well-versed in synthesizers.
This time, I would like to give a thorough explanation of the KX5’s features and how to use it.
Purpose
First of all, the KX5 is a MIDI keyboard, so it’s used to trigger hardware or software sound sources. The KX5 itself cannot produce sound, and fundamentally, its functions are no different from any MIDI keyboard used for DTM.
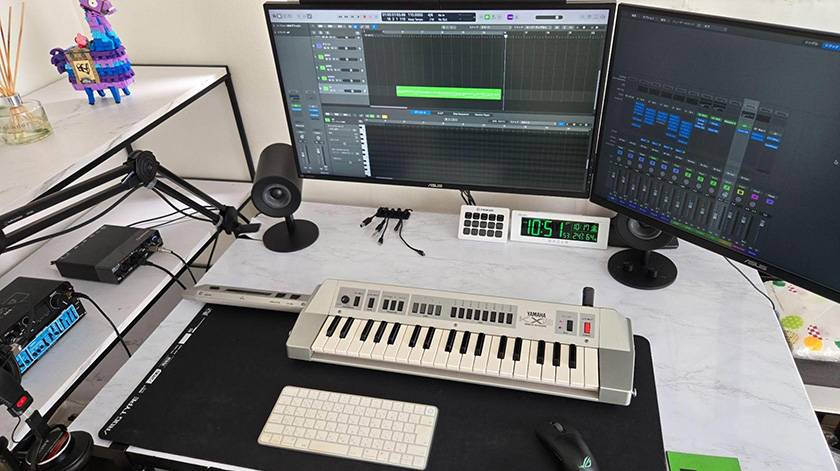
You can also use it in ways like shown in the photo.
It weighs 3.7 kg. People often say it’s heavy, but for those who regularly play guitar, it’s not that bad. More than the weight, the back panel pressing against the pelvis can be painful (laughs).
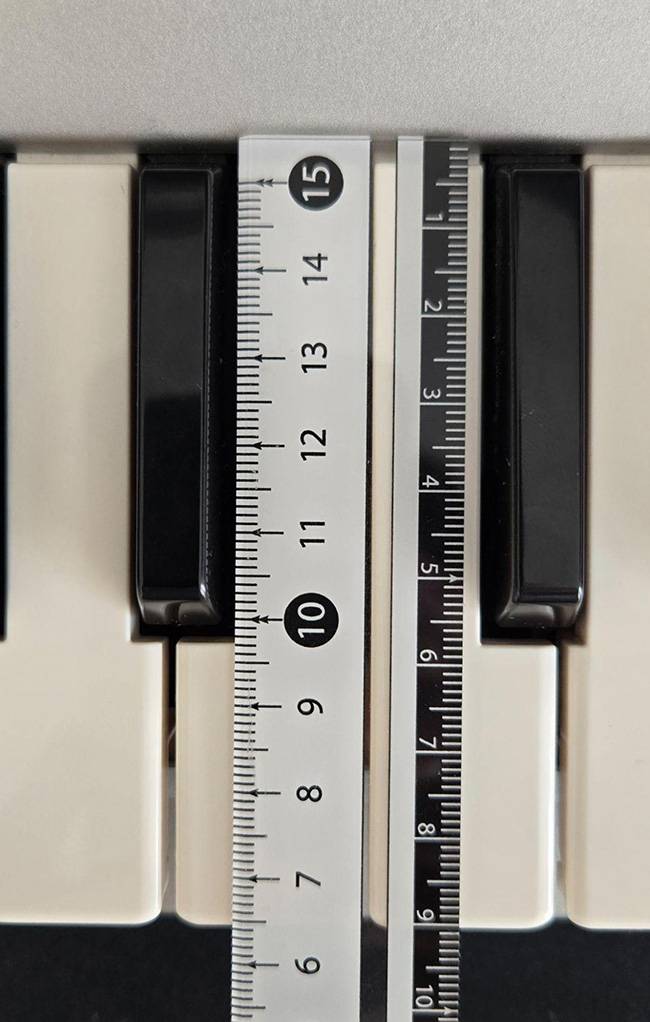
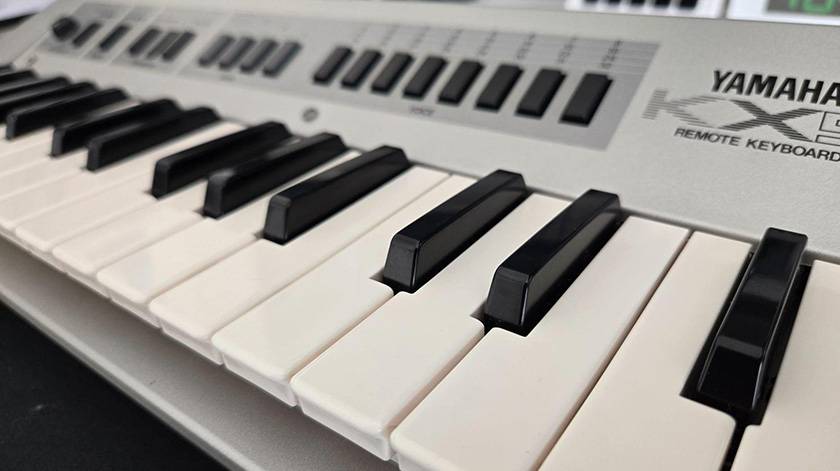
Keys
The KX5 uses mini keys, about 9 cm long and 2 cm wide.
They feel slightly awkward, but they aren’t too difficult to play. The keys use leaf springs, giving a tactile response that is neither too heavy nor too light. Compared to the feel of modern synthesizers, the action is a bit “clicky”.
It’s often said among KX5 users that these mini keys are prone to breaking.
If you hit the base of a black key too hard, the root of the black key can snap. When that happens, the leaf spring loses tension, and the key stays down and becomes unplayable.
I actually had this happen to me a few years ago and had to repair it. I just glued the broken piece back in place with superglue, so now I take precautions: I intentionally set a higher velocity on the sound source and play the keys lightly.
Functions
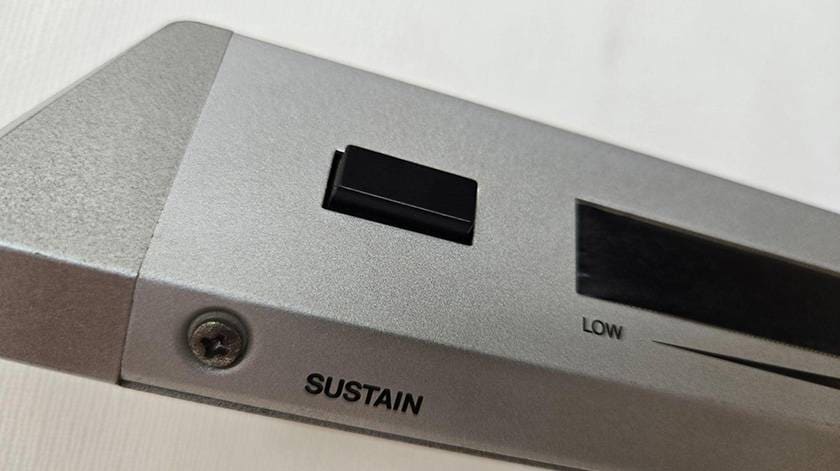
First, let’s look at the grip section for your left hand. From the tip:
SUSTAIN Button
Works just like the sustain pedal on a piano. In Logic Pro, holding down the button writes sustain automation while pressed.
Ribbon Controller
(I covered it with black masking tape because it had yellowed.)
This is used for pitch bending. The range of the bend depends on the settings of your sound source. It has a slightly squishy feel—there’s almost no tactile feedback from pressing it, but it also doesn’t respond to the lightest touch. You need to press it fairly firmly from above for it to react.
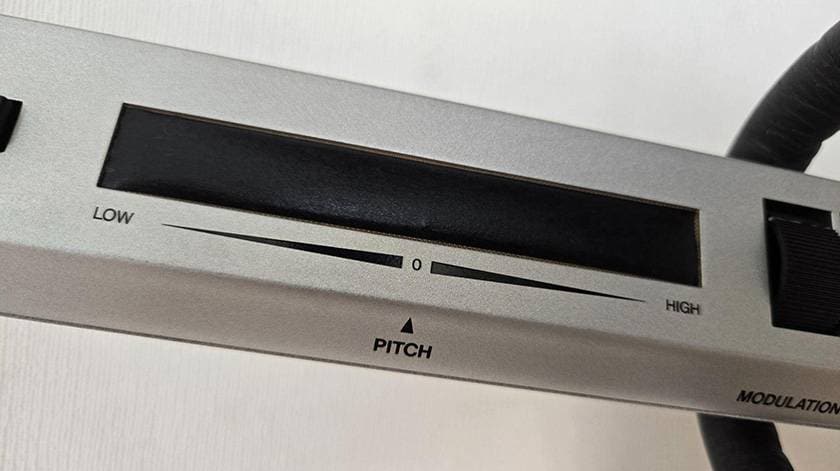
You don’t need to start from the ribbon’s central position since the pitch changes according to where you press. This allows for trills and other expressive techniques.
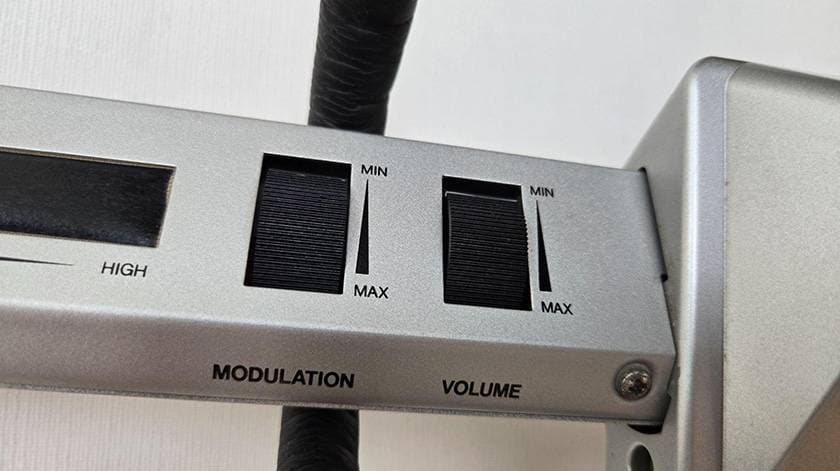
Modulation Wheel
Applies modulation. The rotation feels smooth and slippery, so it’s not ideal for making rapid, aggressive changes. The effect strength depends on the sound source, so if modulation is turned off on your sound module, turning the wheel won’t produce any change.
Volume Wheel
Adjusts volume. This wheel also has moderate resistance, so it’s not suitable for aggressive volume swells. If you want to perform Van Halen-style volume techniques, it’s better to use a dedicated volume pedal.
Next, let’s move on to the main panel of the unit, starting from the left side…
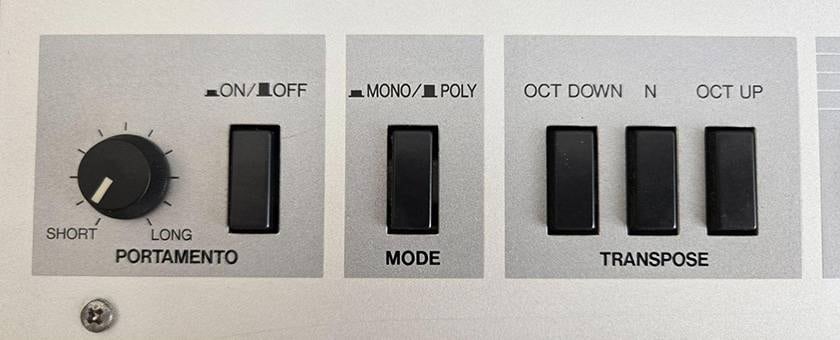
Portamento Switch + Knob
This toggles portamento on or off. The knob adjusts the pitch transition time—the time it takes for the pitch to slide from the first note played to the next. The range is wide, allowing everything from very short slides to slow pitch changes over several seconds.
Mono/Poly Switch
Switches between monophonic and polyphonic modes. For example, setting it to mono makes fast solo passages easier to hear and control.
Transpose Switch
Shifts the pitch up or down by one octave. Since the KX5 keyboard covers 3 octaves, this is usually sufficient for one-handed playing. Using this switch, however, allows you to access the equivalent of a 5-octave range like a 61-key synth.
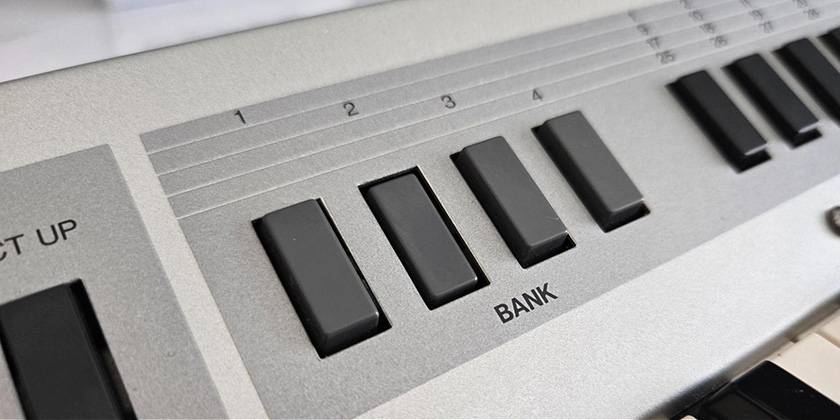
Bank / Voice Selection Switch
This is mainly used when connecting the KX5 to a hardware synthesizer.
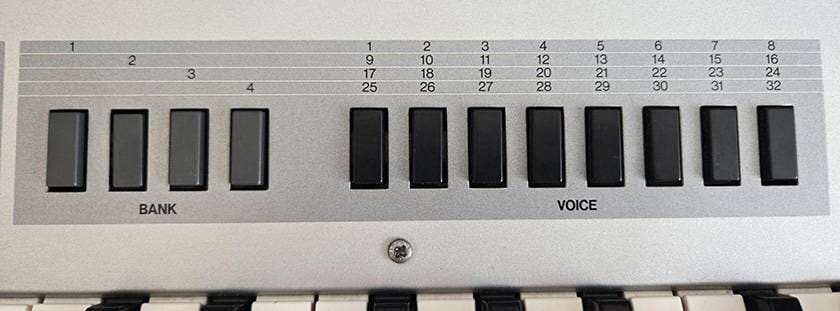
- Selecting Bank 1 → Presets 1–8 are available
- Selecting Bank 2 → Presets 9–16 are available
This continues up to Bank 4 × MIDI 2 channels (for 2 sound modules), allowing the user to select up to 64 different sounds. The available preset numbers change depending on which bank button you press.
For example, if you are playing Preset 1 and want to switch to Preset 30, you first need to press the Bank 4 button, then select Preset 30.
Note: Sounds you want to play on the KX5 should ideally be saved to lower preset numbers, as the system cannot select sounds saved in high-numbered presets like 100.
Aside: The TRANSPOSE, BANK, and VOICE buttons cannot be pressed simultaneously. When you press one button, it stays depressed, and the previously pressed button “clicks” back into place—an amusing mechanism reminiscent of old cassette decks.
To return all buttons to the unpressed state, lightly press the unpressed button in the section you want to reset, and the previously pressed button will pop back into place.
MIDI Channel Selector
Pressing the button alternates between MIDI Ch 1 and Ch 2. By setting your hardware’s MIDI THRU or the DAW’s receiving channel, you can switch between two different sound modules.
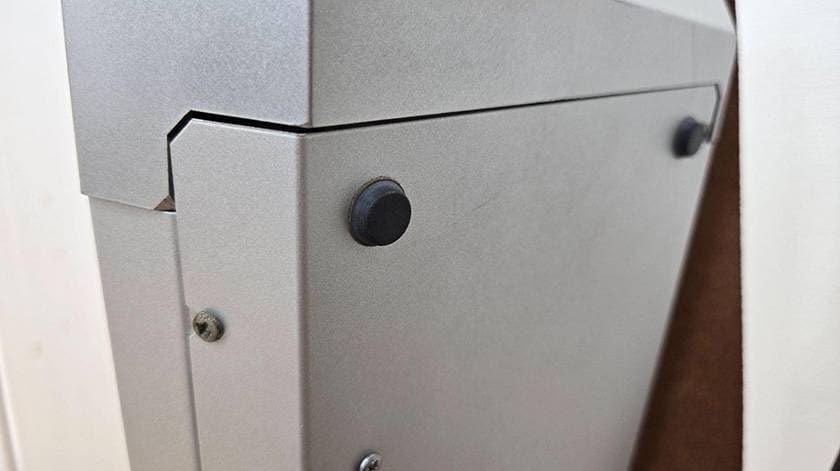
Power Button
A prominent red button. Its position prevents accidental presses during performance.
When powered on, the channel lamp to the left lights up red. If battery levels are low, it blinks to alert you, preventing sudden battery failures during play.
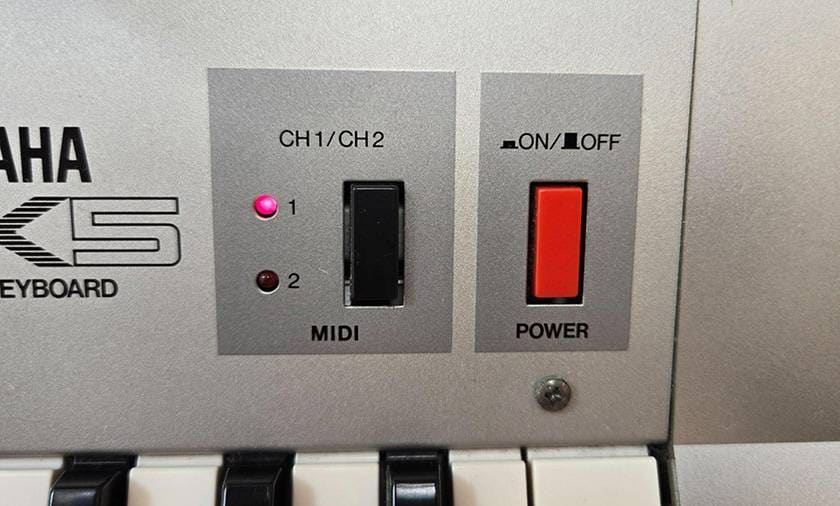
Note: The power will not turn on unless a cable or adapter is connected to the MIDI jack.
Rear Panel
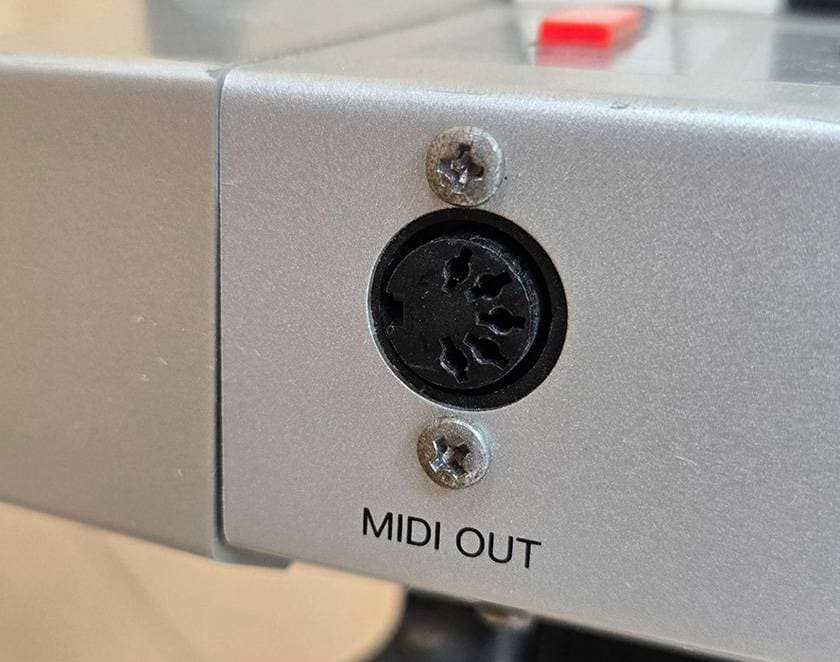
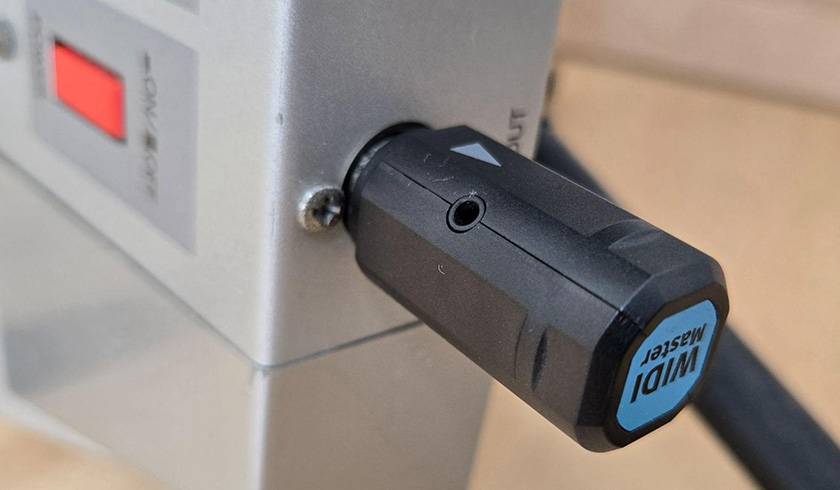
5-Pin MIDI Jack
The connection is very secure, so even if you accidentally step on the cable, it’s unlikely to come loose. Commercial MIDI wireless transmitters can also be used.
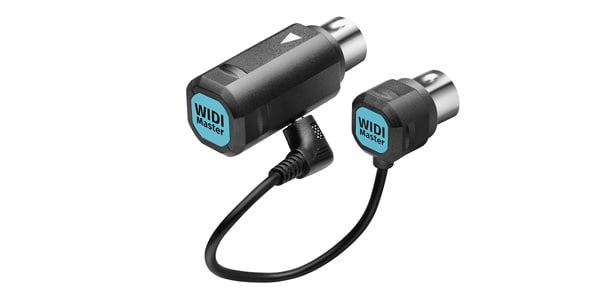
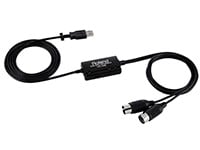
This is the wireless MIDI system I use for live performances.
For short distances of a few meters, latency is hardly noticeable, but at around 15 meters, a slight lag can be felt.
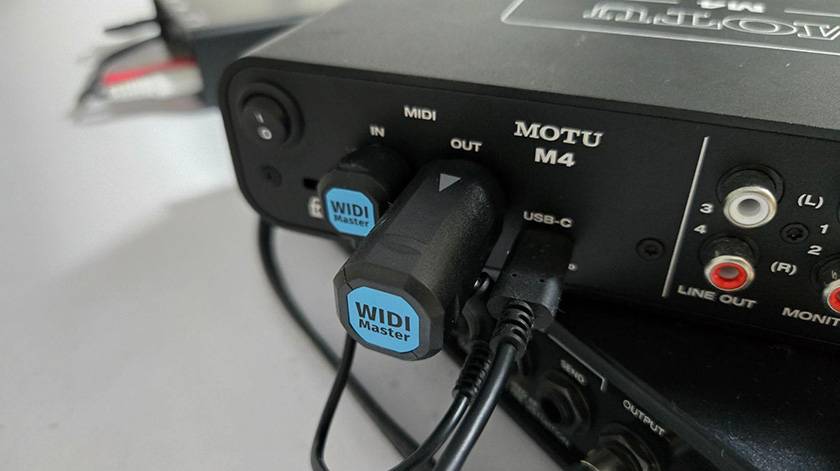
On the KX5 side, only the transmitter is connected, while on the receiver side, the larger plug goes to Out and the smaller plug goes to In.
Right Side of the Keyboard
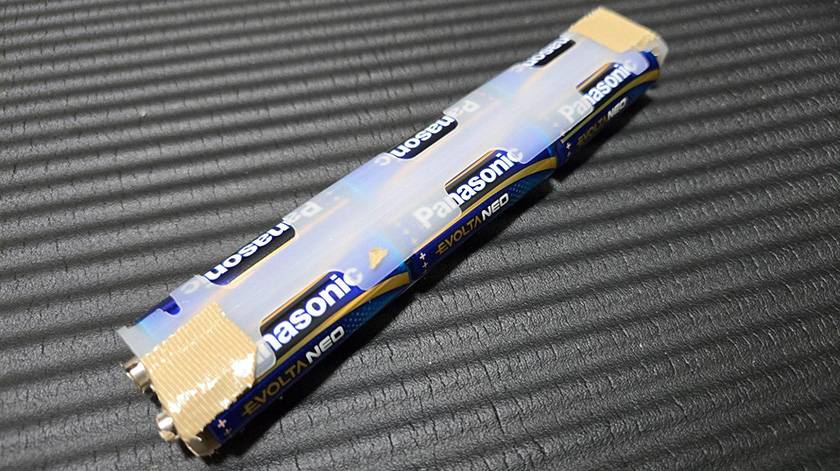
Battery Box / Battery Holder
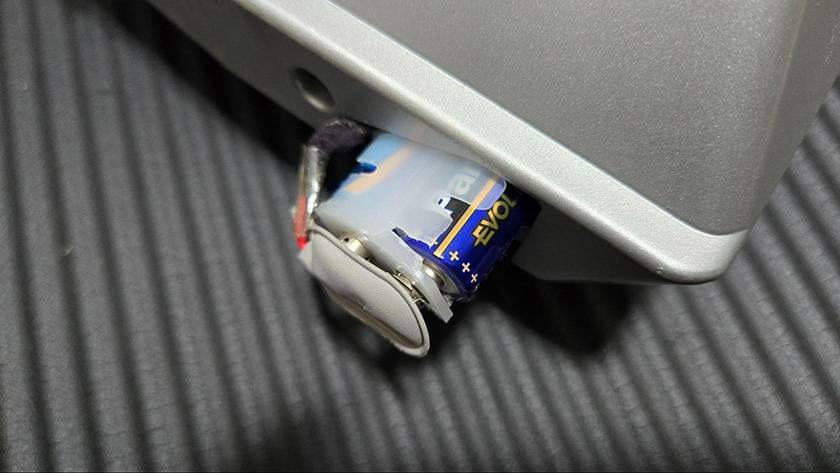
This part is quite tricky and deserves attention.
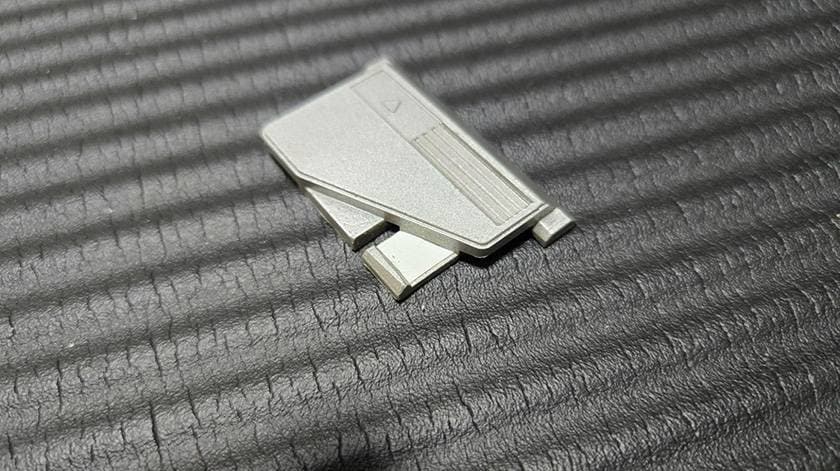
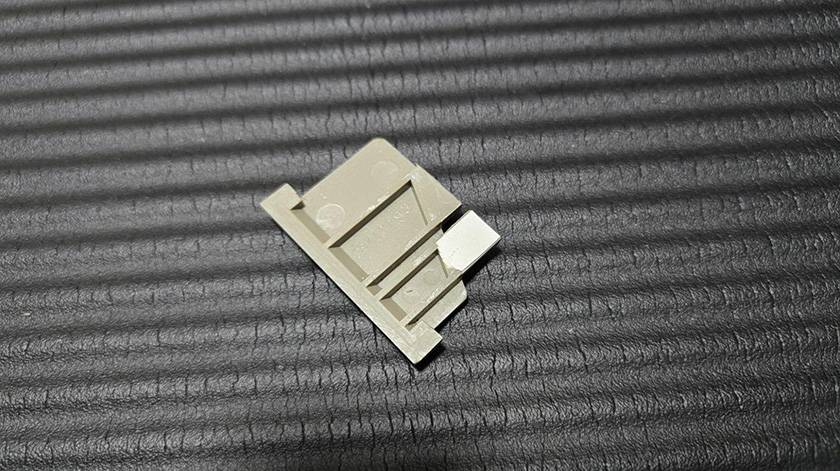
First, the battery cover is made of plastic and attaches/detaches by sliding.
Due to aging, the base of the tabs has turned white, so I reinforced them with Tamiya plastic sheets and adhesive to prevent cracking. In the future, I plan to fill some of the hollowed-out areas with putty.
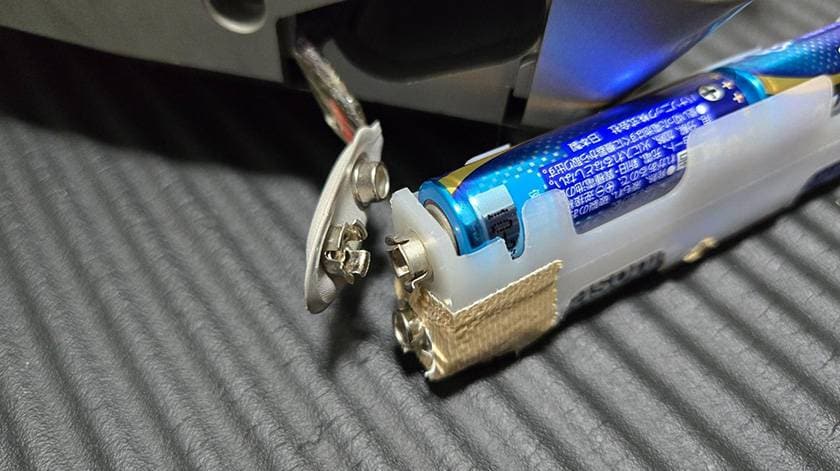
The white battery holder itself is very tight, making it hard to insert batteries. The plastic is thin, and combined with age-related deterioration, it can crack easily. As a temporary measure, I’ve wrapped it tightly with duct tape to prevent the cracks from spreading, but I’m still looking for a better solution.
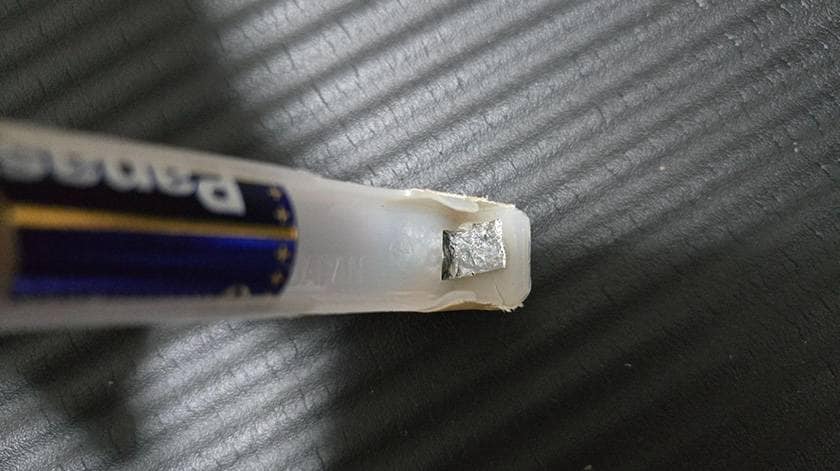
The metal contacts (springs?) inside the battery holder had come loose and stopped working, so I folded thick aluminum foil and inserted it to make the connection work. It functions perfectly, but it still feels precarious.
The KX5 runs on six AA batteries. The KORG shoulder keyboard the RK-100S 2 is similar, but since that model has a built-in sound engine, I personally feel the KX5 could be a bit more energy-efficient.
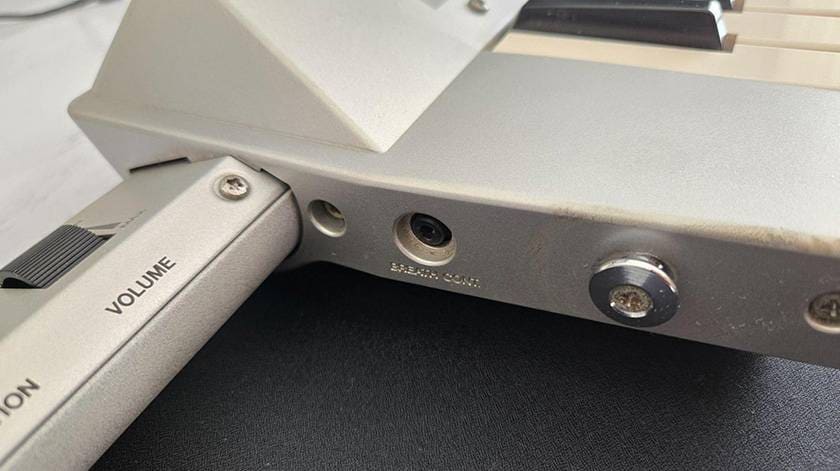
On the left side of the keyboard:
Breath controller jack
This is the port for a device that allows the user to add expression using their breath, kind of like a wind instrument. It wasn’t very popular, so even in the second-hand market it’s rarely seen.
On the back, there are four small rubber feet. During live performances, I attach bubble wrap to the back panel so it doesn’t hurt when it presses against my pelvis.
Summary
How was that so far?
Even in recent years, this model quietly plays a big role in various major live performances. With its forward-looking design that doesn’t feel dated and its no-nonsense functionality, playing it is a lot of fun.
There are still several units circulating in the second-hand market, so be sure to check them out.
I’ve also posted videos of me playing the KX5, so I’d be grateful if you’d take a look.
Thank you very much for reading this far.
The “sound & person” column is made up of contributions from you.
For details about contributing, click here.


![[2026] 12 Electronic Keyboard Recommendations! How to Choose and Popular Keyboards for Beginners Ranking](/contents/uploads/thumbs/2/2023/7/20230713_2_23309_1.jpg)
![[2026 Latest Edition] Choosing a Synthesizer/Popular Synthesizers Ranking](/contents/uploads/thumbs/2/2022/9/20220916_2_19446_1.jpg)
![[2025 Latest Edition!] Popular Keyboard Case Ranking [Recommendations]](/contents/uploads/thumbs/2/2021/12/20211202_2_15469_1.jpg)

 MIDIキーボード 入門ガイド
 シンセサイザー 入門ガイド
 USB接続MIDIインターフェイス
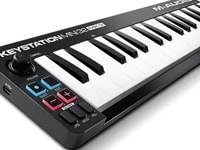 USB接続対応のMIDIキーボード
 用途で選ぶ!鍵盤楽器の種類
 キーボードスタートガイド