Hello,
I’ve been really into Nintendo DS lately.
The other day, I decided to swap out my seasonal wardrobe and thought I’d do some deep cleaning of my room as well. While I was tidying up, I came across all kinds of nostalgic items here and there.
Among them was my Nintendo DS. I thought I’d just play for a bit, but before I knew it, it was already night.
By the way, the game was Pokémon HeartGold.
It’s a masterpiece.
Now, as I promised in my last blog post, this time will be the final chapter on checking the pickups I purchased!!
The topic is “Checking the Phase.”
I briefly touched on the concept of phase in Part 4 about how pickups work, but in this post, I’ll go into more detail about the phase before getting into the main topic.
So, let’s get started.
○ Hot and Cold
Before checking the phase, there’s something you should know about ‘hot’ and ‘cold’.
These aren’t terms you commonly hear when playing guitar, but essentially they refer to positive (+) and negative (-).
But that’s not entirely accurate.
The current generated by pickups is AC (alternating current), meaning + and - switch back and forth. Unlike DC (direct current), there isn’t one wire that’s always positive and the other negative.
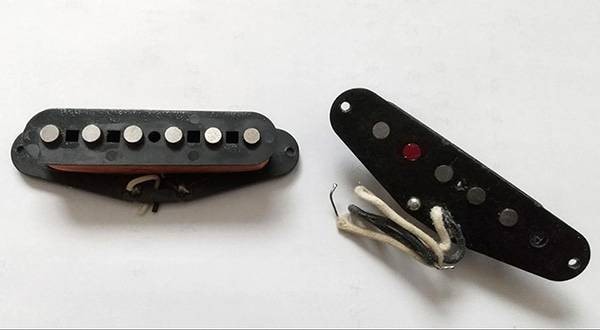
In simple terms, ‘hot’ refers to the non-grounded side, while ‘cold’ refers to the grounded side. However, when it comes to pickups, there are two wires (usually black and white) coming out of the unit, but which one is hot and which one is cold isn’t predetermined.
So, you need to decide which wire will be grounded and which will not.
Does that sound a bit confusing?
Choosing whether to ground or not affects the phase of the two resulting AC waveforms. By grounding one side, you can leave the waveform of the phase you prefer.
By the way, if you don’t ground one side, there’s no complete path for the current to flow, so you’ll just get noise and no guitar sound.
I casually mentioned ‘grounding’ just now, but grounding refers to creating a connection to the earth. Explaining this in detail can be a bit lengthy and complicated, but in the context of guitars, just remember these two points:
Here and
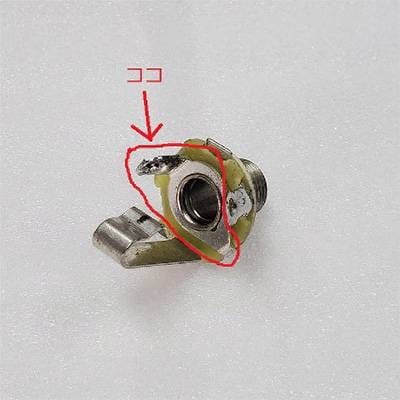
Here
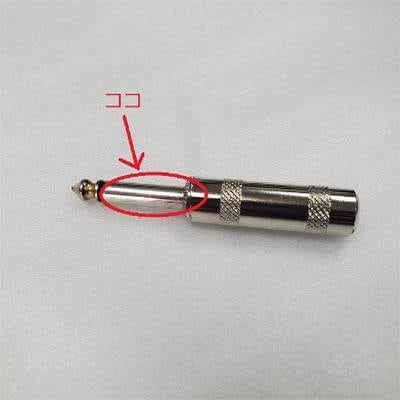
That should cover most cases.
—Though in reality, that’s not entirely correct.
It’s not ideal, but to avoid going too deep into the technicalities, I’ll leave it at that for now. Sorry about that.
Now, since pickups don’t have predefined hot and cold wires, in theory, even if you connect two identical pickups from the same manufacturer, you could wire one pickup with the white wire as hot and the black wire as cold (grounded), and wire the other with the black wire as hot and the white wire as cold. In both cases, the pickups will still work.
So what’s the issue here? The issue comes in the mix position.
Reversing the hot and cold wires reverses the phase, so when mixing the two pickups, their phases will cancel each other out.
This creates the ‘out of phase’ sound, as I explained in Part 4.
This is why guitar magazines and articles often mention the importance of aligning the phase, to avoid this cancellation.
In most cases, when dealing with single-coil pickups with two wires (white and black), wiring white as hot and black as cold will give you the correct phase.
However, if there are three wires, one of them is usually the grounding wire from the pickup body, and you’ll need to carefully check where each wire connects.
As long as the phases are aligned, you can prevent the out-of-phase sound in the mix position, even if the pickups themselves are wired out of phase.
That said, there’s no real advantage to wiring pickups out of phase from the start, so it’s generally better to stick with the correct phase, just like on a standard guitar.
So, what do we need to check?
The key thing to check is whether the hot and cold wires on the product match what the manufacturer has specified.
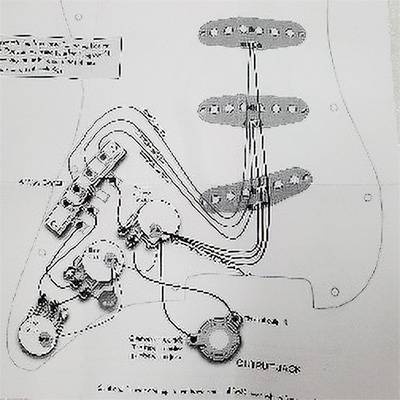
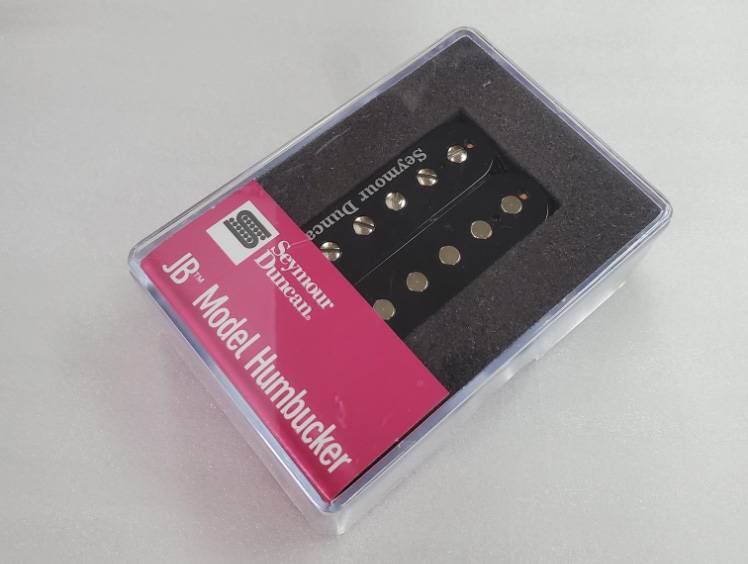
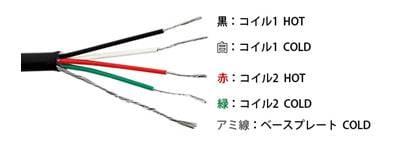
For example, with a Seymour Duncan 4-wire humbucker,
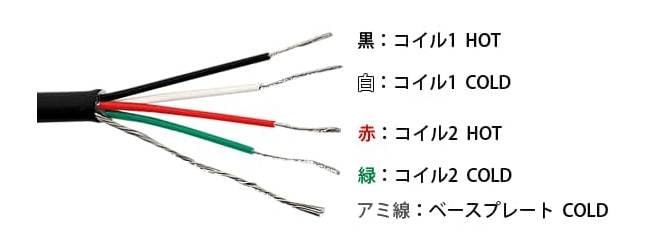
you would need to check if it’s wired like this:
Some instruction manuals mark the wires with + and -, but as I mentioned earlier, pickups don’t technically have + and - marked. In this case, if you treat the black wire as hot, it will be in phase (positive).
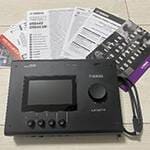
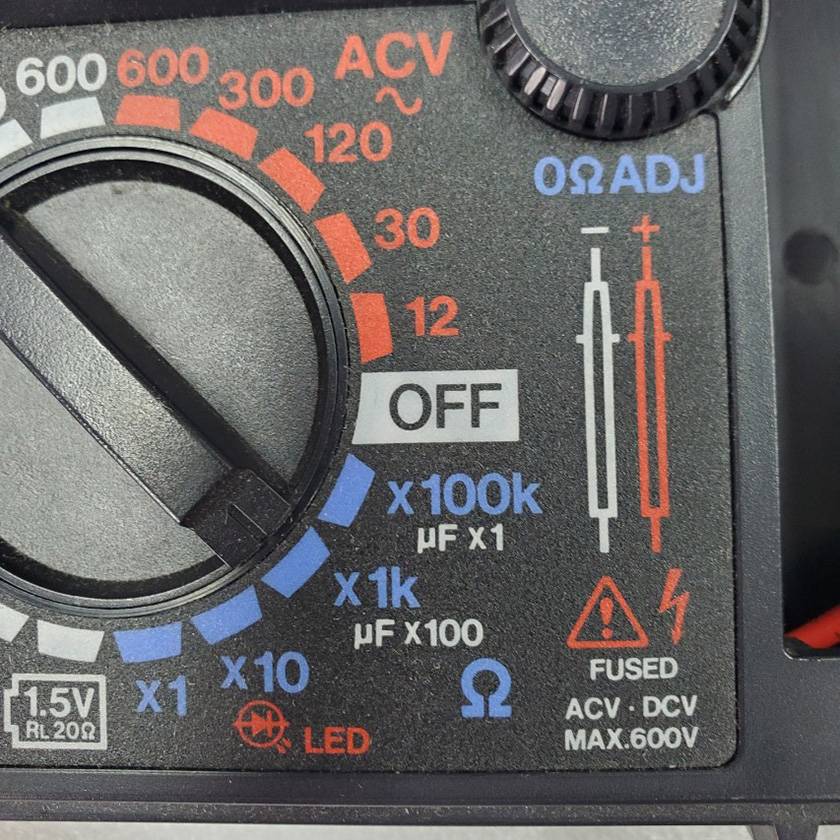
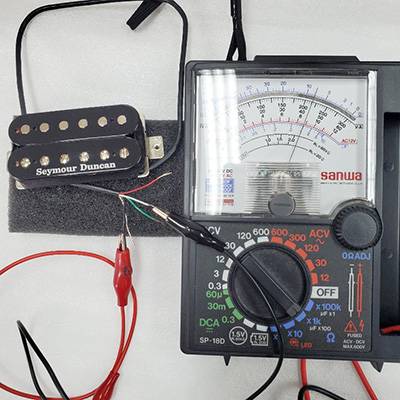
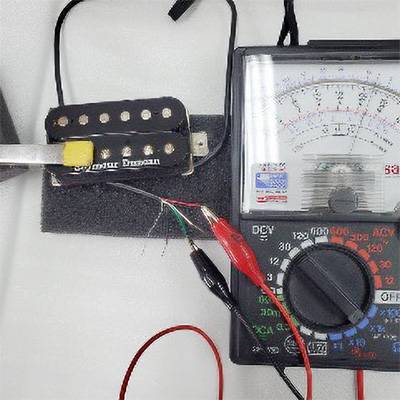
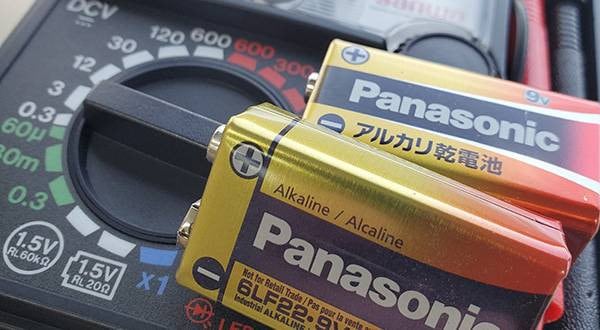
For checking, you’ll use this tool again: the tester we used last time.

This time, however, we’ll be using an analog tester, the type where the needle swings when measuring current and voltage.
You might wonder why not just use a digital tester like we did last time to measure resistance. Digital testers are good for getting precise numbers, but analog testers are better for observing fluctuations in current and voltage.
That’s why the analog needle movement is more suitable for checking phase.
You can use a digital tester, but it’s a bit harder to read. If you’re thinking of swapping your own pickups, I’d recommend having both.
○ How to Check the Phase
Here’s what you’ll need for the phase check.
- Pickup
- Analog tester
- A metal object that reacts to magnets
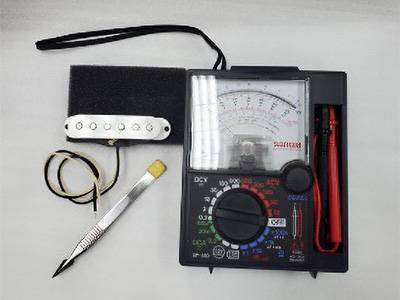
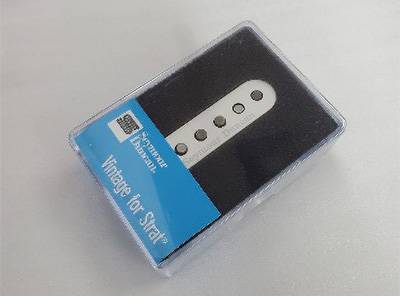
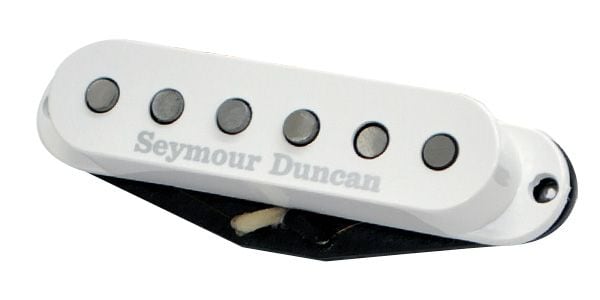
This time, I’ll be testing the Seymour Duncan SSL-1.
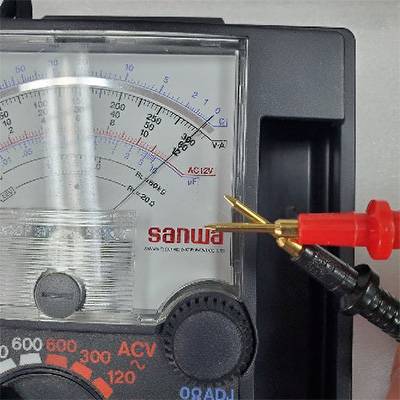
First, set the tester to the 1kΩ range and calibrate the needle to zero.
Then, connect the positive lead to the white wire and the negative lead to the black wire on the pickup (you can connect them either way).
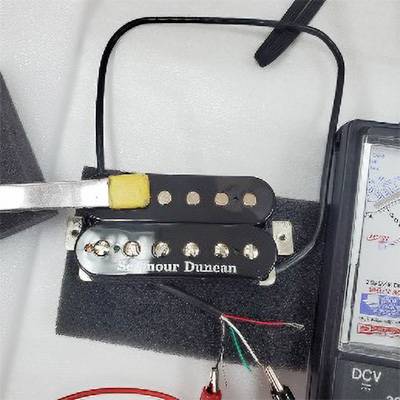
Next, bring a metal object near the pickup to see the reaction.
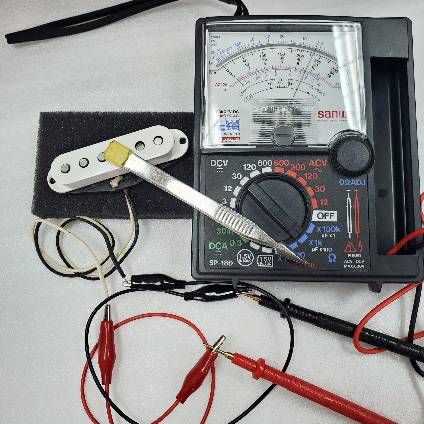
*You can use a screwdriver or wrench as your metal object, but to avoid scratching the pickup, it’s safer to protect the metal part with masking tape.
At this point:
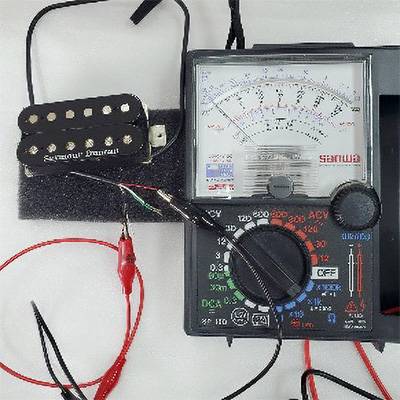
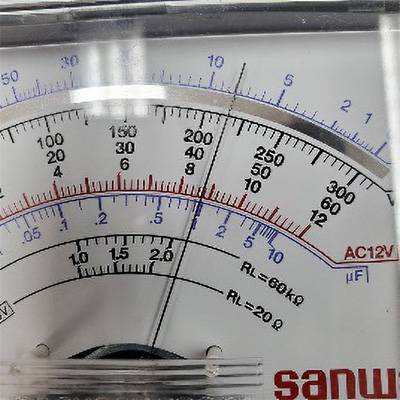
- If the needle moves to the right, the wire connected to the tester’s positive terminal is the hot wire, meaning it will be in phase.
- If the needle moves to the left, the wire connected to the tester’s positive terminal is the cold wire, meaning it will be out of phase.
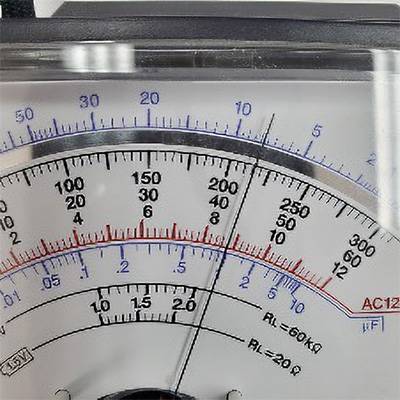
In this case,
when I connected the tester’s positive lead to the white wire, the needle moved to the right. So, the white wire is the hot (positive) wire.
When I compared it with the manual:
The white wire is the hot wire, and the black wire is cold, so this product is good.
By checking the phase like this in advance, you can avoid potential problems. If the product turns out to be defective, it’s easier to handle the return or exchange process since you haven’t started wiring yet.
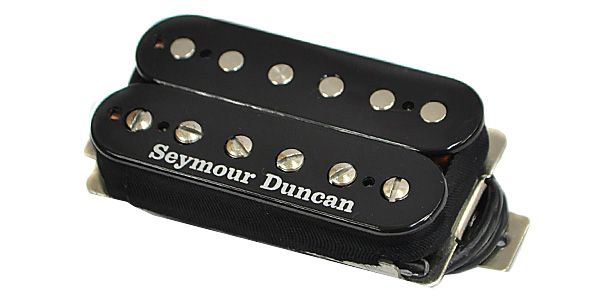
Now that we’ve gone over everything, let’s also check the Seymour Duncan SH-4 , a 4-wire humbucker.
First, connect the tester’s positive lead to the wire you want to check, and connect the negative lead to the remaining three wires one by one.
One of these wires will react, and that’s the wire from the same coil as the one you’re testing.
Then, check it the same way as with a single-coil pickup.
Now you know that the white and black wires come from the same coil.
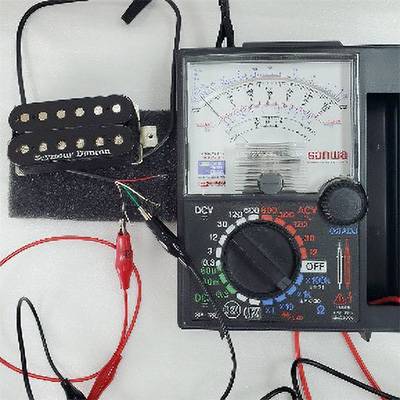
Next, when I connected the tester’s positive lead to the white wire and the negative lead to the black wire, the needle moved to the left.
↓
This means the wires coming from the upper coil are white and black, with the white being cold and the black being hot.
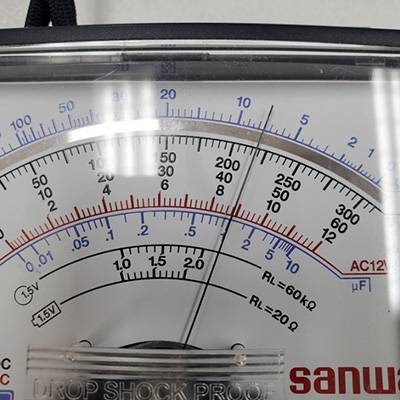
Now, when I connected the tester’s positive lead to the red wire and the negative lead to the green wire,
↓
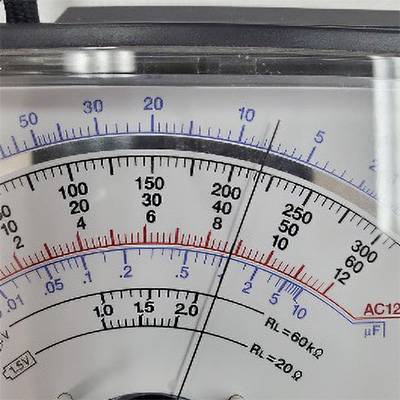
the needle moved to the right. So, the red wire is hot, and the green wire is cold, from the lower coil.
When I compared it with the manual:
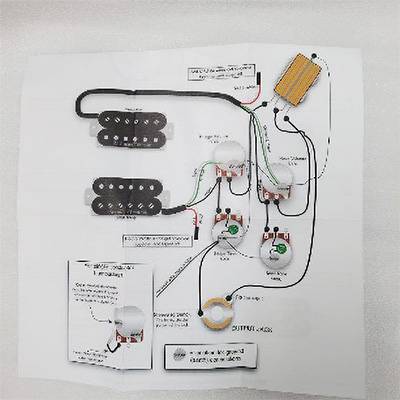
Everything matched up, so this product is also good.
What do you think?
This may have been a bit of a complicated topic, but as long as you understand how to check the phase, you’ll be able to determine whether a product is good or defective.
With that, we’ve completed the checks for pickups after purchase and next time, we’ll dive into wiring.
I hope you’ll join me for the next post as well.
See you again on the Sound House staff blog.
Goodbye!


 ピックアップ交換大作戦!
 ギターパーツの沼
 ピックアップの種類
 配線カスタマイズ 第1回
 パーツの配線を知ろう
 ピックアップの種類(エレキギター)