“A Talk on Rosin” is a continuation of my previous article.
How do you prepare rosin?
How does one go about preparing rosin to adhere nicely to the bow? There are many interesting videos, blogs, and other interesting reading material that are full of the style of a specialty store. It is better to have an interesting story, of course, but let me tell you a story without any fictionalization.
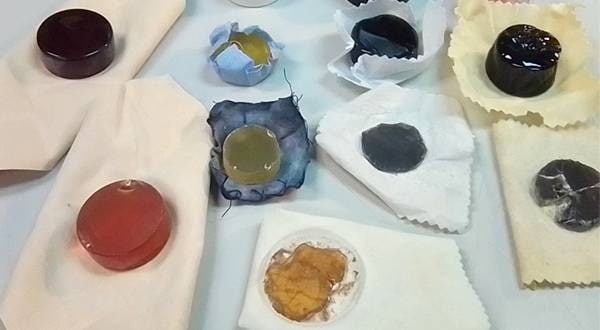
Let's take your rosin out of your violin case and take a good look at it.
Is it bumpy?
Is it not sticking well?
Yes, ideally the surface of your rosin should be smooth. The shopkeeper told me that when I bought the instrument, my teacher instructed me to do so as well, and although I want to do so myself, from what I recall, it seems to be unexpectedly difficult to keep the surface of the rosin flat.
As a result, uneven rosin has less contact area with the bow hairs, so even if you scrub them, they don't make contact in the first place, so it doesn’t stick.
What is “tailoring”? What is the correct way to rosin?
- Make sure the bow is properly rosined
- Apply rosin properly to the bow
- Distribute the amount of rosin evenly so that you don't have to worry about it later.
These are the three main points.
In this article, we will discuss
1. Making sure that the bow is properly coated with rosin → Preparing the rosin

What to prepare

- Table or desk Desk (as a work table)
- Sandpaper #240 #500 (available at any home improvement store) The larger the number, the finer the sand. You can also use a number that’s close to the ones that I have written here.
- Small broom A4 paper, leaflets, paper towels, etc.
- Cleaning paper towels, etc.
- Vacuum cleaner

This sandpaper is made in Switzerland by a company called Siarex, but really you can use any kind of sandpaper you can find.
The sandpaper should be placed on a smooth surface. The first sandpaper I’m using is the #240 for rough sanding.
Here I will use this new rosin as a demo.

The surface of new rosin is usually uneven as shown in the image. If I suddenly apply it to the bow hairs from this state, it will take a lot of time to apply because the contact area is small, as I explained earlier.

If you put a folded piece of paper against the surface to see how smooth it is, there are gaps. This means that the rosin will not apply smoothly to the bow hairs.
Now let's prepare the rosin.

Scrape the surface of the rosin on a piece of sandpaper laid out on a table. Start with #240.
Use your instincts. Don’t use too much force, but not too little either. See the video.
Rosin is surprisingly soft and can be broken off easily.

Rough sanding with a #150 or #240 will result in this state.
Here is an explanation of what to do with the rosin powder residue.

Vacuuming everything from the start can cause clogging. If it is a cyclone type (like Dy●n), be especially careful. If you do use a vacuum cleaner, the paper pack type is recommended.
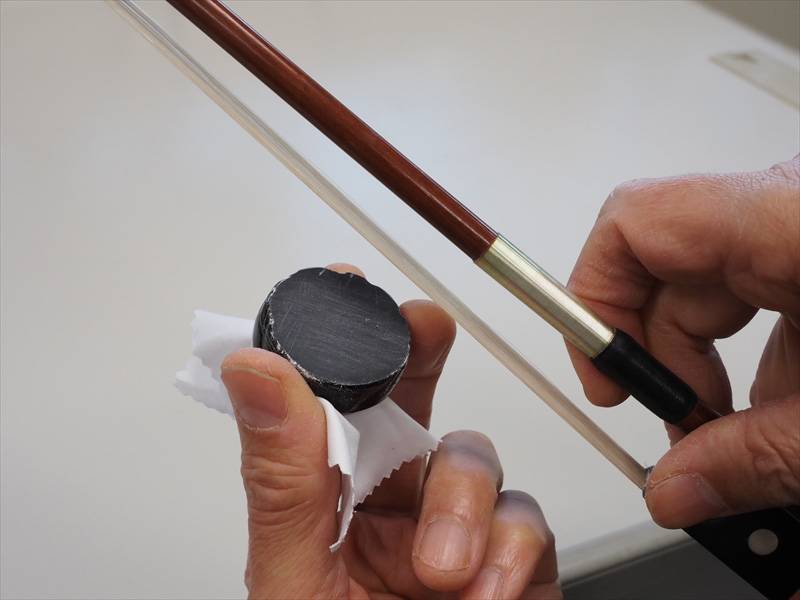
As shown in the picture, put them together on the paper to some extent, wrap them in paper and throw them away, then vacuum and finally wipe them off with a tightly wrung wet elephant cloth or paper towel.
Your hands will also become sticky after touching rosin. Wash them with soap.
You can start to rosin your bow when the rosin looks like this, which has been sanded down with a #240, but in this state, even if it looks smooth at first glance, there are still minor irregularities.

Here I will rub it with a finer #500 sandpaper to make the surface a bit smoother. (Second half of the video)

The number of scratches have reduced.
Now your rosin is ready to use.
This method of sanding and evening out the surface of the rosin can be used to correct any unevenness in rosins you already own as well. If you keep the sandpaper you used this time clean, you can reuse it several times over.
In the next issue, I will talk about how to apply rosin. The rosin will look like this after sanding it. But, as you continue to apply it, it tends to become uneven. If you have such an experience, I will tell you how our professional luthiers apply rosin. See you next time!


![[2026 Edition] For Beginners and Students! Recommended Cello Accessories](/contents/uploads/thumbs/2/2024/10/20241029_2_29189_1.jpg)
![[Electric Violin] Trying Out the PLAYTECH PSV100BR](/contents/uploads/thumbs/2/2024/10/20241025_2_29090_1.jpg)
![[Violin Bows] Trying out the PLAYTECH PVB300](/contents/uploads/thumbs/2/2024/3/20240321_2_26199_1.jpg)
![[Attention, String Players!] How to properly rosin a bow and recommended rosins!](/contents/uploads/thumbs/2/2023/12/20231218_2_25008_1.jpg)
 バイオリンスタートガイド
 チェロの弓の調整と松脂の塗り方
 バイオリンの手入れ
 バイオリン 弓の各部名称と松脂
 弦楽器 初心者講座