


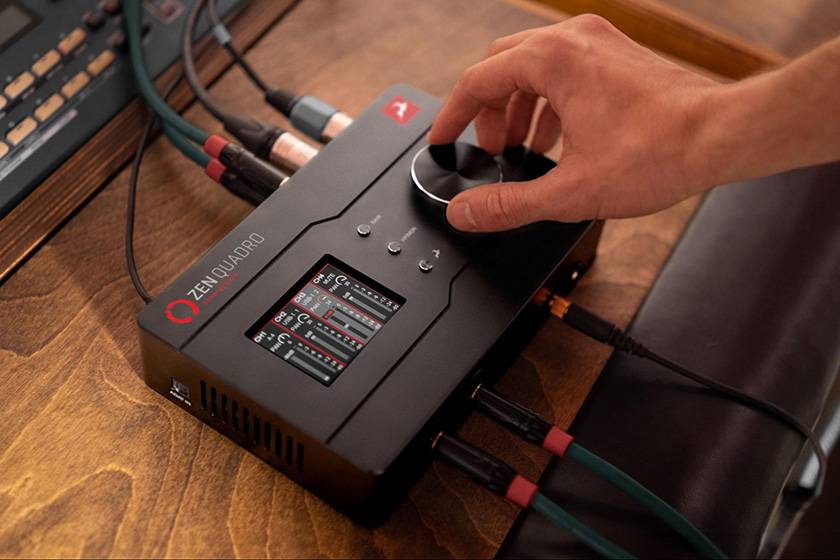
Antelope Audio is a brand known for its high-end recording equipment such as audio interfaces, AD/DA converters, and master clocks. They recently introduced the new audio interface Zen Quadro Synergy Core from Antelope Audio. This latest addition to the Zen family is a dream product, offering a wide range of uses not just for users of music production software.
Now let’s explore the compact yet high-quality Antelope features, examine the attractive new functionalities, and share my review and impressions!
Antelope Audio / Zen Quadro Synergy Core USB Audio Interface
Index
- Basic Specs of Zen Quadro
- Differences from Other Zen Series
- Key Features and Functions
- Unboxing the Product!
- Sound Check
Basic Specs of Zen Quadro
Let’s dive into the key attractions and basic specifications of the Zen Quadro.

- ■130dB Max AD/DA Converter
- →Equipped with converters and signal paths also found in the flagship model Galaxy!
- ■75dB Gain in 4 Preamps
- →Includes console-grade preamps also found in the high-end model Orion Studio Synergy Core.
- ■OTG-Compatible Dual-USB Design
- →Features two independent USB-C ports for simultaneous playback and recording! You can simultaneously connect both a computer and a mobile device and stream computer audio from a single unit.
- ■DC Coupled Inputs/Outputs
- →DC coupled inputs and outputs allow for CV transmission and reception with synthesizers. You can use it as a signal source to drive your synthesizer at home.
- ■Class-Compliant Connection
- →Operates with standard drivers without any restrictions on Zen Quadro’s functions.
- ■Standalone Operation
- →Save routing, FX chain settings, and more in advance, and recall presets directly from the Zen Quadro! This enables quick switching for live performances, streaming, music production, and more.
Specifications
| Connection | USB Type-C (2.0) ×2 |
|---|---|
| Input/Output Channels | 14 in / 10 out (max) |
| Analog Inputs | XLR/TRS Combo Jack ×2 (Mic / Line) XLR/TRS Combo Jack ×2 (Mic / Line / Hi-Z) |
| Mic Preamp Gain | 75dB |
| Analog Outputs | TRS Phone ×4 (Line) Headphone Output ×2 |
| Digital I/O | ADAT IN, S/PDIF I/O |
| Dynamic Range (AD Converter) | 122dB |
| THD+N (AD Converter) | -116dB |
| Dynamic Range (DA Converter) | 130dB |
| THD+N (DA Converter) | -115dB |
| Headphone Output | 10Ω ; 118dB Dynamic Range |
| THD+N (Headphone Output) | -100dB |
| Hardware Monitoring | ◯ (Synergy Core FX applicable) |
| Class Compliant | ◯ |
| USB OTG Support | ◯ *USB Dual Ports |
| USB Bus Power | ◯ |
| Loopback Playback | ◯ |
Differences from Other Zen Series
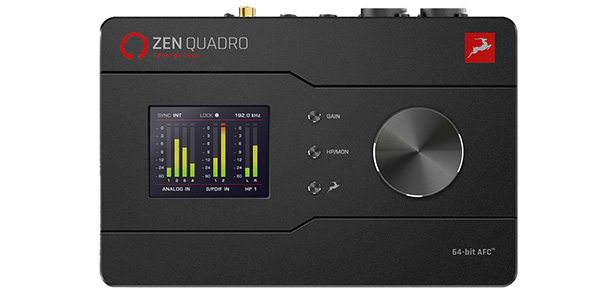
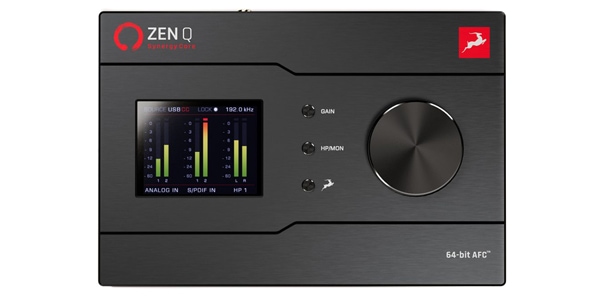
Visually, it resembles the Zen Series, especially the Zen Q Synergy Core, but edges are slightly rounded for a softer look. Although not easily seen from the top, the back is designed to lift, resulting in a more rectangular shape.


L to R: Zen Q Synergy Core and Zen Quadro Synergy CoreUp to Down: Zen Q Synergy Core and Zen Quadro Synergy Core
The connection terminals have also been changed.
While the Zen Q Synergy Core had two Hi-Z compatible TRS phone jacks on the front panel, the Zen Quadro Synergy Core features two Hi-Z compatible XLR/TRS phone jacks (combo), allowing you to fully utilize the 4-in inputs. The number of headphone jacks and Line Out remains the same, making it a worthy upgrade from the Zen Q Synergy Core.
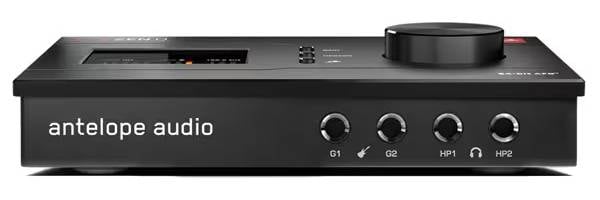
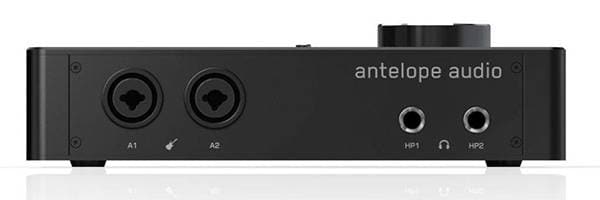
Front Panel (L to R): Zen Q Synergy Core and Zen Quadro Synergy CoreFront Panel (Up to Down): Zen Q Synergy Core and Zen Quadro Synergy Core


Back Panel (L to R): Zen Q Synergy Core and Zen Quadro Synergy CoreBack Panel (Up to Down): Zen Q Synergy Core and Zen Quadro Synergy Core
Additionally, due to the Dual-USB design mentioned later, the ADAT IN has been moved from the back panel to the left side of the unit.

Key Features and Functions
Now, let’s delve into the new features added to the Zen Quadro, which I briefly mentioned in the basic specs.
Among the many functions, this one stands out the most!
Dual-USB Function
When looking at the USB ports on the Zen Quadro, you’ll notice it has two USB Type-C ports, labeled ‘1’ and ‘2’. But how exactly are these used?

In fact, the Zen Quadro can connect to two devices simultaneously, allowing for separate audio input and output for each!
The device connected to USB 1 can utilize 16 in/out channels (14 from the device + 2 from USB), while the device connected to USB 2 operates as a 2 in/2 out audio interface. It’s important to note the difference in in/out channels depending on the USB connection.
For example, you can play game audio on PC1 and input it into PC2 for streaming! This dual-USB functionality can also be used for PCDJing, recording web conferences, simultaneous streaming from both a computer and a smartphone, and more.
Additionally, since USB 2 supports OTG, it can be used to input audio into compatible smartphones. You could, for instance, stream karaoke tracks to a smartphone app.
※*However, please note that the manufacturer does not individually verify compatibility with each app, so some apps may not function properly.
The Zen Quadro operates with power supplied through USB 1, meaning you can use a device connected solely to USB 2 as well. In this case, routing settings are done directly on the Zen Quadro, so it’s recommended to set up configurations on a computer beforehand.
Being class-compliant means there’s no need to install drivers on macOS/iOS, making it very user-friendly to start using.
When connecting to an iPhone or iPad with a Lightning port, you’ll need an OTG-compatible power supply adapter (such as the Apple Lightning to USB 3 Camera Adapter). Before starting, ensure you have this. In my setting, connecting the camera adapter from a USB hub attached to a Mac didn’t work properly. Instead, I had to connect the camera adapter directly to a PD-compatible AC adapter plugged into a power outlet.
If you experience connection issues, try using a PD-compatible AC adapter and connect directly to a power outlet.

Synergy Core Real-Time Processing
The Zen Quadro comes with 37 built-in effects, including compressors and EQs, enabling real-time processing with nearly zero latency for recording, monitoring, and live performances. It can load up to 48 effects across 6 channels (6 channels × 8 effects each).
This allows for smoother production without placing any load on your computer’s plugins, minimizing issues during music production and live streaming, and maximizing your performance!
Additionally, you can apply effects to USB audio inputs and outputs on the control panel. This feature makes it extremely versatile, allowing you to, for example, set an equalizer for playback audio to make it easier to listen to.
Unboxing the Product!
Let’s move on to unboxing the product package.
*Please note that this package design is as of the release date. Specifications may change in the future.
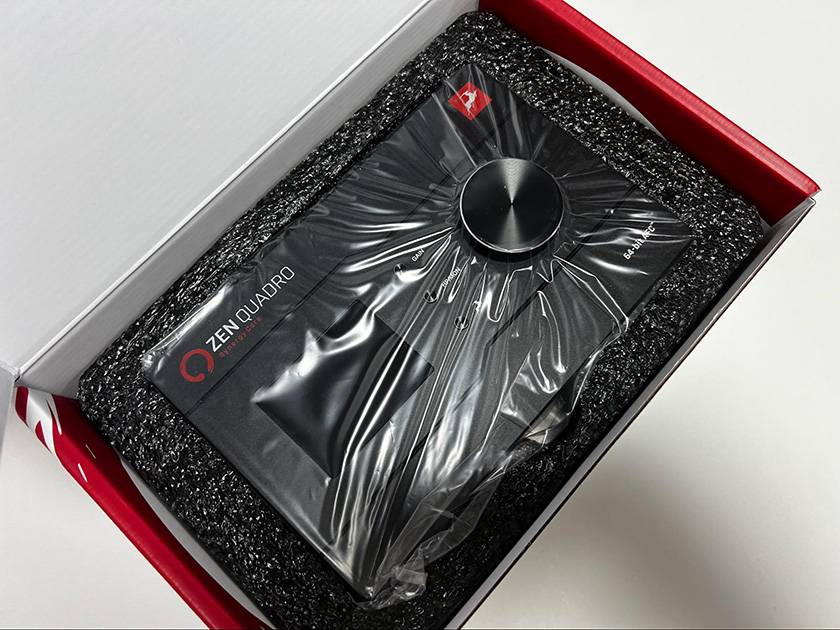
Product Package

The design prominently features red, the brand color of Antelope Audio. Upon opening the package with excitement, I found the control knob area cut out and the entire unit well-protected by cushioning material. The main unit itself was securely wrapped in a plastic bag.

Contents and Accessories
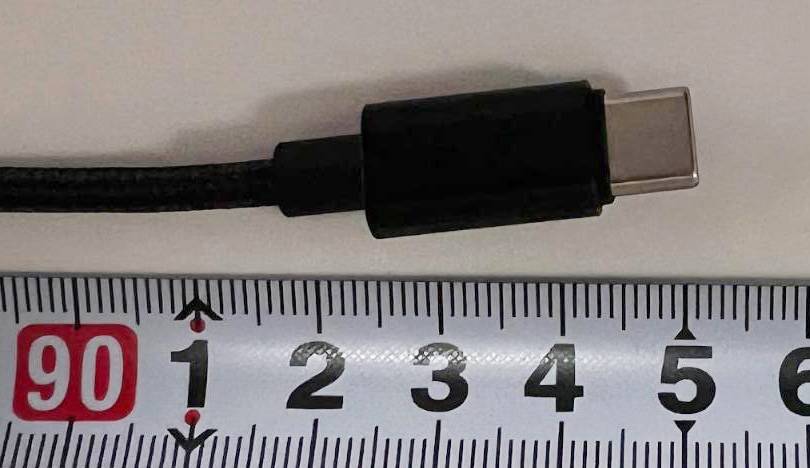
Underneath the main unit, more cushioning material is placed, containing a leaflet, a USB Type-C to C cable, and a USB Type-A to C adapter. This consideration ensures compatibility with computers that only have USB Type-A ports.
Please note that a cable for USB 2 is not included, so please prepare one according to your device (the Zen Quadro Synergy Core port is USB Type-C).

As a side note, the included cable is braided and feels very pleasant to the touch. It measures approximately 1 meter from end to end, with the cable portion alone being just under 92 cm. While longer cables are not generally recommended due to USB specifications, please use this measurement for a reference if you need to purchase an additional cable.
Product Setup Instructions
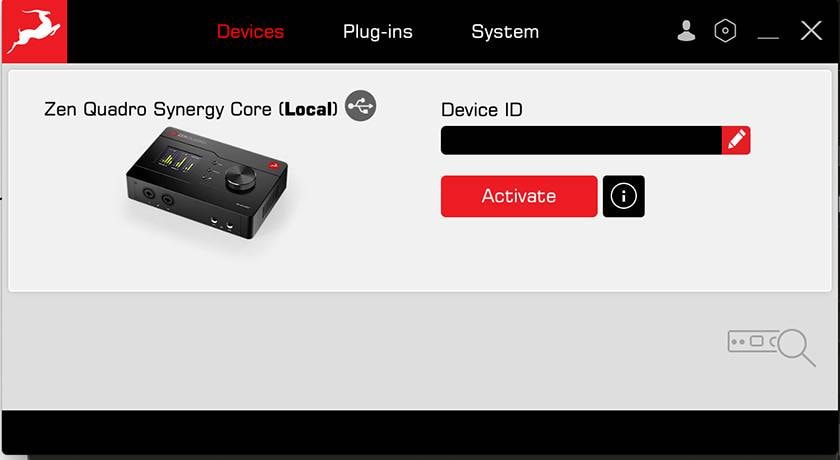
To manage the plugins, download the Antelope Launcher from the Antelope Audio’s website. Click on ‘Download Launcher’ to start downloading.
Launch the Antelope Launcher and connect the Zen Quadro to your computer. The screen will transition for product authentication. The Device ID is automatically detected and the serial number will be entered, so manual input is unnecessary. Note that the Device ID is the name of the device, and by default, it is set to the product serial number, which can be freely changed.
For Windows users, the ASIO Driver is automatically installed during the device registration process. For macOS users, while the device operates as a class-compliant device and does not require driver installation, it is possible to install the Antelope Unified Driver from the ‘System’ tab.
Please note that for macOS Ventura and later, installing the Antelope Unified Driver might require changes to security settings via the recovery environment. Refer to the manufacturer’s FAQ to change security settings in the recovery environment. Additionally, the steps to access the recovery environment may differ depending on the device, so it is recommended to also refer to Apple’s help page.
Official Website: [How to enable the Unified Driver on Mac OS 13.x Ventura and 14.x Sonoma]
Once the setup is complete, go to the ‘Devices’ tab and launch the control panel (software mixer). The panel below should be displayed.

Control Panel Functions
In this section, I’m going to talk about the key functions that you should check first. It is possible to configure settings using only the Zen Quadro, too.
The control panel is largely similar to other audio interfaces, so if you’re specifically interested in functions related to Dual-USB, refer to the Routing Settings section.
- PREAMPS

Configure the four combo jacks located on the front and back of the Zen Quadro. Select the input source (Mic/Line/Hi-Z) according to the connected equipment. Channels 1-2 and 3-4 can be linked to recognize them as stereo inputs.
Additionally, manage +48V phantom power, DIM switch, and mute for each channel.
- Routing Settings
This section allows you to set input/output routing.
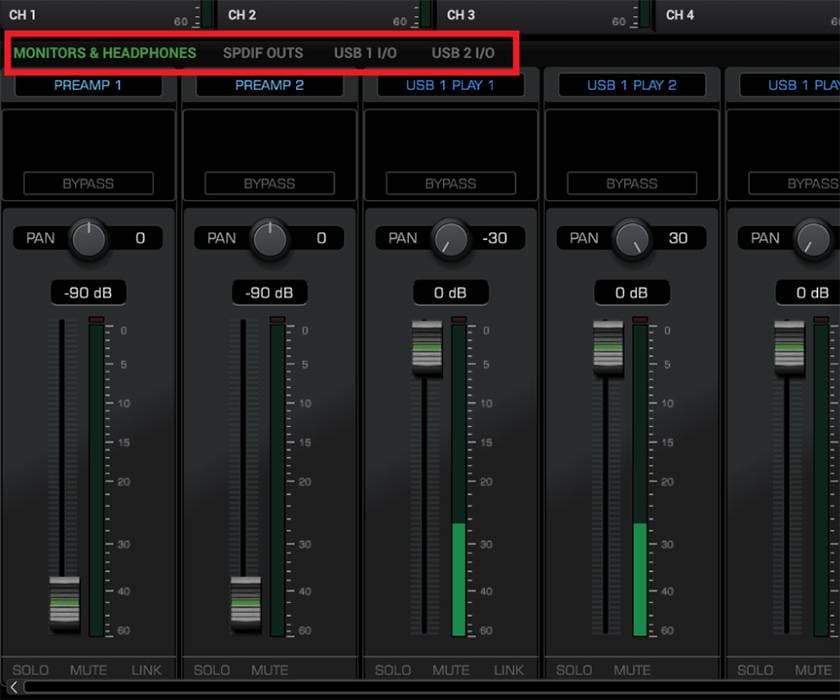
Use the section in the red square to set output to assign each channel in the mixer below.
However, adjustments like input gain or pan are managed under the ‘MONITORS & HEADPHONES’ tab.
You can select monitor out & headphones, S/PDIF out, USB 1 I/O, and USB 2 I/O in the red square, but specific gain adjustments are done in the ‘MONITORS & HEADPHONES’ tab and cannot be changed in other tabs.
The capture shows ‘PREAMP 1’ for channel 1 and ‘PREAMP 2’ for channel 2, but you can also assign different inputs like ‘USB 1 PLAY 1/2’.
By default, USB 2 I/O tab configures USB 1 PLAY 1/2 (main out of the device connected to USB 1). If you intend to send the audio to a device connected to USB 2 and the DAW output is set to channel 3 or 4, the sound will not come out.

In USB 1 I/O and USB 2 I/O, it’s possible to set input sources to MONITOR/HP1 or HEADPHONES 2. This selection is necessary if you want to mix audio from the PREAMP (such as microphone input) and USB 1 and send it to USB 2. If you plan to use the Zen Quadro for streaming purposes, it’s a good idea to save this setting.
Sound Check
Now, let’s check the sound of the Zen Quadro Synergy Core.
First, playing ambient music. From low to high frequencies, expansive and clear sounds are played back, with excellent left-right positioning. I’m impressed by how distinct sounds, previously unnoticed, now stand out. The spatial aspects of pad synths are captured broadly, enhancing the accurate portrayal of the musical atmosphere.
Next, let’s move on to a funk-style track. The bass and snappy snare on the off-beat bring out a lively groove impression. The sound positioning remains intact, maintaining a wide stereo spread. It honestly feels like the band is playing right in front of you.
Next, I played a harder rock track. I’m initially surprised by how clear and articulate the distorted guitars sound compared to before. I can distinctly hear the string noise and the subtle second guitar flowing in the background, without compromising their impact.
Finally, I played an EDM track with a lot of drum and instrument detail. From the low to high frequencies, from end to end, the abundance of sound detail engulfs you, akin to being in a club. The foundation of the kick and bass is cohesive, clarifying sound elements that were previously obscured in my existing setup.
Conclusion
The dual USB connection makes this interface very user-friendly for streaming purposes. Achieving high-quality streaming with Synergy Core Real-Time Processing using EQ and compressors in a standalone setup is no longer just a dream! Additionally, its high-quality and clean sound for the use of music production software is not to be overlooked. I am impressed by Zen Quadro’s ability to deliver Antelope Audio’s clear and natural sound quality powered solely by USB bus power.
Don’t miss out on this audio interface, which can be considered the culmination of Antelope Audio’s renowned digital clocking technology, signal path, and preamps!


![[Thoroughly Reviewed] Discrete 4 Pro Synergy Core Detailed Review! - Including Edge Note](/contents/uploads/thumbs/2/2023/5/20230510_2_22495_1.jpg)
![[Thorough Breakdown] Antelope Audio Zen Q Synergy Core Review!](/contents/uploads/thumbs/2/2022/2/20220217_2_16762_1.jpg)
![[Thorough Review!!] Antelope Audio / Zen Go Synergy Core](/contents/uploads/thumbs/2/2021/10/20211029_2_14891_1.jpg)
![[Thorough Review!!] Antelope Audio / Discrete 4 Synergy Core](/contents/uploads/thumbs/2/2021/8/20210806_2_13613_1.jpg)
![[2022 Latest Edition] Overview of Some New Audio Interfaces!](/contents/uploads/thumbs/2/2021/3/20210311_2_12472_1.jpg)
 厳選!人気のおすすめオーディオインターフェイス特集
 ANTELOPE AUDIO 特集
 DTMセール情報まとめ
 機能で選ぶ オーディオインターフェイス
 DTMに必要な機材
 DTM・DAW購入ガイド


