Hello.
I often perform live shows where I bring my own gear, such as at cafés and nursing homes.
During those times, I make full use of the settings on the HX Stomp, which allows me to significantly lighten my load for live performances.
Today, I would like to talk about how I do that.
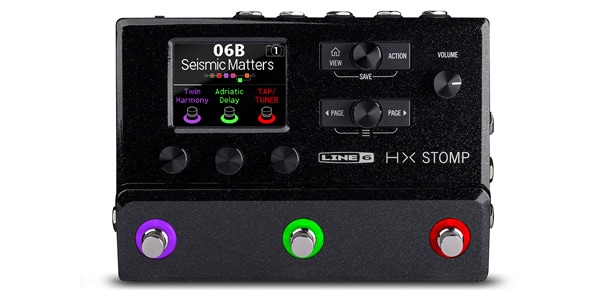
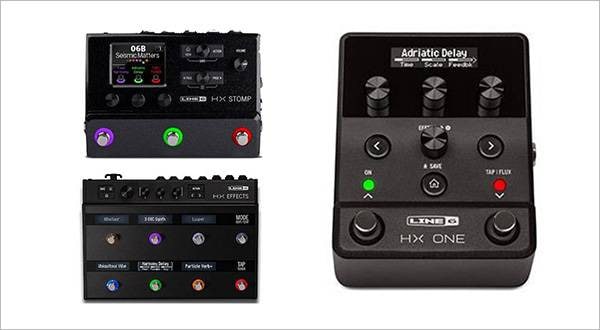
Line 6 / HX Stomp Multi-Effects Processor
Common Challenges with Bringing Your Own Gear at Live Performances
When performing solo, such as singing and playing guitar at a venue where you need to bring your own gear, the typical setup often includes:
- Using an acoustic guitar amp with minimal setup
- Bringing a small mixer and powered speaker
However, have you ever encountered the following issues with these setups?
- Limited functionality and effects
(e.g., you're restricted to only the built-in reverb on the amp or mixer) - Heavy equipment if you want better sound quality or louder volume
(e.g., just the amp or speaker alone can weigh over 5kg)
You end up needing to travel by car or drag around a rolling cart, and yet during the actual performance, you can only use one tone. How frustrating is that?!
By making full use of the HX Stomp, I aim to solve all of these problems!
Essential Gear Including the HX Stomp
First, here’s the list of gear I usually bring when performing at a live show where I need to bring my own equipment:
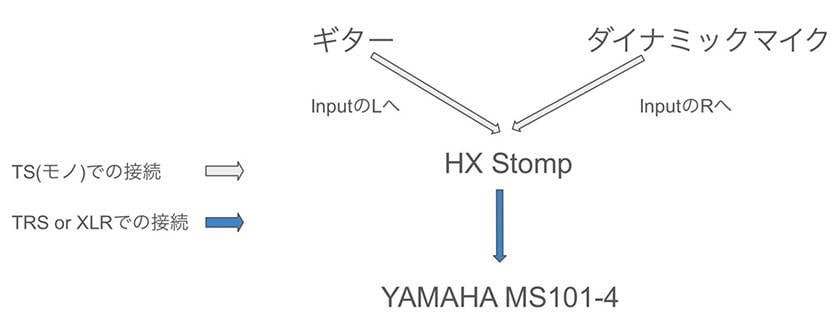
- Dynamic microphone
- Cable to connect the mic to the HX Stomp
→ Use an XLR-to-TS (1/4” mono) cable. The HX Stomp only has TS inputs, so one end of the cable must be a TS plug. - Guitar cable (instrument cable)
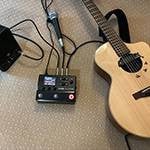
- HX Stomp(820g)
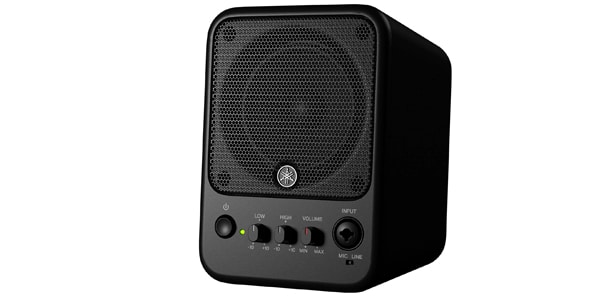
- Powered monitor speaker – Yamaha MS101-4 (2.1kg)
- Cable to connect the HX Stomp to the powered speaker
→ To get the most out of the HX Stomp, it’s best to connect it to the powered speaker using a TRS cable or a TRS-to-XLR cable. - (Optional items depending on the situation):Mic stand, power strip, music stand, smartphone for BGM playback and a wired connection for it
→ If you need to bring a mic stand or music stand, use lightweight and foldable ones. Try attaching them to your guitar case or packing them inside your backpack.
The total weight of the HX Stomp and the Yamaha MS101-4 is under 3kg, which means everything besides the guitar can easily fit in a larger backpack. This makes transportation to the venue much easier! Even if the after-party is a bit of a walk, you’ll be able to get there without much hassle (probably).
I’ve actually used this setup to perform indoors for around 30 people, and it delivered plenty of volume, with no problem at all.
By the way, this is slightly off-topic from the main focus of this article, but if you switch to a mini guitar and a headset mic, you could make the setup even more lightweight.
Going full acoustic with just your voice and a guitar?
Well, that might be straying a little too far, so let’s leave that idea alone for now!
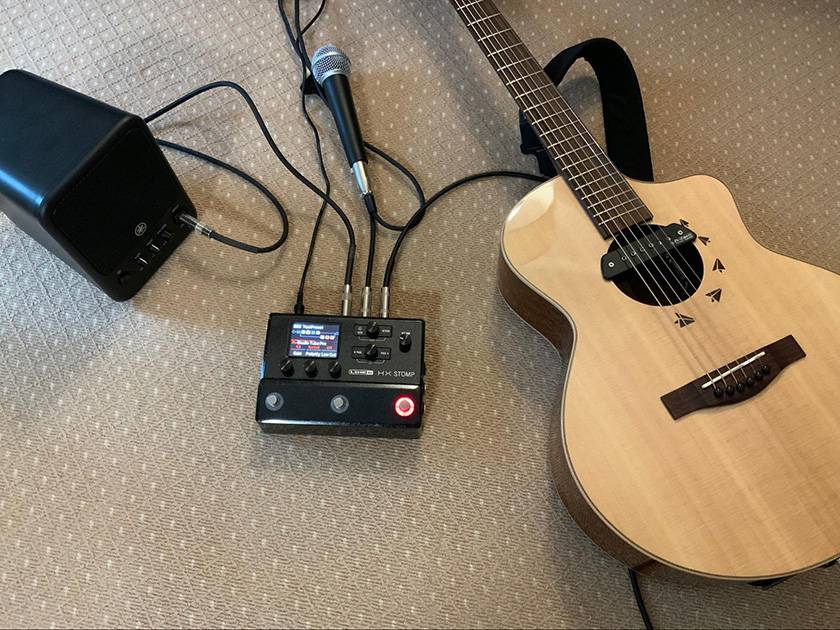
Introducing the Setup
Now, let me walk you through my setup.
First, here’s how I connect everything.
(I use the HX Stomp like a mini mixer.)
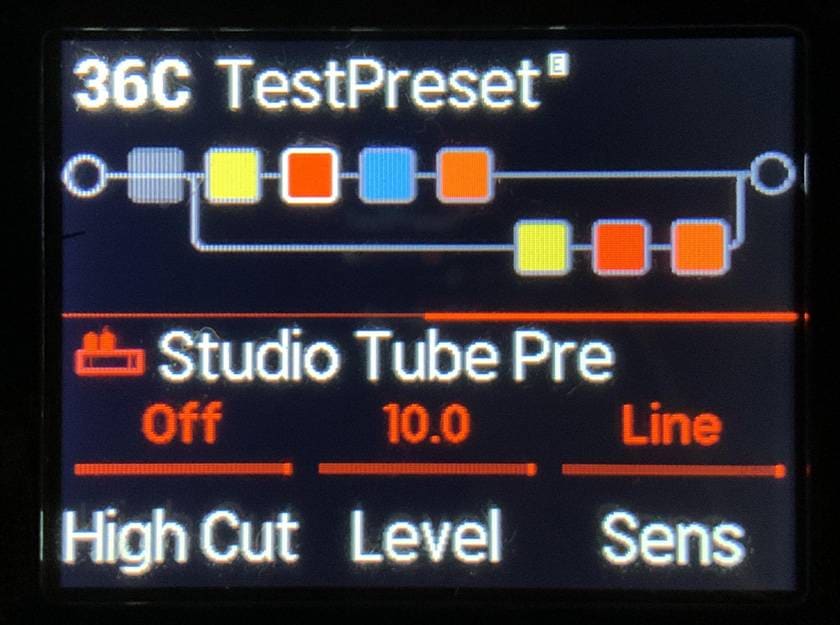
HX Stomp Settings.
When connecting to a powered speaker like in this setup, there’s one crucial setting you need to adjust:
In the Global Settings, set the Output Level to “Line”.
By default, when you first get your HX Stomp, this setting is on “Inst” (Instrument)—so make sure to change it!
Leaving it on "Inst" can result in a signal that's too weak when connecting to line-level gear like powered speakers.

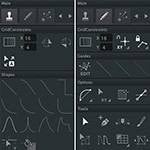
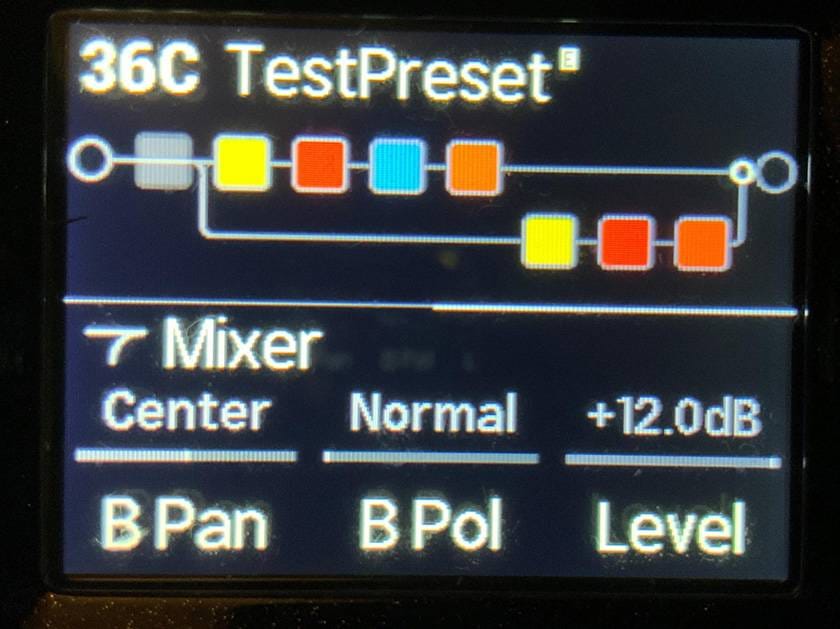
Next, Let’s Take a Look at the Effects.
The top row is the effects chain for the guitar (plugged into input L),
and the bottom row is for the microphone (plugged into input R).
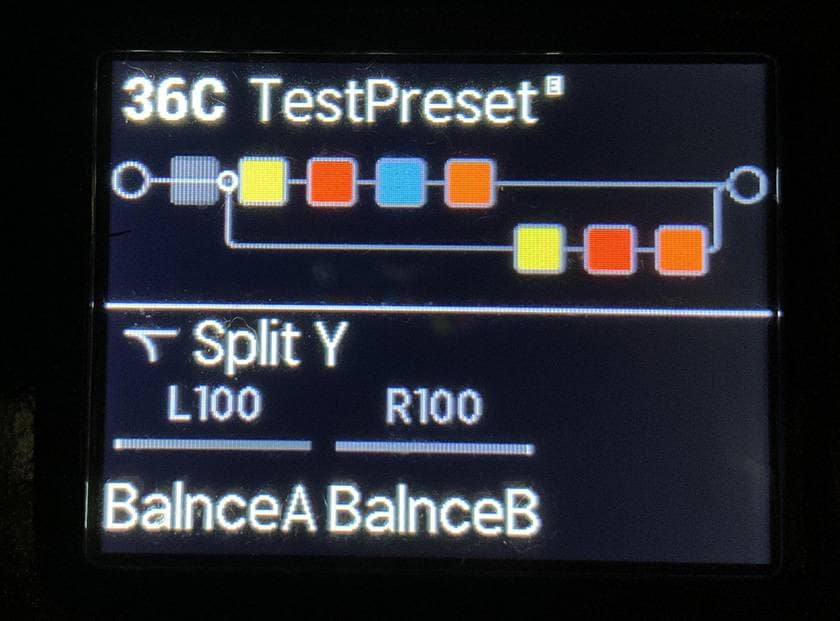
※ Don’t forget to set it up so that input L and R each have their own separate effect chains.
(And honestly, isn’t looking at the effects layout kind of mesmerizing?
I feel like I could eat about 0.0001 of a bowl of rice just staring at it.)
The colored blocks might not make it obvious at a glance, but the settings are laid out like this:
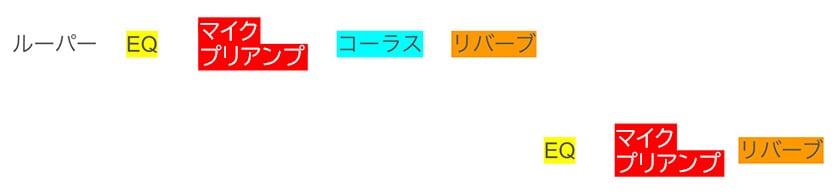
How does it look?
You’re probably getting all the standard effects you'd want for both the guitar and the mic, right?
Of course, you can also add loopers, EQs, other reverb types, or any other effects you want. You can even set up different patches with different effects per song.
Examples:
- Instead of using a looper, add a delay effect to the guitar side.
- If your electro-acoustic guitar has a built-in preamp, you don’t need to use a preamp in HX Stomp for the guitar.
- Add electric guitar-style tones, such as overdrive or wah.
※ In HX Stomp, you can place up to 8 effects blocks max.
Tips for Setting Up
If I explained every single parameter in detail, this article would get extremely long, so I’ll skip that for now.
But here's a basic policy that makes setup easier:
“Keep the volume as loud as possible within HX Stomp (i.e., boost inside the unit itself).”
This is especially important for the mic input, and also if you're using a passive pickup on your guitar.
For both of those, try to boost the signal as much as possible within HX Stomp.
※ Set the mic preamp level to MAX by default.
※ Not just the preamp — it’s recommended to boost the level in other parts of the signal chain as well, as long as it doesn’t cause clipping.
Rather than keeping the volume low on the HX Stomp and raising it on the speaker side, it's better to maximize volume within the HX Stomp and keep the speaker volume relatively low.
This approach results in better sound quality and less noise.
(Oh, and once you’ve finished boosting levels inside HX Stomp, don’t forget to raise your own playing level too, haha.)
Examples of Live Shows Where This Setup Is Not Suitable
However, this setup is not万能 (all-purpose) and naturally there are conditions where it is not suitable.
- When there is no power source
※ HX Stomp and YAMAHA MS101-4 each require one power supply, so a total of two power sources are needed. If there is only one outlet, you can use a power strip, but if there is no access to any outlet at all, this setup cannot be used. - If you want to perform or play background music wirelessly
※ This setup is limited to wired connections only. - If equipment requiring phantom power (such as condenser microphones) is needed
- If you want to emphasize deep bass, such as in strumming with strong low frequencies and sound pressure
- If you need to make fine adjustments like slightly raising only the vocals during the performance
※ To make fine adjustments, you need to operate the HX Stomp each time, so adjustments are limited to rehearsal time or breaks during the performance.
In practice, please try using this setup while considering your playing style and venue restrictions.
(Huh? You put a lot of effort into the setup, but no one has come to listen to you?? What do you do in this type of situation?! Since this content is quite technical, in such cases, please contact Line6’s official support. LOL)
Application of Band Setup and Equipment
This time, I showed an example of a solo singer-songwriter live performance using a combination of HX Stomp and YAMAHA MS101-4 equipment, aimed at an audience of about 30 people. However, it is also possible to realize this with different band formations, equipment combinations, and venue capacities.
Examples of band formations:
- Guitar duos
- Mic-recorded instrument and guitar duos
Examples of equipment combinations:
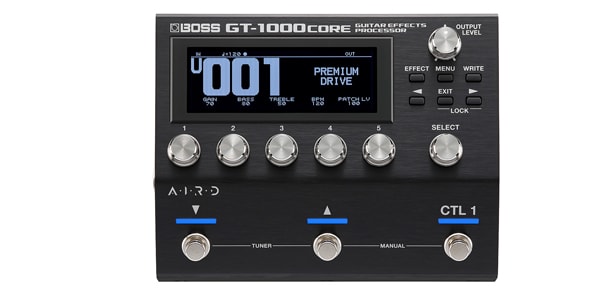
- Other HX series multi-effects units
- Effects units with two inputs that can apply effects separately
(e.g., Boss GT-1000Core)
Capacity
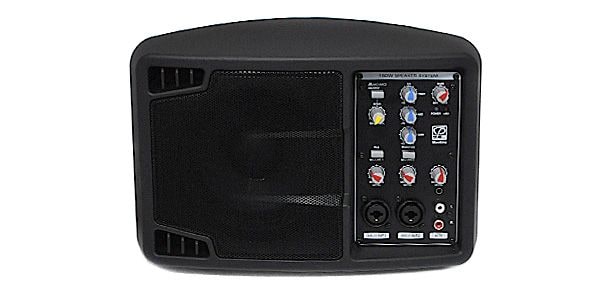
If the audience size is small, you can use lighter speakers. If the audience grows larger or if the performance is outdoors, you can switch to two speakers or even bigger ones—any speaker can be used as desired. (If you want to fully utilize performance, speakers with XLR inputs are preferable, assuming the use of TRS jacks or adapter plugs.)
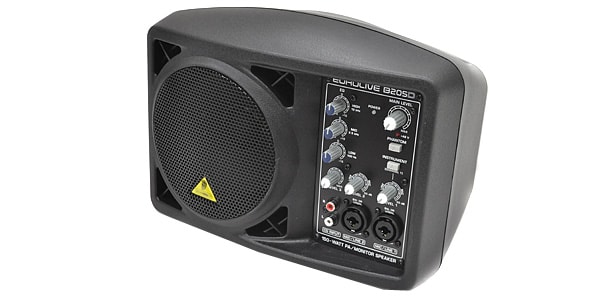
(Examples: BEHRINGER B205D EUROLIVE powered speakers)
(Example: Classic Pro MoniOne PA speakers)
How does that sound? This time, I showed you a setup using the HX Stomp for carrying relatively light equipment to live performances.
Beyond the methods introduced here, by experimenting with different setups, you may discover unexpected ways to use your gear. Try to find your own recommended way to use it!
The “sound & person” column is made up of contributions from you.
For details about contributing, click here.


 技 WAZA CRAFT特集
 【初心者向け】エフェクター講座
 BOSS「技-WAZA CRAFT-」
 あなたのエフェクターボード見せてください
 エフェクターのつなぎ方
 エフェクターの種類