■ Korg Nautilus Virtual Tonewheel Organ CX-3: Dive into the Drawbars
Welcome to Part IV of our exploration of Korg’s workstation synthesizer, the Nautilus.
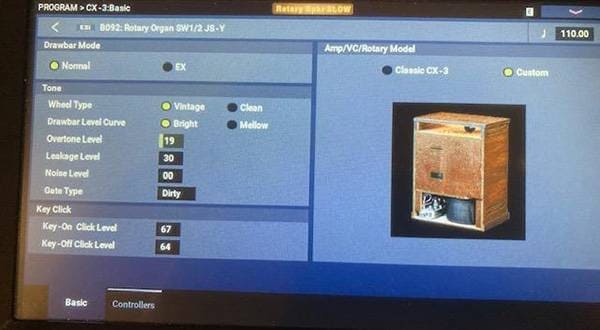
In the previous post, I delved into key aspects of the CX-3 virtual organ engine, covering the leakage noise settings and the two available Leslie types.
Workstation synthesizers, with their numerous parameters accessible through a touchscreen display, can sometimes be less intuitive for real-time sound manipulation compared to analog synthesizers, where physical knobs and sliders allow for immediate tonal adjustments.
The Nautilus, in particular, has fewer manual control knobs and sliders than its predecessor, the Kronos, leading to occasional criticism for its complexity.
However, it compensates with a streamlined interface and excellent cost-performance balance, making it an invaluable tool for those who master its control scheme.
Let’s embark on this ambitious report and discover how best to harness the Nautilus. Your warm support is much appreciated!
This time, I’ll cover control settings and actual sounds related to the drawbars—an essential element for crafting Hammond-style organ tones.
■ The Heart of Hammond Sound Design: Drawbars and the Innovative EX Drawbars
The key to Hammond organ sound design lies in drawbars and percussion settings. With the introduction of EX drawbars, the CX-3 engine offers a new dimension, enabling entirely novel sounds beyond traditional Hammond tones.
1. Setting CX-3 Drawbars
A Hammond organ typically has nine drawbars assigned to a single keyboard, with each bar controlling a sine wave of a specific pitch: 16, 5 1/3, 8, 4, 2 2/3, 2, 1 3/5, 1 1/3, and 1 foot. By pulling out these drawbars individually, musicians can blend sine waves to create Hammond’s distinctive rich sound.
Pulling a drawbar increases the volume in eight levels.
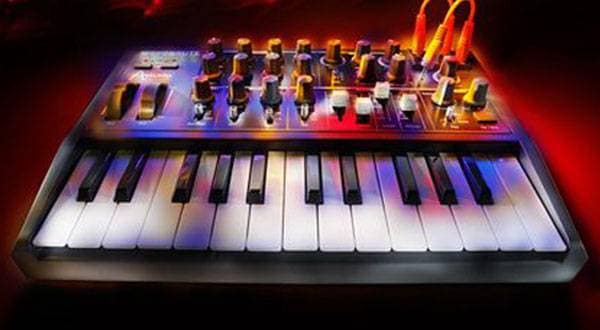
Real Hammond B-3 organs have dual keyboards with separate upper and lower drawbars for each.

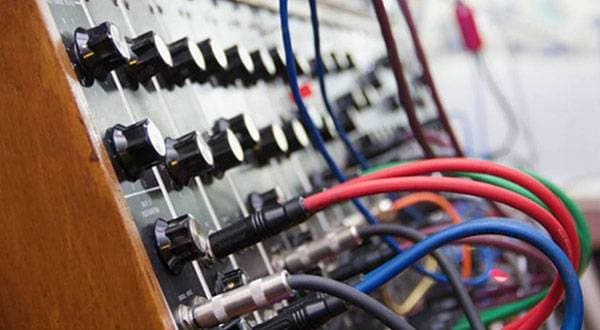
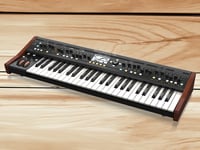
Physical Drawbars (on Yamaha YC61)
On the Nautilus, the drawbar settings can be accessed by selecting the Drawbars tab at the lower left of the touchscreen display. This brings up both the upper and lower drawbar controls (see Screen 1).
When splitting the keyboard, drawbar settings can be customized for the left (lower) and right (upper) sections, allowing distinct tones for each hand.
However, unlike physical drawbars found on real Hammond organs, the CX-3’s virtual drawbars must be controlled via the touchscreen display. (see Screen 1)
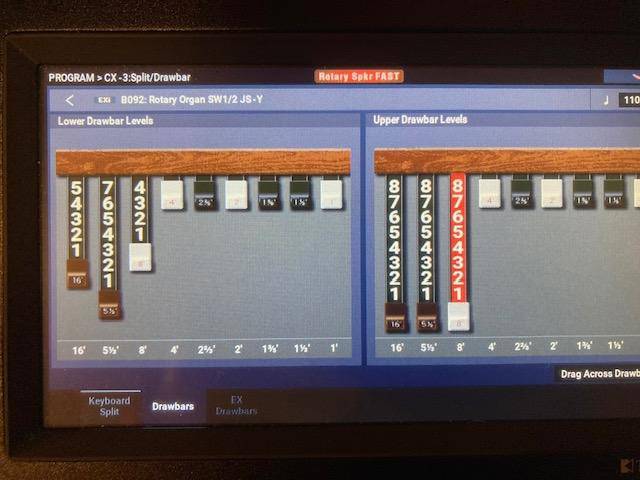
Nautilus Drawbar Display (Screen 1)
Drawbar Settings Example (Screen 2)
To operate the display, simply touch the drawbar you want to pull out. The selected drawbar will turn red, indicating it is active. Then, dragging the red-highlighted drawbar with your finger adds the 11/3 pitch tone (see Screen 2).
This digital drawbar system only allows one drawbar to be activated at a time. It is not possible to select and control multiple drawbars simultaneously. I personally tried touching several drawbars at once but found that it didn’t work — only one drawbar can be active.
On a physical organ with real drawbars, players often grab and adjust two or three drawbars simultaneously with their left hand or pull all remaining drawbars at once for a full-drawbar setting. Unfortunately, such actions aren’t possible when performing on the Nautilus CX-3, which may be considered a significant drawback.
2. The New Weapon of the CX-3 Engine: EX Drawbars
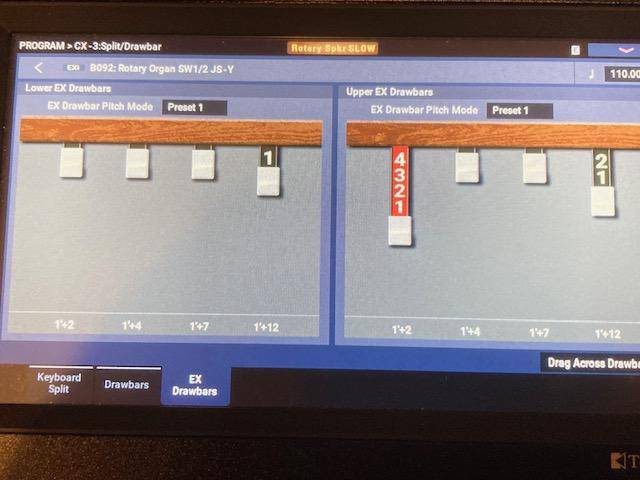
To switch the drawbar mode to EX, tap the EX Drawbars tab located on the lower left of the display (see Screens 3 and 4).
EX Drawbars Display (Screen 3)
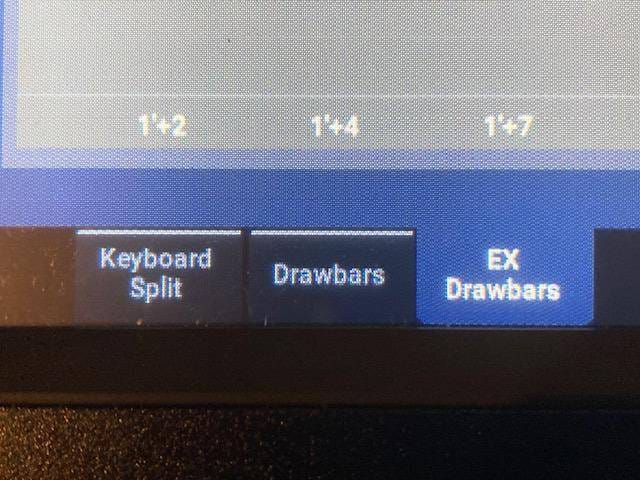
EX Drawbars Tab (Screen 4)
When the drawbar mode is set to EX, you can add 4 additional drawbars to the standard 9. The pitch of these drawbars can be adjusted in semitone increments across a range from 16' to 1', covering two octaves.
You can also choose from four preset pitch combinations for the drawbars.
By utilizing the EX drawbars, it becomes possible to create entirely new Hammond organ sounds that were previously unattainable.
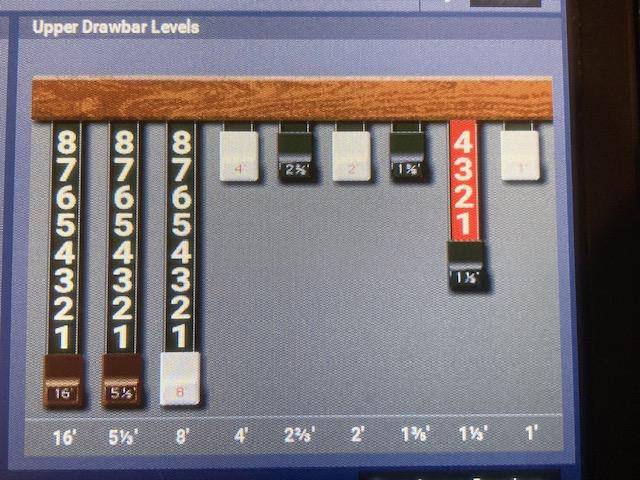
I tried out the EX drawbars myself. On the display, the upper EX drawbars were assigned with Preset 1, which mapped the higher frequencies to the EX drawbars. Because these tones were quite high-pitched, mixing them with the base drawbar registrations (typically the lower three drawbars) resulted in sounds that diverged or even became completely different from the original tone (see Screen 5).
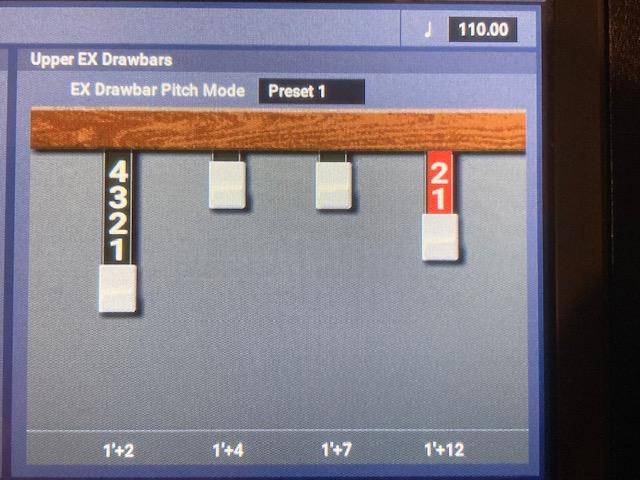
EX Drawbar Display (Screen 5)
I added an EX drawbar with 1 foot plus 12 at level 1 to the registration of the lower (split) section of the keyboard (see Screen 6).
The lower section is used for backing. Naturally, its volume is set lower than the upper section in a split configuration.
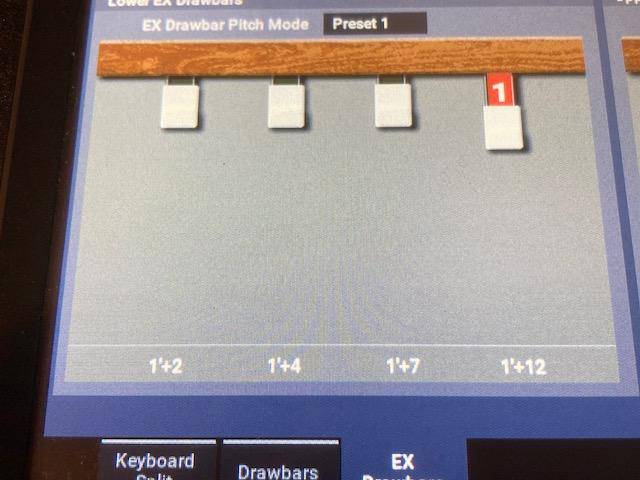
EX Drawbar Registration Added to the Lower Keyboard (Screen 6)
For reference, the lower keyboard registration uses the lower three drawbars set to levels 5, 7, and 4, respectively (see Screen 7).
By adding just a hint of high tones from the EX drawbar, the overall backing sound gained clarity and definition. I felt this approach might be quite effective.
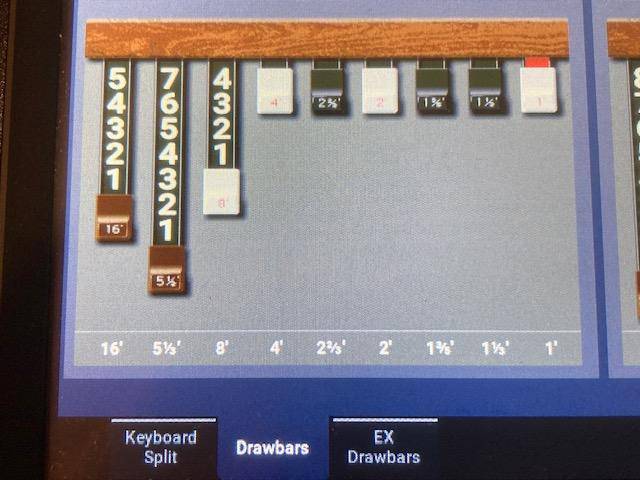
Drawbar Registration for the Lower Keyboard (Screen 7)
I realized that I still need to thoroughly study the EX drawbars. To be honest, it’s quite challenging. It might be a bit tough for an old-timer with a rigid mind like me!
Moreover, this EX version not only allows control over drawbars but also applies similar control to percussion. I believe this feature could be invaluable for creative organ players.
■ No Physical Drawbars, But There’s Another Way!
During my exploration to report on the Nautilus’s drawbars, I made an unexpected discovery.
I initially thought that the only way to control the drawbars in real time was through the touch-view display. However, if you touch any one of the nine drawbars on the display to activate it (it turns red), you can control that drawbar in real time using the circular Value controller located on the right side of the display.
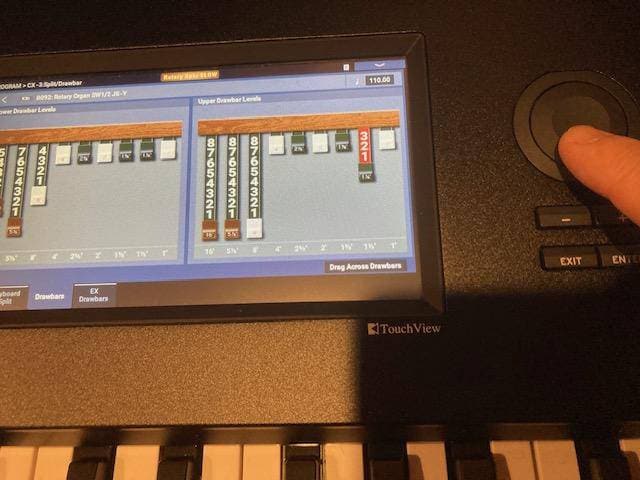
The activated (red) drawbar can be controlled via the Value controller on the right side of the display! (Screen 8)
Turning the Value controller to the right increases the value (+), while turning it to the left decreases it (-).
Since operating the drawbars by touching the display isn’t very practical, using the Value controller is recommended if you want to change the sound during a performance. However, keep in mind that it only works for the single drawbar that has been activated.
The next post will be the final report on the Nautilus sound engine’s virtual organ CX-3.
I will be covering parameters that have a significant impact on organ sounds, such as chorus, vibrato, Leslie effects, and key click noise, as well as a comprehensive review of the virtual organ CX-3. I also plan to compare it with Yamaha’s iconic YC61.
Stay tuned!
The “sound & person” column is made up of contributions from you.
For details about contributing, click here.


![[2026 Latest Edition] Choosing a Synthesizer/Popular Synthesizers Ranking](/contents/uploads/thumbs/2/2022/9/20220916_2_19446_1.jpg)

 YAMAHA YC61 特集
 シンセサイザー 入門ガイド
 おすすめの電子ピアノ
 各メーカーの鍵盤比較
 用途で選ぶ!鍵盤楽器の種類
 キーボードスタートガイド