When you go to a rehearsal studio, one piece of equipment that is almost always permanently installed is the mixer.
It is used to connect vocal microphones and output sound from speakers, input line instruments such as acoustic guitars and keyboards, and play audio sources from smartphones or PCs, making it useful not only for band rehearsals but also for individual practice.
In addition, some mixers come with built-in effects such as delay and reverb depending on the model, which makes them very convenient for vocal practice in the studio.
That said, the mixers installed vary from studio to studio, and it is not uncommon to encounter a model you are using for the first time.
However, as long as you understand the basic mechanism of a mixer, the fundamental way of using it is almost the same regardless of the manufacturer.
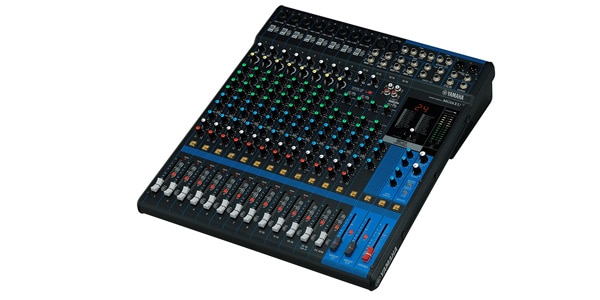
This time, using the YAMAHA MG16XU as an example, I will clearly introduce the structure of a mixer and its basic operation methods.
YAMAHA / MG16XU Analog Mixer, 16 Channels
The Mixer Has a Surprisingly Simple Structure
When you look at a mixer, many people think “It looks difficult…” because of all the knobs lined up, but in reality it is very simple.
A mixer is
a series of sections (channel strips) with the same functions lined up horizontally.
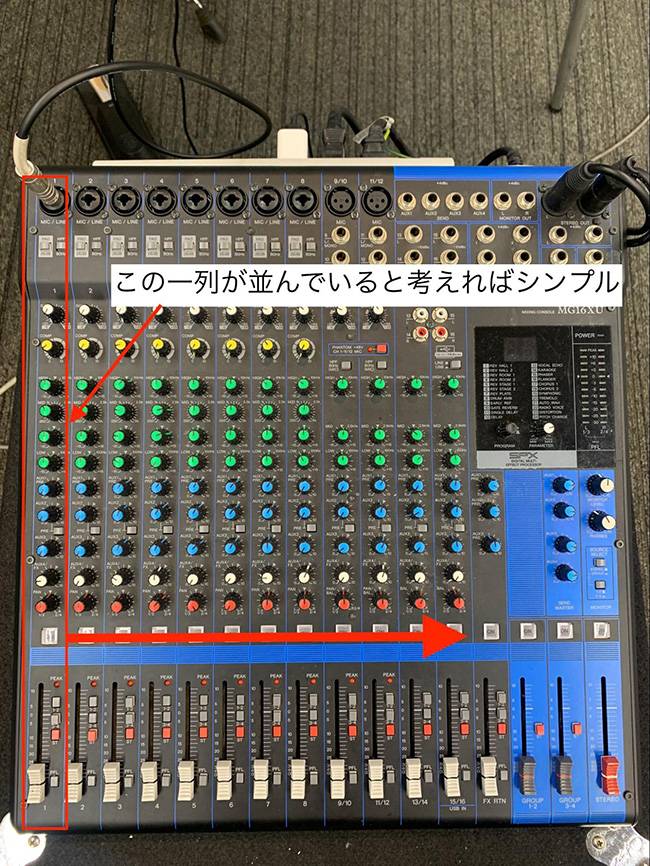
In other words, once you understand one column, you can handle the other columns in the same way.
Now, let’s look at the functions from top to bottom.
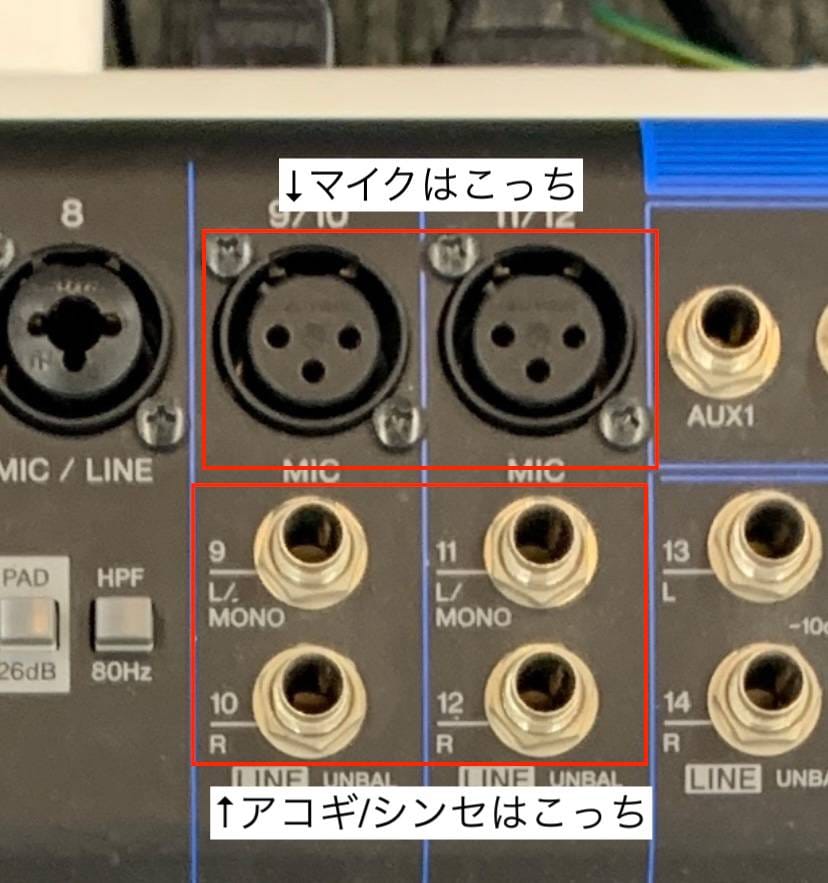
1. Input — Where You Connect Microphones and Instruments
At the very top of each channel is the “input jack.”
This is where you plug in microphone cables (XLR/Cannon) or guitar/keyboard cables (shielded/phone).
Connect microphones to the side with three small holes, and line instruments such as acoustic guitars or synthesizers to the side with a single hole.
*Some Models Support Two Types of Cables
On certain models, such as the MG series, combo jacks are used that allow both XLR (for microphones) and phone (shielded) plugs to be connected.
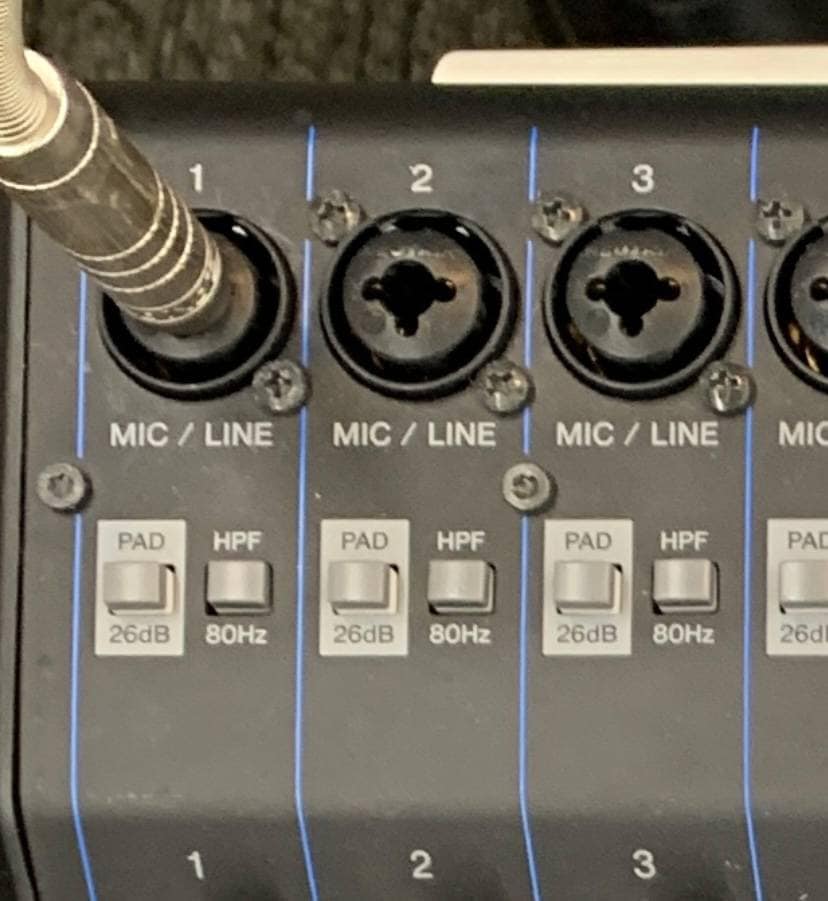
PAD Switch
PAD is a switch that reduces the signal level.
For beginners, it’s easiest to remember it like this:
- When connecting line instruments (keyboards, synths, etc.) → PAD ON
- When connecting microphones → PAD OFF
HPF (High-Pass Filter)
HPF is a function that cuts only the low frequencies.
On this model, frequencies below 80Hz are cut.
Low frequencies tend to interfere with each other easily, so if this function is available, it’s generally a good idea to turn it on.
Phantom Power (+48V)
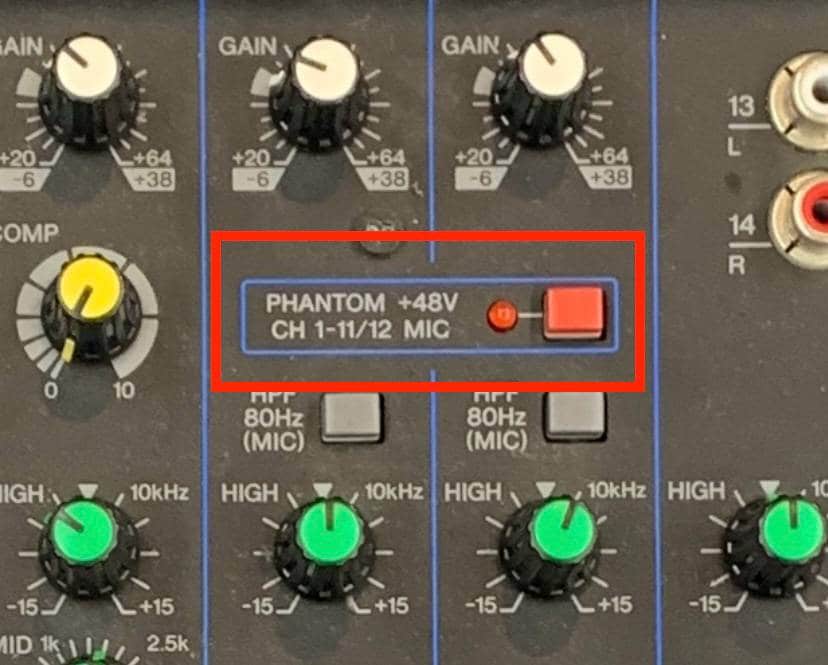
Used to supply phantom power to condenser microphones, etc.
Caution!!!
When connecting or disconnecting equipment, always turn off the phantom power first, as doing otherwise may cause damage.
2. Gain — The Section to Adjust Gain
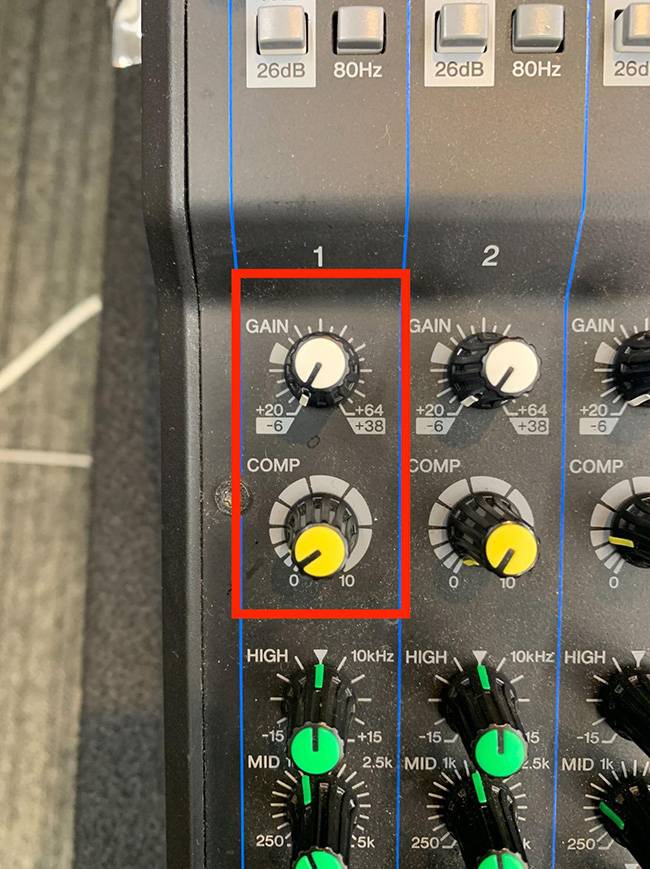
Determines how much the input signal is amplified.
If set incorrectly, the sound may be too quiet or too loud and distorted.
For MG series mixers
There is a reference mark at around the “10 o’clock” position on the knob.
For beginners, adjusting to this position first is an easy way to get started.
COMP (Compressor)
Some mixers, like the MG16XU, have a built-in compressor on each channel.
A compressor is an effect that:
- Raises quieter sounds
- Reduces excessively loud sounds
…to even out volume differences.
Applying a light amount to vocals or acoustic guitar makes them easier to listen to.
Be careful not to overdo it, as excessive compression can cause feedback.
About the Peak Lamp
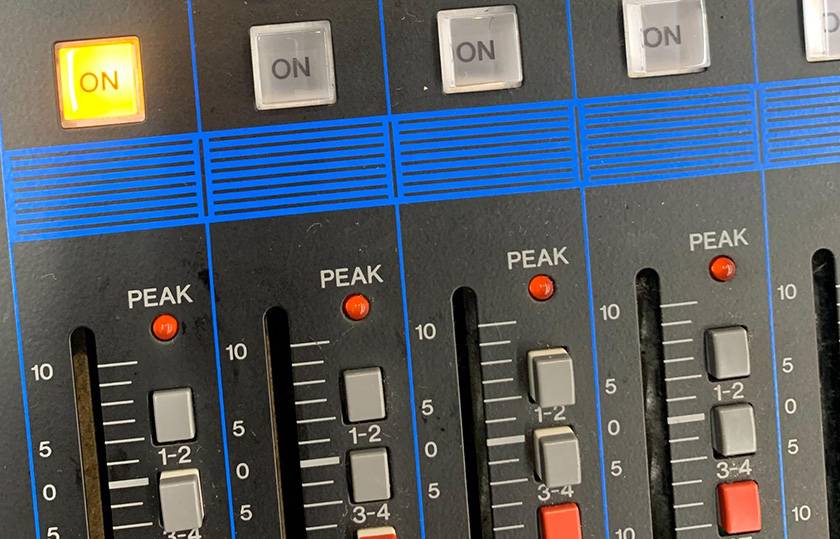
Peak Lamp Lit = Sign that the sound is too loud and distorting.
If the lamp lights up, slightly reduce the gain.
3. EQ (Equalizer) — The Section to Adjust Tone
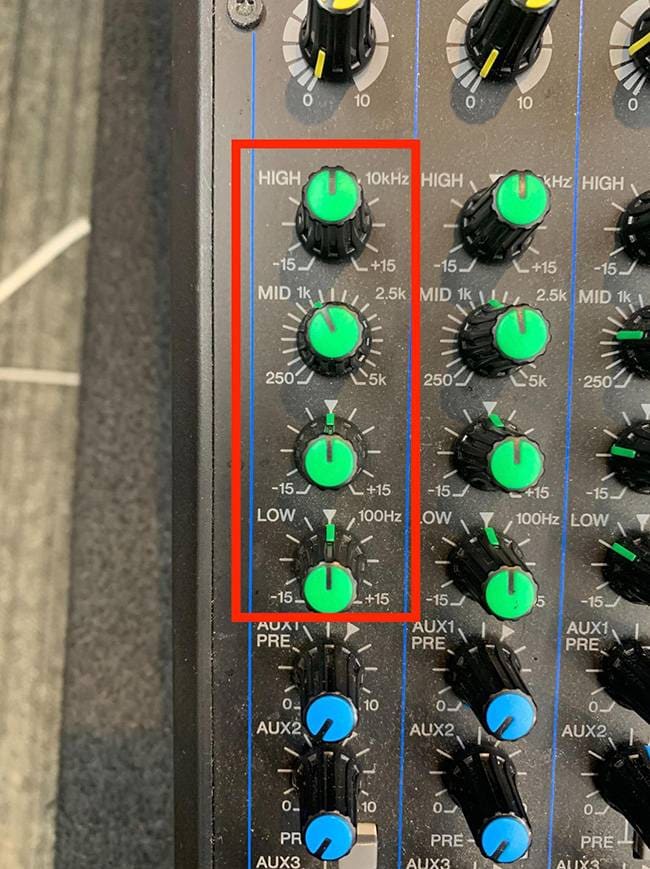
EQ is the set of knobs used to shape the tone.
In the MG16XU, it consists of:
- HIGH (treble)
- MID (midrange)
- LOW (bass)
The MG16XU allows you to set the midrange frequency to a specific value, but depending on the model, some mixers divide MID into High-Mid and Low-Mid.
Example Usage
- Vocals not cutting through → Slightly raise HIGH
- Synth bass too thick → Lower LOW
- Voice sounds muffled → Slightly raise or cut MID to adjust
EQ is for fine-tuning, so the trick is not to turn the knobs too drastically.
4. AUX (Auxiliary) — Function to Send Sound to Another Destination
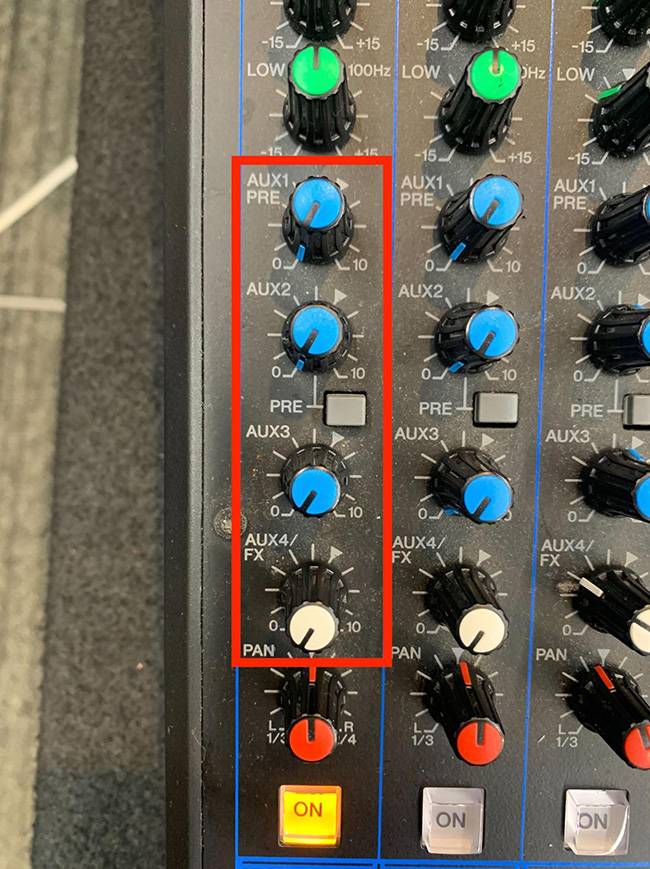
AUX is a function used to send sound through a separate route.
Main Uses
- Send signal to external effects
- Send signal to external recording devices
- Create a separate mix for monitor speakers (e.g., make vocals louder)
Using AUX involves external equipment or creating more complex mixes, so it’s a slightly advanced function.
For beginners, it’s enough to just understand that “AUX sends sound through a separate route.”
5. PAN / Fader — Determines the Position and Volume of Sound
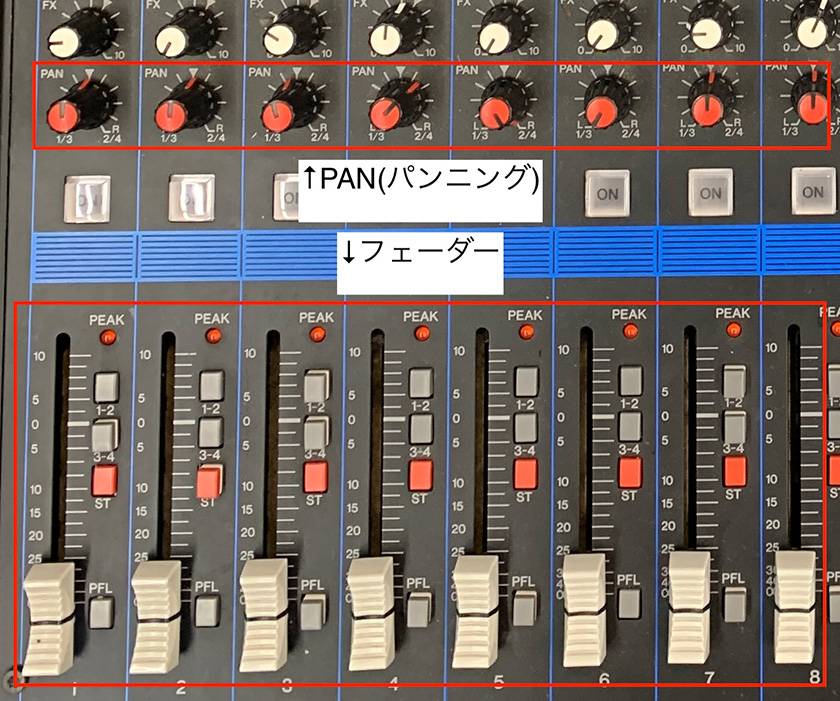
PAN
Decides which speaker (left or right) the sound will come from.
- Center → Vocals
- Right or Left → Backing vocals, acoustic guitar, keyboard, etc.
You can use this to position instruments and vocals in the stereo field.
Fader
Controls the volume of each channel.
As a basic rule, adjust up or down relative to the 0dB mark.
6. Master Fader — Controls Overall Volume
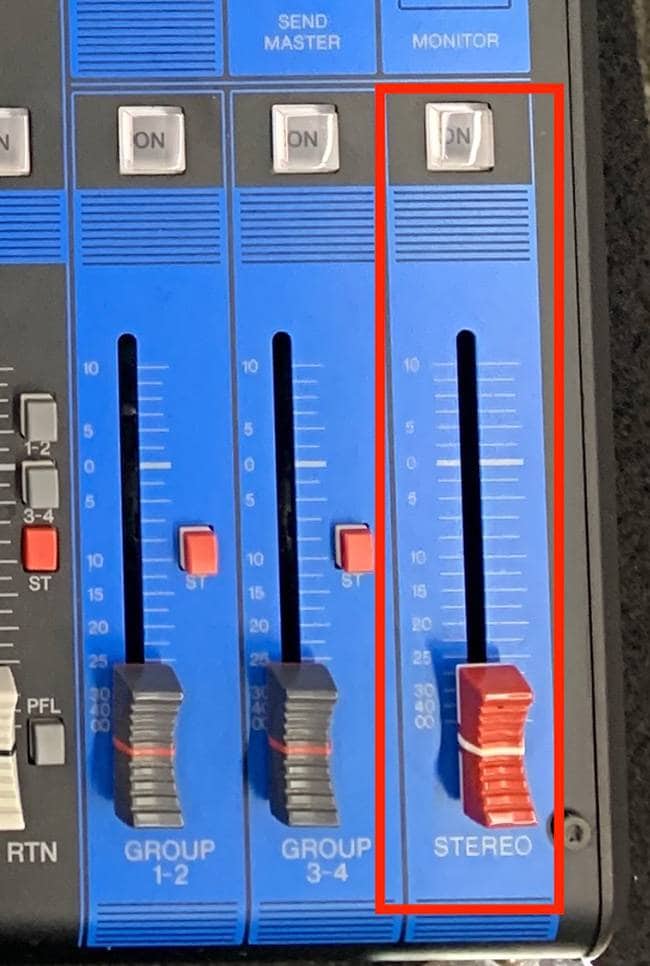
The final point that determines the overall volume of the mixer.
If this fader is down, no sound will come out regardless of the individual channel fader levels.
Caution
- Before turning on the power
- When plugging or unplugging microphones or cables
Make it a habit to lower the fader to 0 (minimum).
When in doubt, ask a professional
If you are unsure about handling the equipment:
- Read the manufacturer’s manual
- Ask the studio staff to adjust it for you
This is the safest and most reliable approach.
Staff are experienced and can quickly help with requests such as fixing a microphone that isn’t working or applying an effect.
Summary
Mixers may look complicated at first glance, but they are actually very simple.
If you understand the structure — “once you learn one channel strip, the others are mostly the same” — even beginners can handle them quickly.
- Input — Connect instruments or microphones
- Gain — Adjust the input volume
- EQ — Adjust the tone
- AUX — Send audio to a separate route
- PAN / Fader — Control the position and volume of each sound
- Master Fader — Control the overall volume
Keep these six points in mind to make your studio practice more comfortable.
The “sound & person” column is made up of contributions from you.
For details about contributing, click here.


![[PA Guide for Beginners] Let’s Put Together A PA System for Your Live Show!](/contents/uploads/thumbs/2/2023/1/20230131_2_20980_1.jpg)

 YAMAHA MGP&MG シリーズ
 神社でお祭りバンド
 ミキサーケース セレクター
 CLASSIC PRO
 学校向け機材特設ページ
 ケーブル購入ガイド