Have you ever wondered how background music and sound effects for events and stage audio are created? Generally speaking, there are two methods: (1) use a device called a sampler; and (2) combine the use of computer software and related peripheral products. DTM station notes that for the latter, ABLETON LIVE DAW software is often used because of its convenient features.
The simple configuration of ABLETON LIVE can be easily introduced and understood. This time, we would like to introduce ABLETON LIVE as well as related products!
■ A controller that comes with ABLETON LIVE/h2>
NOVATION / Launchpad Mini MK3
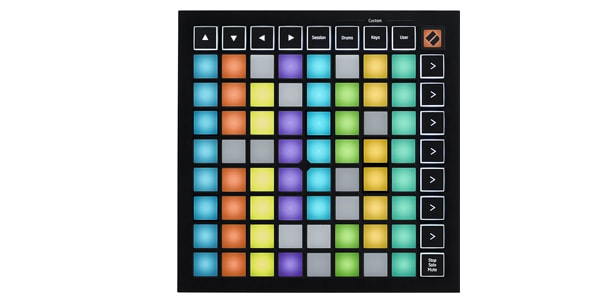
ABLETON LIVE is the software that allows you to emit sounds at the push of a button. Often when you purchase DTM equipment, a simple version of LIVE, called ABLETON LIVE Lite, comes with the equipment. This time, we’ve chosen an affordable MIDI controller that is convenient for emitting sounds at the push of a button. By setting up the Launchpad Mini MK3 with LIVE Lite, you can easily recall background music and sound effects that you have assigned to the 64 pads. (Up to 8 sounds can be played simultaneously.)
* You will need a PC or Mac with a USB terminal that meets the operating environment in the link below, as well as an Internet connection to install the software.
ABLETON Live 10 Lite operating environment
■ Installing the Trial version
The trial version of ABLETON LIVE Lite is free to try out. You can't save your project, but you can check your operating environment and operability. I you are interested, please try the free version before you make your purchase!
After purchasing the DTM equipment that comes with ABLETON LIVE Lite, follow the steps below to install and authenticate LIVE Lite.
Register the DTM product on the product manufacturer’s site
↓
Create an account on the ABLETON website
↓
Register your LIVE Lite serial number in your new ABLETON account * Depending on the product, there are two patterns: 1) the serial number is displayed on MY PAGE on the manufacturer's site for the product; and 2) the serial number is included with the product. Launchpad Mini MK3 is the former, so the Live Lite serial number will be displayed on MY PAGE after registering the product on the NOVATION website.
↓
Install Live Lite from the download page above
↓
Launch Live Lite and authenticate online
■ Environment settings
Let's take a look at LIVE Lite settings from here. The image shown is for Windows. The Mac layout will be slightly different.
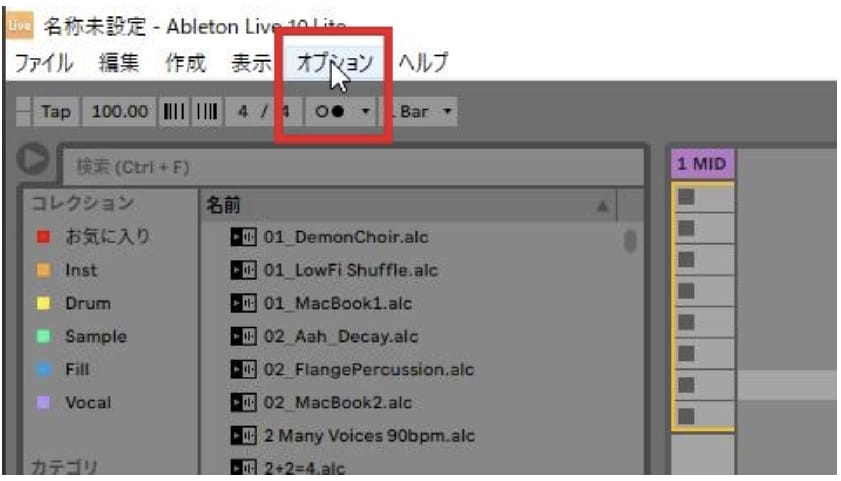
Go to Options → Preferences.
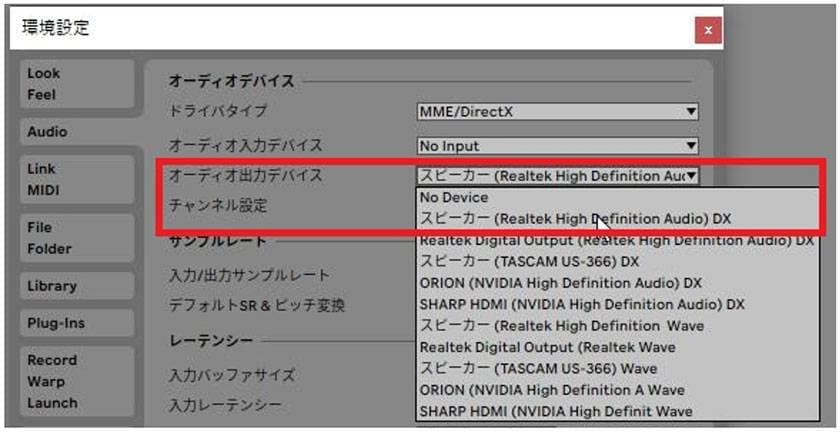
ASet the speaker & headphone output device(s) using "Audio output device".
* The output device name varies depending on the computer. There are cases where the sound quality is not very good when using the audio device that is installed as standard equipment on the computer (there may be a delay or no sound). In such a case, you'll need an audio interface like the one we introduce at the end of this blog.
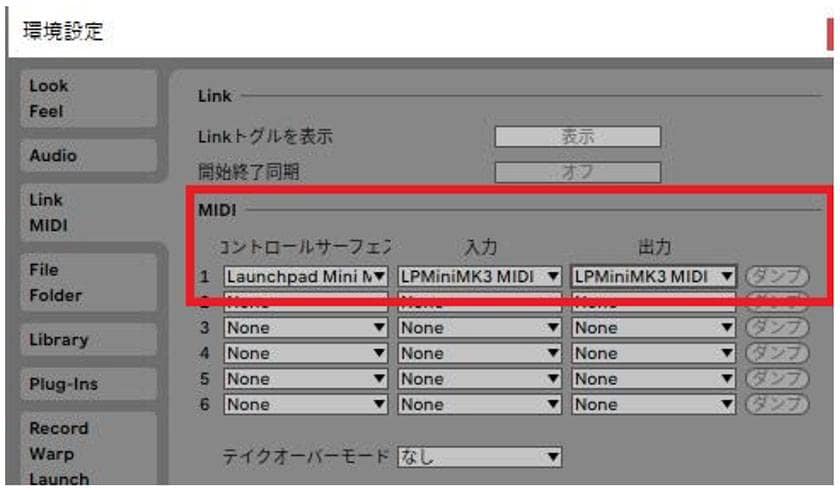
Link MIDI is links the controller and ABLETON LIVE Lite. Let's select our controller that is connected to the computer from within the red frame.
* If you are using the trial version without a controller, this does not need to be set.
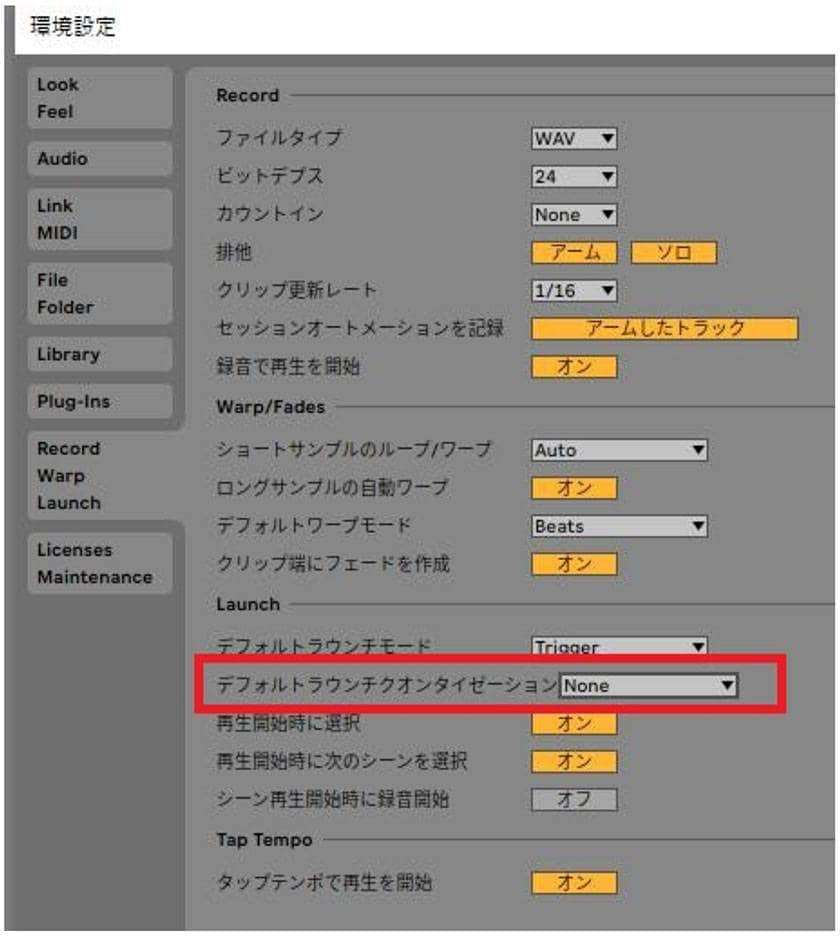
Set the item in the red frame in the Record / Warp / Launch tab to "None". Then close preferences. Uncheck "Launch Quantization Enabled" in the "Preferences" option. If you do not create the launch quantization settings, the sound will be corrected so that it plays at a fixed timing. Because we want the sound to be emitted at the push of a button, let’s turn off this function so that the timing does not change arbitrarily.
■ Track settings
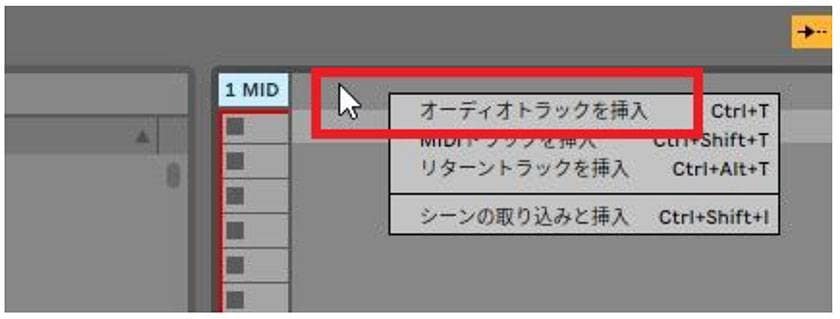
Next, right click on the blank area beside the track as shown in the image → selecting "Insert Audio Track" will create an audio track. By default, there is a MIDI track created ("1 MID"). However, I don't use MIDI very much in the start-up, so let's delete the unnecessary track by right-clicking to make it easier to operate.
Track width can also be changed by clicking on and dragging the edge of the track name. This allows you to change track names and colors to make them easier to see.
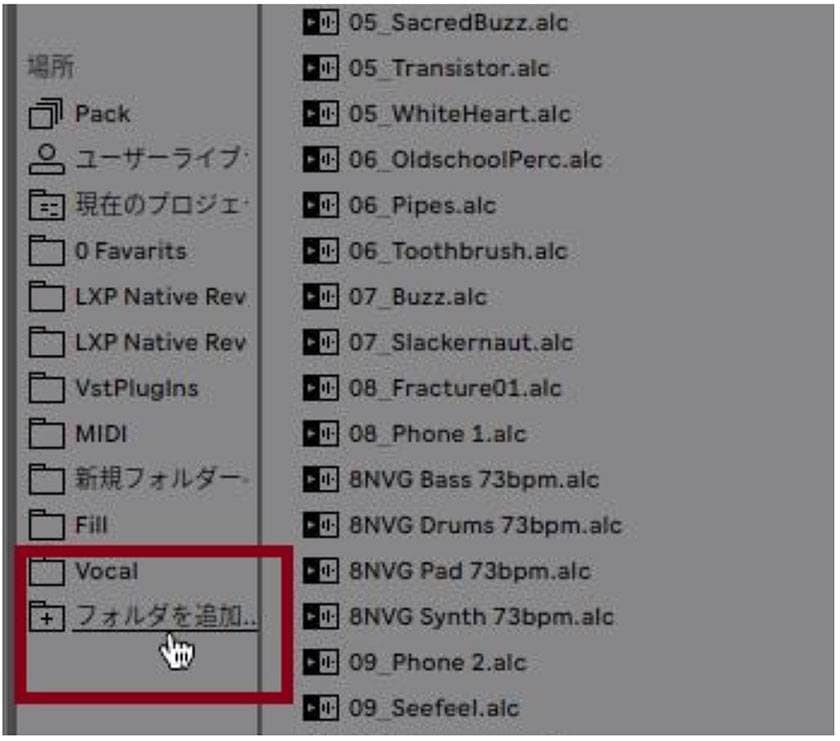
Select the folder that contains the audio files from "Add Folder" on the left.
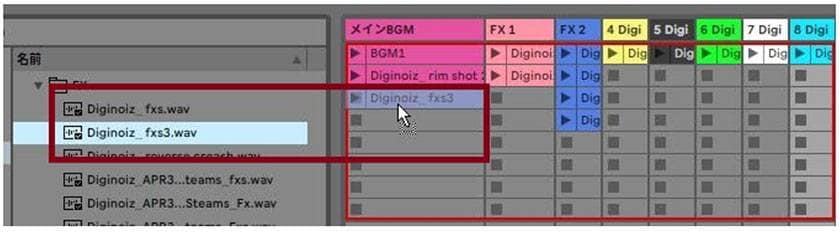
From the folder, you can drag any file to the track. The file placed in this square is called a "clip", and playing the file is called a "Launch".
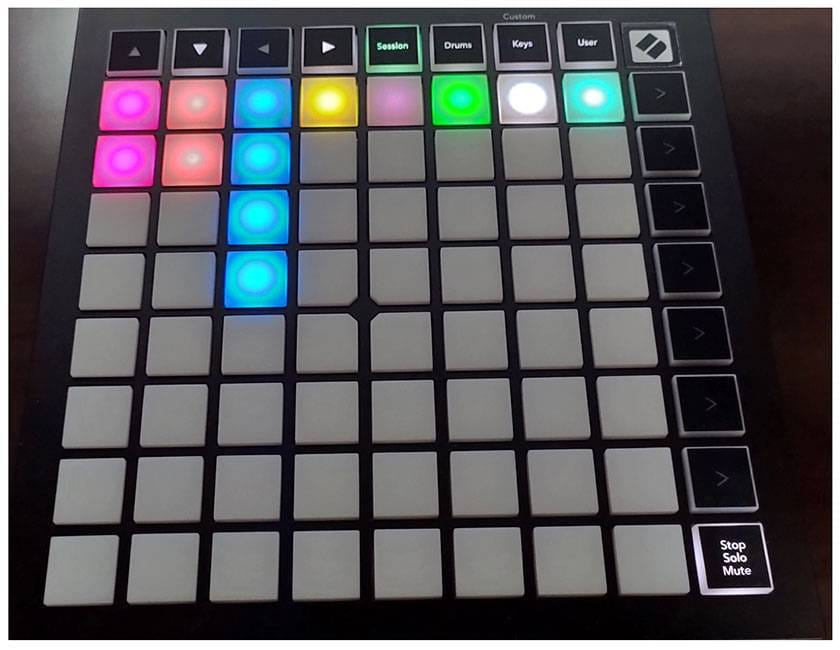
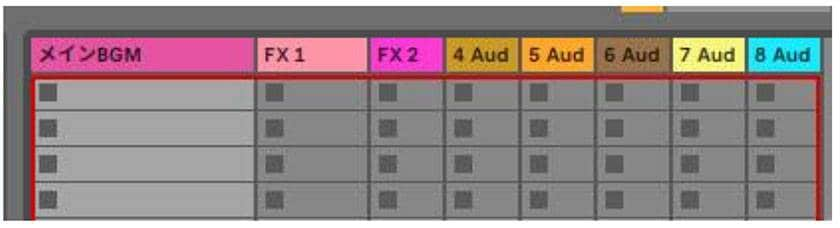
A big feature of the Launchpad Mini MK3 is that the pad to which a clip is assigned lights up in an easy-to-understand manner by reflecting the track color set on LIVE Lite like above!
* The central part of some of the pads appear to shine brightly in the photo, but the brightness will appear more evenly on the Launchpad Mini MK3 itself.
You can actually use LIVE Lite as is to emit sounds by clicking the clip on the screen with the mouse or assigning the clips to the computer keyboard. However, it may be difficult to operate, or it may cause trouble, so I think it's best to use a controller whenever possible.
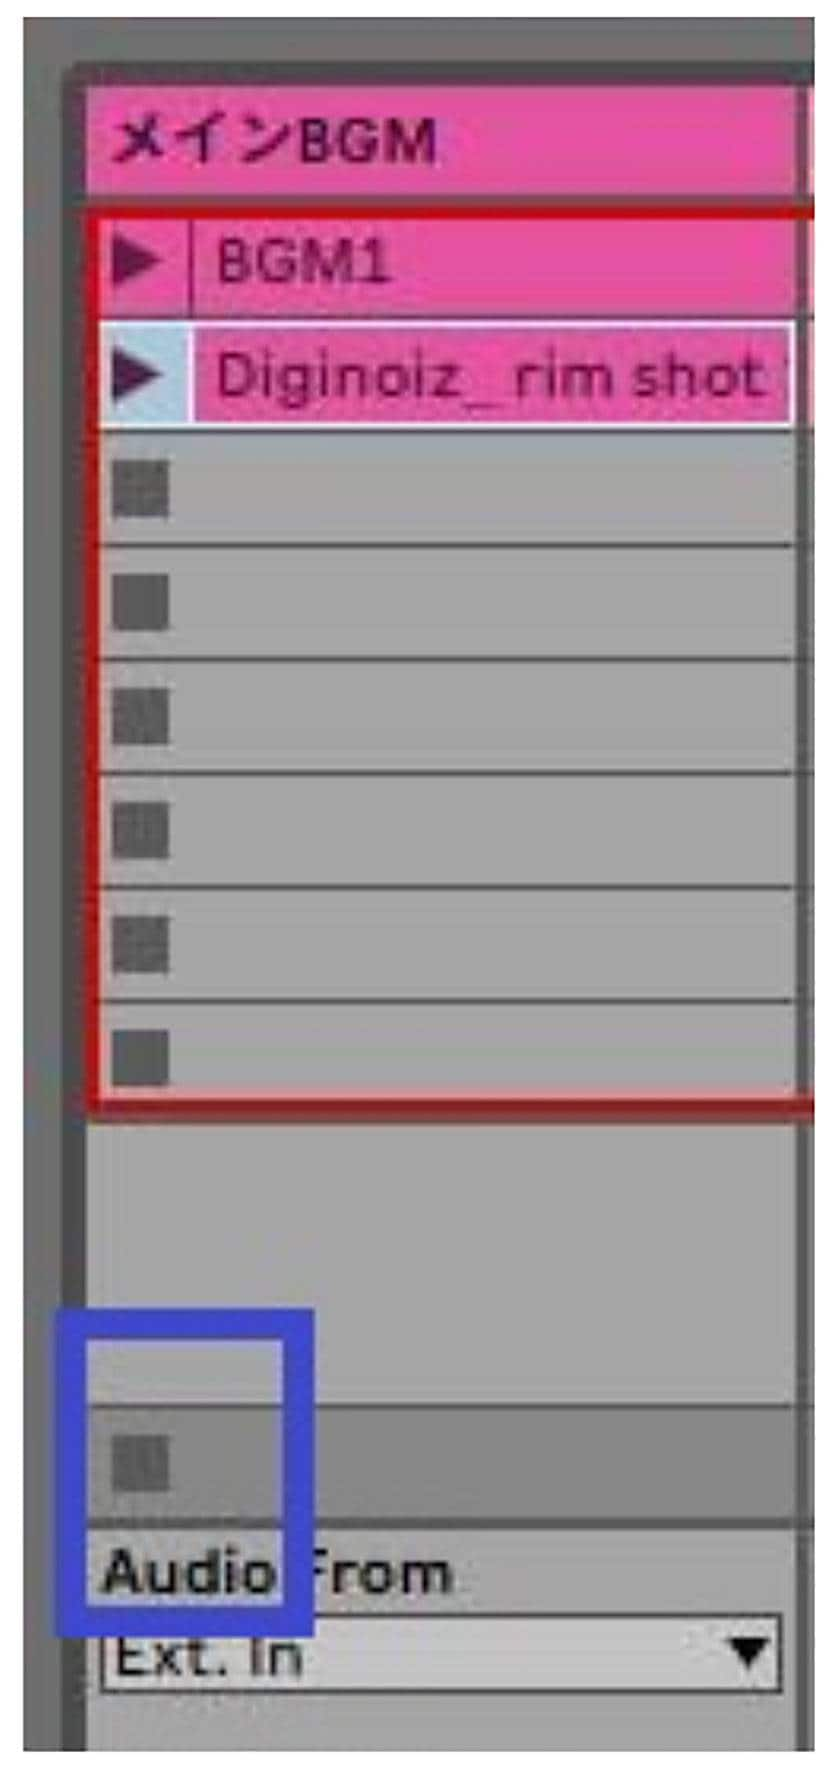
By the way, if you prefer to turn off clipping of individual tracks on the screen, click the square in the blue frame in the image above.
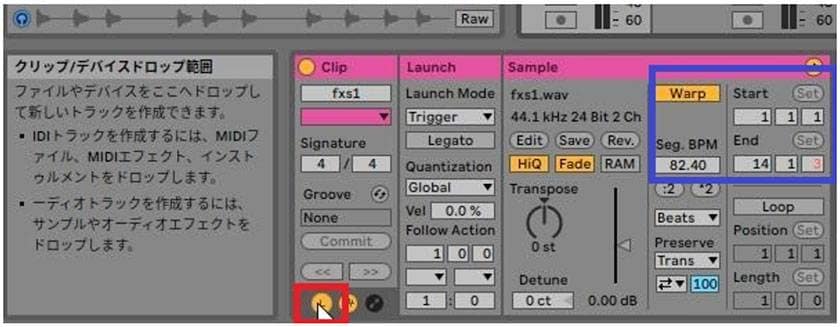
The launch method can be set in detail for each clip. Double-click on a selected clip, and click the "L" in the image at the bottom of the screen, and an item "Launch" will appear between Clip and Sample. Launch Mode is set to "Trigger” by default,. In this case, when you launch the clip, it will be played once from the beginning to end and then stop. If you set Launch Mode to “Gate”, the clip will play only as long as the Launchpad button is being pressed. For details on other playback modes, refer to the help page on the ABLETON website.
The "Warp" function in the blue frame in the above image automatically matches the tempo of the project and the clip. It is set to on by default and can be a very convenient function when creating music. You can just turn it off, or if the tempo of the clip is not quite what you wanted, you can adjust it. Next to Warp, you have "Start" and "End", which determine the start and end of the clip. The “Loop” below allows you to loop a section for as long as the clip is being played, and only when Warp is enabled. You can also adjust the clip volume using the fader above the "0.00 dB" section.
■ Scene playback

The vertical axis in ABLETON LIVE represents the track and the horizontal axis is called the scene. Scenes (clips placed on the same horizontal axis) can be launched as a batch by pressing the play button under Master. You can also name and manage scenes, which is convenient. In LIVE Lite, you can have up to 8 scenes. Purchasing ABLETON / Live 10 Standard will give you an unlimited number of tracks & scenes.
■ Audio interface
FOCUSRITE / Scarlett 2i2 (gen. 3)
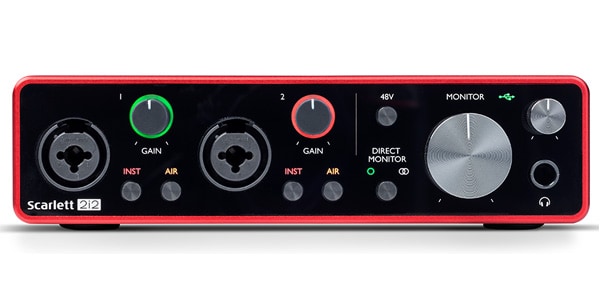
If you want to further improve the sound quality of your tracks, you will want to invest in an audio interface. As there are a variety of products to choose from, it is necessary to consider your operating environment and the number of input & output terminals to suit the application. For example, the Scarlett 2i2 (gen. 3) allows stereo input at the microphone or line level, which is easy to use and convenient when creating original sampled sound sources.
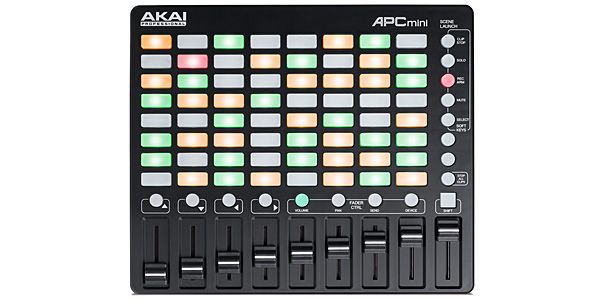
■ Other equipment that is often used in combination
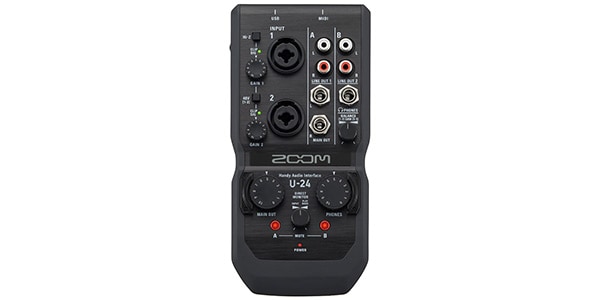
In addition to the equipment introduced here, controllers with faders can be added to adjust the volume of individual tracks and space-saving audio interfaces are also handy for some applications. If you are a registered user who owns LIVE Lite that was received with a DTM product, an upgrade version is also available that will get you LIVE 10 Standard with unlimited tracks & scenes at an affordable price. ABLETON Live and related peripheral products are becoming the new standard for sound effects. Please consider getting yours now!
* Note that ABLETON LIVE Lite is free software, and there is no support.
ZOOM / U-24 Handy Audio Interface
ABLETON / Live 10 Standard, upgrade from Live Lite