


Hello, Conservario here.
One of the great things about the ukulele is that you can take it anywhere, but I think it’s safe to say you can’t bring it to school or work.
Many people think they can't practice without their ukulele, but this is not true.
In this column, I will introduce some ways to practice that you can do even without a ukulele.
■ Practice You Can Do Even Without a Ukulele
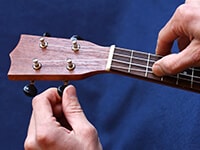
First, place your left hand on the table (please refer to the photo).
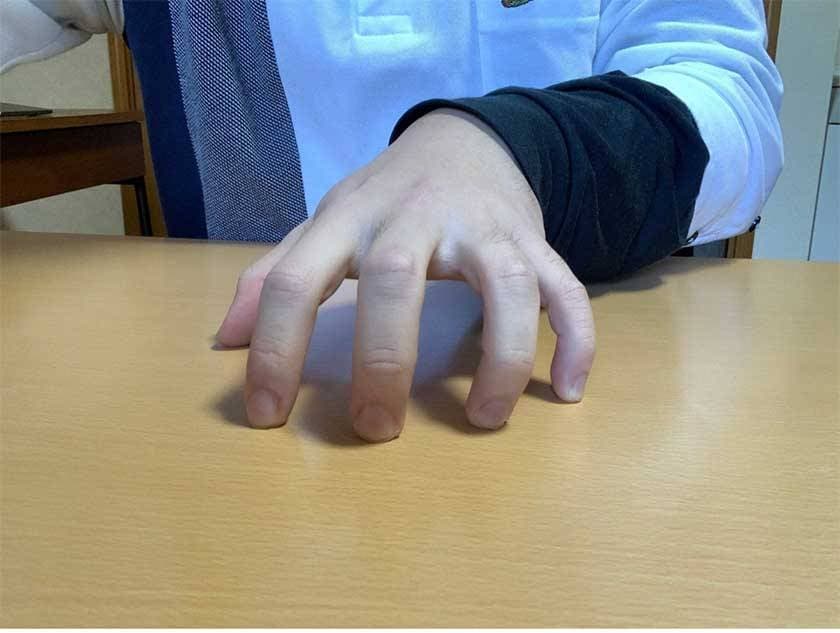
This hand position is the starting position.
From the starting position, lift only your index finger upwards, drop it to make a tapping sound, and then return it to the original position.
Keep the other fingers on the table and be careful not to move them.
Try doing this continuously: “tap tap tap tap".
Once you can do that, change the finger you lift.
Do this again with your middle finger, ring finger, and pinky finger.
Pianists also use their thumbs to strike keys, so they practice with their thumbs as well. However, ukulele players typically do not play with their thumbs, so it’s not necessary to do that.
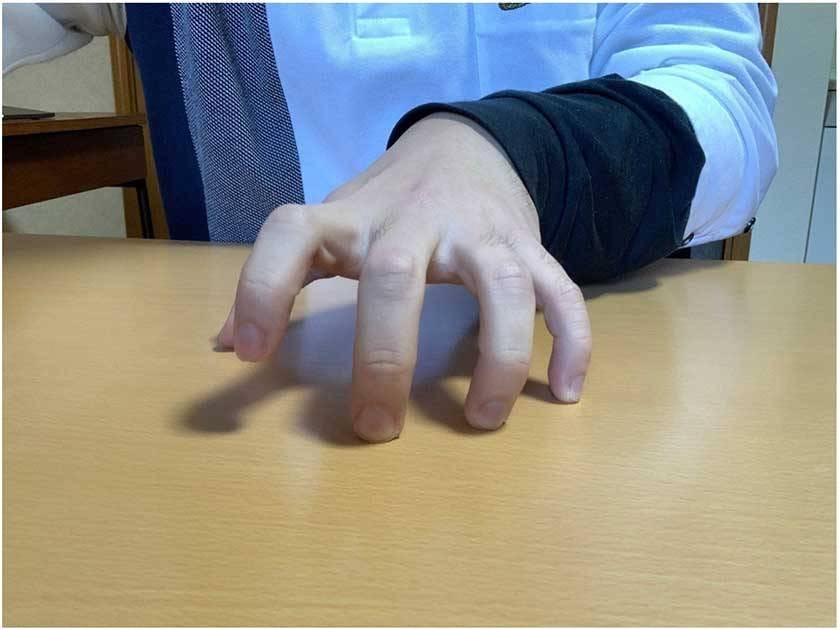
Once you are comfortable with moving one finger, the next step is to tap two fingers at once.
Lift only your index and ring fingers, then lower them to produce a tapping sound and return them to the original position.
Moving two fingers independently can be more difficult compared to tapping just one. Be aware of other fingers moving that you didn’t intend to move.
It’s possible that your fingers are not yet independent.
If you can already play chord changes or solo ukulele to some extent, you should understand the importance of not moving fingers that don’t need to move.
Focus on moving only the finger you want to move. Once you can move the index and ring fingers, try moving the middle and pinky fingers simultaneously.

I’ve had many people try this practice, and there are many who struggle to move their ring and pinky fingers as desired.
However, if you can master controlling the movement of your ring and pinky fingers, you will undoubtedly improve rapidly.
Move your index and ring fingers, middle and pinky fingers, index and ring fingers, middle and pinky fingers.
Next, try to tape in a rhythm.
The key to success really varies from person to person.
For some, being mindful of relaxing your hand and arm works, while others might do better without thinking about it at all.
Try different methods (even sneaky ones are okay!).
However, be careful not to focus only on speed and move your fingers haphazardly, as that won’t help with your practice.
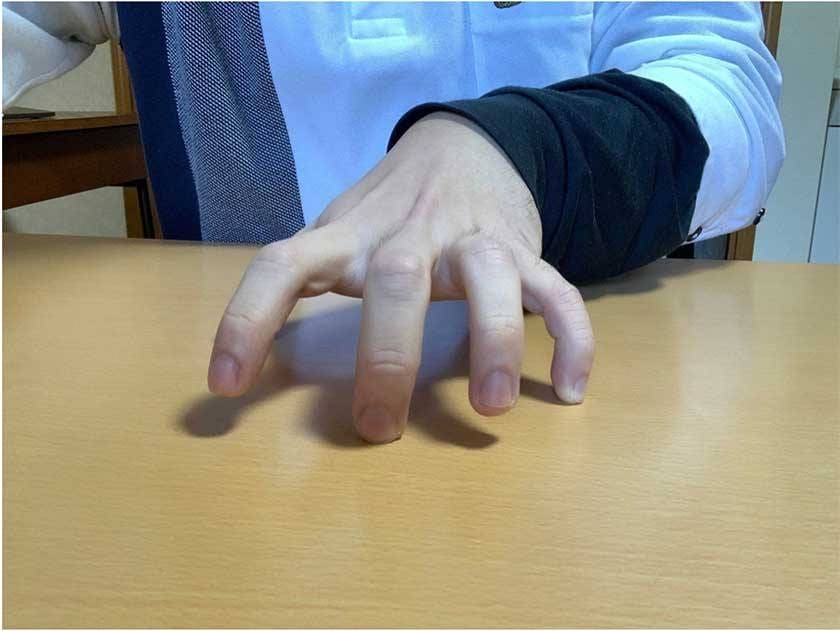
Once you can move one finger or two fingers simultaneously, practice moving three fingers at the same time.
The practice I most recommend is tapping two fingers simultaneously. You’ll realize that once you try, tapping three fingers at once is not that difficult.
It feels very similar to when you practiced tapping just one finger. Tapping the middle, ring, and pinky fingers at the same time is similar to moving only the index finger.
If you have enough time, try practicing all possible combinations and find out what you excel at and what you struggle with.
Now, let me explain the benefits of this practice.
As you can probably tell, this practice will help you move the fingers you want to move. Practicing two fingers simultaneously is an exercise for finger independence.
Also, the instruction to tap is actually a preparatory exercise for hammering and pulling (pull-offs). Hammering is a technique where you produce sound by simply tapping the string with your left hand. There are various tips for hammering, but first, you need the muscle strength and control in your left hand to strike the string effectively.
The better you can tap the string with a strong sound, the faster you will learn hammering.
At first, your pinky and ring fingers might not produce sound when you try to tap them, but with daily practice, you will gradually get better at it.
Pulling (pull-offs) is the technique of producing sound by releasing a pressed string.
The key to pull-offs is to release your finger from the string with the right amount of force and a sense of speed.
For this, finger control and strength are necessary as well.
Once you are able to do hammering and pull-offs, your playing ability will greatly expand, so it’s essential to master them.
Summary
I introduced some practices you can do even without a ukulele. If you don’t have a desk, you can even use your leg to practice.
No matter the situation, if you have the motivation, you can practice anywhere. Also, practicing ukulele without actually holding one helps you notice many things.
When you are holding an actual ukulele, there are many things you need to pay attention to, such as your form, sound, and rhythm.
These are indeed important and things you must always be mindful of, but...
If you focus too much on these aspects, you might miss some things that are just as important.
By practicing without the ukulele and simply tapping your fingers on the desk, you can fully concentrate on the movement of your fingers. Focus on your finger movements and habits.
Repeat this exercise over and over, ensuring that your fingers don’t make any unnecessary movements.
Also, this kind of practice won’t be effective if you only do it a few times.
Please continue practicing every day, even for just a short time.
When you actually practice with the ukulele, your fingers will move more smoothly.
I hope this has been helpful. Thank you for reading until the end.
The “sound & person” column is made up of contributions from you.
For details about contributing, click here.


![[Enjoy the Ukulele Even More!] Here We Go, Shredding!](/contents/uploads/thumbs/5/2022/1/20220120_5_16254_1.jpg)
![[Enjoy the Ukulele Even More!] Tips for Playing Your Own Accompaniment](/contents/uploads/thumbs/5/2021/12/20211230_5_15993_1.jpg)


 サウンドハウス社員が選ぶ 『おもしろ商品』はコレだ!
 ウクレレのチューニング方法
 ウクレレの各部名称
 ウクレレの種類
 ウクレレスタートガイド
 ウクレレ初心者講座


