“I can’t seem to get a clean sound…”
“I don’t know how hard I should pluck…”
“My rhythm isn’t steady…”
These are common struggles every beginner faces.
You can get a sound by striking the strings with any finger, but producing a good tone on the ukulele is surprisingly tricky.
So, why not build the confidence to always play your best possible sound?
In this article, I’m going to clearly explain how to strum with your thumb.
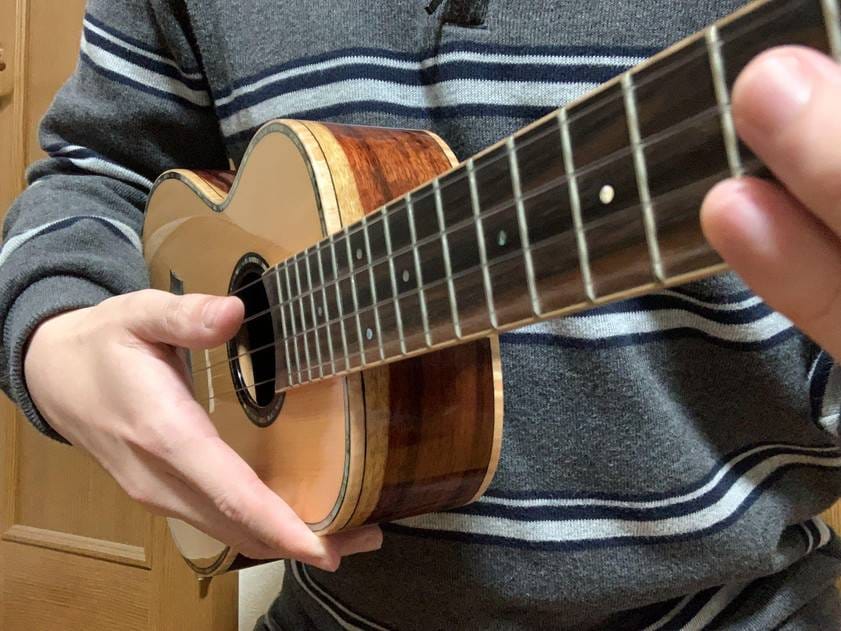
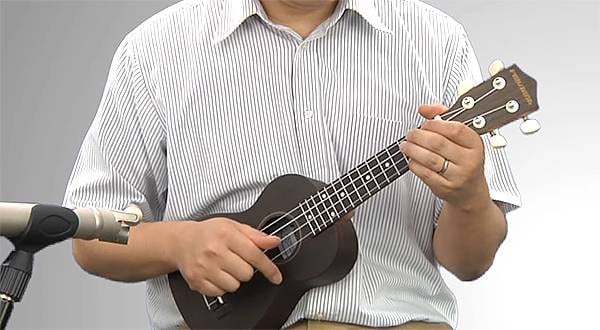
① First, let’s check the basic right-hand form.
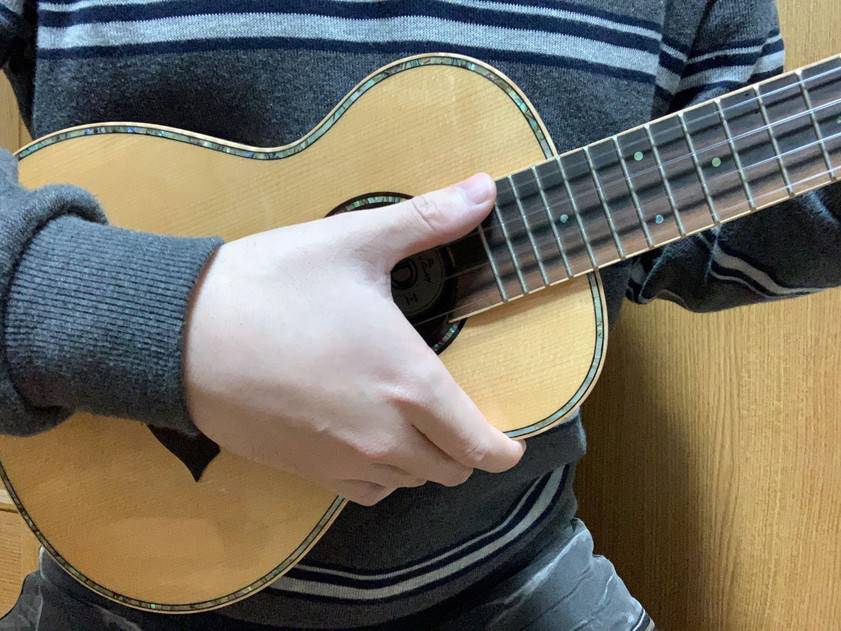
Stretch your thumb sideways, pointing toward the neck.
Use the other four fingers to gently support the ukulele.
Since finger lengths and ukulele sizes vary, the exact positioning will differ from person to person.
There’s no strict rule that says you’re not allowed to strum above the neck.
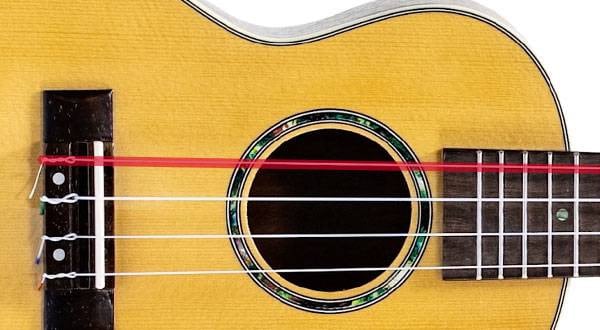
② Place your thumb on the 4th string.
③ Strum the 4th string in a downward motion toward the 3rd string.
④ Let your thumb come to a stop on the 3rd string after striking the 4th string.
Were you able to do it?
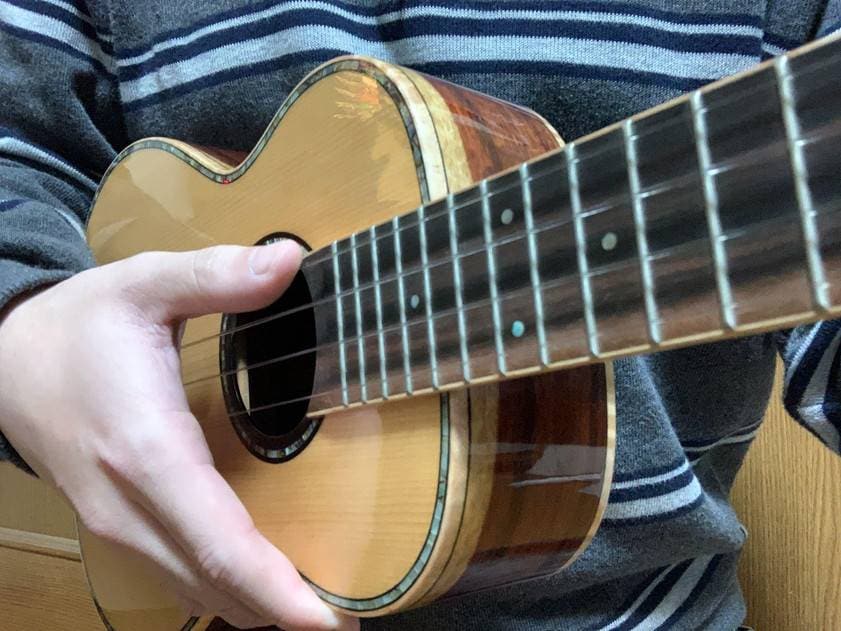
When your thumb stops on the lower string after playing, that’s called apoyando. (Sounds cool, doesn’t it?)
Some of you might be trying this technique for the first time, while others may have been unknowingly doing it already.
For your first right-hand practice, I recommend starting with playing single notes using apoyando.
There are many benefits to this technique:
1. It's easier to produce a louder sound.
2. It helps to keep your volume consistent.
3. It makes it easier for you to understand which string you're playing.
Being able to produce a strong sound is very important.
It reveals what parts of your playing still need work, and more importantly, it trains the muscles that are necessary for performance.
Another strength of apoyando is how it helps balance volume across your playing.
Pluck the 4th string and stop on the 3rd, pluck the 3rd and stop on the 2nd, pluck the 2nd and stop on the 1st.
By practicing this thoroughly, you'll eventually be able to hit the intended string without even looking at your right hand.
You don’t need to press anything with your left hand for this exercise.
Focus on your right hand and repeat the apoyando technique many times.
By the way, since there's no string below the 1st string, it’s not possible to do the apoyando technique here.
However, try to play it with the same strength and volume as the other strings.
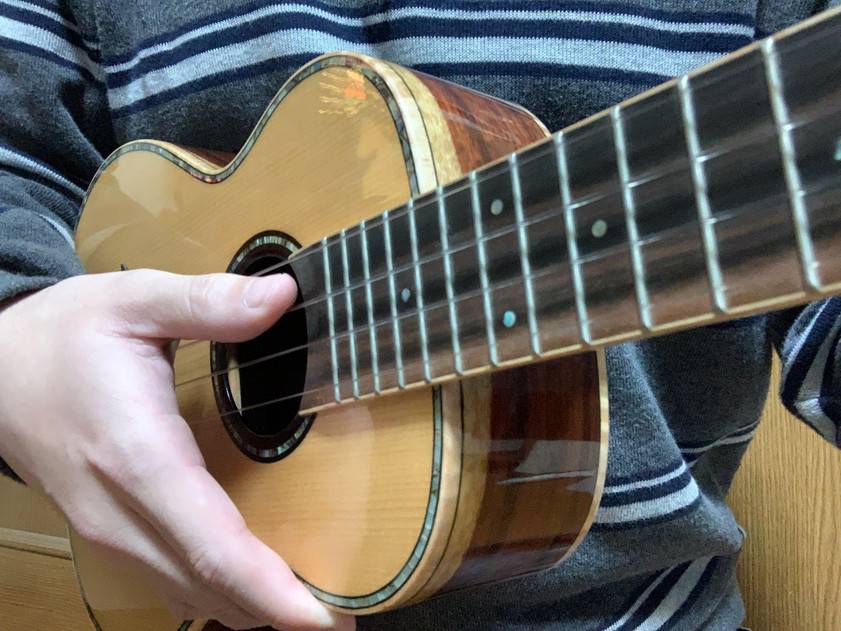
The next technique I’ll introduce, al aire, tends to produce uneven volume and unstable rhythm when you’re not used to it.
⑤ Keep your thumb hovering in the air.
(In the photo, the distance from the string is exaggerated for clarity, but try not to keep it too far away.)
⑥ Use your thumb to pluck the 4th string and stop above it.
Unlike apoyando, you don’t touch the 3rd string.
The main difference between apoyando and al aire is whether or not you make contact with the next string.
This difference also affects the sound.
Al aire produces a lighter, brighter tone, and once you're used to it, you can play faster.
Also, because you don’t touch any other strings, you can let all the strings ring out.
When practicing both techniques, be conscious of which one you’re using, whether it’s apoyando or al aire, while you’re playing.
Practice on all four strings: the 4th, 3rd, 2nd, and 1st.
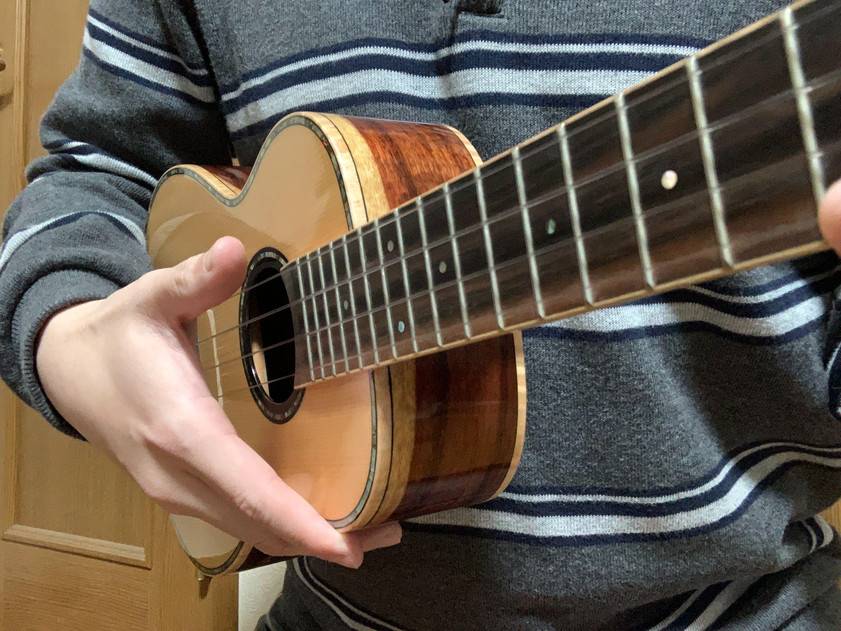
Finally, let’s consider how your finger should be touching the string.
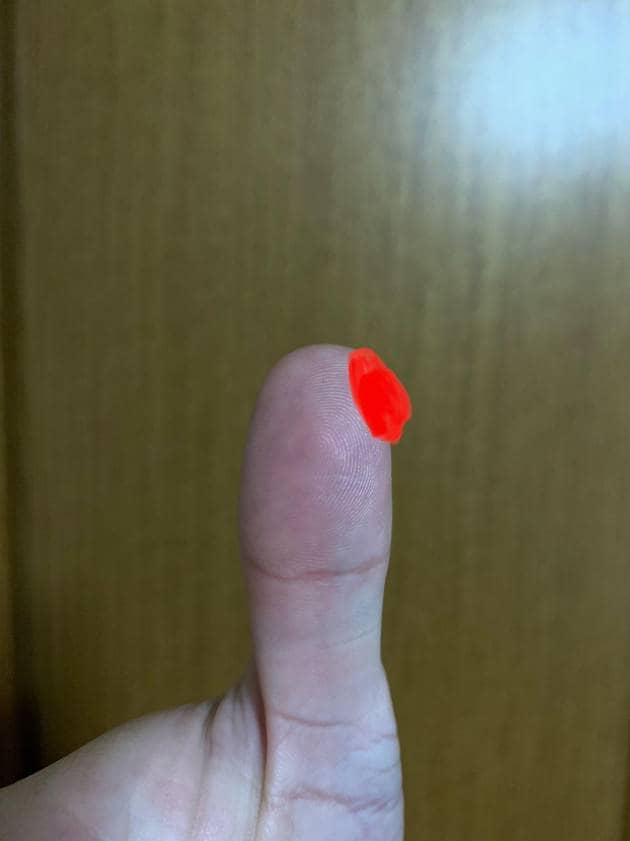
Let’s imagine your thumb is like a grain of rice.
The top diagonal corner of the rice grain is chipped off.
Use about that much of your thumb to touch the string when playing.
Refer to the red-highlighted part in the photo for guidance.
Whether you’re resting your thumb on the string or plucking it, the area of contact should be about that size.
Most people tend to press too hard.
Of course, pressing harder can make it easier to produce a louder sound,
but it also increases the resistance from the string.
As a result, you may end up using unnecessary force,
which can make it difficult to play fast or cause unpleasant, harsh sounds.
To summarize
I introduced two main thumb techniques: Apoyando and Al Aire.
Before moving on to strumming, I recommend you first become comfortable playing each string using both of these methods.
If you can’t play a single string well, you won’t be able to play all the strings well at once.
Strumming involves many strings ringing out at once, so it can sound good no matter who’s playing.
That’s why many people continue playing with poor habits, without thinking about form or picking strength.
What songs would you like to play?
Do you have a ukulele player you admire?
To get closer to your goals, the most efficient path might just be through steady, basic practice.
Practicing fundamentals or thinking in detail about finger movements may not be very fun.
But during your daily practice, try to remember just a bit of what I’ve shared with you here.
Your playing will definitely improve.
I’ll continue to share articles to support every ukulele player out there.
Let’s keep learning and growing together!
The “sound & person” column is made up of contributions from you.
For details about contributing, click here.


![[Enjoy the Ukulele Even More!] How to Practice for Better Left Hand Dexterity - Part 1](/contents/uploads/thumbs/5/2021/11/20211129_5_15353_1.jpg)


 ウクレレのチューニング方法
 ウクレレの各部名称
 ウクレレの種類
 ウクレレスタートガイド
 めちゃラク!ギター講座
 ウクレレ初心者講座