


Hello!
My name is Fujioka Takuto, and I am a guitarist who also performs therapy.
I usually write about posture, but this time I am not going to write about posture.
I would like to talk about filing the fret edges on my guitar by myself!
What do you see when you buy a guitar?
You may wonder, "Why are the prices so different?" There are differences in the quality and wood and parts, but I think the “quality of the finish" is also a factor.
There is a difference in finishing techniques, time, and labor between an expensive guitar and an inexpensive guitar, and I think this is quite normal.
"Processing fret edges" is one of them.
It's a bit of a hassle, but I think many people are spending more time at home these days. Find spare time and try processing the fret edges as a first step in your guitar DIY endeavors!
So much for the introduction, let’s start the work!

This is the guitar I’m going to work on.
It is a travel guitar called the Journey Instruments OF 420. Although it is not an established brand in Japan, this guitar has an interesting structure in which the neck and body can be separated.
(By the way, I usually do the work on joint mats to prevent the floor from getting dirty or scratched, and the mats can be washed with water, and are easy to clean.)
The tools required
・Masking tape
・Diamond file(I’m going to use a semi-circular type this time)
・Sandpaper(# 1500 and # 2000) and polishing compound
I am not using any special tools this time. All can be purchased at home improvement stores.


Sound House also handles special tools, so please check them out.
After all, I think that using a special tool will improve work efficiency as well as the finishing quality.
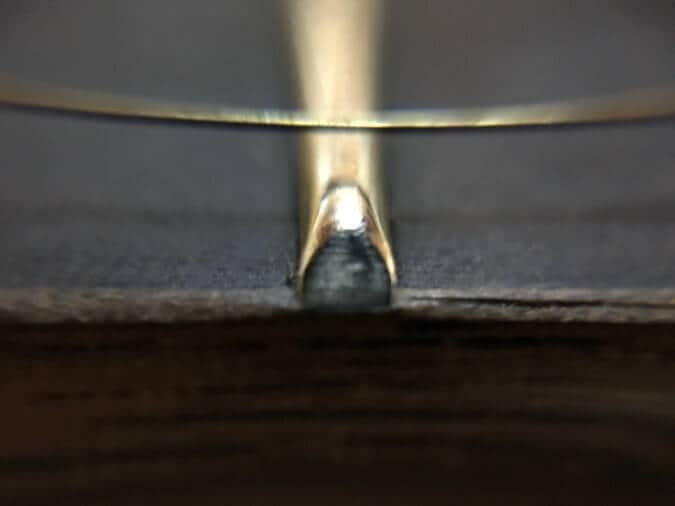

This is the fret edge before the work. Please note that the pictures are a little unclear as they were taken with a smartphone.....
If you look closely at the fret edges, the part near the apex is rounded, but the edges are not smooth on both sides, which may scratch your fingers. I will file this.
(By the way, if the fingerboard is dried, the frets themselves may pop out, and in such cases it is necessary to remove any protuberances.)

Mask around the fret you are working on.
Remove or loosen the strings in advance so that they do not get in the way while working.

Make sure to file carefully to make both edges symmetrical, and do not file a large amount at once.

At this point, try holding the neck and see if the fret edges catches on your hand. If it still catches, let's file it off again without rushing.

その後、目の細かい紙やすり(#1500-#2000)でフレットについた傷をとり、仕上げにコンパウントで磨いていきます。

Done!


Compare it with the initial state.
Seen from the front, it looks like the edges still remain, but when seen from the side, you can see that the edges are rounded. I don't feel them catching on my skin when I touch them. The finish is not as good as a professional, but it is sufficient( ^ω^ )
However, if you do this work on 22 frets on both ends, it will be really painful to do it 44 times. .. .. Lol
If you do it all at once, you will get tired, so I recommend doing it little by little when you have spare time.
If you have never done guitar DIY before or you want a hobby other than playing the guitar, please try out some guitar maintenance yourself!)^o^(
Bye now ~!


