


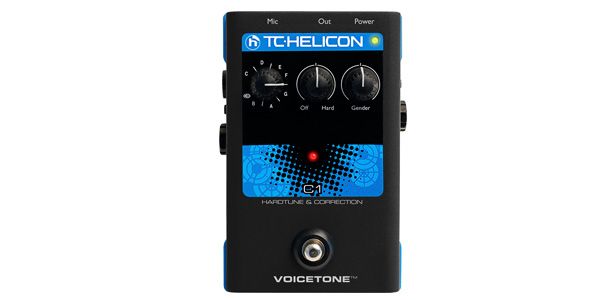
The TC Helicon VoiceTone C1 is a popular effects pedal that allows for easy pitch correction and robotic voice effects. However, sometimes the pitch may not align properly, either from the factory or after extended use. In such cases, the C1 may require calibration, but this process is not documented in the manual. This guide explains how to perform the calibration.
Additionally, improper connection methods can introduce noise into the VoiceTone Series. This guide also provides precautions regarding proper connections.
■ Calibration Settings
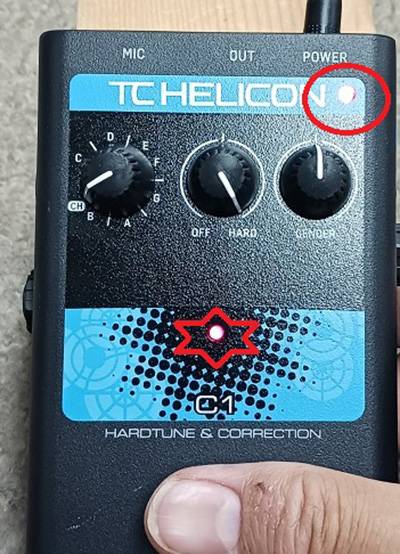
While holding the footswitch, unplug and replug the power adapter three times.
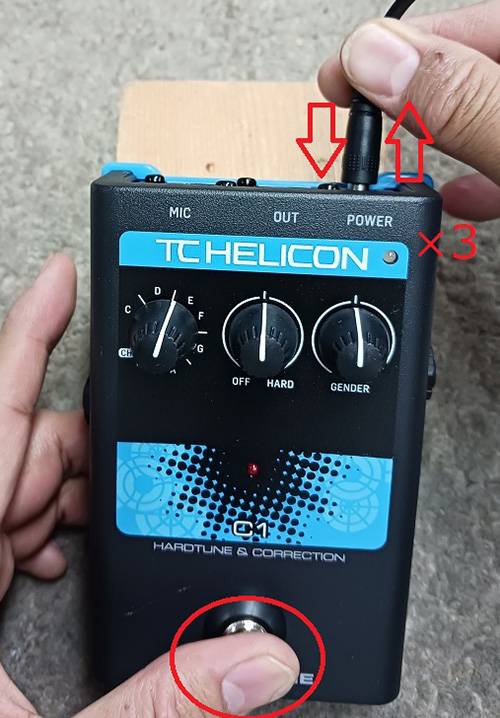
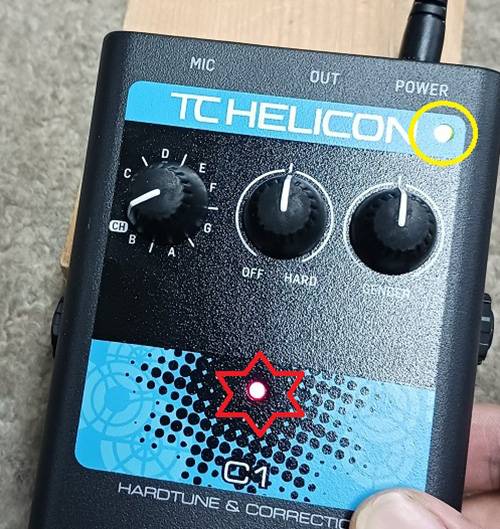
On the third reconnection, wait a moment until the Input Level LED lights up green and the ON/OFF LED starts flashing.
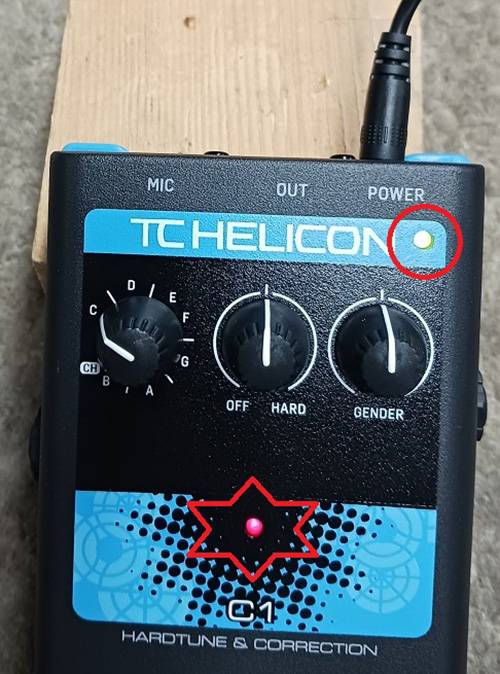
This puts the device into calibration mode, so release the footswitch.
Turn the leftmost knob (Key Selector) fully counterclockwise.
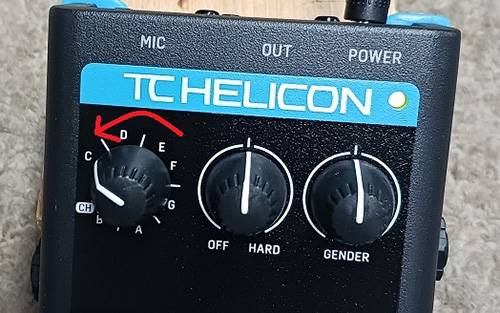
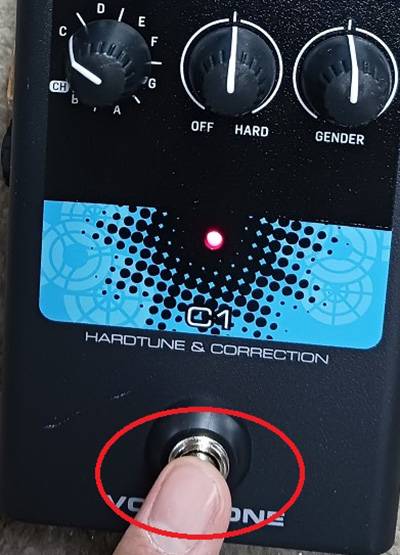
Press the footswitch once. The ON/OFF LED will light up.
Next, turn the leftmost knob (Key Selector) fully clockwise.
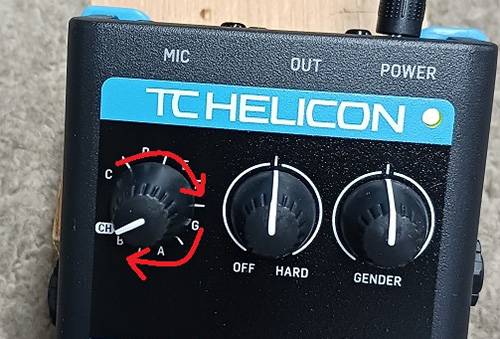
Once it is fully turned, press the footswitch once again. The ON/OFF LED will start blinking again, and the input level LED will light up yellow.
Next, turn the middle knob (Off/Hard) fully counterclockwise.
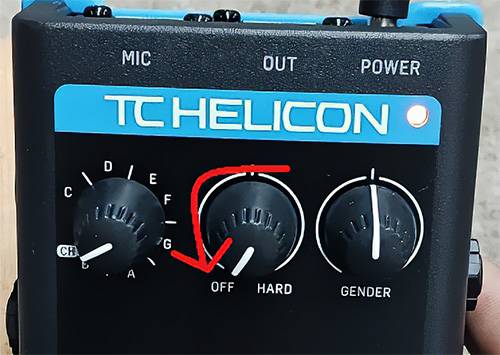
Once it is fully turned, press the footswitch once again. The ON/OFF LED will turn solid.
Now, turn the middle knob (Off/Hard) fully clockwise.
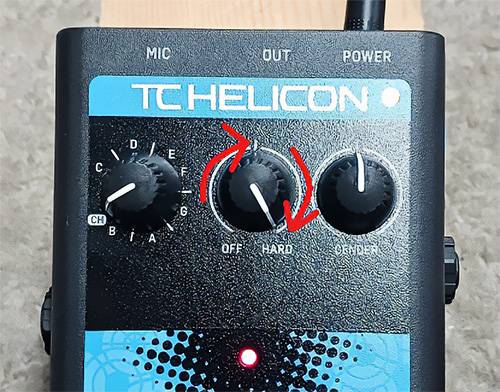
Once it is fully turned, press the footswitch once again. The ON/OFF LED will start blinking again, and the input level LED will light up red.
Next, turn the rightmost knob (Gender) fully counterclockwise.
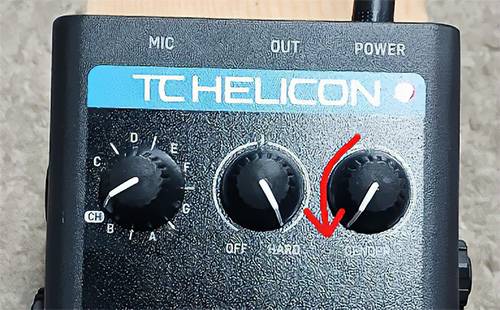
Once it is fully turned, press the footswitch once. The ON/OFF LED will turn solid.
Now, turn the rightmost knob (Gender) fully clockwise.
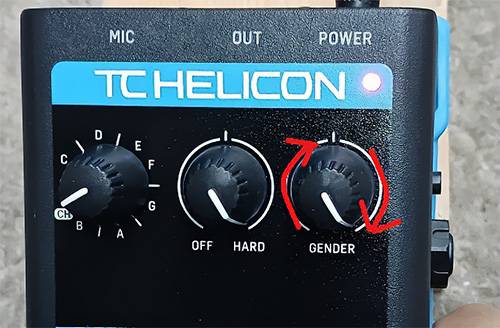
Once it is fully turned, press the footswitch once.
Finally, unplug the adapter and reconnect the power to complete the process.
It may seem complicated when written out, but in practice, the process takes less than two minutes once you understand it. Essentially, you just turn each knob from left to right, first counterclockwise while pressing the footswitch, then clockwise while pressing the footswitch again.
If the key is set correctly but pitch correction is not functioning as expected, try performing this procedure.
■ Connection Precautions
The input and output of the VoiceTone Series use XLR connectors, so be sure to connect them using an XLR-to-XLR microphone cable.
For the output cable, avoid using cables like
CLASSIC PRO / MIP050 Microphone Cable (5m)

since it is an XLR-to-phone (1/4'') cable and can result in lower output levels and increased noise.
If the input of the connected amplifier only supports unbalanced phone (1/4'') inputs, it is recommended to use a small mixer or DI box to receive the signal in balanced mode before sending it to the amplifier. This will ensure a clearer sound with minimal noise.
Additionally, the power adapter is a 12V center-negative type, which is somewhat uncommon. Be careful not to use the wrong type of adapter!


 Sennheiser ボーカルに最適なマイクの選び方
 BOSS ボーカル・エフェクターのススメ
 TC HELICON 製品カテゴリー一覧
 ワンランク上のボーカルマイク選び
 簡易PAセットとは
 PAシステム講座


