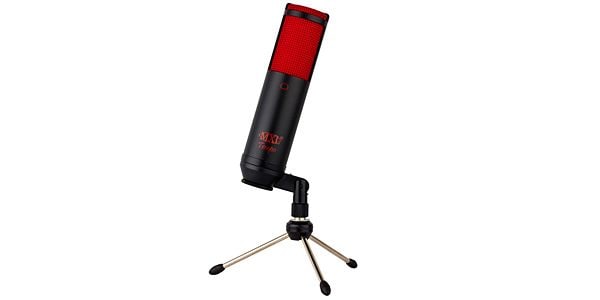
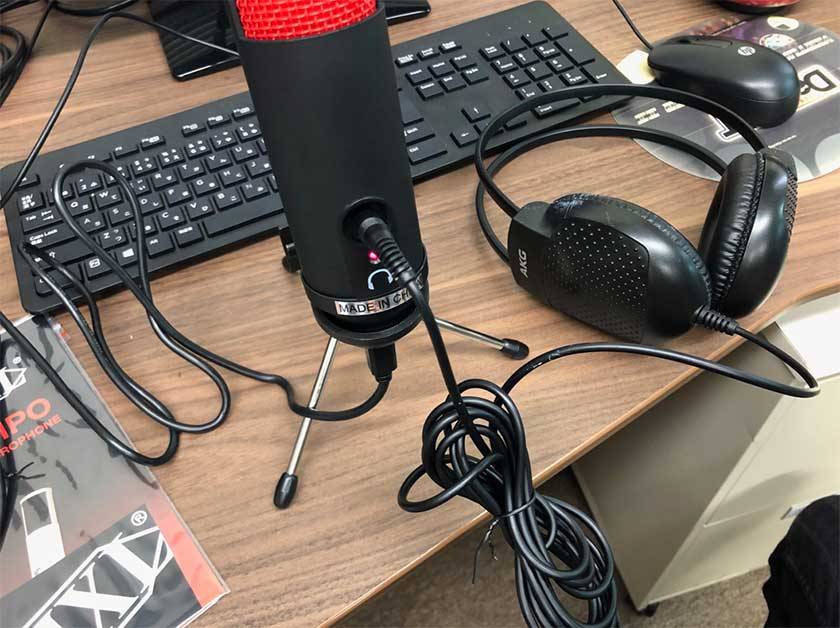
The simple and lightweight "MXL / TEMPOKR" USB microphone can be used just by connecting it to a computer with the USB cable that comes with it. You can connect headphones directly to the microphone, which can be used for recording, monitoring, and meetings. It comes with a mic stand that is ideal for carrying out the above tasks, while making it easier to work with the mic around the computer.
There are many people who have had remote drinking parties or a conferences because of COVID-19. I am one of them. I made some video calls using the Zoom teleconferencing app when I couldn't get together with my friends.
If you are using the built-in microphone on your computer, the sound may be muffled and difficult to hear, or the microphone may be in poor condition and there may be no sound.
In such a case, the TEMPOKR will be a powerful ally. You can experience the clear sound of a condenser microphone by connecting it directly to your computer via USB.
Let's take a closer look at TEMPOKR. First, the design of the microphone.
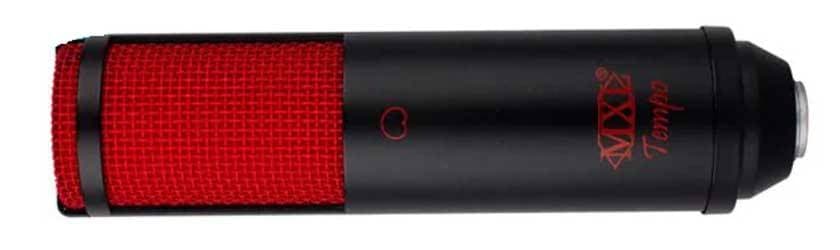
It is slim. When I held it in my hand, I felt the size was not too large. At 280g, it felt like the weight of a small apple. It’s 47 mm x 110 mm, or about the size of a banana.

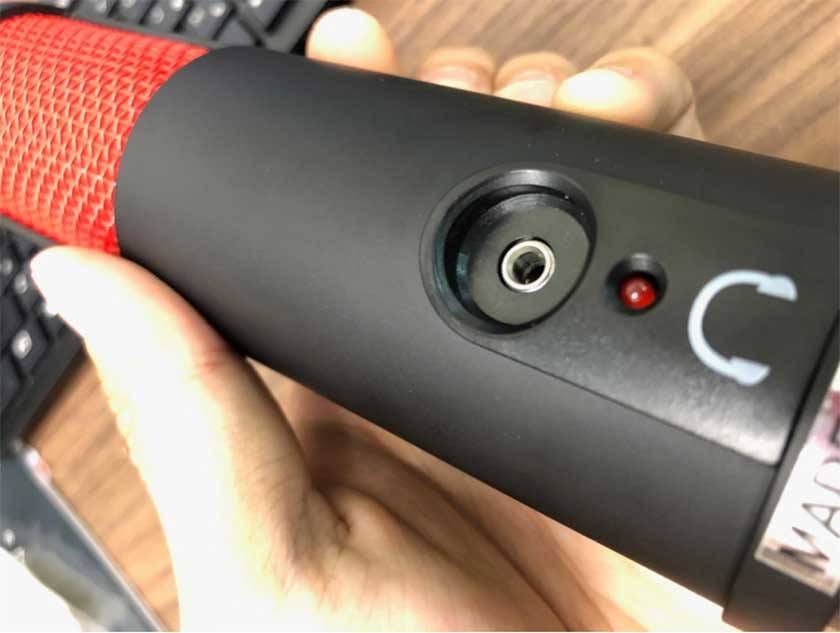
Let's rotate it and look at the other side. The LED is red like the grill. Power is supplied by connecting via USB, and the light is always on when power is being supplied. There is a headphone jack right next to the light. It is a 3.5mm jack, and headphones can be plugged in here for use.
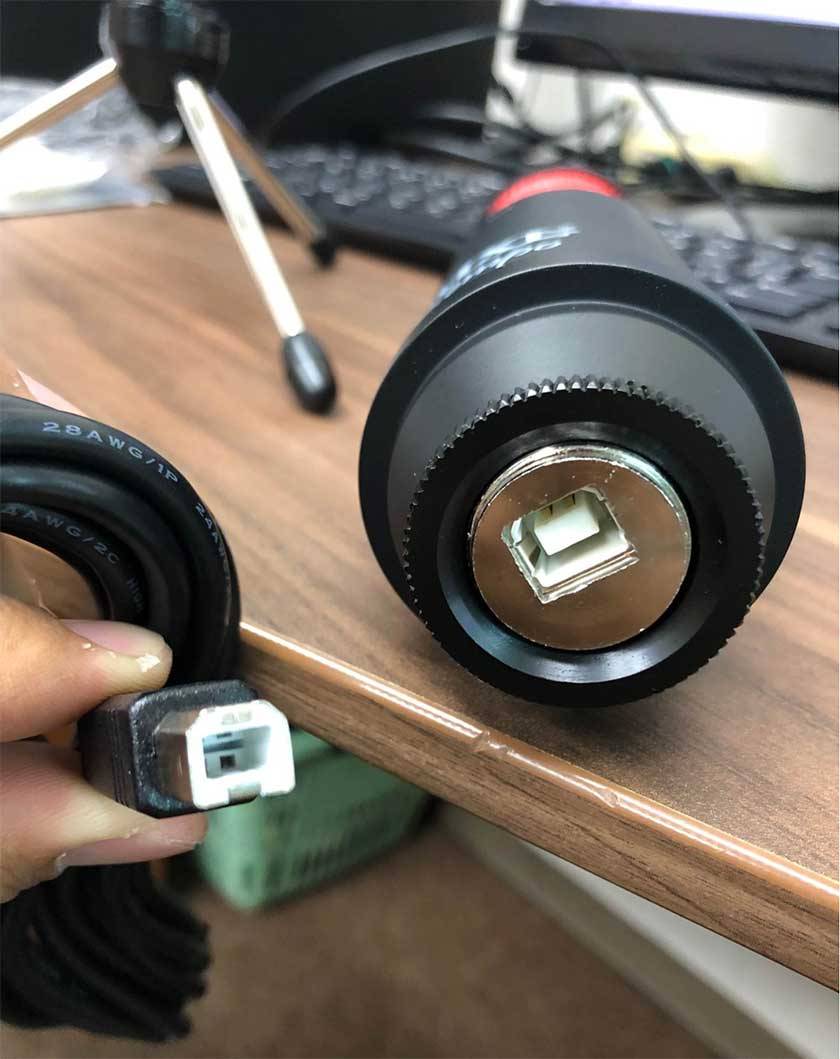
Next, regarding the USB.

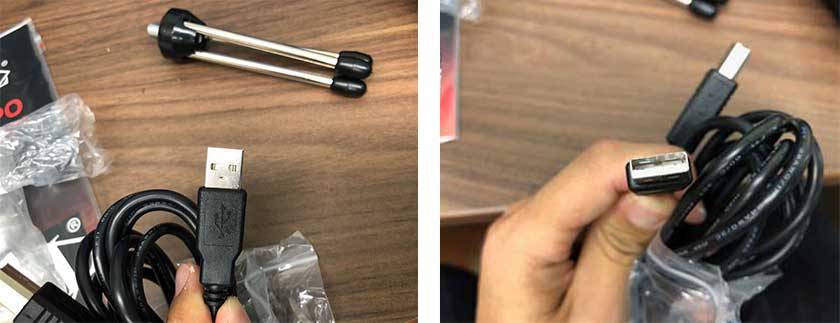
The USB outlet is on the bottom of the microphone and uses USB 1.1 or 2.0. A USB cable is included and it connects to a Windows or Mac computer.
■ USB Travel Tips
There are several standards for USB, and the transmission speed of data increases as the number increases from USB1.1 to 2.0 to 3.0. It can be plugged into any of the three (USB1.1-3.0), but if you use a 3.0 plug with a 2.0 port, the transfer speed will be 2.0. If you plug a 1.1 or 2.0 plug into the 3.0 slot, the transfer speed will match the speed of the smaller numeral.
*There are rare USB devices that are not compatible with USB3.0, so please check if for compatibility when using.
Now let's actually try it out. Let’s use the stand to set up the mic, and connect the USB cable and connect some headphones. Make sure that the computer recognizes the USB microphone and speak into it to see if it is working.
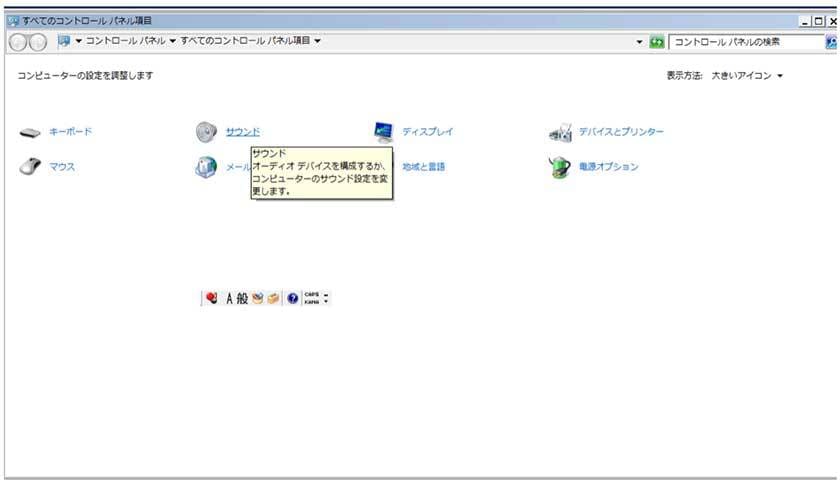
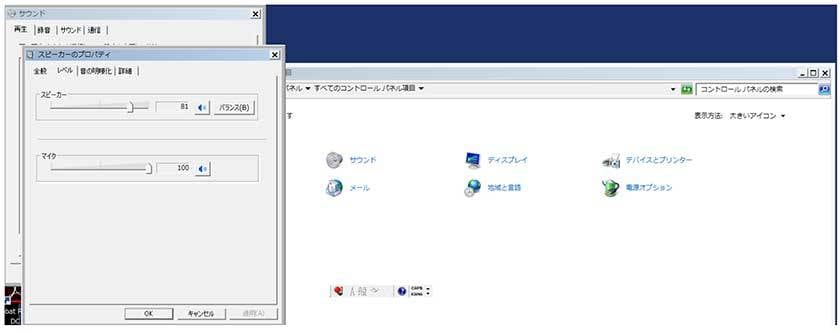
If you cannot hear sound from the headphones, the computer may not be recognizing the mic or the sound input/output settings may need to be changed. Let's check the following image. First of all, from the input settings on.
*The image below is for Windows 7. Of course, it can be used on Windows 8.1, 10 and Mac.
①Control panel (or "Start" → "Settings") → Sound
② Select [Recording] → Microphone. Confirm that the mic is checked, and click [OK]
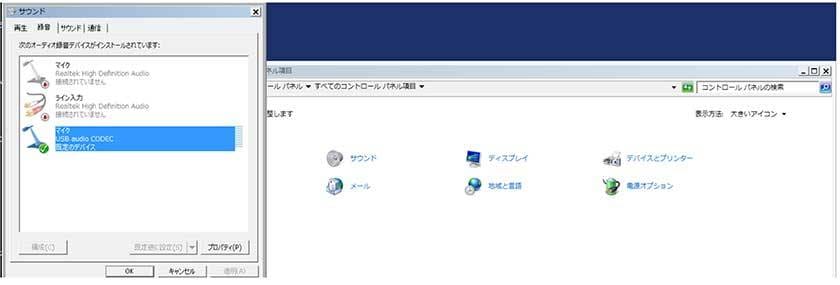
or [Properties]. If only the built-in computer microphone is selected, the sound of TEMPO KR will not be picked up. Make sure TEMPO KR is set.

If you still cannot hear any sound, you may need to change the output settings as well.
③Select [Play] → Speaker. Here, the output must be set to the TEMPO KR.
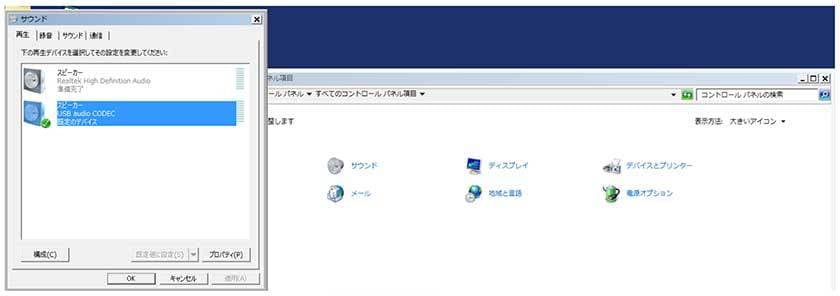
In the same way, you can set the volume and so on from [Properties].
Let me introduce the accessories. The stand on which the microphone can be placed. The part in my hand below has threads and can be attached to the legs.
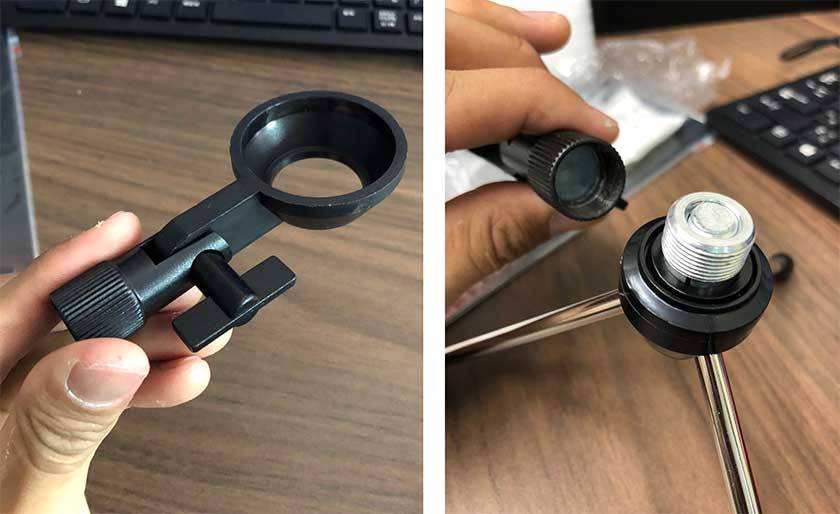
Furthermore, you can change the angle using the adjustment screw on the base. You can set the mic at a perfect angle!
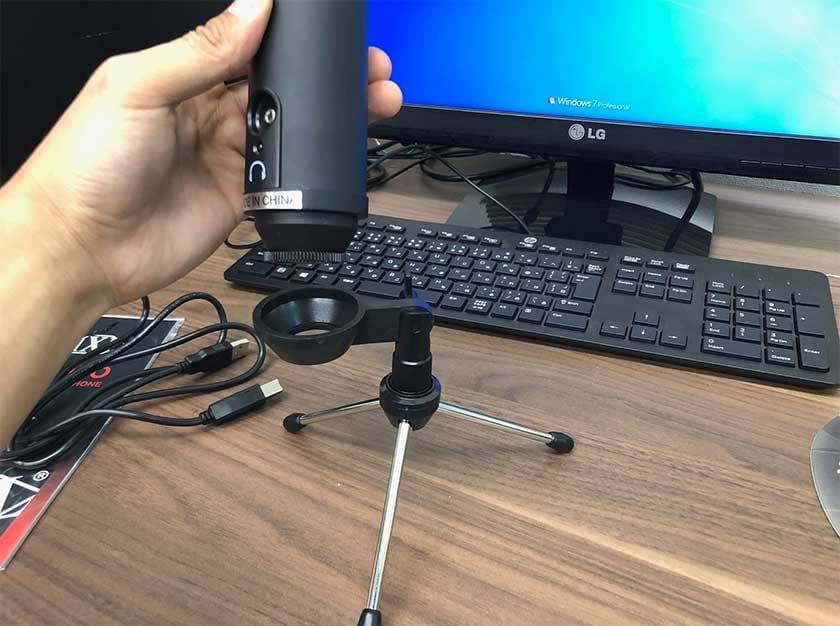
Just put the microphone on the round base. It is not fixed to the base, so be careful not to move your desk too much. Connect the USB on the microphone from the bottom.
Other accessories include a USB cable. The end in the image below connects to the computer.
What did you think?
The mic will help to clear up your desk. Not only can you use the microphone for your voice, but you can also watch YouTube and so on as is, and you can use it for meetings, as well as streaming video. If you are interested, please check it out here!
→ MXL / TEMPO KR