


Hello, this is Conservario!
In this article, we’ll introduce you to some recommended arpeggios.
If you’re thinking, “I’ve gotten pretty good at strumming and chord changes, so I want to try out some new techniques!” this article is for you.
Learning arpeggios can greatly expand your options for song accompaniment. Plus, it will improve your solo ukulele skills, making it a win-win!
We’ve written this guide in a way that’s easy for beginners to follow, so feel free to read along with confidence.
Arpeggios
Arpeggios are a playing technique where the notes of a chord are played individually, one at a time, instead of all together.
It’s a bit hard to explain with words, but if strumming sounds like “Shan! Sha-shan!”, then arpeggios would sound more like “Pon, pon, pon, pon.”
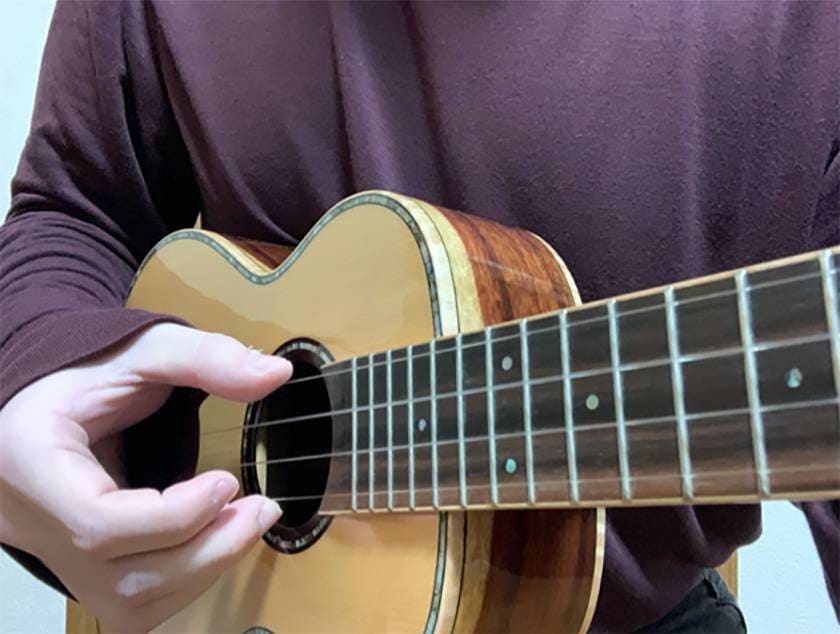
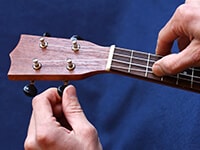
To start, practice arpeggios using just your thumb.
For the chord, you can simply press the 3rd fret on the first string (C chord). Using your thumb, play each string from the 4th string downwards, one by one, like “Pon, pon, pon, pon.”
While strumming involves playing all four strings at once, arpeggios are about plucking each string individually.
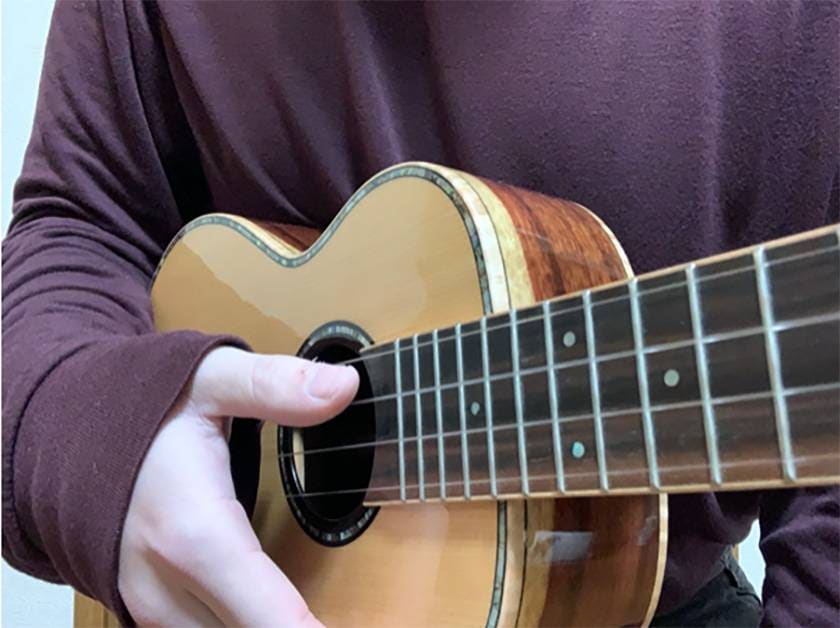
The key is to avoid pressing your thumb too deeply onto the strings.
Many people tend to apply more force than they do when strumming, so be mindful of this.
If the sound becomes a harsh, buzzing noise like “Beeen,” it means you’re pressing too hard.
Once you’ve played from the 4th string to the 1st string, bring your thumb back to the 4th string and repeat the motion down to the 1st string. This repetitive movement is what creates the arpeggio pattern.
Unlike strumming, where the sound gradually fades after a single “Shan!”, arpeggios can sustain a continuous sound if you keep playing before the notes fully decay.
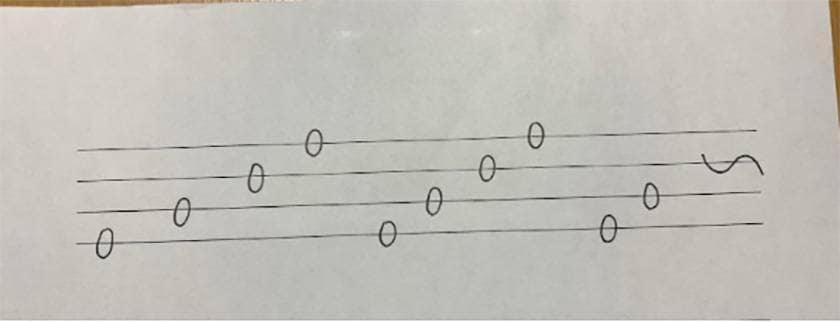
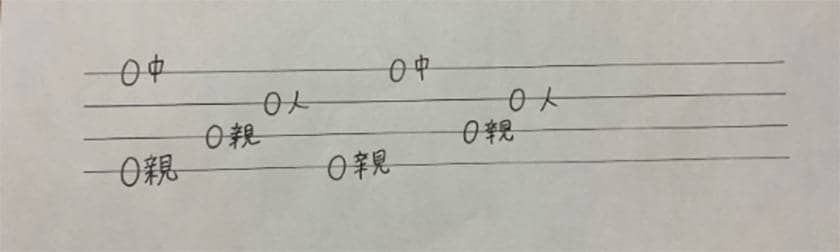
Here’s what it looks like in tablature:
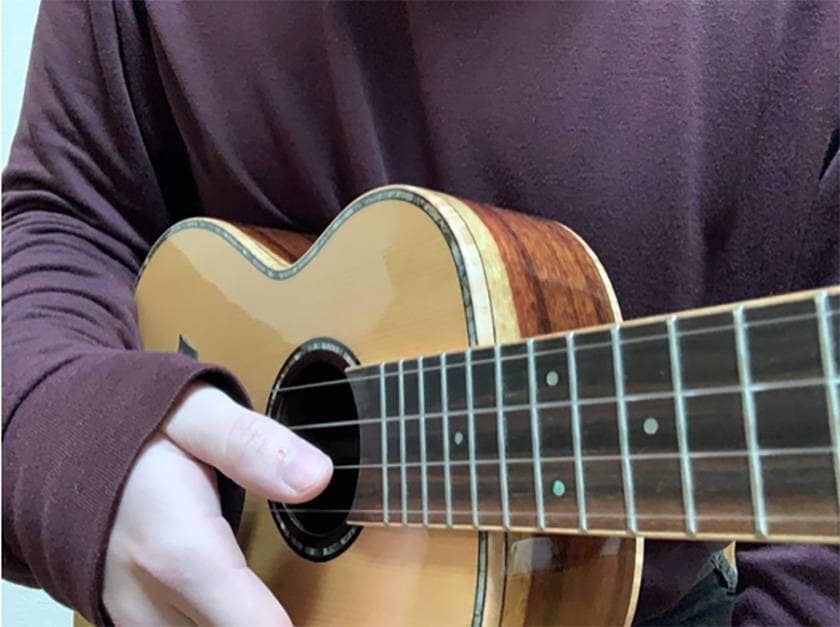
Once you’re comfortable with the previous pattern, try practicing a pattern that starts from the 1st string and works its way back up.
The earlier pattern, starting from the 4th string, might have felt easier because it’s somewhat similar to the motion of strumming. However, starting from the 1st string and reversing the motion can be more challenging if you’re not used to it.
Use your thumb to pluck the strings from the bottom (1st string) upward.
Make sure to keep your right-hand movements as smooth as possible, similar to when playing from the 4th string downward.
Many people find their movements become awkward when reversing the pattern, so if you have access to a mirror, practice while watching yourself to check for smoothness.
With the ukulele’s tuning, playing arpeggios that move from the 1st string back to the 4th string also produces a bright and clear sound.
While arpeggios are a classic technique for the guitar as well, the tuning of a guitar is different. On a guitar, the strings get progressively thicker (and the pitch lower) as you move from the 1st string to the 6th string.
An arpeggio played from the 6th string to the 1st string on a guitar can sound somewhat similar to a ukulele. However, an arpeggio played from the 1st string to the 6th string has a darker, more dramatic tone as the notes descend in pitch.
On a ukulele, whether you start from the 4th string or the 1st string, the sound remains bright and cheerful.
Make sure to practice both patterns—starting from the 4th string and the 1st string—so you’re comfortable with both.
Once you’ve gotten the hang of it, try switching up the chords. Starting with simple chords like C or Am is recommended.
You can also practice with more challenging chords, but be careful not to lose consistency in your right-hand technique or volume control.
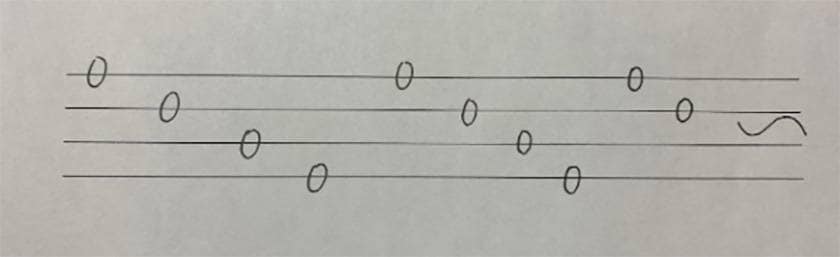
Here’s how the tablature looks:
Finally, let me introduce the three-finger technique.
It might seem a bit complicated when written out, but once you get the hang of it, it looks and sounds very cool—definitely worth practicing!
Here’s how it works:
① Use your thumb and middle finger to pluck the 4th string and 1st string simultaneously.
② Pluck the 3rd string with your thumb.
③ Pluck the 2nd string with your index finger.
④ Pluck the 4th string with your thumb.
⑤ Pluck the 1st string with your middle finger.
⑥ Pluck the 3rd string with your thumb.
⑦ Pluck the 2nd string with your index finger.
The most challenging part of the three-finger technique is the first step, where you pluck two strings simultaneously with your thumb and middle finger.
To get started, practice the seven steps written above slowly and carefully.
For the chord, I recommend Am (press the 2nd fret with your middle finger). This technique pairs beautifully with older ballads and traditional songs.
There’s no need to rush, but once you’re able to play it faster, it instantly gives off that "authentic" feel.
People often ask for tips on speeding up, but honestly, repetition is the only way. If there were any shortcuts or secret tricks, I’d definitely share them—plus, I’d love to know them myself! (Haha)
Compared to the thumb-only arpeggio introduced earlier, it’s harder to balance the volume when using the three-finger technique. That’s because you’re working with three fingers, as the name suggests.
Pay close attention to ensure that all the notes sound even and balanced.
Here’s how the tablature looks:
Summary
We’ve introduced three types of arpeggios in this guide. Just like with strumming, there are many other types of arpeggios to explore.
Once you’re comfortable with right-hand arpeggios, try experimenting with different chords for your left hand. Apologies for repeating this, but it’s important to pay attention to the touch and volume of your right hand while practicing.
If you focus on these finer details during your early practice sessions, it will set a strong foundation for your ukulele journey. With time, you’ll be able to deliver incredible performances no matter the song or technique you’re tackling.
These were my recommendations, but if you discover other great arpeggios, I’d love to hear about them!
Thank you so much for reading to the end.
Recommended Ukuleles:
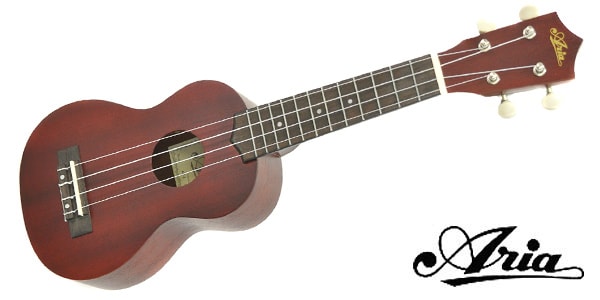
PLAYTECH (PUK300) – Soprano Ukulele

The “sound & person” column is made up of contributions from you.
For details about contributing, click here.


![[Enjoy the Ukulele Even More!] What Exactly is a Scale?](/contents/uploads/thumbs/5/2022/1/20220107_5_16092_1.jpg)
![[Enjoy the Ukulele Even More!] Easy Way to Play Strokes With Your Thumb](/contents/uploads/thumbs/5/2021/12/20211230_5_15998_1.jpg)


 サウンドハウス社員が選ぶ 『おもしろ商品』はコレだ!
 ウクレレのチューニング方法
 ウクレレの各部名称
 ウクレレの種類
 ウクレレスタートガイド
 ウクレレ初心者講座


