


This is Cheena.
Do you like Semi-Acoustic basses?
This time, I imported a semi-acoustic bass kit and made it myself.
Before we get into the actual production, let's take a look at the semi-acoustic bass.
The semi-acoustic lineage, which has a hollow body and is equipped with electrical components, begins in 1958 with the Gibson ES-335.
At the same time, Gibson EB-2, the third model after Gibson's SG-based EB-0 and violin-based EB-1, was introduced to the market.
It has the same body shape as the ES-335, but is a bass, with only one humbucker for the EB series mounted just below the neck, and a sponge mute on the bridge for a distinctive look.
Starting with this, later models came out but not frequently, followed the Fender Starcaster Bass, the Ibanez AGB / AFB, the Duesenberg Starplayer Bass and so on.
Most semi-acoustic basses use medium scales and short scales, just like guitars, and have a string length of around 30 inches. Basically, they have two humbuckers, one close to the neck and another near the bridge, and they are also characterized by the fact that it is easier to produce a softer sound than the other two pickup basses.
The semi-acoustic is rarely used but is occasionally found in jazz and fusion, but its strong appeal is irreplaceable.
Following the review, I will give a rough list of what you need before getting started. All the basic things such as a soldering gun and solder for wiring are required.
A neck pillow and a mat or bath towel to be used as an underlay are essential. A clamp is required when setting the neck.
Please note that C clamps and F clamps may be difficult to get at a 100-yen shop.
Also, it is easy to overlook adhesives. Although it is required for a tight bond, it cannot be shipped by air because it is treated as a liquid, and if you try to purchase it at the same time as the kit, it will not arrive at the same time.
This also applies to liquids other than adhesives, such as orange oil, lemon oil, or spray cans. You need to purchase it individually from Amazon, etc.
As for painting, I will leave it up to you. After applying the finish to the body with the binding, you need to use a scraper to remove the paint on the binding.
There is no problem if you pick one up at a 100-yen shop, but it is recommended to have several types that fit your hand well, one of which is narrow because it is difficult to cut around the F hole and it will take some time. In some cases it may be useful to have a pickup tool.
Now, let's talk about production.
The kit I bought this time is from Fret Wire, which is famous for manufacturing inexpensive kits.(https://thefretwire.com)
They have a large number of guitars and basses, and the lineup of basses, from jazz bass models and pre-bass models to semi-acoustic, full-acoustic, double-necked and headless, is different from the kit lineup found on Amazon.
I found a DIY Electric Bass Guitar Kit -- Semi Hollow Body Bass Build Your Own here, and when I realized that it was in the 20,000 yen range, I was on it like it was my own.
I don't think it took even two weeks from the confirmation of the order to the arrival.
Of course, shipping from overseas costs a lot for shipping, and in the case of UPS, it is best to assume that about 10,000 yen will be added on top of the product price.
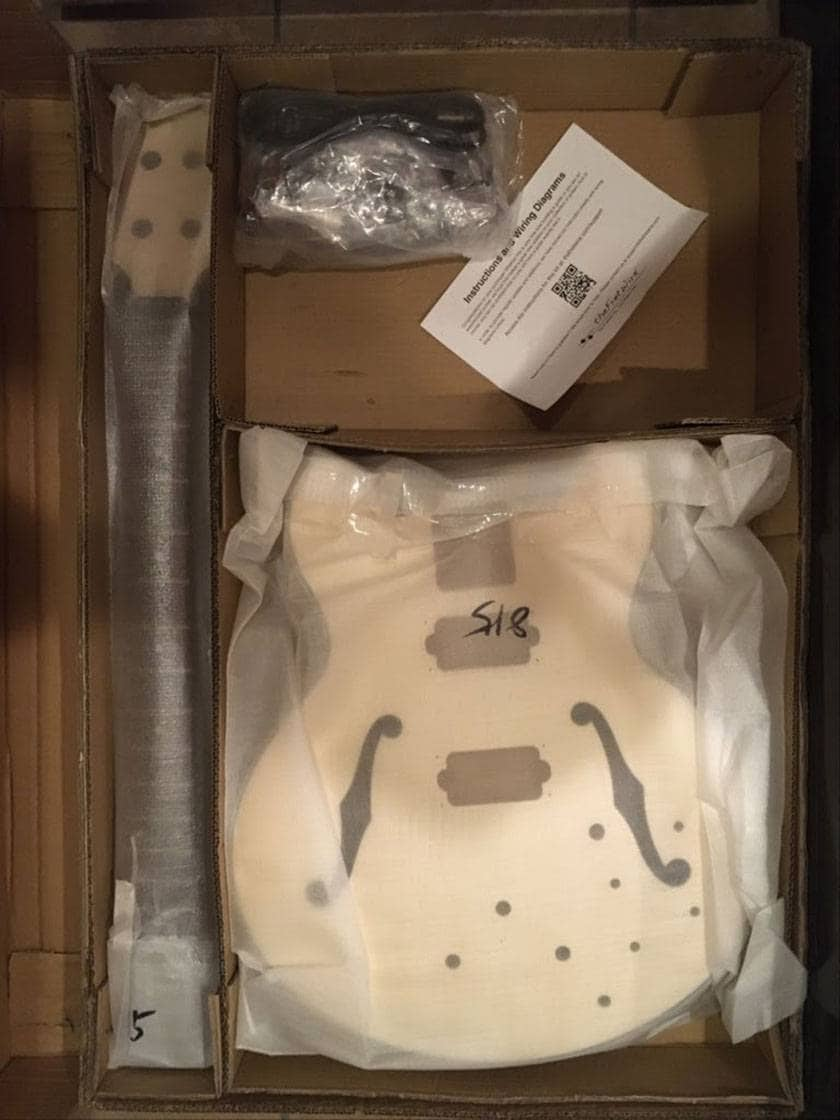
And here is the one that arrived.
It contains a piece of paper with a QR code printed on it, and it says that you can print the manual from there.
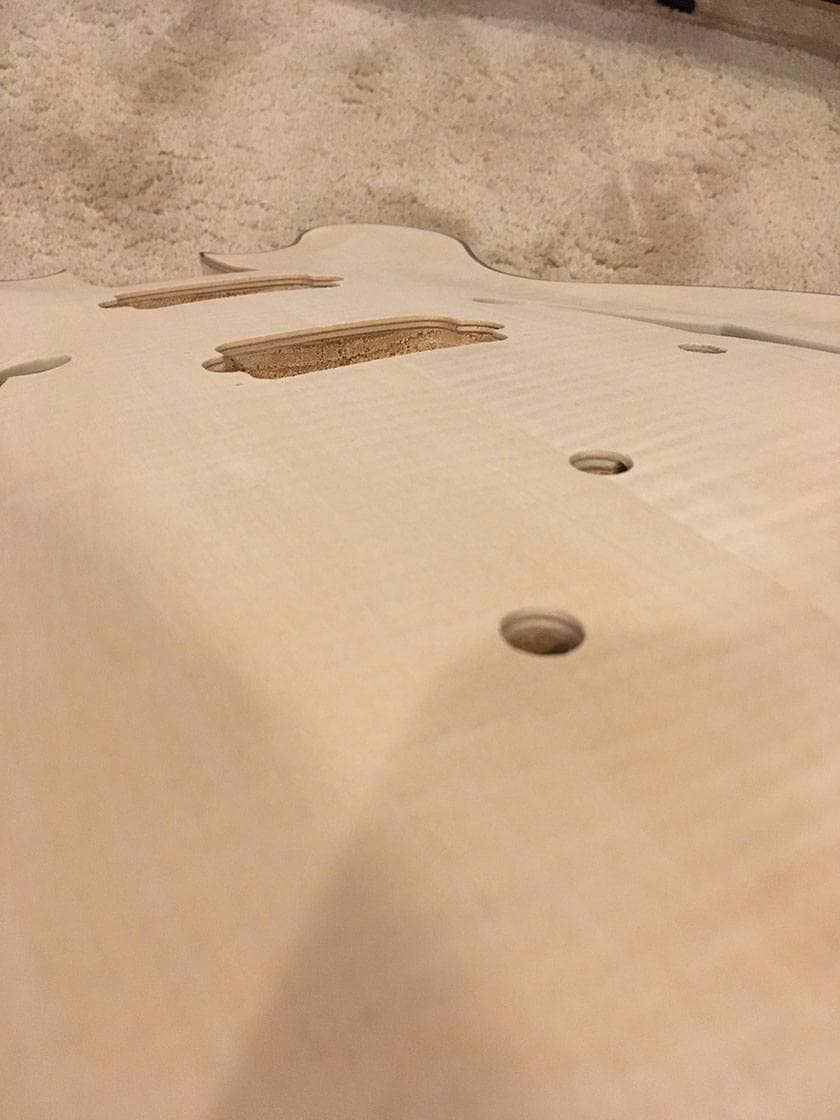
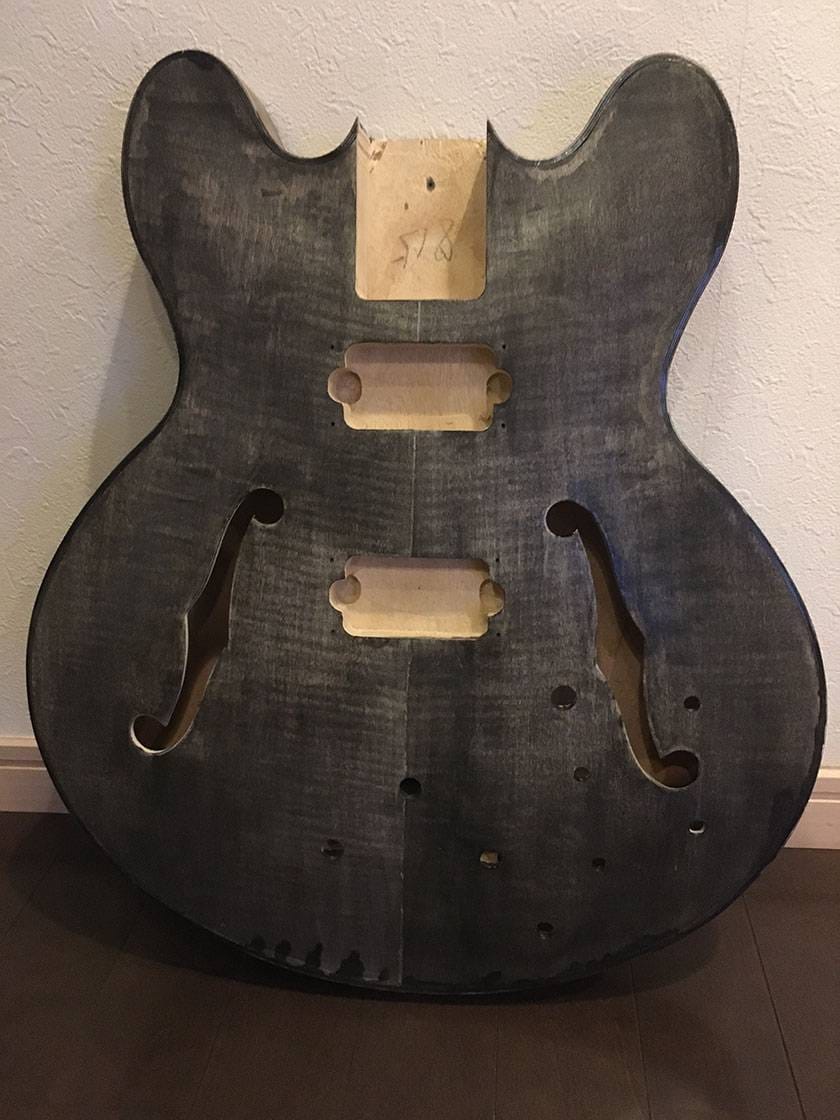
The body shows the wood grain. It seems that they are trying to win using wood grain.
There is a mark filled with putty at the joint of the veneer, but that’s okay at this price.
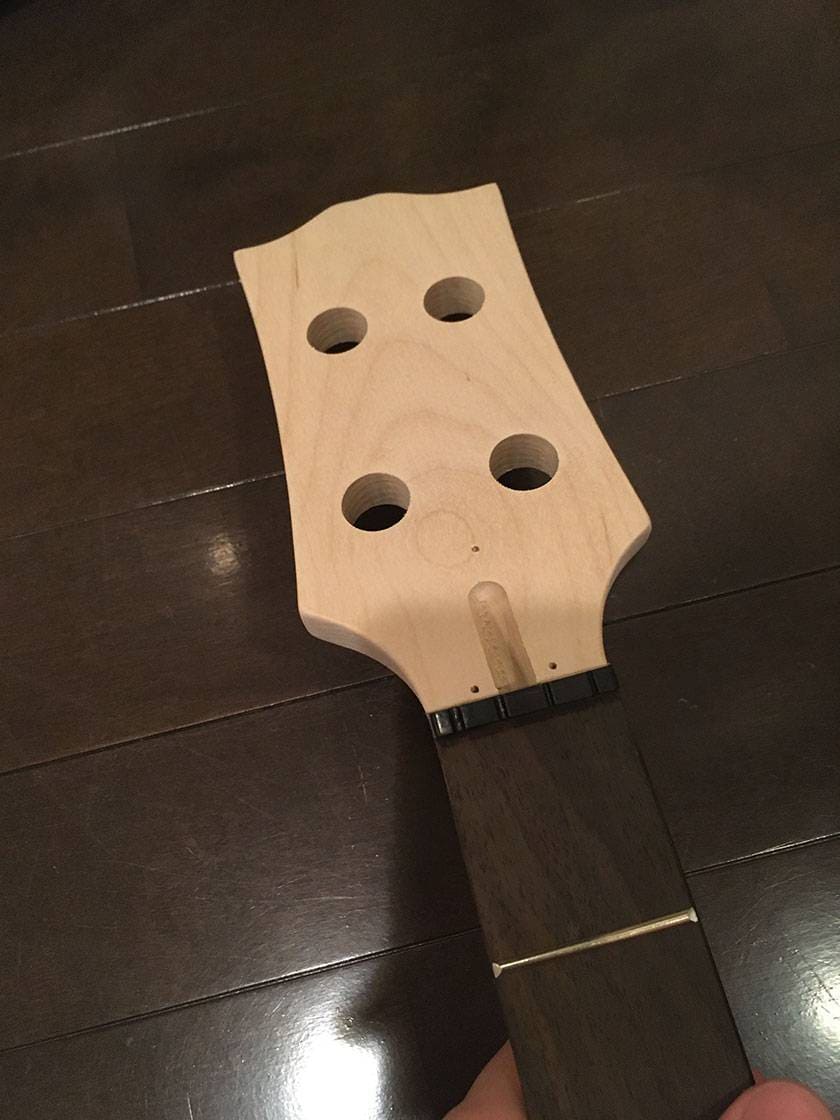
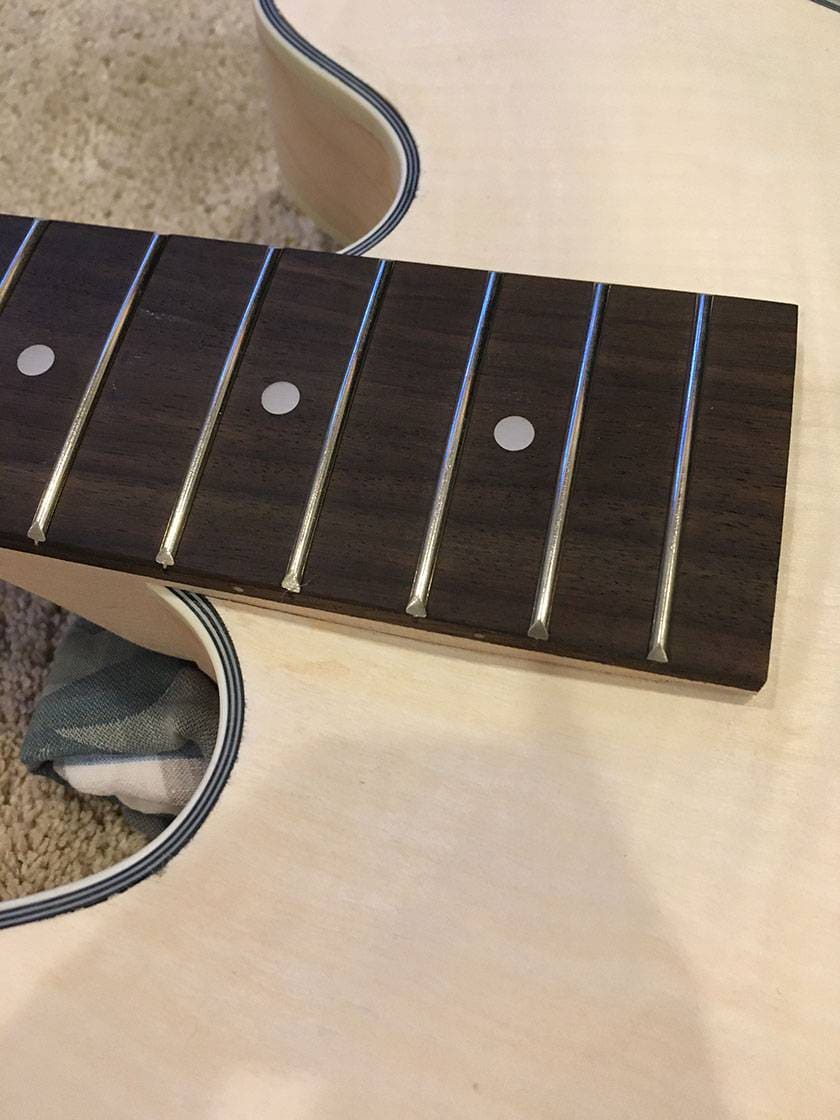
The neck is 2L2R without a binding.
I like square inlays, but I find they are difficult to find it at this price. It came with a nut, but it doesn't fit well and it's just a plastic nut, so I'll replace it with Tusq.
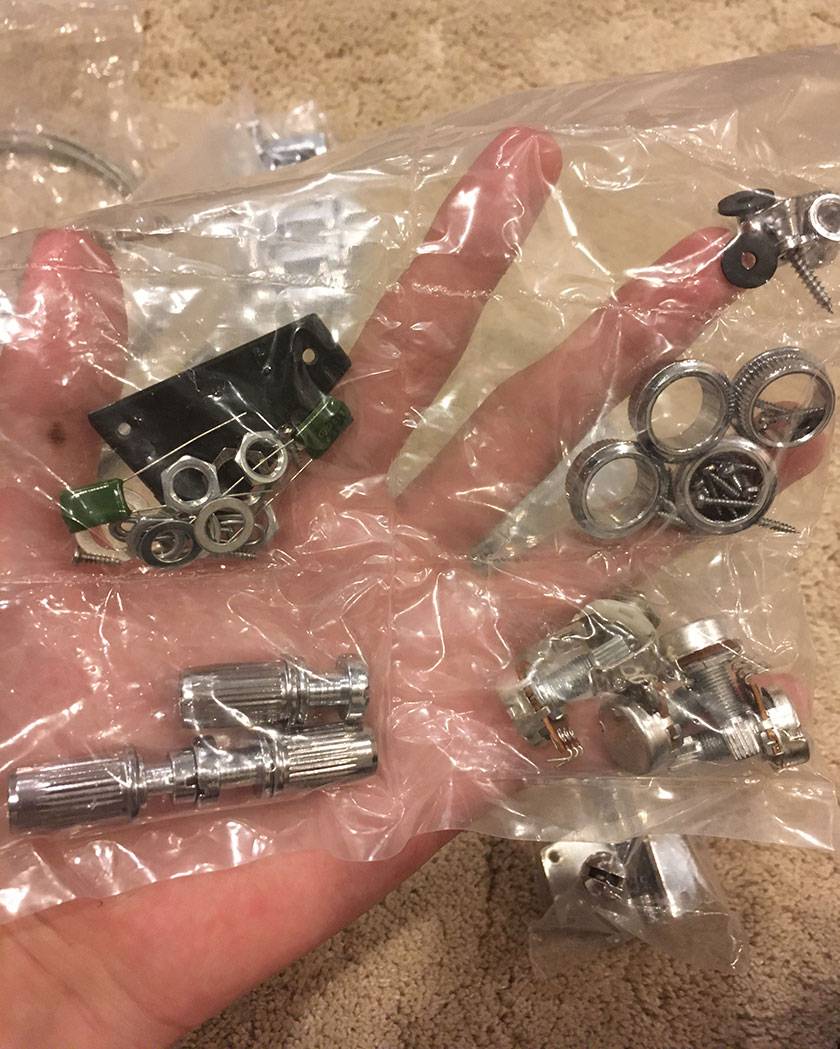
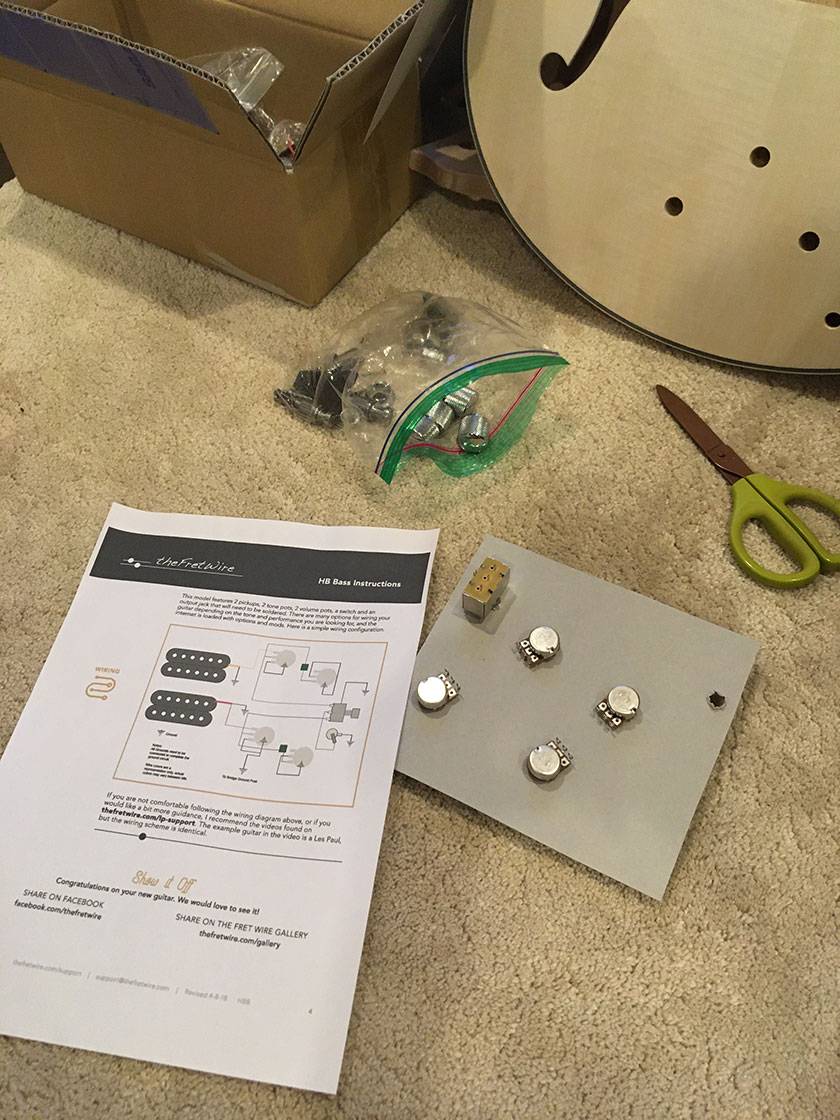
When I checked all the included items, the so-called "regular" parts were all included.
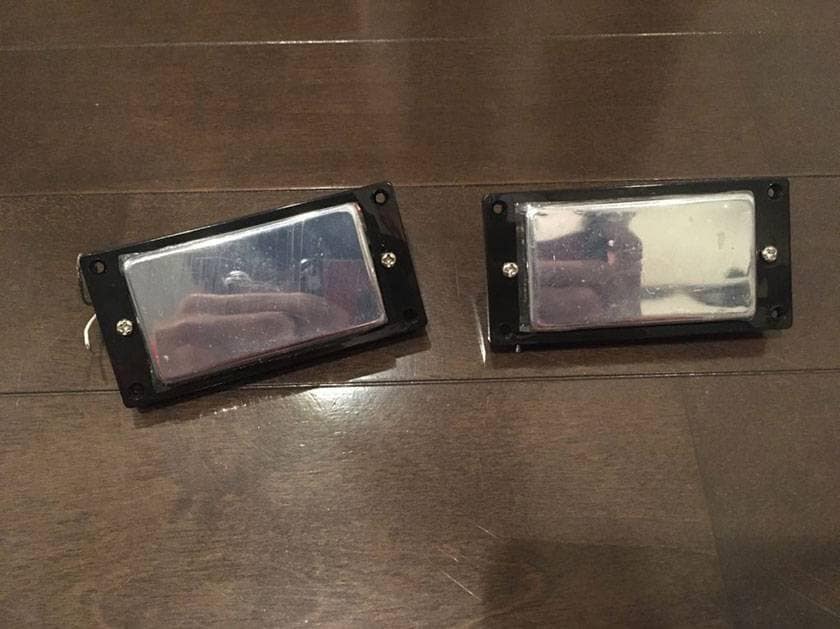
Pick up.
Some imagine that mini humbuckers for bass are hard to get.
This has a 2-core wire, but since I have no plans to tap it, I will not make it a 4-core.
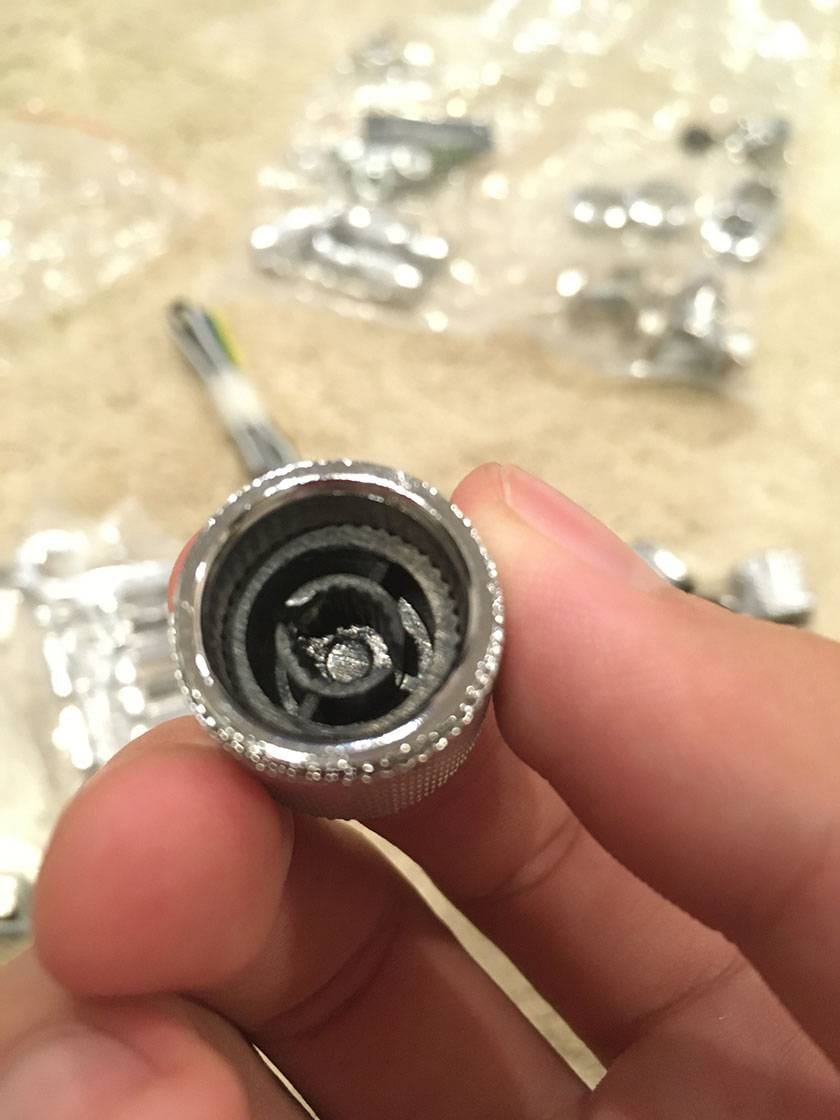
I'm not sure if it's compatible with a regular Les Paul / 335 escutcheon, so be careful.
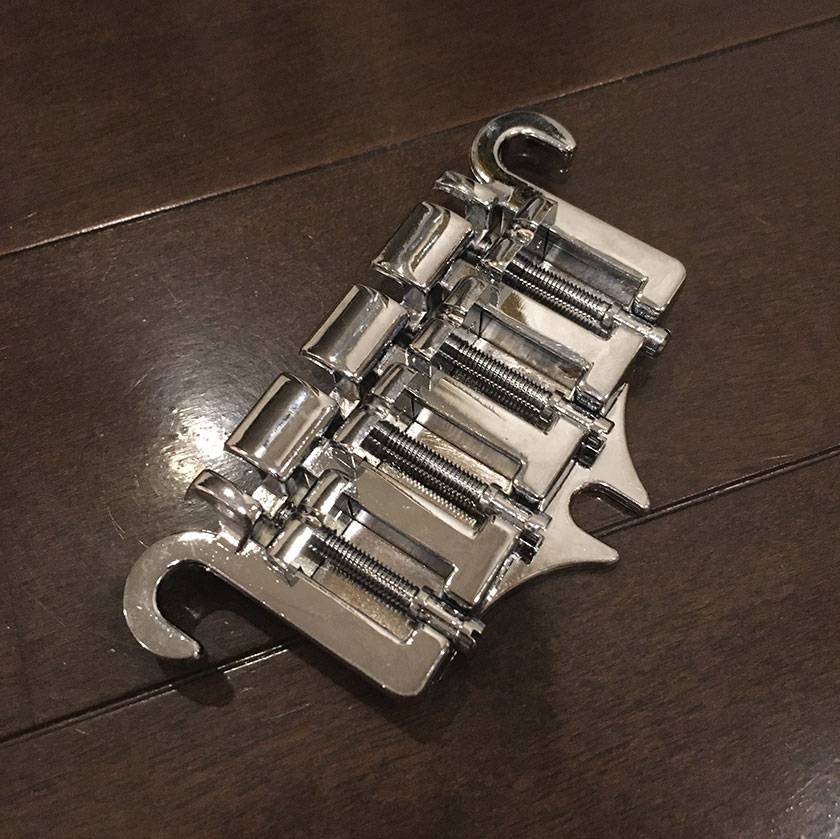
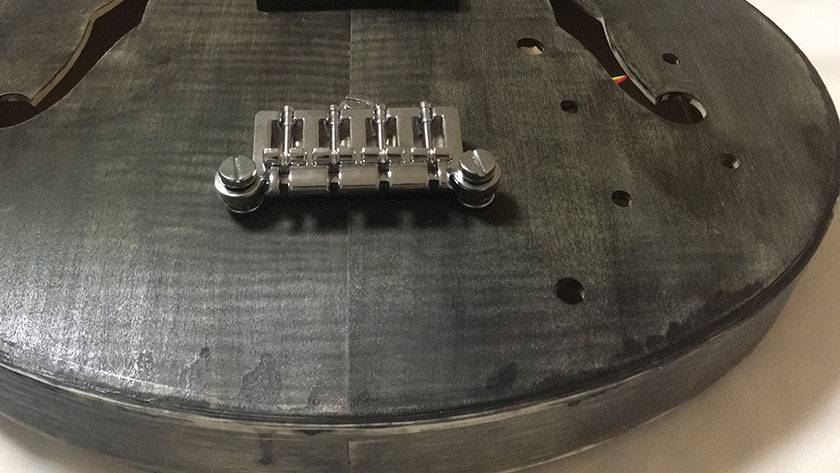
The bridge is a 3-point bridge for Gibson bass.
It's called a ripper bass type.
The same thing is available from Allparts and SCUD, but it doesn't seem to be make much difference even if it is replaced, so I will use it as it is.
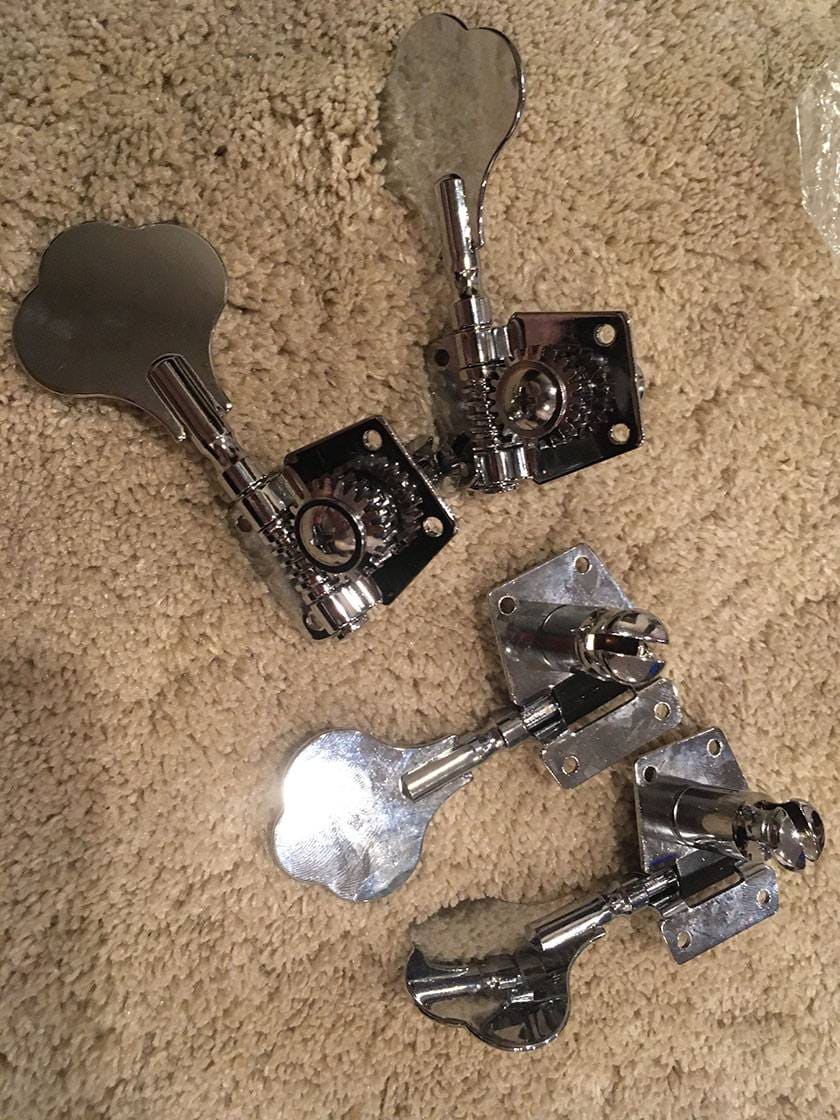
Pegs are ordinary open gear pegs.
For some reason, only one gear was abnormally stiff. When I disassembled it to check, the plating on the shaft had peeled off and it was caught in the bearing.
I disassembled all four and then lightly sprayed them with silicone oil and reassembled them.
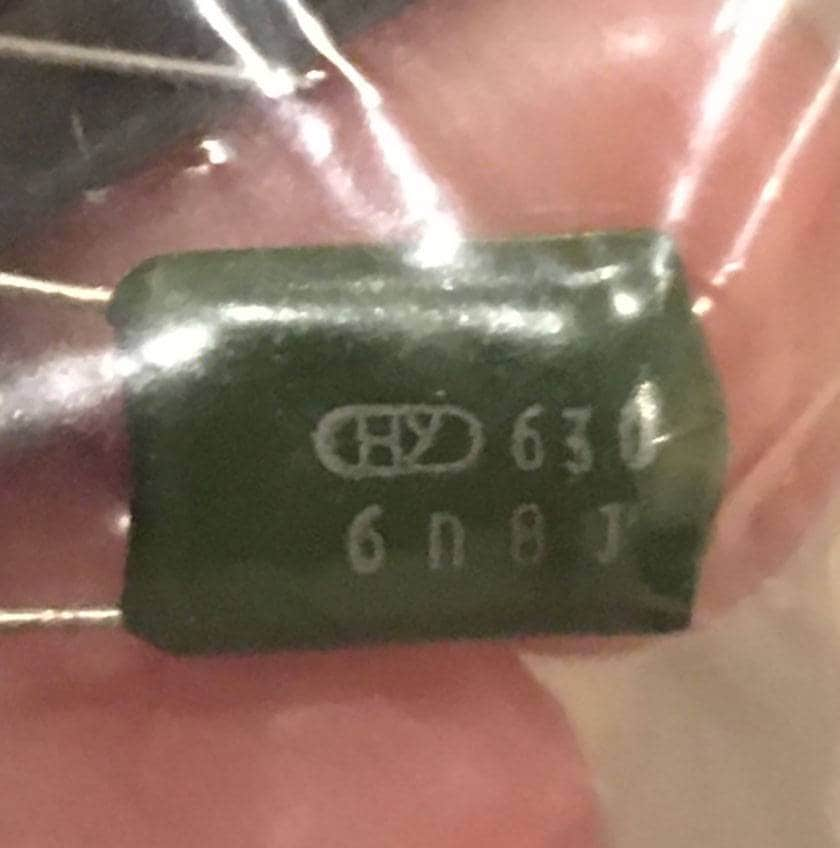
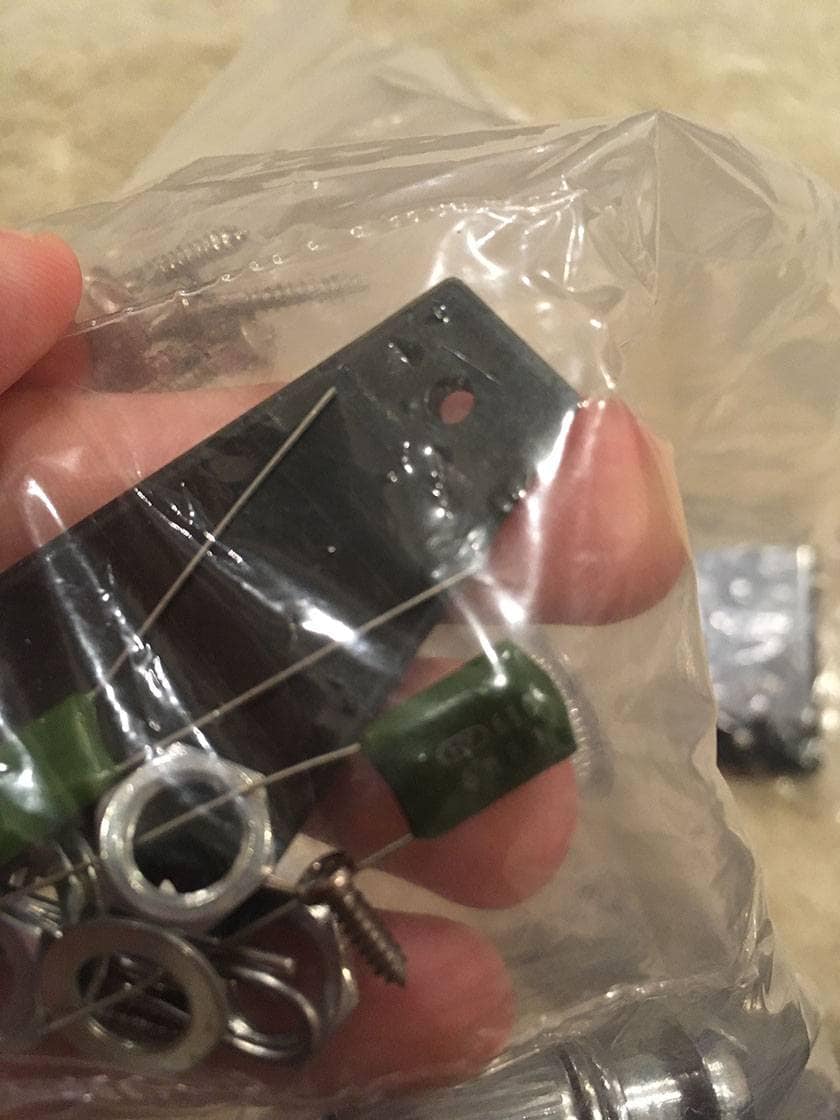
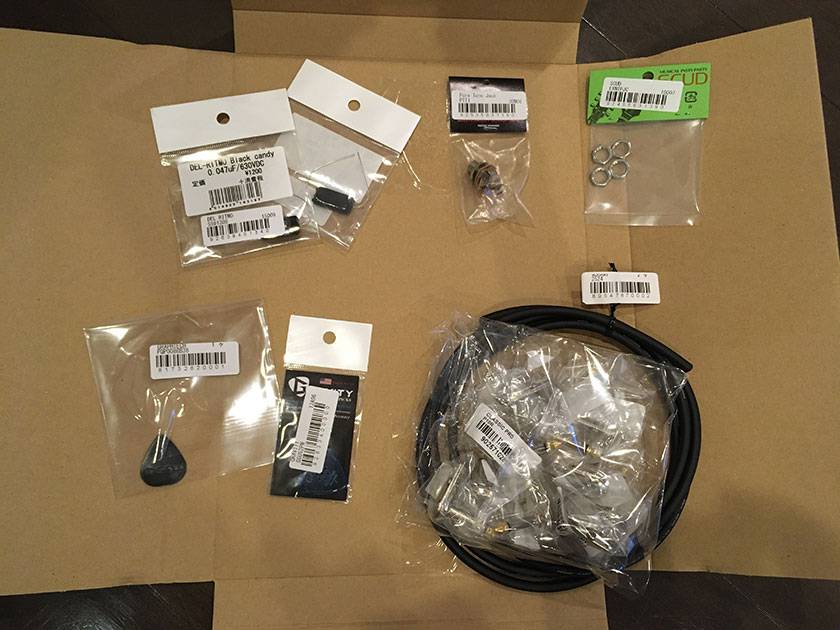
The capacitor is 0.068μF / 630V, probably selected for a bass humbucker.
However, it doesn't look very good, so I replaced it with Del Ritmo's Black Candy 0.047μF.
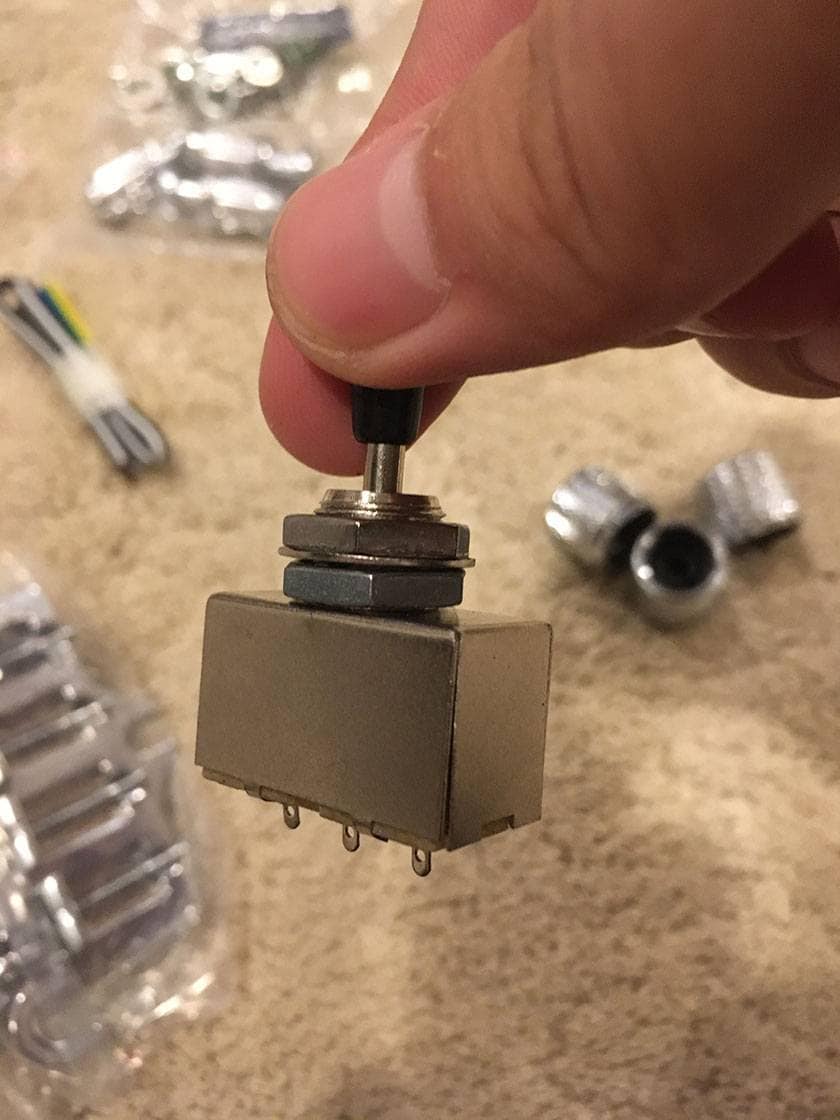
The pots and switches were pretty good. I am not particular about these, so I will use them as is.
The knobs are ... normal.
They’re a metric spec silver dome knobs. I’ll change them to speed knobs or something later.
I don't have time to dig for replacements, so I'll use this for now.
When I put the truss rod cover together, the holes were misaligned and the chamfering was rough, so I decided to replace it later. I’ll probably buy a blank pickguard and replace it.
The strap pin was a normal cone and the cushion was rubber. I made my own cushion with felt and replaced it with a Pickboy dish-shaped one.
The cushion can be punched out with a leather punch and a hammer.
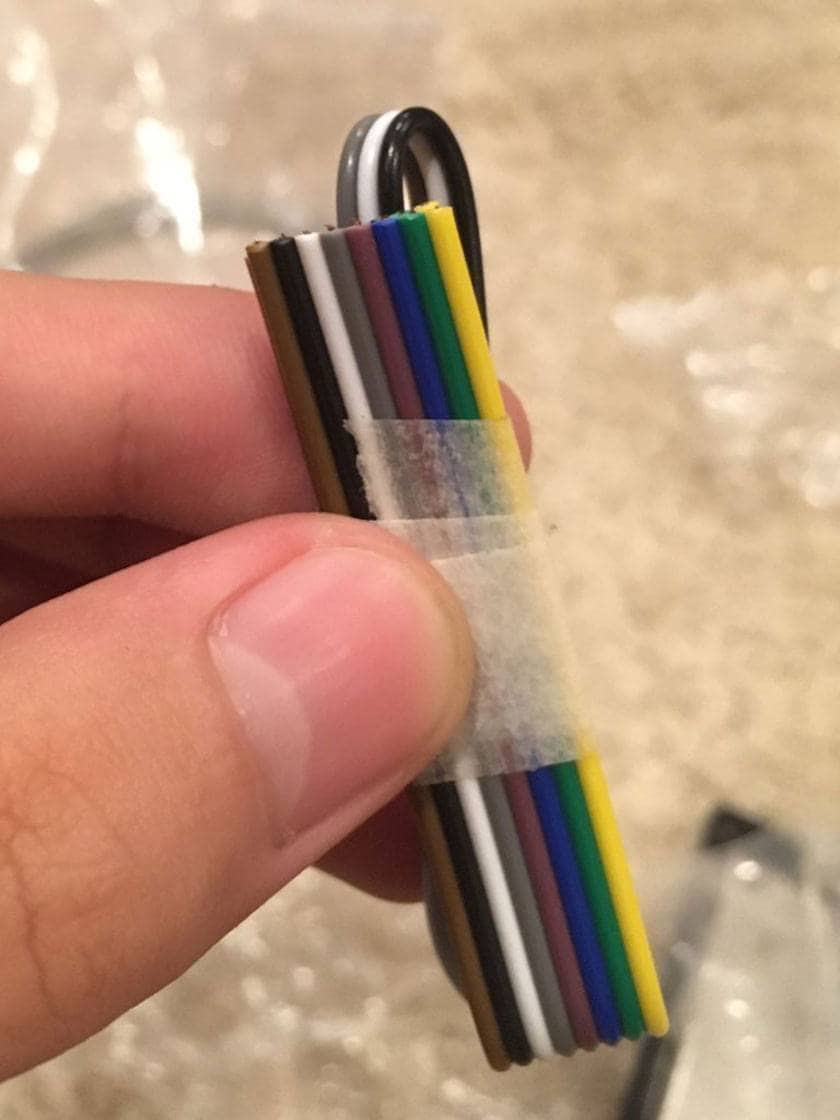
The wiring material was black, gray, white, and several color coatings.
It also came with solder.
I am not good with thin wiring, so I use OFC copper wire and solder that I prepared myself.
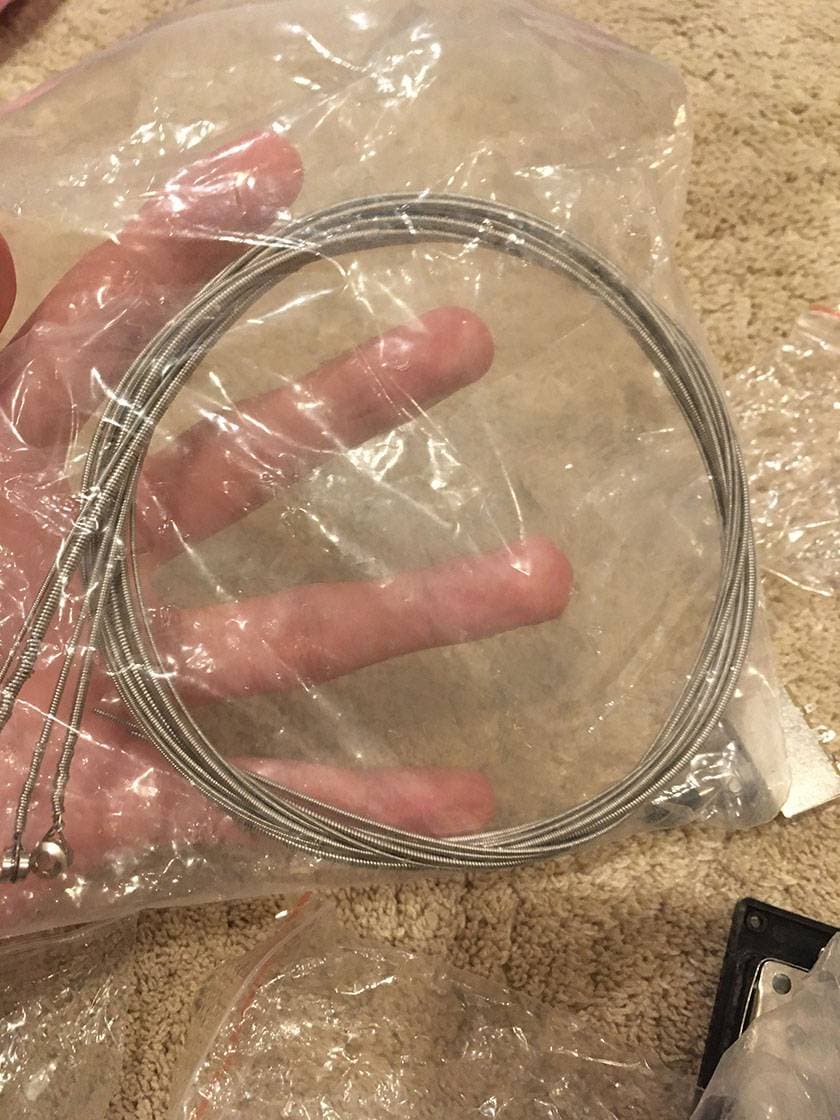
It also contained mysterious strings.
They were not vacuum packed, just rolled up, but for the time being there is no rust, so it is not necessary to replace them. It's now been about two months since it was completed, but it seems that they’re good strings because there are no problems.
There was nothing extra and nothing missing from the kit and no fatal problems, so there was no need to return or make any inquiries. These kinds of kit sometimes have such problems, so confirmation is essential.
The instruction manual says, "First, temporarily assemble and check if there is a problem with the neck angle", so I inserted the neck, installed the bridge, stretched the strings, and checked the string height.
There seems to be no problems except that the nut is unusually high.
This is probably higher so that there is room for adjustment. Since it is not fixed in place, it can be shaved to adjust the height at the time of the final adjustments.
And on to the finish
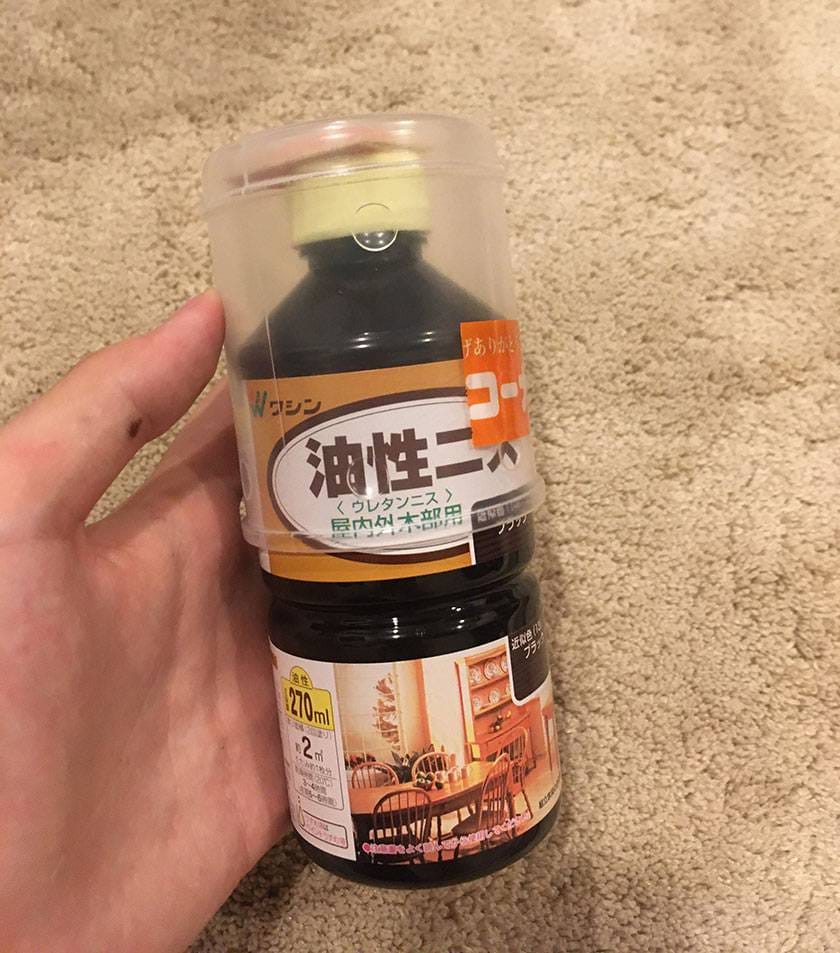
I used Wako's oil varnish.
There were various bumps along the way such as the paint drying from the side where it was painted in the heat, and there’s some color unevenness, but I’ll leave it to give it a handmade flavor.
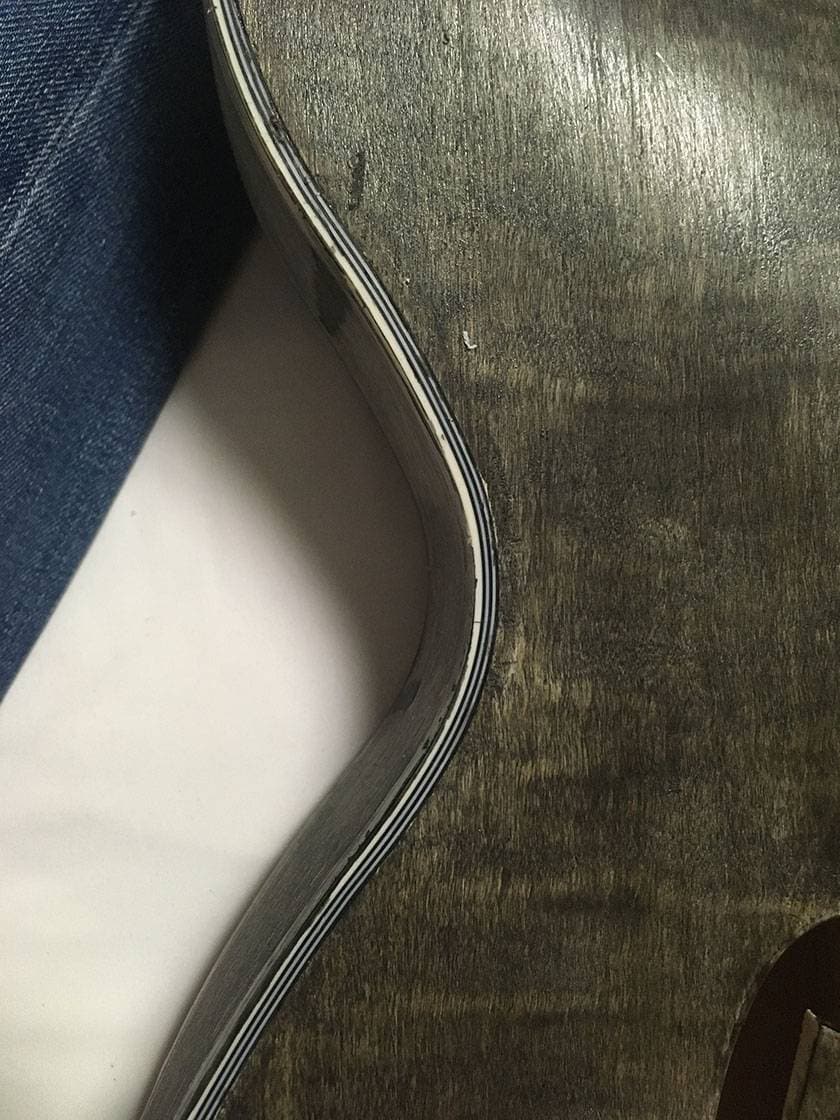
Remove the varnish on the binding with a scraper.
It seems that the wiring is recommended as described in the manual.
Seymour Duncan has a wiring procedure manual for semi-acoustic / full-acoustic, so check it out as well. It states that the wiring should be done on cardboard first, and then inserted from the F hole and installed.
Wiring procedure manual for semi-acoustic / full-acoustic
I forgot to take a picture of the wiring, but it's now the same as the wiring for a typical Les Paul model. I will introduce some parts that I bought at Sound House.
At the same time, the body and neck have been finished, so hammer in the bushings and glue the neck.
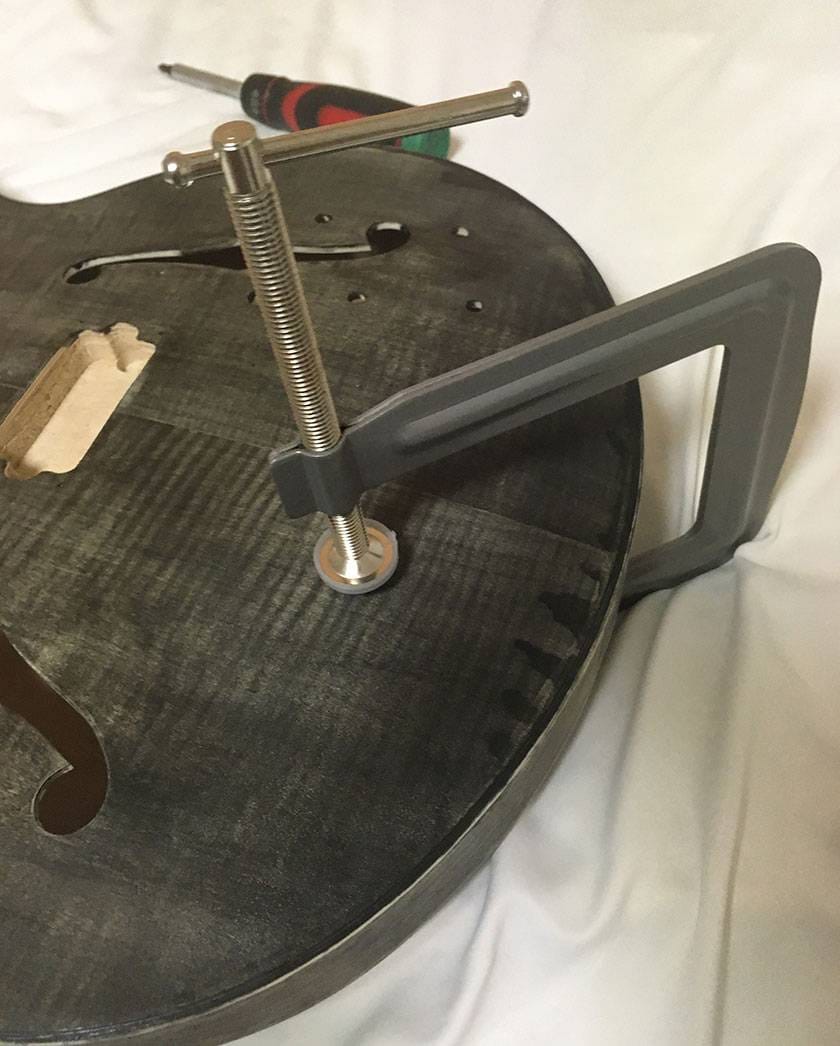
… But it seems that the area around the unfinished pocket expanded due to humidity from the rain every day.
The neck that was inserted during temporary assembly now does not fit. I have no choice but to dehumidify the entire room, sand down the side of the neck joint to match the amount of varnish, apply a strong adhesive and insert the neck.
The strong adhesive is quite slippery, so even a slightly tighter joint can be inserted.
Be careful as there will be a gap in the neck end if you do not insert it firmly and clamp it. Clamp it in that state and leave for 24 hours or more.
The adhesive will leak out for several hours after you setting it, so immediately wipe it with a wet rag.
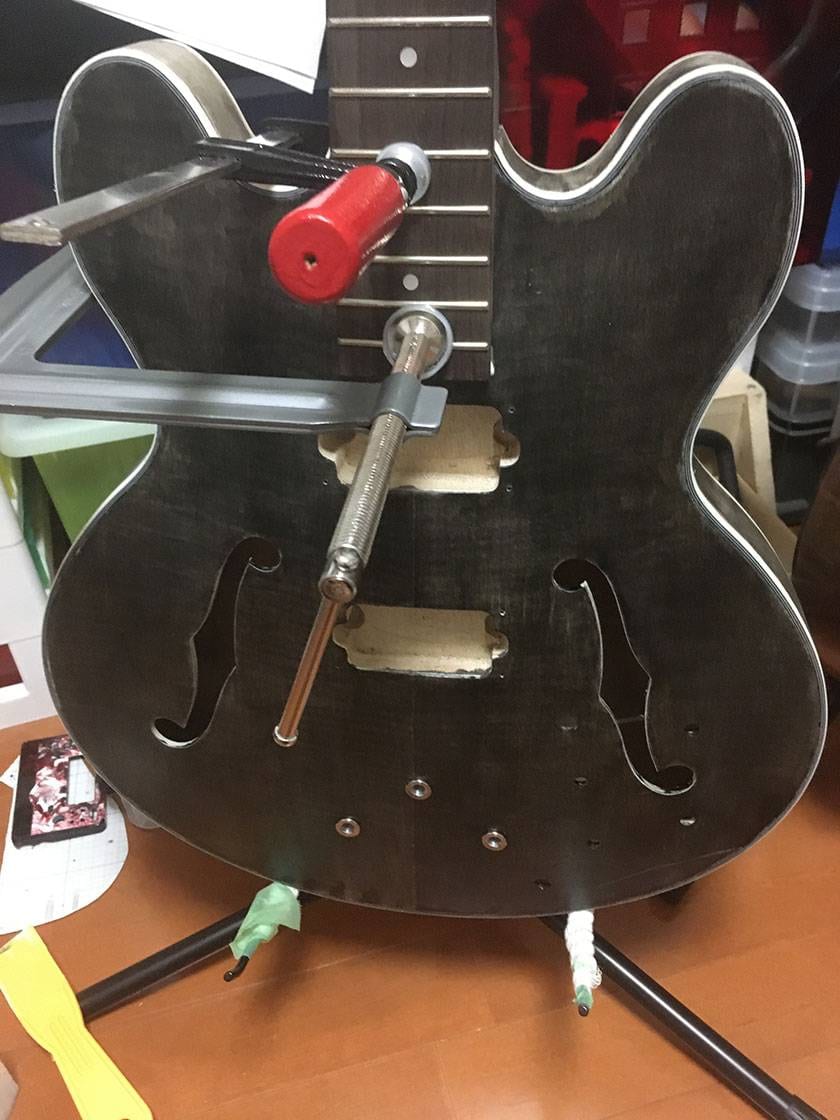
When it is completely dry, start the wiring.
Remove the wiring made on the cardboard, tie the thread to the pot or selector and pull it through the hole.
That's easy to say, but it takes a lot of time to actually do it. You can see how efficiently a semi-acoustic with the back plate can be wired.
When tightening the nut, tighten it while holding the pot so that it does not rotate.
It is difficult to hold the pot by sticking your finger through the F-hole, but if you do not do this, the wiring will snap and you will end up taking everything out again, so be careful. By the way, when the pot is loose, it is a hassle to retighten it, so tighten it with a wrench.
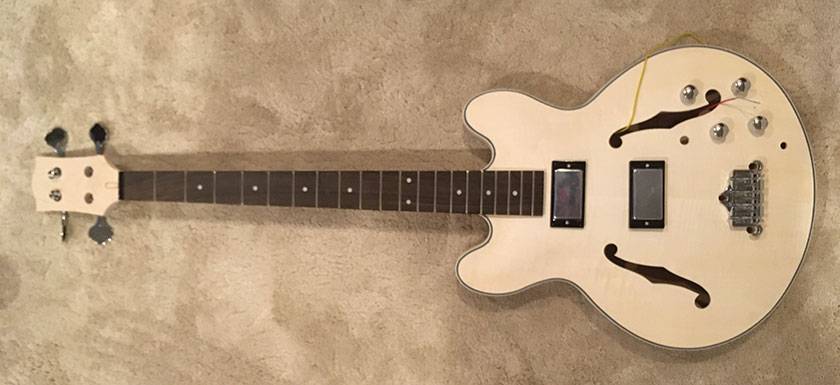
And the completed semi-acoustic ...
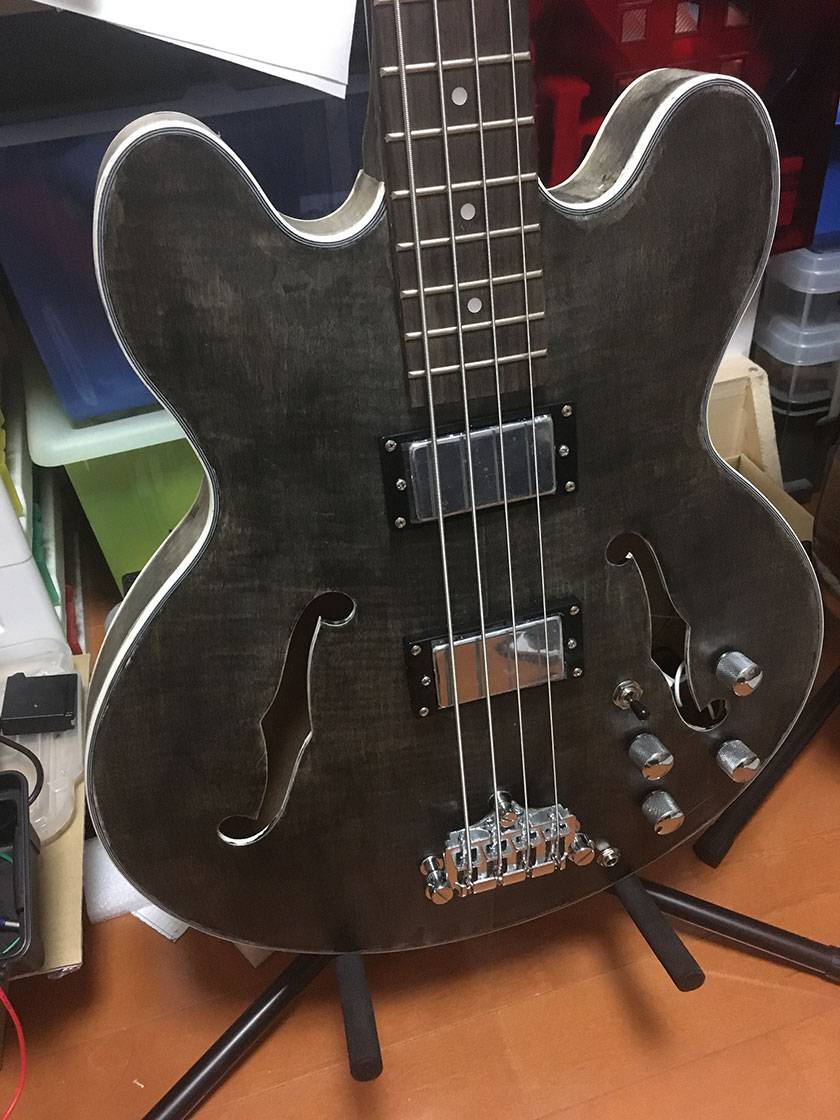
I now have one that looks pretty good.
Exquisite astringency. It's a semi-acoustic bass that is quite expensive to buy normally, but it was a kit and the man-hours put into it were unavoidable.
Unlike the solid body kit, this is not recommended for beginners ...
And one more thing, which I was completely careless about, is that there are instrument cases in which a bass with a body shape that is this aggressive will not fit.
For example, if you have a huge body such as an Explorer bass, full acoustic, double neck, you will have to make your own case as well.
This time, I was lucky because I was able to buy an acoustic bass case at a low price, but you will need to keep that in mind.
I wrote about my Semi-Acoustic kit. You can only make your own unique instruments that aren't sold anywhere.
There are kits such as Telecasters and Les Pauls at Sound House, so why not buy one?
→ SOUND HOUSE production kit list
Let's have a good musical instrument life!


