Hello everyone, it's RIMITO, your night-owl DTM enthusiast here.
This time, I'll be diving deeper into acoustic panels, aimed at those who already have a basic understanding of them. I'll be explaining some more advanced details about acoustic panels.
I'll also introduce an easy method for making your own DIY acoustic panels, so stick around till the end!
Basic Knowledge
Before diving into this article, it would be helpful to review some foundational information:
- Basic knowledge of sound absorption and soundproofing
- Principles behind acoustic panels and soundproofing materials
- Surface treatments for acoustic panels
- Methods for attaching acoustic panels
- About vibration-damping materials
All of these topics are covered in detail in the "Sound House Guidebook." Be sure to check it out first!
Types of Acoustic Panels
When you hear "acoustic panel," the image that comes to mind may vary from person to person, but in reality, there are many types of acoustic materials.
Broadly speaking, they can be divided into three main categories:
- Porous Materials
- Panel Materials
- Perforated Panels
Let's take a closer look at each type.
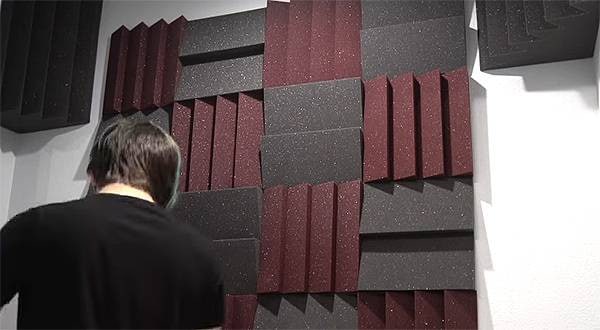
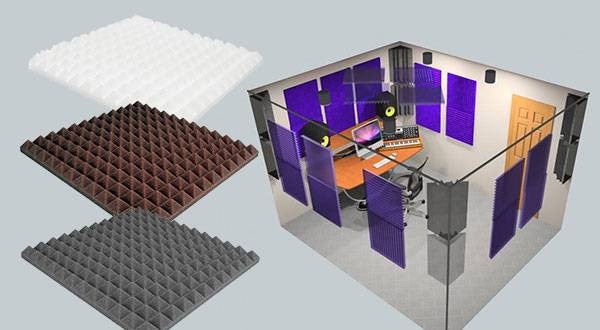
Porous Materials
Porous materials are materials with numerous small air pockets within them. When sound waves hit these materials, the air inside vibrates, causing the fibers to move, which generates frictional heat. This process converts sound energy into heat energy, creating an effective sound absorption effect.
Common types of porous materials include:
- Urethane Foam
- Melamine Foam
- Rock Wool
- Glass Wool
- Felt
- Poly Leaf
I'll also provide a brief explanation of urethane and melamine foams here, but for more detailed information, you can check out this article:
⇒ *Choosing Acoustic Panels for DTM, Streaming, and Remote Work*
Additionally, recommended urethane and melamine acoustic panels, as well as vibration-damping materials, are introduced here, so be sure to take a look after reading this article.
Reference Blog: *Improving Sound Quality! Recommended Acoustic Panels*
Each material has a different density, with the most effective sound absorption typically occurring at densities of 40-60 kg/m³. Let's look at the characteristics of each material.
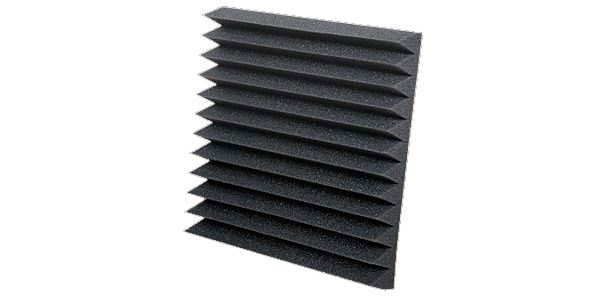
Urethane Foam
Urethane foam generally has a density of around 25 kg/m³. Due to its material properties, it has strong sound absorption performance, especially in the mid to high frequency range. To compensate for its lower density, most urethane foam panels are designed with features to increase surface area, such as cutting them into wedge shapes or making them thicker. One downside is that it tends to degrade easily when exposed to direct sunlight for extended periods.
Example Product:
AURALEX / Studiofoam Wedges - 24 pieces, 30 cm x 30 cm, 5 cm thickness
Melamine Foam
This is the same material used in melamine sponges known for removing tough stains. Although its density is generally around 10 kg/m³ — significantly lower than other acoustic materials — it actually has higher sound absorption performance than urethane foam. Due to its extremely light weight and easy-to-cut properties, melamine foam is popular as an easy-to-apply acoustic panel. It performs particularly well in the 1,500–2,500 Hz frequency range. However, it does have some drawbacks, such as being brittle and relatively expensive.
Example Product:
CLASSIC PRO / CQP302 Pyramid Acoustic Foam - 4 pieces, 30 cm x 30 cm x 2.5 cm

Rock Wool
Often referred to as "mineral wool," rock wool is sometimes mistaken for asbestos, but it is completely different and considered safe, with a carcinogenic risk level similar to that of tea or coffee. Its typical density is around 80 kg/m³, though products with densities exceeding 150 kg/m³ are also available. Due to its high density, rock wool is highly effective at absorbing low-frequency sounds and also provides soundproofing benefits. Being a mineral-based material, it is non-combustible and resists degradation even under direct sunlight, making it a popular choice for construction in many buildings in Japan.
Glass Wool
Also known as GC board, this material is made from glass fibers, making it highly durable and environmentally friendly. It typically has a density of around 30–40 kg/m³, providing excellent sound absorption. Glass wool is widely recognized as an effective acoustic material for creating optimal monitoring environments, and it is relatively affordable. Products labeled as "10k" or "24k" are intended for insulation use and have lower density, which results in poorer sound absorption performance, so be cautious when selecting for acoustic purposes.
Felt
Modern felt materials are primarily made from synthetic fibers, such as polyester or recycled synthetic fiber blends. Felt is particularly effective at absorbing high-frequency sounds, but its density is generally quite low, around 2 kg/m³, making it less effective when used alone. For this reason, felt is often combined with other acoustic materials. When layered with high-density materials like rock wool, which is effective at absorbing low frequencies, felt can provide sound absorption across a wider frequency range.
Poly Leaf
Poly Leaf is an acoustic material made from polyester, the same material often used in clothing. Compared to other materials, it is highly resistant to mold and doesn’t produce dust over time, making it a hygienic choice suitable for people with sensitive skin or asthma. With a moderate density of around 70 kg/m³, Poly Leaf offers excellent versatility and can be used in a wide range of applications. However, it does have some drawbacks, such as a higher price point and limited availability due to the small number of manufacturers producing it. Despite these drawbacks, it’s an ideal choice for people who use a single room for multiple purposes, such as music, sleep, and work.
This concludes our overview of porous acoustic materials.
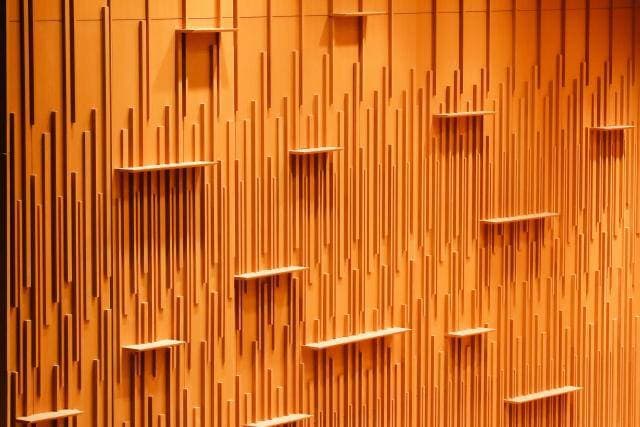
Panel Materials
Next, let's look at panel materials. These are primarily made from board materials like plywood, designed to create an air layer that contributes to sound absorption. By themselves, panel materials don’t offer much sound absorption, so they’re typically used in large spaces like concert halls to help manage reverberation. The effectiveness of these panels depends on factors such as the rigidity of the wall, the placement of support beams, and the material type, which makes installation a complex process best handled by professionals.
Common types of panel materials include:
- Plywood
- Fiberboard
- Slate Board
- Gypsum Board
- Metal Sheets
- Plastic Sheets
Each of these materials has its own characteristics and applications.
Plywood
Plywood is a wood-based material made by layering thin slices of wood veneer and bonding them together. It actually contains countless tiny, invisible pores that allow it to absorb sound evenly across a wide range of frequencies, from low to high. This makes plywood a popular choice as a primary material for concert halls, theaters, and other large venues. It can be installed as part of the original construction or added later as an acoustic treatment.
Fiberboard
Fiberboard is a type of wood-based board made by combining wood fibers with adhesive and then hot-pressing the mixture. MDF (Medium-Density Fiberboard) is a well-known example of this material. Like plywood, fiberboard is often used in large venues such as halls, but it is also commonly found in medium-sized spaces like school music rooms. Since the board is compressed with adhesive, it requires an air layer to be effective for sound absorption. Fiberboard is generally better suited for sound tuning than for absorption alone. It can also be installed as part of the initial construction or added afterward as a secondary treatment.
Gypsum Board, Metal Sheets, and Plastic Sheets
At this point, these materials are more about soundproofing than sound absorption. They are often used to prevent direct sound reflection—such as when a speaker is mounted perpendicular to a wall—by angling surfaces to redirect sound toward absorptive materials. Their primary purpose is sound isolation, and they are typically installed within walls to block sound transmission. In some cases, these materials are also used as components in high-end acoustic tuning panels.
This concludes the overview of panel materials.
Perforated Panels
Perforated panels are familiar sights in music rooms, characterized by numerous holes spaced at regular intervals, typically 25mm or 30mm apart. These panels can be made from a variety of materials, including wood, gypsum, and metal.
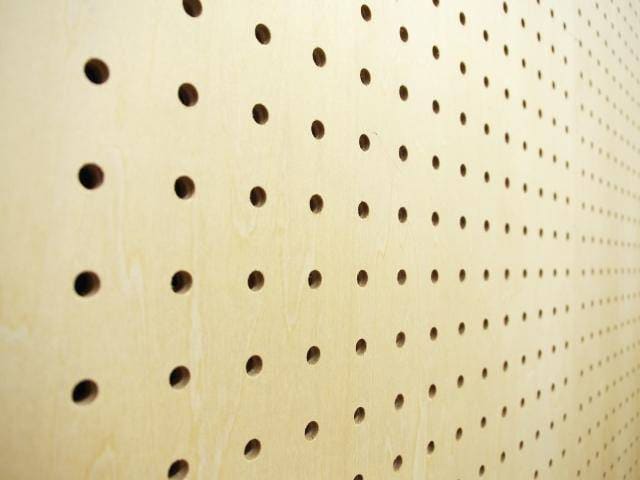
Sound enters the countless holes in perforated panels, where it resonates and disperses within the air layer behind the panel, creating an absorption effect. Additionally, perforated panels provide soundproofing, making them highly valued in the acoustics field as a versatile solution. If made from wood, they can support relatively heavy objects if screwed in, adding to their versatility.
Another advantage of perforated panels is that they are affordable and widely available. They can be purchased at home improvement stores (often for use with hooks) and even at major furniture retailers. However, there are some considerations: an air layer is necessary for proper installation, which can make setup challenging. Also, overusing these panels can lead to excessive sound absorption, which can diminish the impact of the audio.
This concludes the explanation of porous materials, panel materials, and perforated panels.
DIY Acoustic Panels
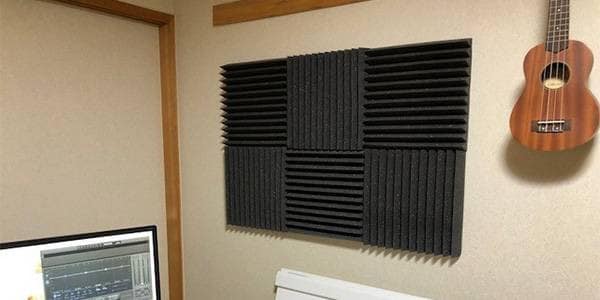
As explained in the previous section, there are a variety of acoustic materials available on the market, but I discovered that by making them myself, I could create acoustic panels for less than 1,000 yen in material costs. So, I went to a home improvement store, purchased the materials, and gave it a try. After placing the DIY panels behind my speakers, I noticed a significant reduction in sound reflections from the wall. (Keep in mind that the effectiveness may vary depending on the environment, so this is not guaranteed.)
If you're interested, give it a try—but remember, this is a DIY project, so proceed at your own risk!
Materials
- Rock Wool Acoustic Board (MG board is also acceptable)
- Frame Material
- Sheeting Fabric
- Screws (or nails, if preferred)
The frame material should ideally be 1 cm thicker than the acoustic board to allow for a snug fit. Adjust the length of the frame pieces to match the four edges of the acoustic board.
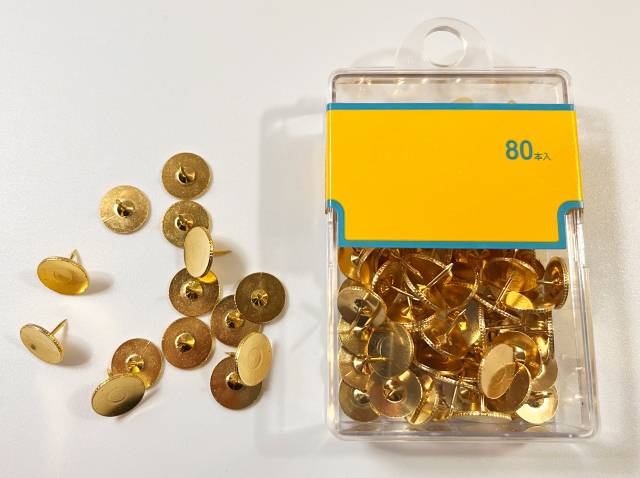
For thumbtacks, use ones with a flat head, as shown in the image, to ensure a smooth, even finish when securing the fabric.
The rock wool acoustic board refers to those white panels often seen on office ceilings, technically called "formed decorative panels." MG board is also made from rock wool but has the sound-absorbing material exposed rather than covered. Either one is fine to use for your DIY acoustic panel, but be careful when handling them with bare hands, as they can cause skin irritation.
Tools
- Screwdriver (or hammer if using nails)
- Woodworking Drill
- Scissors
- Saw
- Staple Gun
- Work Gloves
- Air Duster
- Sandpaper
Both the woodworking drill and staple gun can be found at 100-yen shops, not just home improvement stores. A stapler that opens 180 degrees can be used as a substitute. The air duster is handy for cleaning dust off the acoustic board but is not essential. Be sure to take safety precautions throughout the process to avoid injury.
~Instructions~
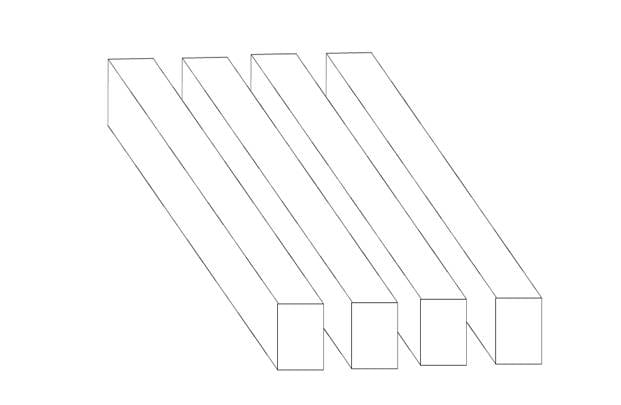
First, cut the frame material to match the size of the acoustic panel using a saw, and use sandpaper to remove any splinters or burrs.
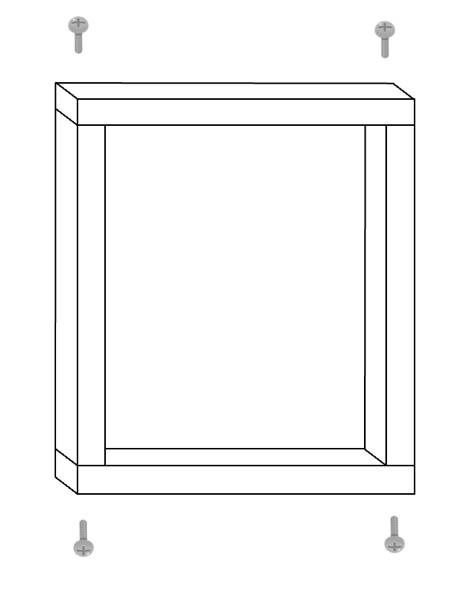
Next, assemble the frame as shown in the diagram below, drill pilot holes for screws, and secure the frame with screws or nails to create a structure to hold the acoustic panel.
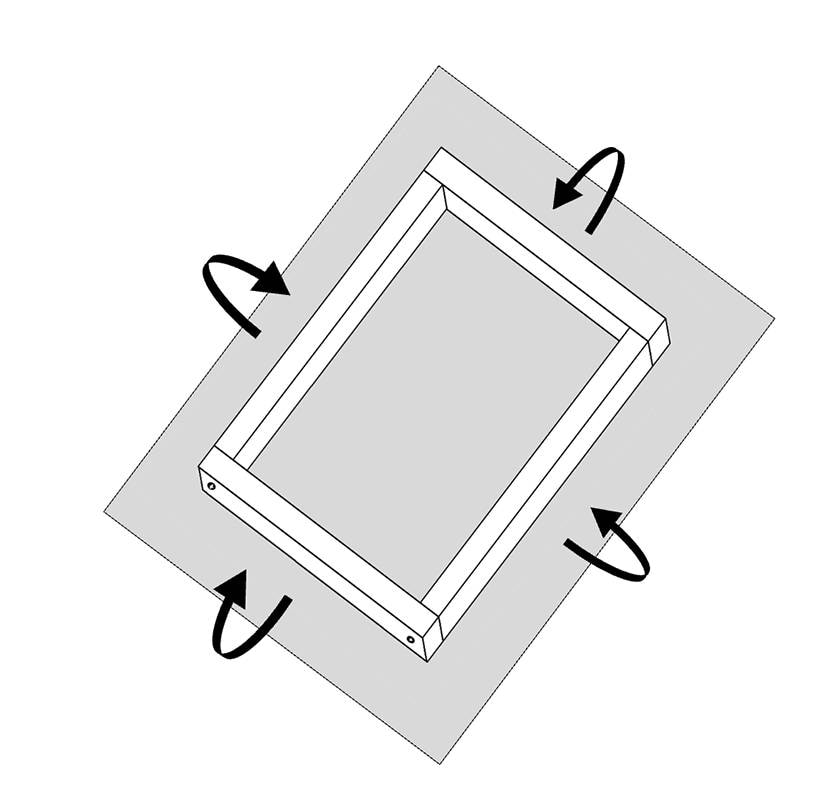
Once the frame is assembled, stretch the sheeting fabric over it as shown in the diagram. Make sure to pull the fabric taut to avoid wrinkles.
Then, on the back side of the frame (the side opposite to where the fabric is stretched), use a staple gun to secure the fabric firmly, making sure there are no wrinkles. If you’re using a regular stapler as a substitute, apply a few extra staples for added hold.
Once the sheeting fabric is secured and wrinkle-free, place the acoustic board inside the frame.
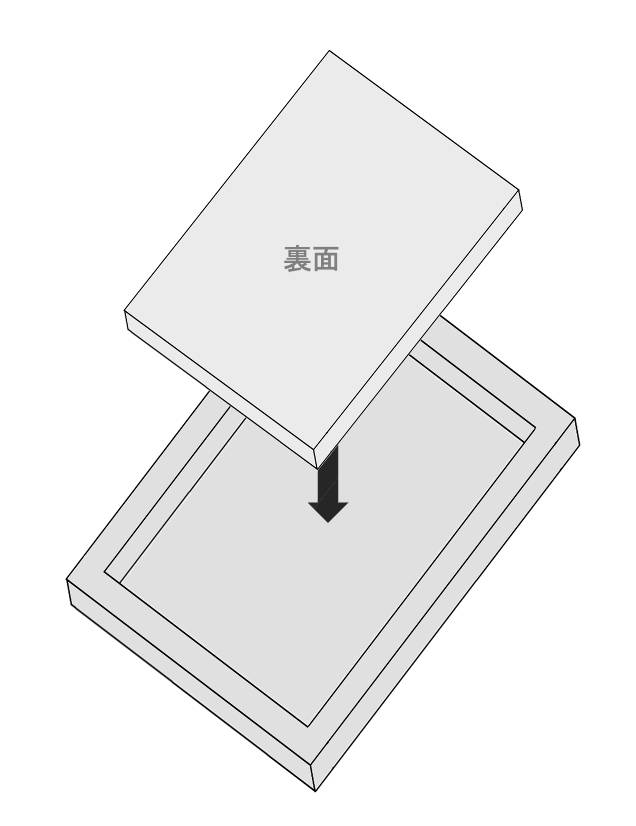
After dusting off the acoustic board, place it inside the frame so that the front surface of the board (the white, solidified side) is in contact with the sheeting fabric, as shown in the image.
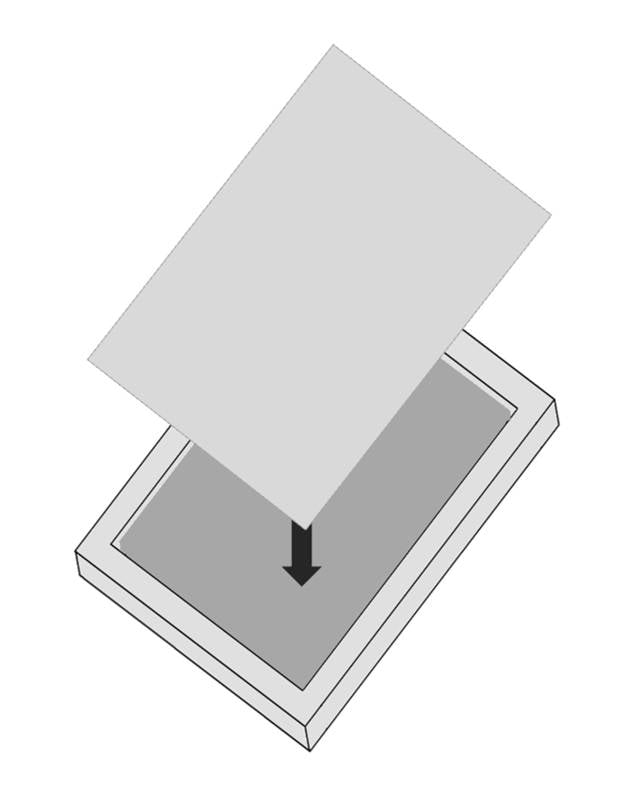
After placing the acoustic board inside the frame, stretch the sheeting fabric over the open back side of the frame as shown in the diagram. Finally, trim any excess fabric so it doesn’t stick out from the frame edges. And with that, your DIY acoustic panel is complete!
In Conclusion
How was it? I’ve covered everything from an explanation of acoustic materials to instructions on making your own acoustic panels, along with a few other tips. I hope this guide has been helpful and can serve as a reference for you.
Thank you for reading all the way to the end. Wishing you an enjoyable music life!
The “sound & person” column is made up of contributions from you.
For details about contributing, click here.


![[Latest for 2025!] Recommended Sound Absorbing Panels!!](/contents/uploads/thumbs/2/2023/2/20230222_2_21344_1.jpg)
![[DIY] Creating a Soundproof Room - Part 1](/contents/uploads/thumbs/2/2022/12/20221206_2_20287_1.jpg)
 定番DAWソフトウェア CUBASE
 iZotopeが手がけるオールインワンDAW “Spire”
 SONEX 吸音材特集
 DTMセール情報まとめ
 DTMに必要な機材
 DTM・DAW購入ガイド