“Modifying a guitar seems too hard…”
If that’s what you’re thinking, then pickguard replacement is the perfect place to start. The pickguard is a part that significantly affects your guitar’s appearance. Simply changing its material or color will give you that same excitement as when you first got your new guitar.
What’s more, the process is surprisingly simple—it’s basically just filling in old screw holes and then drilling new ones! Even beginners can easily take this task on. In fact, this was my first DIY guitar project too.
This article will walk you through the replacement process and I will highlight key points that I learned along the way, so even first-timers can confidently give it a try.
Will it go smoothly...?
Note: For this project, I used a guitar body that already had its pickups and other parts removed.
Let’s check the tools you’ll need to replace the pickguard.
Tools used for the job
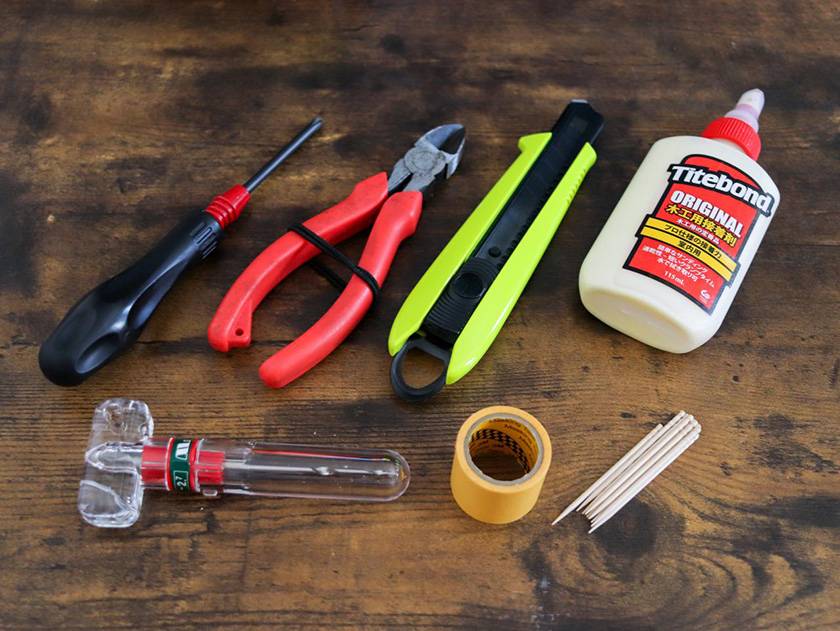
In this guide, I’m replacing the pickguard on a Strat-style guitar. Here are the eight tools and items I used:
Tool checklist
- Utility knife
- Wire cutters
- Pilot hole reamer (a power drill can also be used)
- Phillips screwdriver
- Titebond wood glue
- Tissues
- Masking tape
- 11 toothpicks
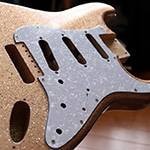
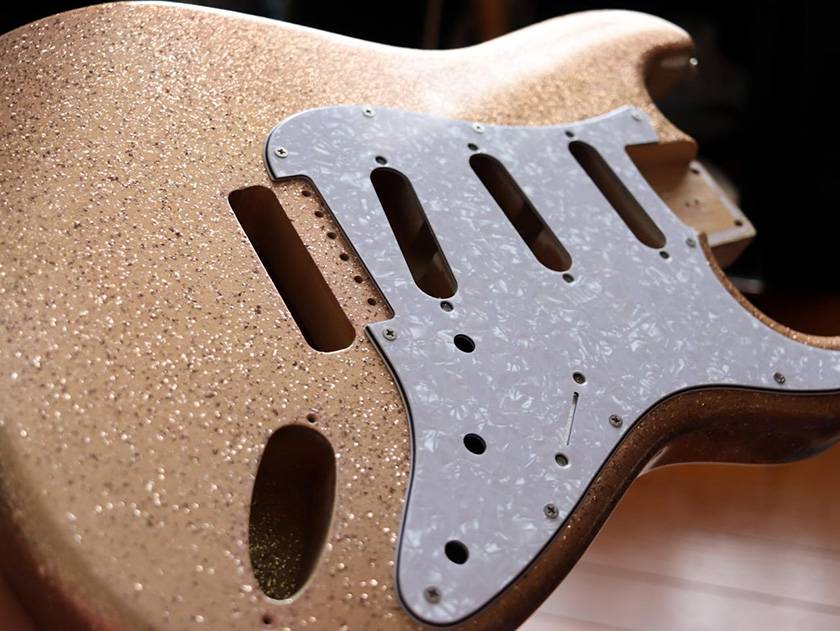
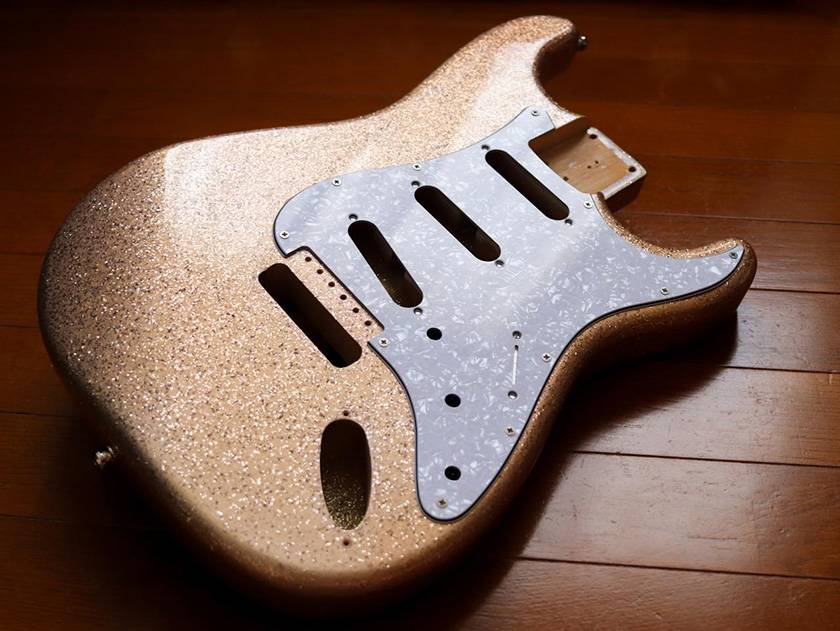
For the new pickguard, I chose a pearl white one.
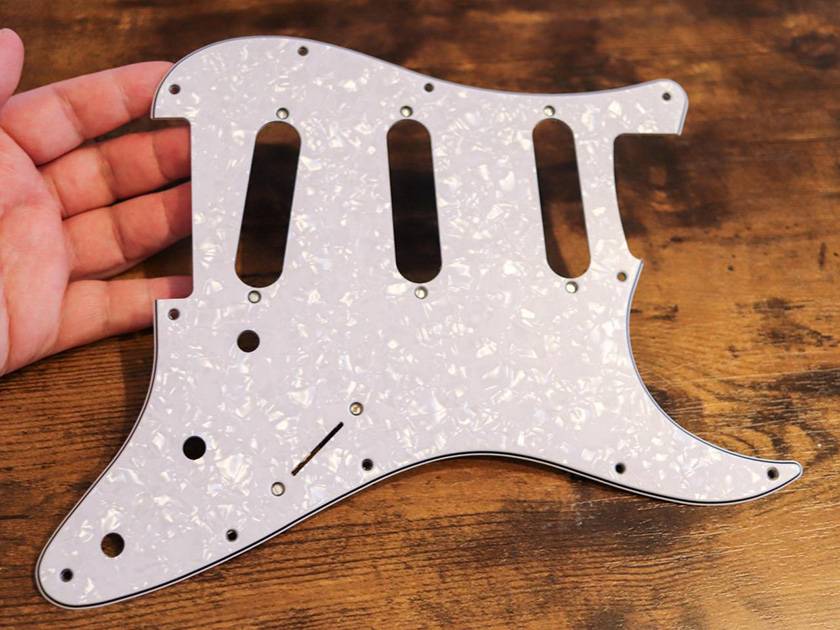
For the new pickguard, I chose a pearl white one.
Many pickguards come with a protective vinyl film on the surface. If it’s difficult to remove, try lightly warming it up with a hair dryer or even placing it in a heated space like under a kotatsu. This softens the adhesive and makes peeling it off much easier.
Replacing a pickguard check-list!
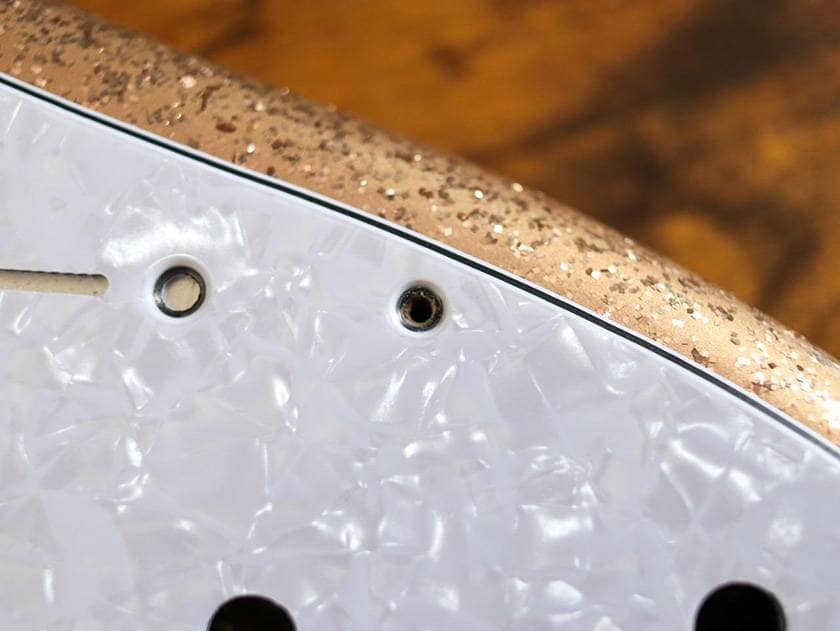
When replacing a pickguard with a non-genuine (aftermarket) part, it’s common for the screw holes not to line up perfectly. In that case, you’ll need to do two things: fill the old screw holes and drill new ones.
Let’s get started!
Step 1: Apply masking tape around the screw holes
Place masking tape around each existing screw hole to protect the finish and help guide your work. This step also helps prevent glue from seeping onto the body and keeps things tidy when filling the holes.
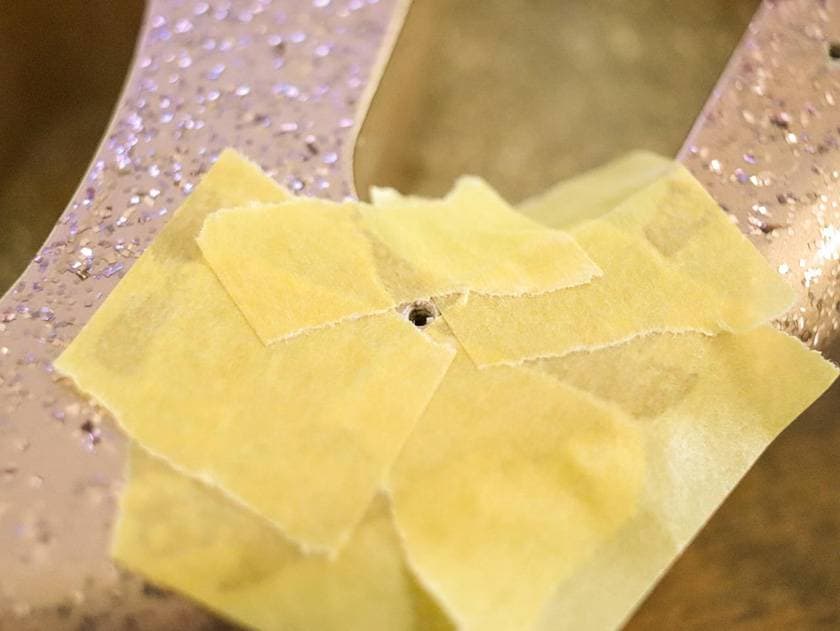
Surround the Screw Holes with Masking Tape
What you’ll need for this step:
- Masking tape
The original screw holes will be filled using tight bond glue and toothpicks. Before doing that, place masking tape around each hole to prevent glue overflow or accidental scratches when trimming the excess wood with a cutter. This precaution helps protect your guitar’s body finish and keeps your workspace neat during the filling process.
Filling the Holes with Tight Bond and Toothpicks
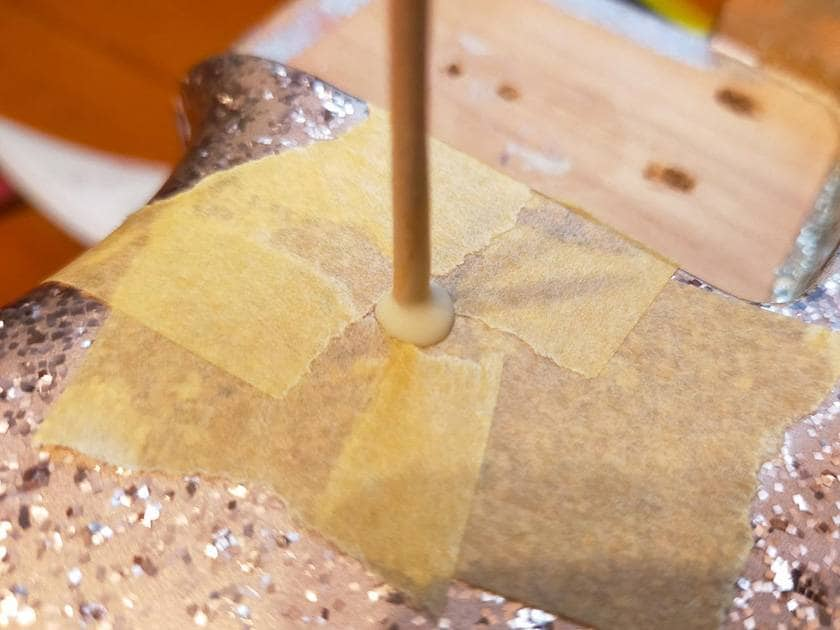
The scene of a toothpick coated in Titebond being inserted into a screw hole.
What you’ll need for this step:
- Toothpicks
- Tight bond glue
- Tissue
- Nippers
- Cutter
Apply a small amount of tight bond glue to the tip of a toothpick, then insert it into the screw hole. The ideal amount of glue is just enough for it to slightly overflow from the hole, as it’s shown in the reference image. Once the glue is applied and the toothpick is inserted, wipe away any excess glue with a tissue to keep the surface clean.
Once you’ve completed the same process for all the holes you want to fill, allow the glue to dry until the toothpicks are securely set. It took about 30 minutes for the glue to fully harden for my case.
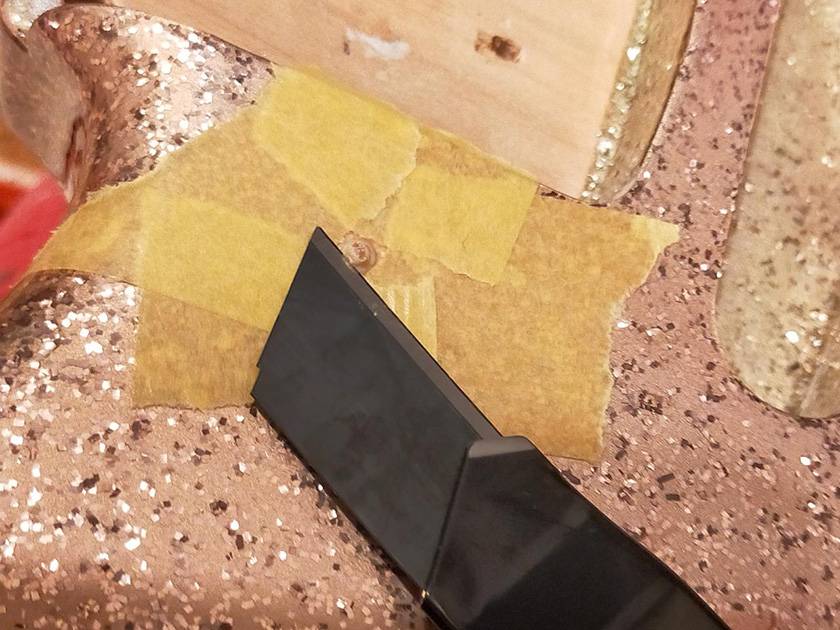
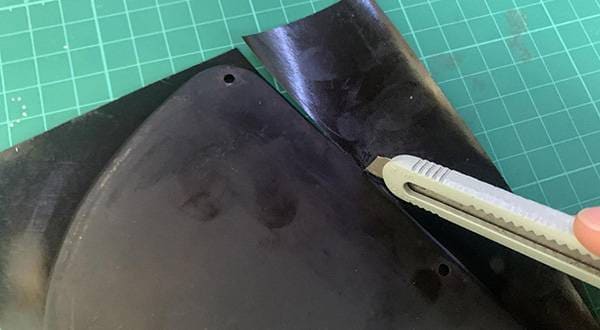
It is easier to cut if you hold the cutter blade out longer and move it in small increments like a saw.
To trim the toothpicks, start by cutting them short with nippers. Then, using a utility knife, shave off any small protrusions to make the surface flush with the body. For easier cutting, extend the blade slightly and move it in short, saw-like strokes. This will help you get a clean, even finish without damaging the surrounding area.
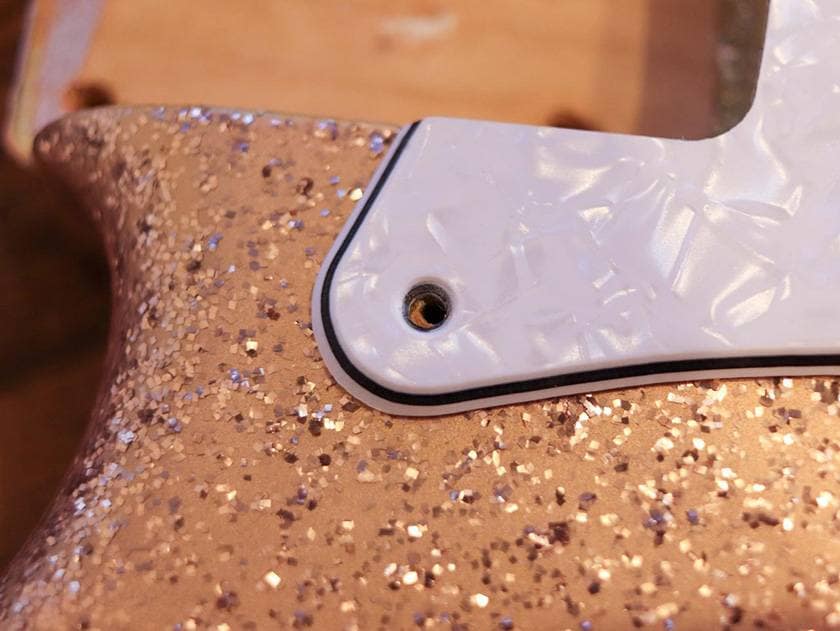
Once you’ve opened the new screw holes and attached the pickguard, the job is complete!
I adhered the pick guard temporarily to the body
What to use for this work:
- Masking tape
- A pre-drilling cone (or an electric drill)
In this step, temporarily fix the pickguard in place on the body using masking tape so it doesn’t shift during drilling. After filling the old screw holes, avoid the temptation to drive in new screws right away. Doing so can damage the finish or wood, and it may make it difficult to drill straight and accurate holes.
To prevent issues like these, always use a pilot drill (or hand drill) to create guide holes before inserting the screws. This not only ensures a clean fit but also helps maintain the integrity of the guitar body. Once all the holes are properly drilled, you can screw in the pickguard securely and enjoy the refreshed look of your guitar!
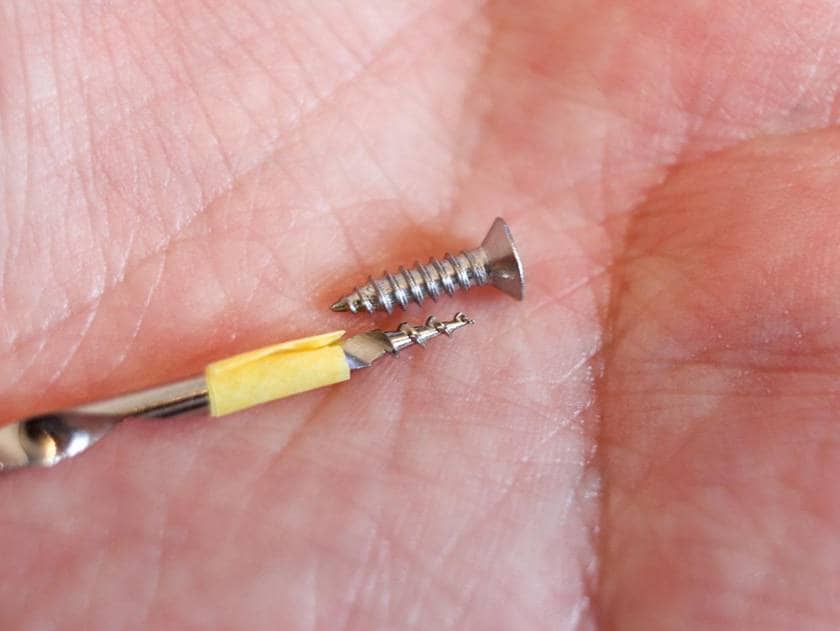
Marking your pilot drill makes the job easier!
When I asked a staff member at a home improvement store about pilot hole depth, they advised that the ideal depth is about 70% to 100% of the screw’s length, and the hole’s diameter should be slightly smaller than the screw itself. Both are too shallow and too deep which are not ideal, so to keep things accurate, place a piece of masking tape on the drill bit as a depth marker before starting the work.
>With this visual guide in place, you can confidently drill clean and consistent pilot holes using your pilot drill. This step ensures the screws go in smoothly and hold securely without damaging the body.
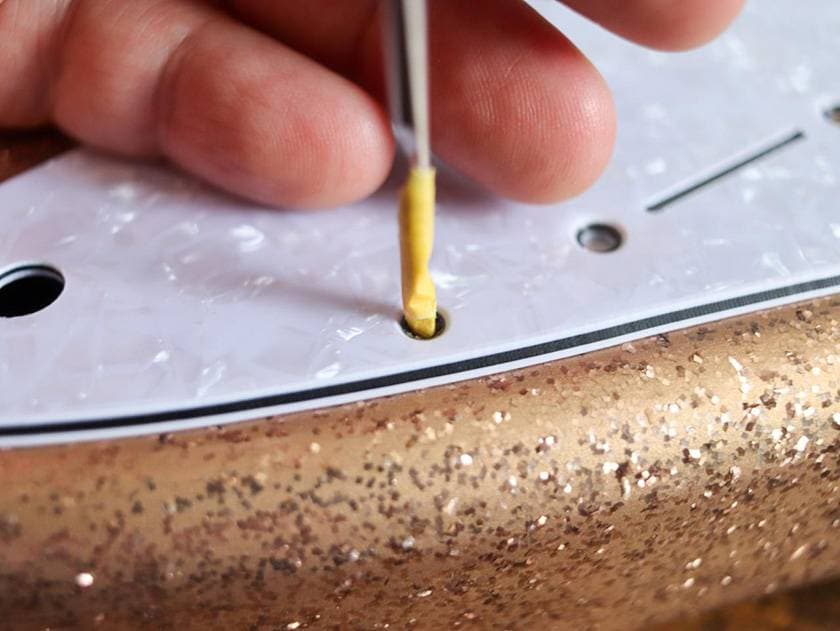
Drilling a pilot hole with a gimlet.
Adhere the pickguard temporarily to the body using masking tape, then begin drilling pilot holes at the desired screw positions using your pilot drill.
Since the diameter of the pilot holes is relatively small, the drilling went smoothly without needing much force.

Pilot holes are now done!
For a first-time attempt, I think it turned out pretty well.
Once the holes are ready, all that's left is to attach the pickguard. In the case of a Strat-style guitar, you'll want to complete the wiring before installing the pickguard. For detailed instructions on wiring, check out Sound House’s article linked below.
Related article: [Sound House | Wiring of Parts]
And with that, the pickguard replacement is complete!
Tips for Choosing a Stratocaster Pickguard
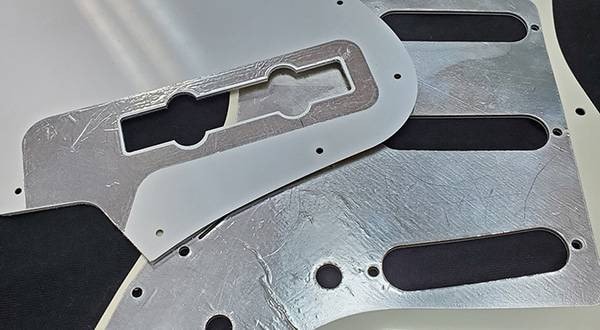
Pickguards come in a wide variety of materials and colors.
If you're replacing a pickguard on a classic Strat-type guitar, such as a Fender Stratocaster, it’s helpful to know which model year your guitar is based on. This makes the process much smoother, especially since pickguard screw hole patterns can vary between different eras.
Examples of Stratocaster Pickguard Types:
- 1957 style: Pickguard is secured with 8 screws.
- 1962 style: Pickguard is secured with 11 screws, with an additional screw hole between the neck and middle pickups, near the top.
- 1972 style: Pickguard also uses 11 screws, but the extra screw is above the middle pickup, slightly angled.
If you’re unsure what year your Strat is modeled after, you might be able to determine it by counting and examining the position of the pickguard screw holes.
Transform Your Guitar with a Pickguard Swap!
Changing the pickguard is a great way to give your guitar a fresh look. Even if the screw holes don’t align perfectly, don’t worry! Simply fill in the old holes and re-drill the new ones to make it work. The experience of modifying your guitar with your own hands offers a different kind of satisfaction compared to just playing it. It’s a fun and rewarding project, so give it a try!
The “sound & person” column is made up of contributions from you.
For details about contributing, click here.


 ギターパーツの沼
 配線カスタマイズ 第1回
 パーツの配線を知ろう
 ギターのお手入れ
 お手入れに必要な道具
 ギターの各部名称