Hello, this is Conservario.
Today, I’ll introduce a playing technique called ‘three-finger’. It’s not a strumming technique but an arpeggio-based technique.
This style works perfectly for quieter songs. Please read through to the end and master it!
■ Master the Three-Finger Technique
As the name suggests, the three-finger technique uses three fingers:
The thumb, index, and middle fingers of the right hand.
By combining these fingers, you can either play them together or one at a time to create the three-finger technique.
However, it’s not just about randomly using three fingers to play.
There is a well-known way to play it, so let’s start by trying it out.

Looking at the sheet music, it might seem a bit complicated. But if you play it slowly and in order, you’ll find it surprisingly simple.
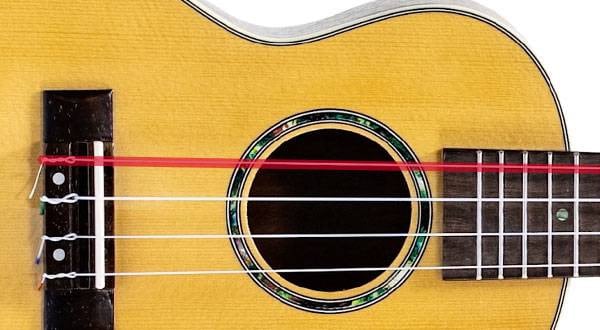
① Play the 4th and 1st strings together with the thumb and middle finger.
② Play the 3rd string with the thumb.
③ Play the 2nd string with the index finger.
④ Play the 4th string with the thumb.
⑤ Play the 1st string with the middle finger.
⑥ Play the 3rd string with the thumb.
⑦ Play the 2nd string with the index finger.
These are the steps written out. The first step is to play the 4th and 1st strings together.
The thumb and middle finger will play the two outer strings. This simultaneous playing can be difficult for some people.
The goal is for the sound to be a single ‘pop’, but at first, it might sound like two separate notes (‘pop-pop’).
Focus on playing both strings at the same time, and practice getting them to sound together.
By the way, the thumb moves downward, and the middle finger moves upward, both toward the inside of the strings.
Some people mistakenly play both the thumb and middle finger downward like a strumming, so be careful.
After this, you play each string one by one: 3rd string, 2nd string, 4th string, 1st string, 3rd string, 2nd string.
Think of it as alternating between the inner two strings and the outer two strings. Choose a mental approach that makes it easier for you to play.
For those who find it hard to remember which string to play and which finger to use, it may help to think of fixing the finger to the string.
The index finger always plays the 2nd string, and the middle finger always plays the 1st string. This rule never changes. Even when you play the 4th and 1st strings together at the beginning, the middle finger still plays the 1st string.
The index finger will never play the 1st string, and the middle finger will never play the 2nd string. If you find that your finger and string combination doesn’t match, fix it immediately.
If you use your fingers casually, you’ll end up playing a different technique, not the three-finger technique. At first, practice while being very conscious of your right hand’s finger usage.
Once you get used to it, it’ll become easier.
The index and middle fingers are fixed to certain strings, but the thumb alternates between the 4th and 3rd strings.
Look closely at the sheet music. When you focus on just the thumb, it’s just alternating between the 4th and 3rd strings.
Match the 4th, 3rd, 4th, and 3rd strings with the count of “one, two, three, four.” Finding the pattern in how you play is very important.
If you try to just process the numbers written in the tab without understanding the pattern, it can become overwhelming. Once you recognize patterns, you’ll be able to play much more smoothly.
The three-finger technique may seem complex because of the movement of three fingers, but once you break it down, it’s not that complicated. Practice slowly and carefully while keeping the finger movements in mind.
■ Summary
I’ve introduced how to play the three-finger technique and some important points to remember.
Personally, I think this technique works well for genres like enka (Japanese ballads) and country music.
If you play the Am chord and use the three-finger technique, it will instantly create the feeling of enka.
Of course, it works in other genres too, so try incorporating it into your songs and experiment.
It’s best used for quieter songs, but it can also be used for upbeat and fast songs—though it gets quite challenging!
Many experts in the country music world (though not on ukulele, but on guitar or banjo) are masters of this technique, so if you want to perfect it, be sure to check them out.
Lastly, a note about posture. For those who usually support the ukulele with all four fingers except the thumb:
When using the three-finger technique, you’ll need to use the index and middle fingers to pluck the strings, so you won’t be able to support the ukulele in that way.
While you can support it with your ring and little fingers, considering the movement of the index and middle fingers, this isn’t the best form.
For the three-finger technique, it’s recommended to support the ukulele with your elbow or arm.
If that’s difficult, you can place the ukulele on your lap. Find the most comfortable form for you.
Thank you for reading to the end!
The “sound & person” column is made up of contributions from you.
For details about contributing, click here.


![[Enjoy Your Ukulele Even More!] Play Stylishly with Arpeggios](/contents/uploads/thumbs/5/2022/1/20220110_5_16096_1.jpg)
![[Enjoy the Ukulele Even More!] Easy Way to Play Strokes With Your Thumb](/contents/uploads/thumbs/5/2021/12/20211230_5_15998_1.jpg)

 バンドあるある相談
 ウクレレのチューニング方法
 ウクレレの各部名称
 ウクレレの種類
 ウクレレスタートガイド
 ウクレレ初心者講座