


![]()
- Wireless Equipment
- WIRELESS MIC
- Wireless / Lavaliers
- Saramonic/UwMic9 Kit1
Saramonic / UwMic9 Kit1


Variations
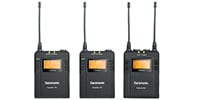

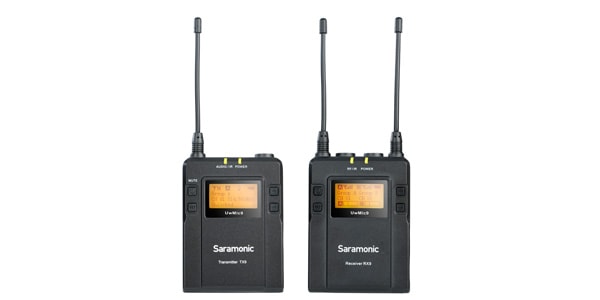
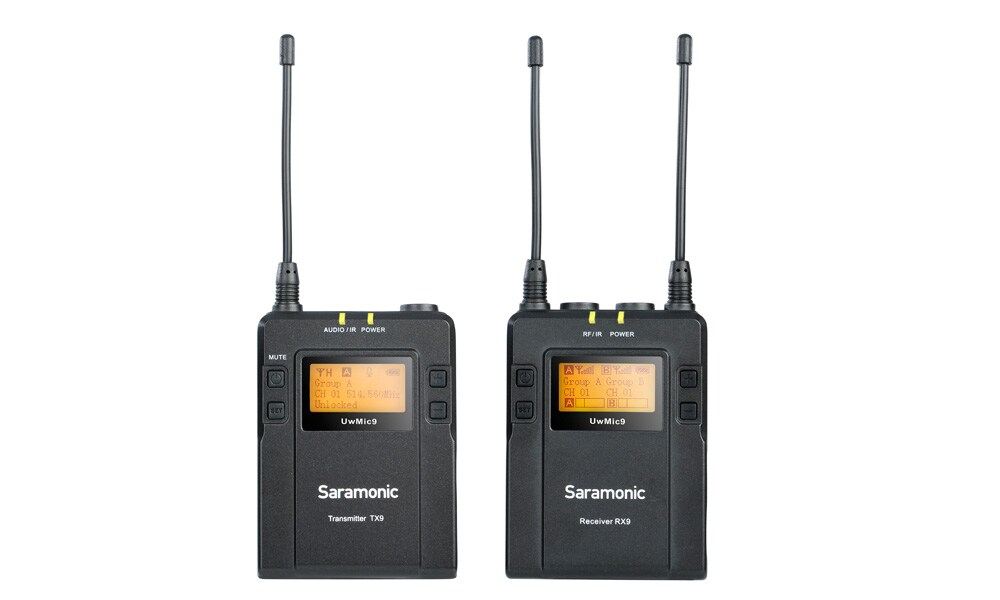
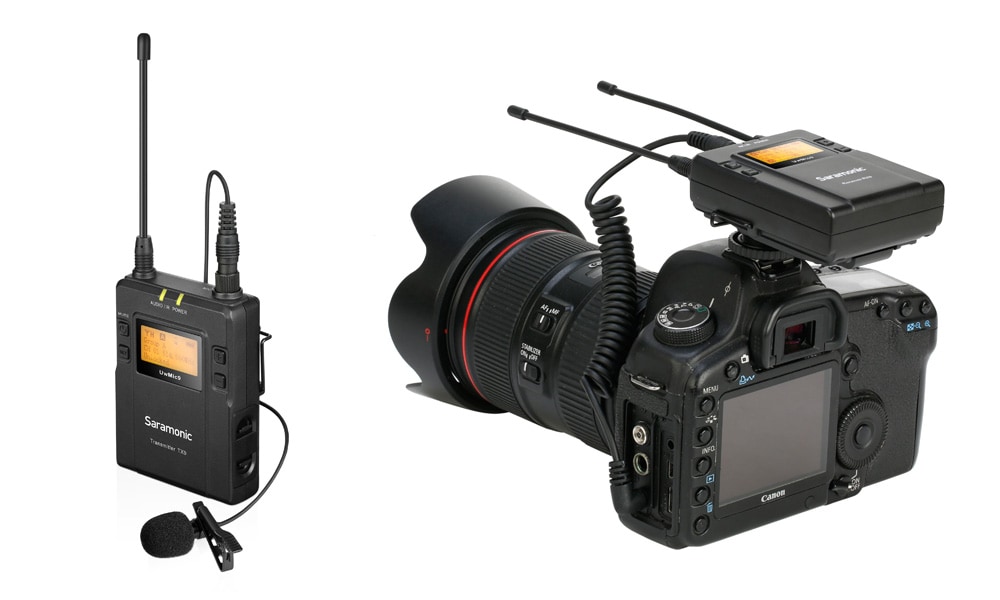
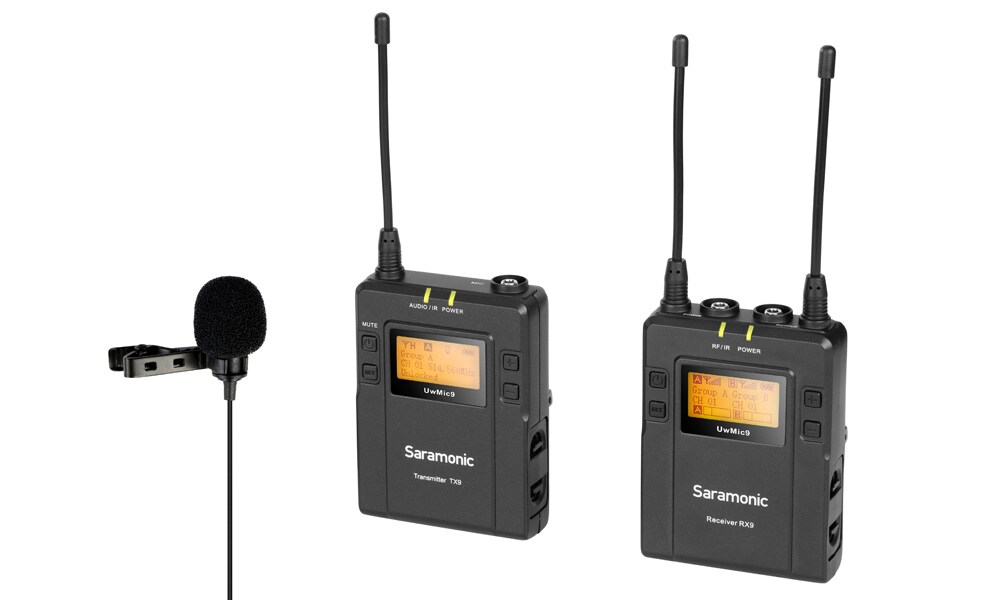
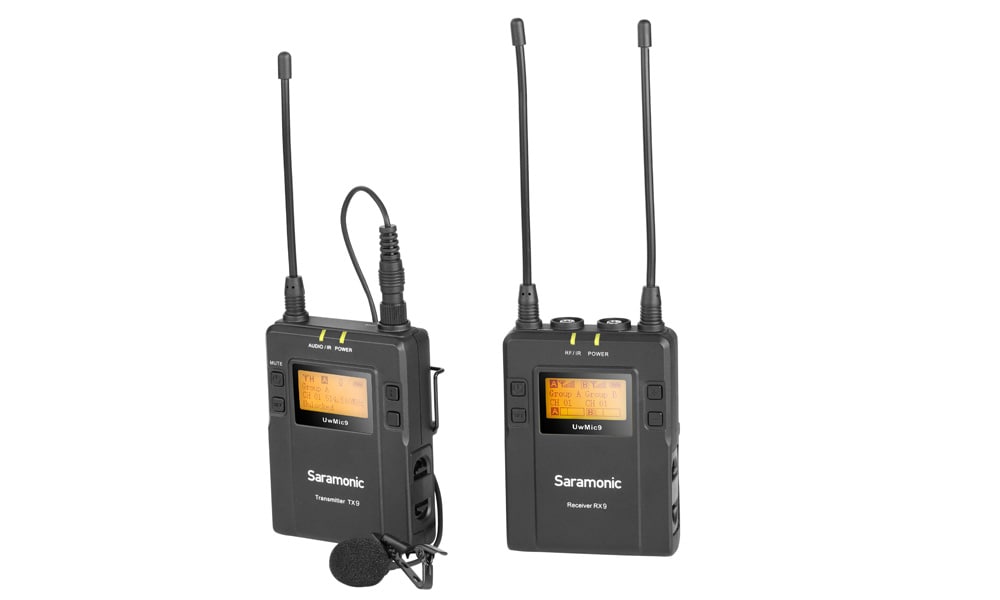
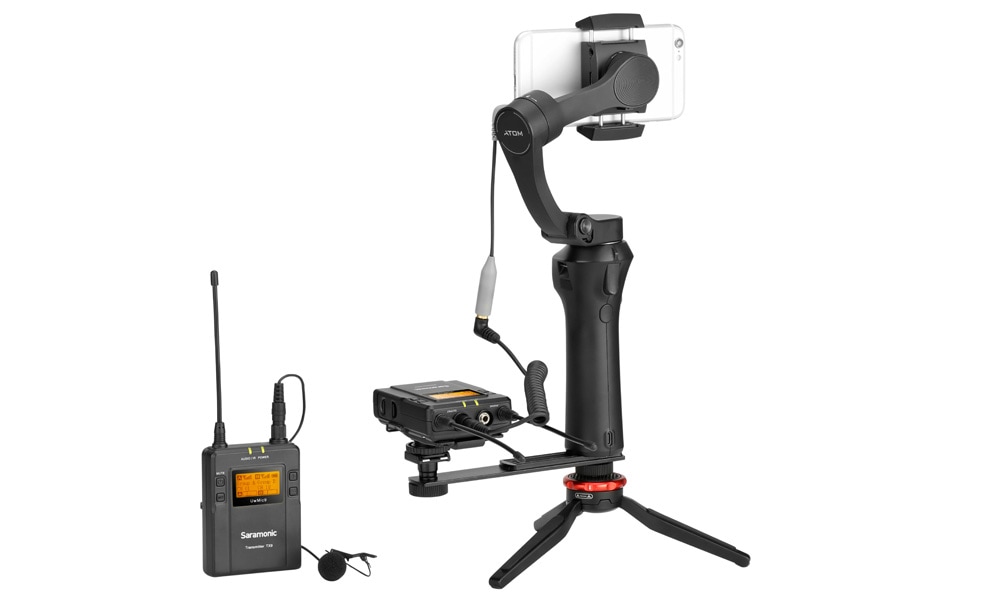
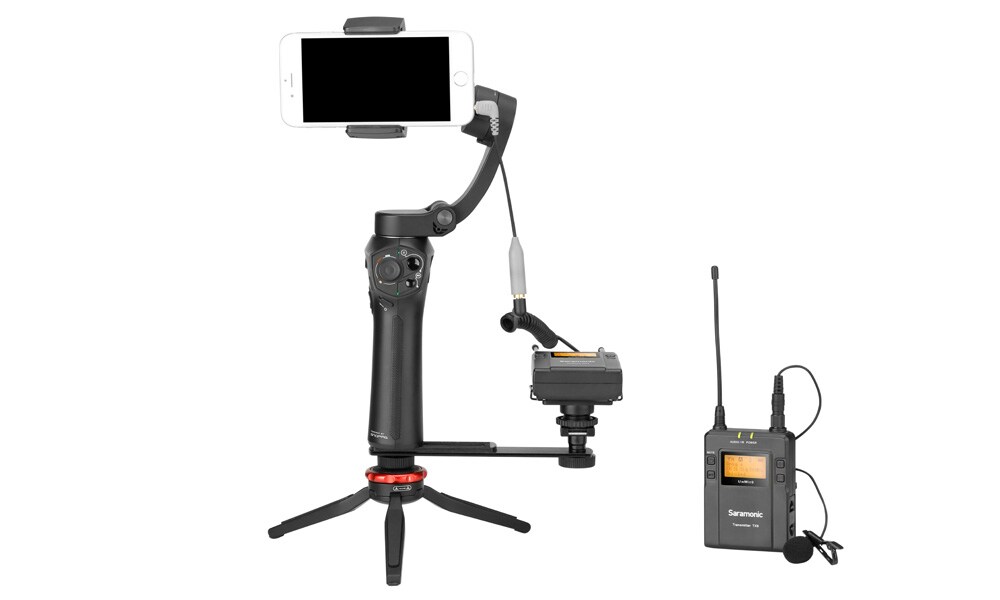
A wireless system that includes a camera-mountable receiver and a transmitter with a 3.5mm mini jack input. The receiver has a headphone input that allows real-time monitoring, making it convenient for shooting with cameras that do not have a monitor function. The transmitter is equipped with a mute function. A lavalier microphone with a clip is included, so you can use it from the day it arrives. Ideal for video shooting on YouTube, interviews, etc.
■Wireless lavalier microphone system 2ch can be used simultaneously 806.125MHz - 809.500MHz Headphone monitoring possible Number of units that can be used in the same area: Up to 2 sets UwMic9 RX9 receiver x1 UwMic9 TX9 transmitter x1 Clip-on lavalier microphone x1 Transmission method: PLL Synthesizer Maximum reach: Up to 60 meters Output connector: 3.5mm mini jack Power requirements: 2 AA batteries Weight: Approximately 218.7g (excluding batteries) External dimensions: 170.9 x 63.5 x 30.0 mm Transmission type: PLL Synthesizer Maximum reach: Up to 60 meters Frequency band: 806.125MHz - 809.500MHz Signal to noise ratio: 70 dB or more Audio Input Connector: 3.5mm mini jack Power Requirement: 2 x AA batteries Audio Input: 3.5mm TRS lavalier microphone input Weight: Approx. 211.4g Dimensions: 170.9 x 63.5 x 30.0 mm Set the receiver channel using the following method. ① Using the Auto Scan function 1. Use the + or - button to display the Auto Scan screen. 2. Press and hold the SET button to select "Auto scan?" 3. Press the SET button to confirm. 4. The channel with the least noise and interference will be displayed and "Use CH..." will be displayed. 5. Press the SET button within 20 seconds to confirm the channel. ② Setting the receiver channel manually 1. Use the + or - button to display the channel menu on the receiver. 2. Press and hold the SET button to select the menu. 3. Use the + or - button to select the desired channel. 4. Shortly press the SET button to confirm. Once you have finished setting up the receiver, follow the steps below to set up the transmitter. 1. Use the + or - button to display the "Match with TX" menu on the receiver. 2. Use the + or - button to display the "Match with RX" menu on the transmitter. 3. Press and hold the SET button to select the menu, then press briefly to confirm. 4. Place the infrared transmitter port on the receiver close to the infrared detector on the transmitter. 5. "Sync finished!" will be displayed on the screen and the frequency to be used by the transmitter will be set.
関連商品
-
¥220(incl. tax)
 In Stock
 -
¥2,980(incl. tax)
In Stock
 CLASSIC PRO / CPB3X
 Saramonic / SR-XM1
商品レビューProduct Review


不適切な投稿として報告しますか?
理由
ご協力ありがとうございました
投稿を削除しますか?
投稿されたレビューを削除しました。
Saramonic
UwMic9 Kit1
Item ID:299422
Regular Price:¥39,380(incl. tax)
¥21,800(incl. tax)
218Pt(1%)Detail
- 218Pts
通常ポイント
- 218Pts
Total
限定特価
- In Stock
- In Stock, can be shipped when order is confirmed.
- Low Stock
- Low Stock, may be sold out soon.
- Scheduled date
- Expected to arrive at Sound House on this date.
- TBA
- Expected date of arrival at Sound House to be determined.
- Back Order
- It needs to be orderd from the manufacturer. Please inquire about the estimated date of arrival.
- Mfr. Delivery
- Must be ordered from manufacturer. Please inquire about the estimated date of arrival.
- Download
- Only the serial number will be sent to your registered email address.
- Special Order
- Made to order item or must be ordered from manufacturer. May take several weeks or months.
- No Longer Available
- Product is no longer available due to having been discoutined or other reasons.
Rating

この商品に関連するセレクションRelated Articles

-
 Discount Sale
-
 Outlet
-
 New Arrivals
-
 Podcast (streaming)
-
 Headphones / Earphones
-
 Microphones
-
 Wireless Equipment
-
 Speakers
-
 Power Amps
-
 Mixers
-
 Processors
-
 Portable PA Systems
-
 Recorders
-
 Karaoke
-
 Guitars
-
 Basses
-
 Ukuleles
-
 Drums & Percussion
-
 Pianos / Synthesizers
-
 Wind Instruments
-
 Stringed Instruments
-
 Japanese Instruments
-
 Harmonicas, Other
-
 Software
-
 DJ & VJ
-
 Stands
-
 Cables & Connectors
-
 Racks & Cases
-
 Lighting
-
 Stage & Truss
-
 Video Equipment
-
 PC PERIPHERALS
-
 Power Supplies
-
 Studio Furniture
-
 Household Items, Other
-
 Alcoholic Beverages
Search by Brand
Brand List


- Sound House
- 〒286-0825 14-3 Shinizumi , Narita City, Chiba
- Monday-Friday 10:00-17:00
- Narita Call Center
- TEL. 0476-89-1111
- FAX. 0476-89-2222
- Tokushima Call Center
- TEL. 0885-38-1111
- FAX. 0885-38-1100
- Showroom Hours
- Monday-Friday 10:00-17:00
closed on Saturdays, Sundays and Holidays
© Sound House

すべてのレビューを見る