


![]()
- SOUND HOUSE Beginner's Guide
- Stringed Instruments Beginner's Guide
- Beginner's Guide to Violin
- How to Press Down on the Strings with the Left Hand Fingers
How to Press Down on the Strings with the Left Hand Fingers
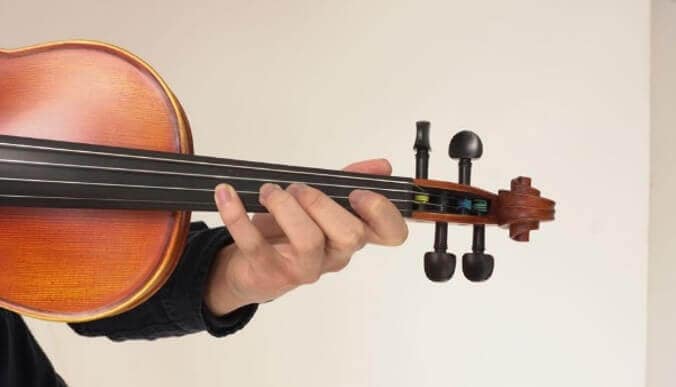
For those who wonder how to press down the violin strings with the left hand, here is a tutorial on how to do just that.
Names of the Fingers on the Left Hand
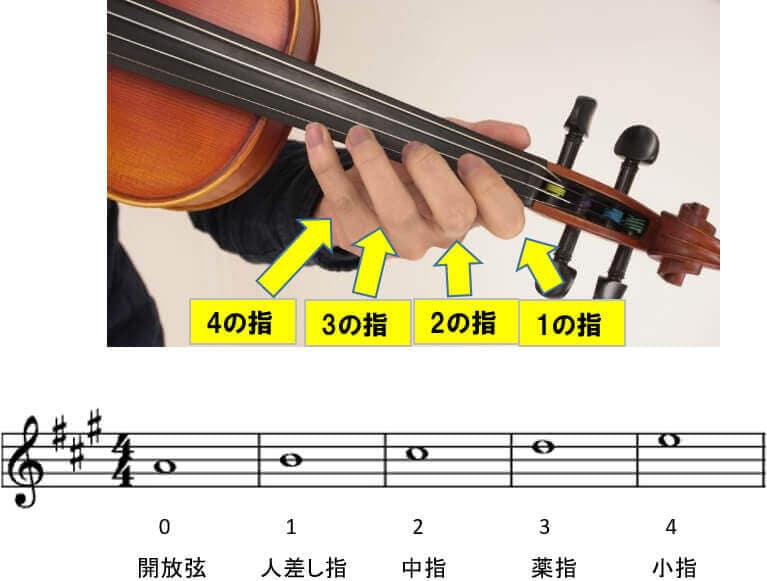
In order to make it easier to understand which finger should be pressing down on which string for different notes on the violin, each finger has a number. As shown in the picture, fingers are labeled as one, two, three, and four, starting from the index finger as the first finger to the pinky finger as the fourth finger. 0 refers to an open string that is played without holding down any strings.
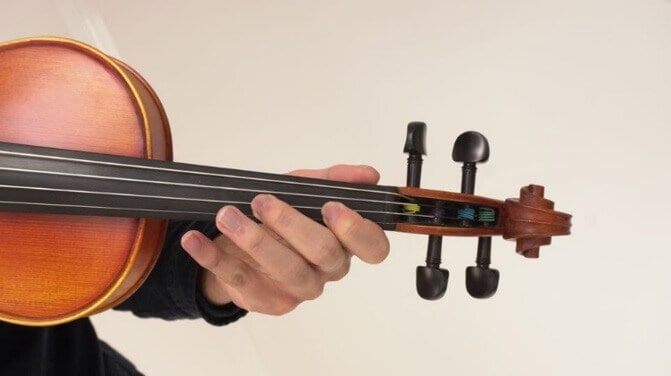
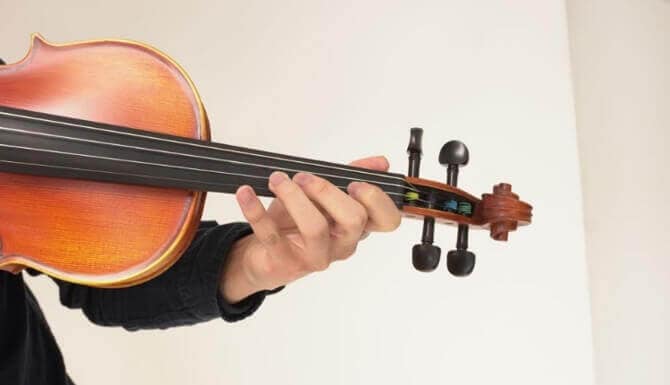
How to Press Down on the Strings with the Fingers on the Left Hand
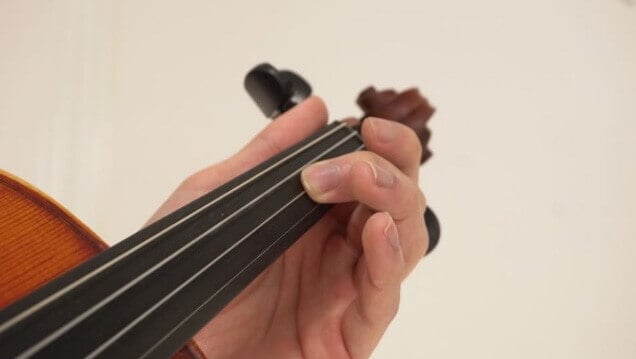
While pressing down on the strings with your fingers, do not press down on your fingertips or nails, but the finger pads should be pressing down on the strings as shown in the picture below. This makes playing with an accurate intonation easier without damaging your fingers or nails.
Introducing the Basic Scale - A Major
This section is going to talk about the fingerings for the basic A major scale that all violinists usually learn first. “Twinkle Twinkle Little Star” and “Hänschen Klein” are relatively easy if you can master the A major key!
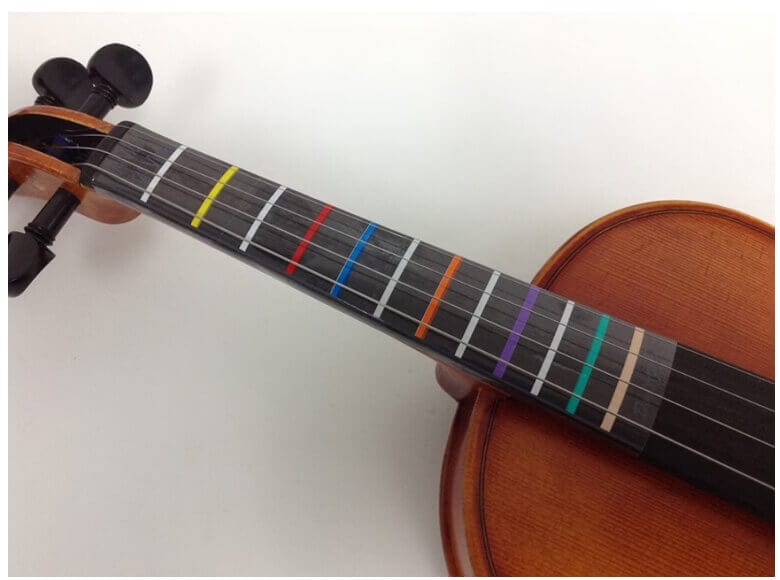
In the following chapters, fingerboard stickers will be used so you can see the position where the fingers should be pressing.
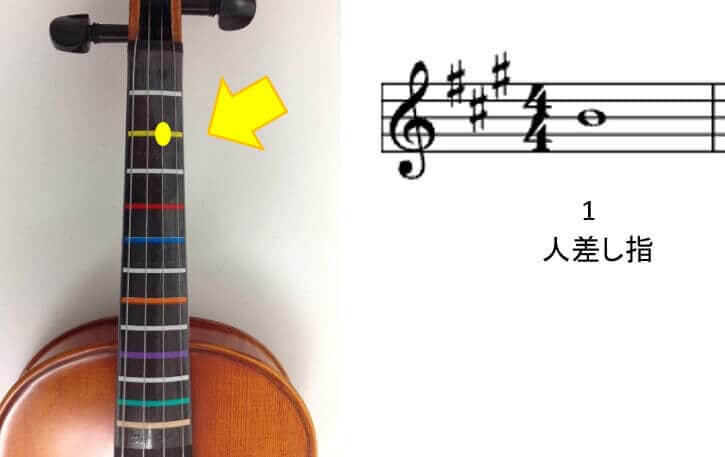
How to Play First Finger B♮ (natural)
To play B♮ on the violin, press down onto the A string using only the first finger (index finger) as shown in the picture on the left. The position is marked with a yellow dot on the yellow line in the picture on the right.
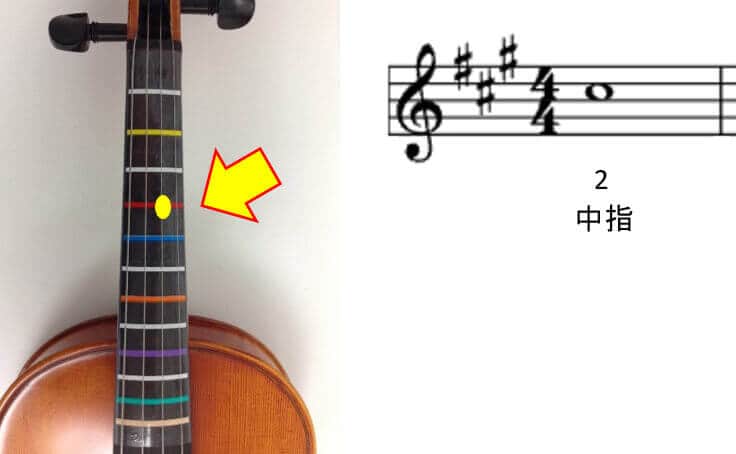
How to Play Second Finger C# (sharp)
To play the note C# in A major, press your second finger (middle finger) down on the same A string as you played B♮, but extend your second finger to the red line of tape, creating enough space for one finger to be able to fit in between the B♮ and the C# positions.
C# is marked with a yellow dot on the red line in the picture on the right.
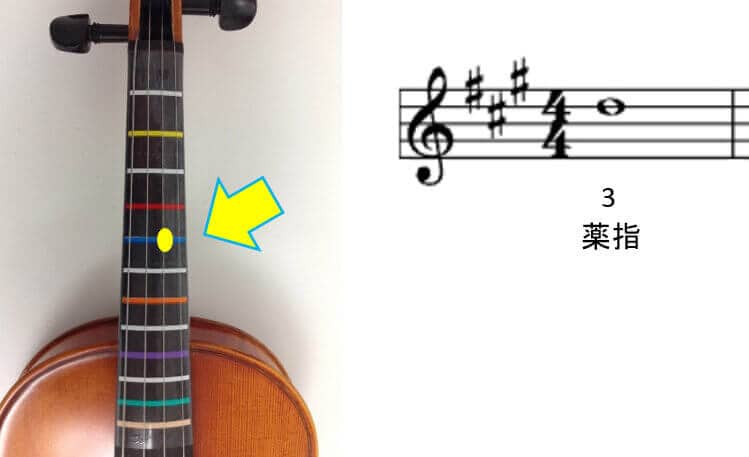
How to Play Third Finger D♮
The note D♮ in A major can be played by using the third finger (ring finger) to press down on the A string while also leaving the second finger on C#. The position is marked with a yellow dot on the blue line in the picture on the right.
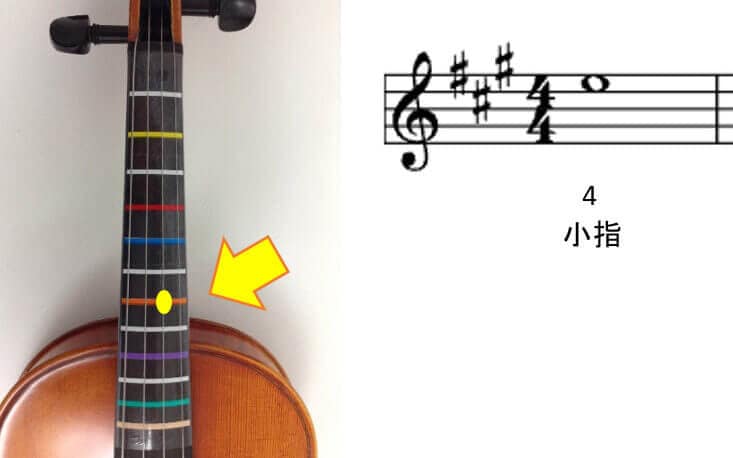
How to Play Fourth Finger E♮
E♮ in A major can be played by pressing down the fourth finger (pinky finger) on the A string with enough space for one finger between the D♮ and the E♮ positions. The orange tape marks this position in the picture on the right.
Recommended Ways to Practice
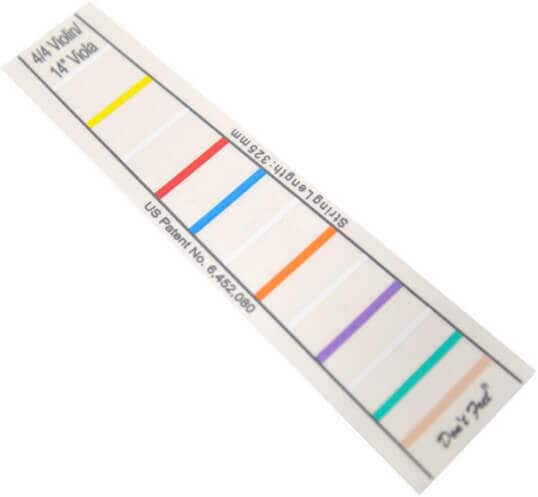
It is recommended to practice first on the A string. When you get used to playing notes on the A string, you can then move onto the E, D, and G strings. If you’re unsure about where to press down on the string, use fretboard stickers like the ones shown below!
-
 Discount Sale
-
 Outlet
-
 New Arrivals
-
 Podcast (streaming)
-
 Headphones / Earphones
-
 Microphones
-
 Wireless Equipment
-
 Speakers
-
 Power Amps
-
 Mixers
-
 Processors
-
 Portable PA Systems
-
 Recorders
-
 Karaoke
-
 Guitars
-
 Basses
-
 Ukuleles
-
 Drums & Percussion
-
 Pianos / Synthesizers
-
 Wind Instruments
-
 Stringed Instruments
-
 Japanese Instruments
-
 Harmonicas, Other
-
 Software
-
 DJ & VJ
-
 Stands
-
 Cables & Connectors
-
 Racks & Cases
-
 Lighting
-
 Stage & Truss
-
 Video Equipment
-
 PC PERIPHERALS
-
 Power Supplies
-
 Studio Furniture
-
 Household Items, Other
-
 Alcoholic Beverages
Search by Brand
Brand List


- Sound House
- 〒286-0825 14-3 Shinizumi , Narita City, Chiba
- Monday-Friday 10:00-17:00
- Narita Call Center
- TEL. 0476-89-1111
- FAX. 0476-89-2222
- Tokushima Call Center
- TEL. 0885-38-1111
- FAX. 0885-38-1100
- Showroom Hours
- Monday-Friday 10:00-17:00
closed on Saturdays, Sundays and Holidays
© Sound House
