


![]()
- Sound House lessons for beginners
- Truss course
- How to assemble trusses
Truss course|How to assemble trusses
How to assemble trusses
Table of contents
Truss assembly method
-

Accessories
・Connecting brackets
・Pins
・Clips -

Step 1
Fit the connecting bracket to the truss and install the pin
-

Point
If it is difficult to insert the pin, please use a hammer, etc.
-

Step 2
Attach the clip to fix the pin
-

Step 3
Connect the trusses
-

Point
Do not insert one point all the way at once, but insert them evenly and little by little at all points.
-

When it is difficult to insert the truss
It can be easily assembled by using the optional rigger hand.
* Only compatible with trusses with a width of 29 cm. -

Step 4
Complete by installing all fittings
Accessories used for assembly
Connecting bracket TRUSS JOINT

Normally, it can be assembled with the metal fittings included with each part of the truss, but if you want to make a complicated structure, you may need to purchase additional fittings. Please refer to the cheat sheet "How to choose and estimate" to see if you need additional metal fittings.
- For 29 cm width:
- TRUSSJOINT
- For 22 cm width:
- TRUSSJOINT/22
- For 10 cm width:
- TRUSSJOINT/10
Connecting pins & clips
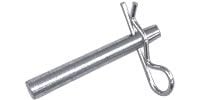
- For 29 cm width:
- TRUSSPIN
- For 22 cm width:
- TRUSSPIN/22
* We do not carry truss pins for 10 cm width.
Silencer

The silencer reduces the noise generated when hitting the head of the pin with a hammer when it is difficult to install a pin.
It is compatible only with the pin for 29 cm wide truss and cannot be used with the pin for 22 cm wide truss.
Rigger hand

An accessory that hooks on the brace of the truss and facilitates the connection of two trusses in the form of leverage.
Compatible with 29 cm wide trusses only. Bracing may bend when used on 22 cm wide trusses.
Frequently Asked Questions
- Q: The connecting bracket cannot be removed from the truss.
- A: The bracket can be easily pulled out by hitting with a hammer or heating the truss pipe.
- Q: Is it possible to combine trusses with different shapes?
- A: It is possible with square trusses and flat trusses.
Since the positions where the pins for the fittings are installed are different, a special fitting is required.
Viewing the truss from above, the metal fittings used differ depending on whether it will be connected to the right side or the left side of the square truss.

- 22 cm width for right side
- TRUSSJR24/22
- 22 cm width for left side
- TRUSSJL24/22
-
 Discount Sale
-
 Outlet
-
 New Arrivals
-
 Podcast (streaming)
-
 Headphones / Earphones
-
 Microphones
-
 Wireless Equipment
-
 Speakers
-
 Power Amps
-
 Mixers
-
 Processors
-
 Portable PA Systems
-
 Recorders
-
 Karaoke
-
 Guitars
-
 Basses
-
 Ukuleles
-
 Drums & Percussion
-
 Pianos / Synthesizers
-
 Wind Instruments
-
 Stringed Instruments
-
 Japanese Instruments
-
 Harmonicas, Other
-
 Software
-
 DJ & VJ
-
 Stands
-
 Cables & Connectors
-
 Racks & Cases
-
 Lighting
-
 Stage & Truss
-
 Video Equipment
-
 PC PERIPHERALS
-
 Power Supplies
-
 Studio Furniture
-
 Household Items, Other
-
 Alcoholic Beverages
Search by Brand
Brand List


- Sound House
- 〒286-0825 14-3 Shinizumi , Narita City, Chiba
- Monday-Friday 10:00-17:00
- Narita Call Center
- TEL. 0476-89-1111
- FAX. 0476-89-2222
- Tokushima Call Center
- TEL. 0885-38-1111
- FAX. 0885-38-1100
- Showroom Hours
- Monday-Friday 10:00-17:00
closed on Saturdays, Sundays and Holidays
© Sound House
