


![]()
- Lessons for Beginners
- Stringed Instruments Beginner's Guide
- How to Handle a Violin
- How to Change Violin Strings -Haste Makes Waste-
How to Change Violin Strings - Haste Makes Waste-
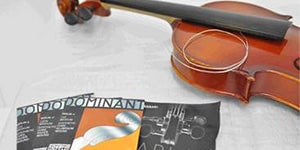
Since the strings of a stringed instrument are used frequently, they inevitably deteriorate or break. Even if a string is new, it sometimes breaks and needs to be changed.
Q&A for the Beginner Violinists
- When should I change the strings?
- The strings can be strung as long as they are in decent condition, but as they get older, you may not be able to keep pitch and the sound quality may grow worse.
There is no clear rule on how often you need to change them, but it may be a good idea to make your own rule, for example, once every 3 months based on the frequency you play violin. Keep a set of spare strings so you can change them anytime. - Is it possible to know when the strings have deteriorated or need to be replaced?
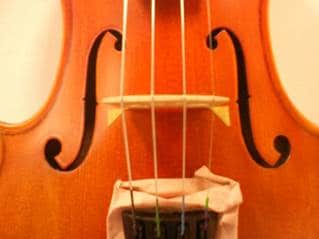
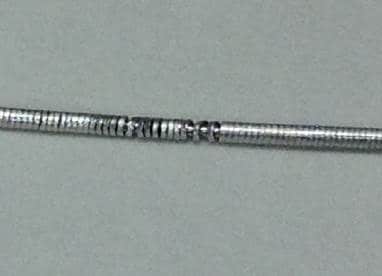 The violin strings are wound around the core wire. If you look closely at the strings and the windings are frayed, it is time to replace them. The picture shows a frayed steel winding. The parts of the string that tend to deteriorate first are the parts of the string that touch the bridge and the nut. These areas experience the most friction against the string and cause the string to bend and deteriorate. The E (1st) string is not usually a wound string, so you can judge by seeing if it has any rust or darkening and touch the string for roughness. After playing, use a cloth to wipe the area you touched.
- What kind of strings should I buy?
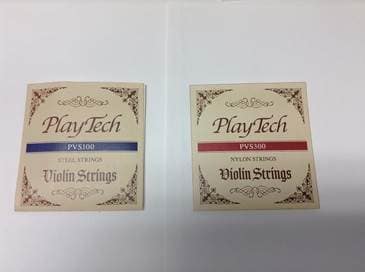 There are two types of strings: steel strings and nylon strings. Steel strings produce a clear sound and are easy to play as practice strings, but they are a little difficult to tune with pegs. Nylon strings produce a softer tone than steel and tuning the pegs is easier.
Playtech PVN244 or 344, electric violin PSV100BK, BR has steel strings.
Replacement Strings:Playtech Violin strings PVS100 (Steel) and PVS300 (Nylon) (The products are now under preparation)
Replacing the Strings
Now let’s start changing the strings. It seems there is no quick way to change strings. However, don’t rush and go at one step at a time.
1. Prepare a workspace
Clean up your work space and rest your violin on your lap. The violin is not stable on a flat surface, so use a cushion with a hollow middle and place the violin on it for stability. Once you become used to it, your lap will become a comfortable workbench.
2. Mark the position of the top before removing the old strings
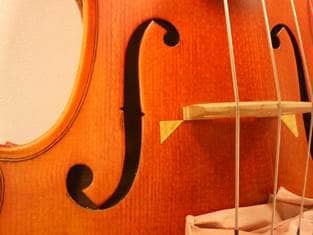
Beware! If you unstring all the strings at once, the bridge will collapse!
Cut out a sticker or some masking tape into triangles and mark one corner at the back end of the bridge foot so you can keep the original position of the bridge.
Place a folded tissue or cloth under the tailpiece so that the tailpiece adjuster parts do not accidentally scratch the body.
*NoteWhen releasing the tension on the strings, the sound post inside the violin body may collapse in rare cases.
If the sound post falls, do not proceed further. Please contact Sound House.
3. Removing the strings
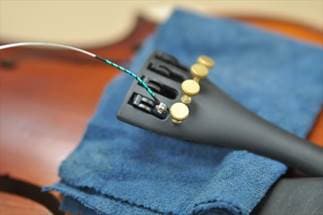
The round metal part on one end of the string is called the ball.
Hook the ball end into the keyhole-shaped slot on the tailpiece or the adjuster’s notch.
The hooked ball end may unhook due to the elasticity of the string during the stringing work. If necessary, use masking tape to lightly fix the string.
The length of the strings is generally designed to suit the size of the instrument.
The best order of stringing is:G (4th) String
E (1st) String
D (3rd) String
A (2nd) String
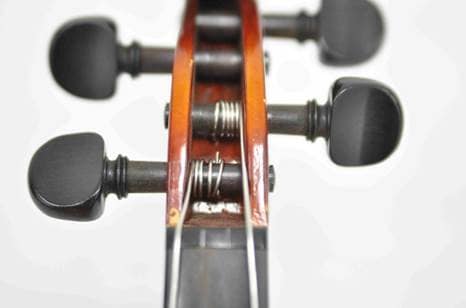
4. Insert the tip of the string into the peg hole, pull out the tip a little, and then start winding.

Beginning of winding
When turning the pegs, keep some tension in the strings and wind them so that they don't become loose. The object is to wind the string from the inside of the peg hole to wrap around the outside of the peg.
(Thick solder wire is used instead of the violin string to make it easier to see in the picture.)
5. Check the ball end on the tailpiece side
After winding the G (4th) string to some extent, check that the ball end of the string hasn’t popped out of the tailpiece. Also, leave enough tension in the string to keep the bridge standing after winding the E (1st) string.
6. Wind the E (1st) string
Wind the E (1st) string in the same fashion. The direction in which the strings are wound go in the opposite direction to the G string on the left and right. Wind the string from the inside to the outside.
7. Set the bridge once
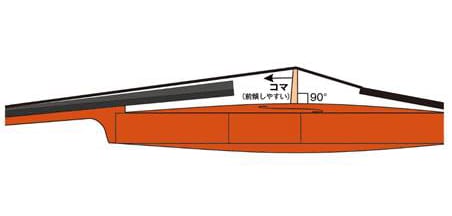
Set the bridge once when the two strings, G (4th) string and E (1st) string, are wound to some extent.
Now, remember from the “When you tune a violin, check if the bridge for tilting” part that was explained in the “Tune a Violin” section.
Before completely winding the strings, set the bridge at the marked original position and check the bridge tilt from the side. After this, the same procedure will need to be repeated often after tuning the D (3rd) string and the A (2nd) string.
8. Check the ball end again, and tune the strings
When you have finished winding all the strings, double-check the ball end to make sure it is hooked properly into the slot. If this is not properly inserted, the ball end may come off when tuning the strings.
While paying attention to the bridge tilting, wind the rest of the strings in the same way, and then just tune the strings.
New strings, especially nylon strings, take time for the pitch to stabilize. It is best to tune the strings often along with checking the bridge tilt.
Tuning a violin might feel like an insurmountable task just by reading the instructions, but you will get used to it the more you do it. Try to be calm when working on it so as not to damage the precious strings or the instrument itself that can happen when trying to attempt changing the strings in a hurry. It might be a bit exaggerated to say “haste makes waste”, but you will actually have an impeccably tuned instrument in less time if you stick to working at a slow, steady pace.
-
 Discount Sale
-
 Outlet
-
 New Arrivals
-
 Podcast (streaming)
-
 Headphones / Earphones
-
 Microphones
-
 Wireless Equipment
-
 Speakers
-
 Power Amps
-
 Mixers
-
 Processors
-
 Portable PA Systems
-
 Recorders
-
 Karaoke
-
 Guitars
-
 Basses
-
 Ukuleles
-
 Drums & Percussion
-
 Pianos / Synthesizers
-
 Wind Instruments
-
 Stringed Instruments
-
 Japanese Instruments
-
 Harmonicas, Other
-
 Software
-
 DJ & VJ
-
 Stands
-
 Cables & Connectors
-
 Racks & Cases
-
 Lighting
-
 Stage & Truss
-
 Video Equipment
-
 Computer Accessories
-
 Power Supplies
-
 Studio Furniture
-
 Household Items, Other
-
 Alcoholic Beverages
Search by Brand
Brand List


- Sound House
- 〒286-0825 14-3 Shinizumi , Narita City, Chiba
- Monday-Friday 10:00-17:00
- Narita Call Center
- TEL. 0476-89-1111
- FAX. 0476-89-2222
- Tokushima Call Center
- TEL. 0885-38-1111
- FAX. 0885-38-1100
- Showroom Hours
- Monday-Friday 10:00-17:00
closed on Saturdays, Sundays and Holidays
© Sound House
