


Cello string changes
Strings of stringed instruments are consumables, so they will always deteriorate or break. Even if they are new, they can break at any time. Broken or old strings should be replaced (also called re-tensioning).
Q&A for those who have not yet purchased
How soon should I change the strings?
Strings can be kept in place as long as they do not break, but as they get older, they may not play the correct pitch or the sound quality may deteriorate. Since it depends on the degree of wear, there is no definite rule on when to replace the strings, but it may be a good idea to decide when you want to replace them based on your own usage environment, for example, about 3 months. We recommend keeping a set of spare strings on hand.

Can I tell when strings have deteriorated and need to be replaced by myself?
Strings are made up of a core wire around which windings are wound. We recommend that you look at the strings carefully and replace them if the windings are frayed. The photo shows a steel string with a frayed winding. The parts where the strings are bent and subjected to force, such as the pieces and the upper nut, deteriorate quickly. The main criteria for judgment are whether or not there is any rust or blackening with the eye and whether or not the strings feel rough when touched by the finger. Another factor to consider is if you feel that the pitch has become unstable or the resonance has become dull. To prevent the strings from deteriorating as much as possible, wipe the areas touched by your hands with a cloth after you have finished playing.

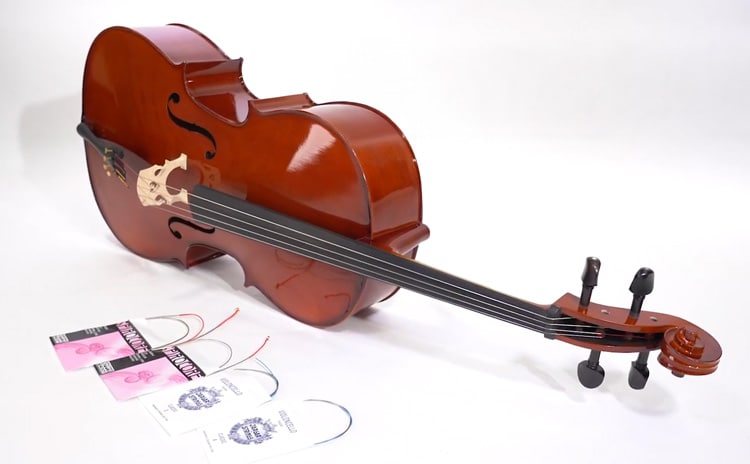
What kind of strings should I buy?
There are three types of strings: steel strings, nylon strings, and gut strings. Of these, steel strings are recommended for beginners.
The strings of larger instruments such as cellos and double basses are a little more prone to tuning deviations than those of violins and violas. Due to the characteristics of nylon and gut strings, even if they are tuned once, the strings often stretch and become unstable after a short period of playing. With this being said, steel strings are popular in cellos.
PLAYTECH Cello PVC44 is delivered to you with steel strings.
-Example of replacement strings
PLAYTECH / PSC100 Cello Strings Steel 4/4 Set、
Thomastik-Infeld / Cello string set Jargar Classic AD/Spirocore GC
How to change cello strings
01
First things first.
Place the cello on a stable surface. To prevent damage to the instrument, place a blanket or similar covering underneath.
02
Replace one string at a time

The basic rule is to replace strings one at a time. If all strings are removed at once, the position of the pieces and the soul post may become misaligned. Not only will this adversely affect the sound quality and playing comfort, but in the worst case, the soul post may fall over.
03
Remove the old strings

The recommended order for replacing the strings is from the bottom peg (string windings): 4th string, 1st string, 3rd string, 2nd string. Turn the pegs slowly to loosen the strings. At this point, it is important to loosen the strings slowly, because if you loosen them too quickly, the strings may bounce around and damage your fingers or the instrument.
Once the strings are sufficiently loosened, remove the ball end from the tailpiece, then remove the strings from the pegs.
04
String a new string


Hook the ball end of the new string into the hole in the tailpiece. Thread the string through the hole in the peg.
Next, bring the string to the side of the peg while passing it over the fingerboard and insert the tip into the string hole in the peg. Let the tip out a little before beginning to wind. Apply a light tension so that there is no slack, and wind the strings neatly from the inside to the outside so that the strings do not overlap.
When the strings are wound to a certain degree, check that the ball end on the tailpiece side has not come off.
05
Check the posture of the pieces

Once the replacement of the two strings, the fourth and first strings, is completed, check the posture of the pieces. It is important that the piece is perpendicular to the body. Once this is confirmed, replace the third and second strings in the same manner.
Once all the strings are in place, check the posture of the pieces again and make a final check to ensure that the ball ends are properly seated in the grooves. After the strings are tuned, the cello is ready to be re-stringed.
The procedure may seem complicated when written down, but you will get used to it after you have done it several times. Try to work calmly so as not to damage your precious strings or the instrument itself by rushing through the process. “More haste, less speed” may be a bit of an exaggerated expression, but I believe that following the proper steps leads to quicker and cleaner results.
-
 Discount Sale
-
 Outlet
-
 New Arrivals
-
 Podcast (streaming)
-
 Headphones / Earphones
-
 Microphones
-
 Wireless Equipment
-
 Speakers
-
 Power Amps
-
 Mixers
-
 Processors
-
 Portable PA Systems
-
 Recorders
-
 Karaoke
-
 Guitars
-
 Basses
-
 Ukuleles
-
 Drums & Percussion
-
 Pianos / Synthesizers
-
 Wind Instruments
-
 Stringed Instruments
-
 Japanese Instruments
-
 Harmonicas, Other
-
 Software
-
 DJ & VJ
-
 Stands
-
 Cables & Connectors
-
 Racks & Cases
-
 Lighting
-
 Stage & Truss
-
 Video Equipment
-
 PC PERIPHERALS
-
 Power Supplies
-
 Studio Furniture
-
 Household Items, Other
-
 Alcoholic Beverages
Search by Brand
Brand List


- Sound House
- 〒286-0825 14-3 Shinizumi , Narita City, Chiba
- Monday-Friday 10:00-17:00
- Narita Call Center
- TEL. 0476-89-1111
- FAX. 0476-89-2222
- Tokushima Call Center
- TEL. 0885-38-1111
- FAX. 0885-38-1100
- Showroom Hours
- Monday-Friday 10:00-17:00
closed on Saturdays, Sundays and Holidays
© Sound House
